Configure Authorize.net in WordPress through Paymattic
Authorize.net is a powerful payment plugin that allows you to secure and efficient transactions for your forms, subscriptions, or e-commerce needs. This article will guide you through configuring Authorize.net in your WordPress Site with the Paymattic plugin.
Configuring Authorize.net Payment Method
To learn how to configure the Authorize.net payment gateway through Paymattic, follow the steps with screenshots below:
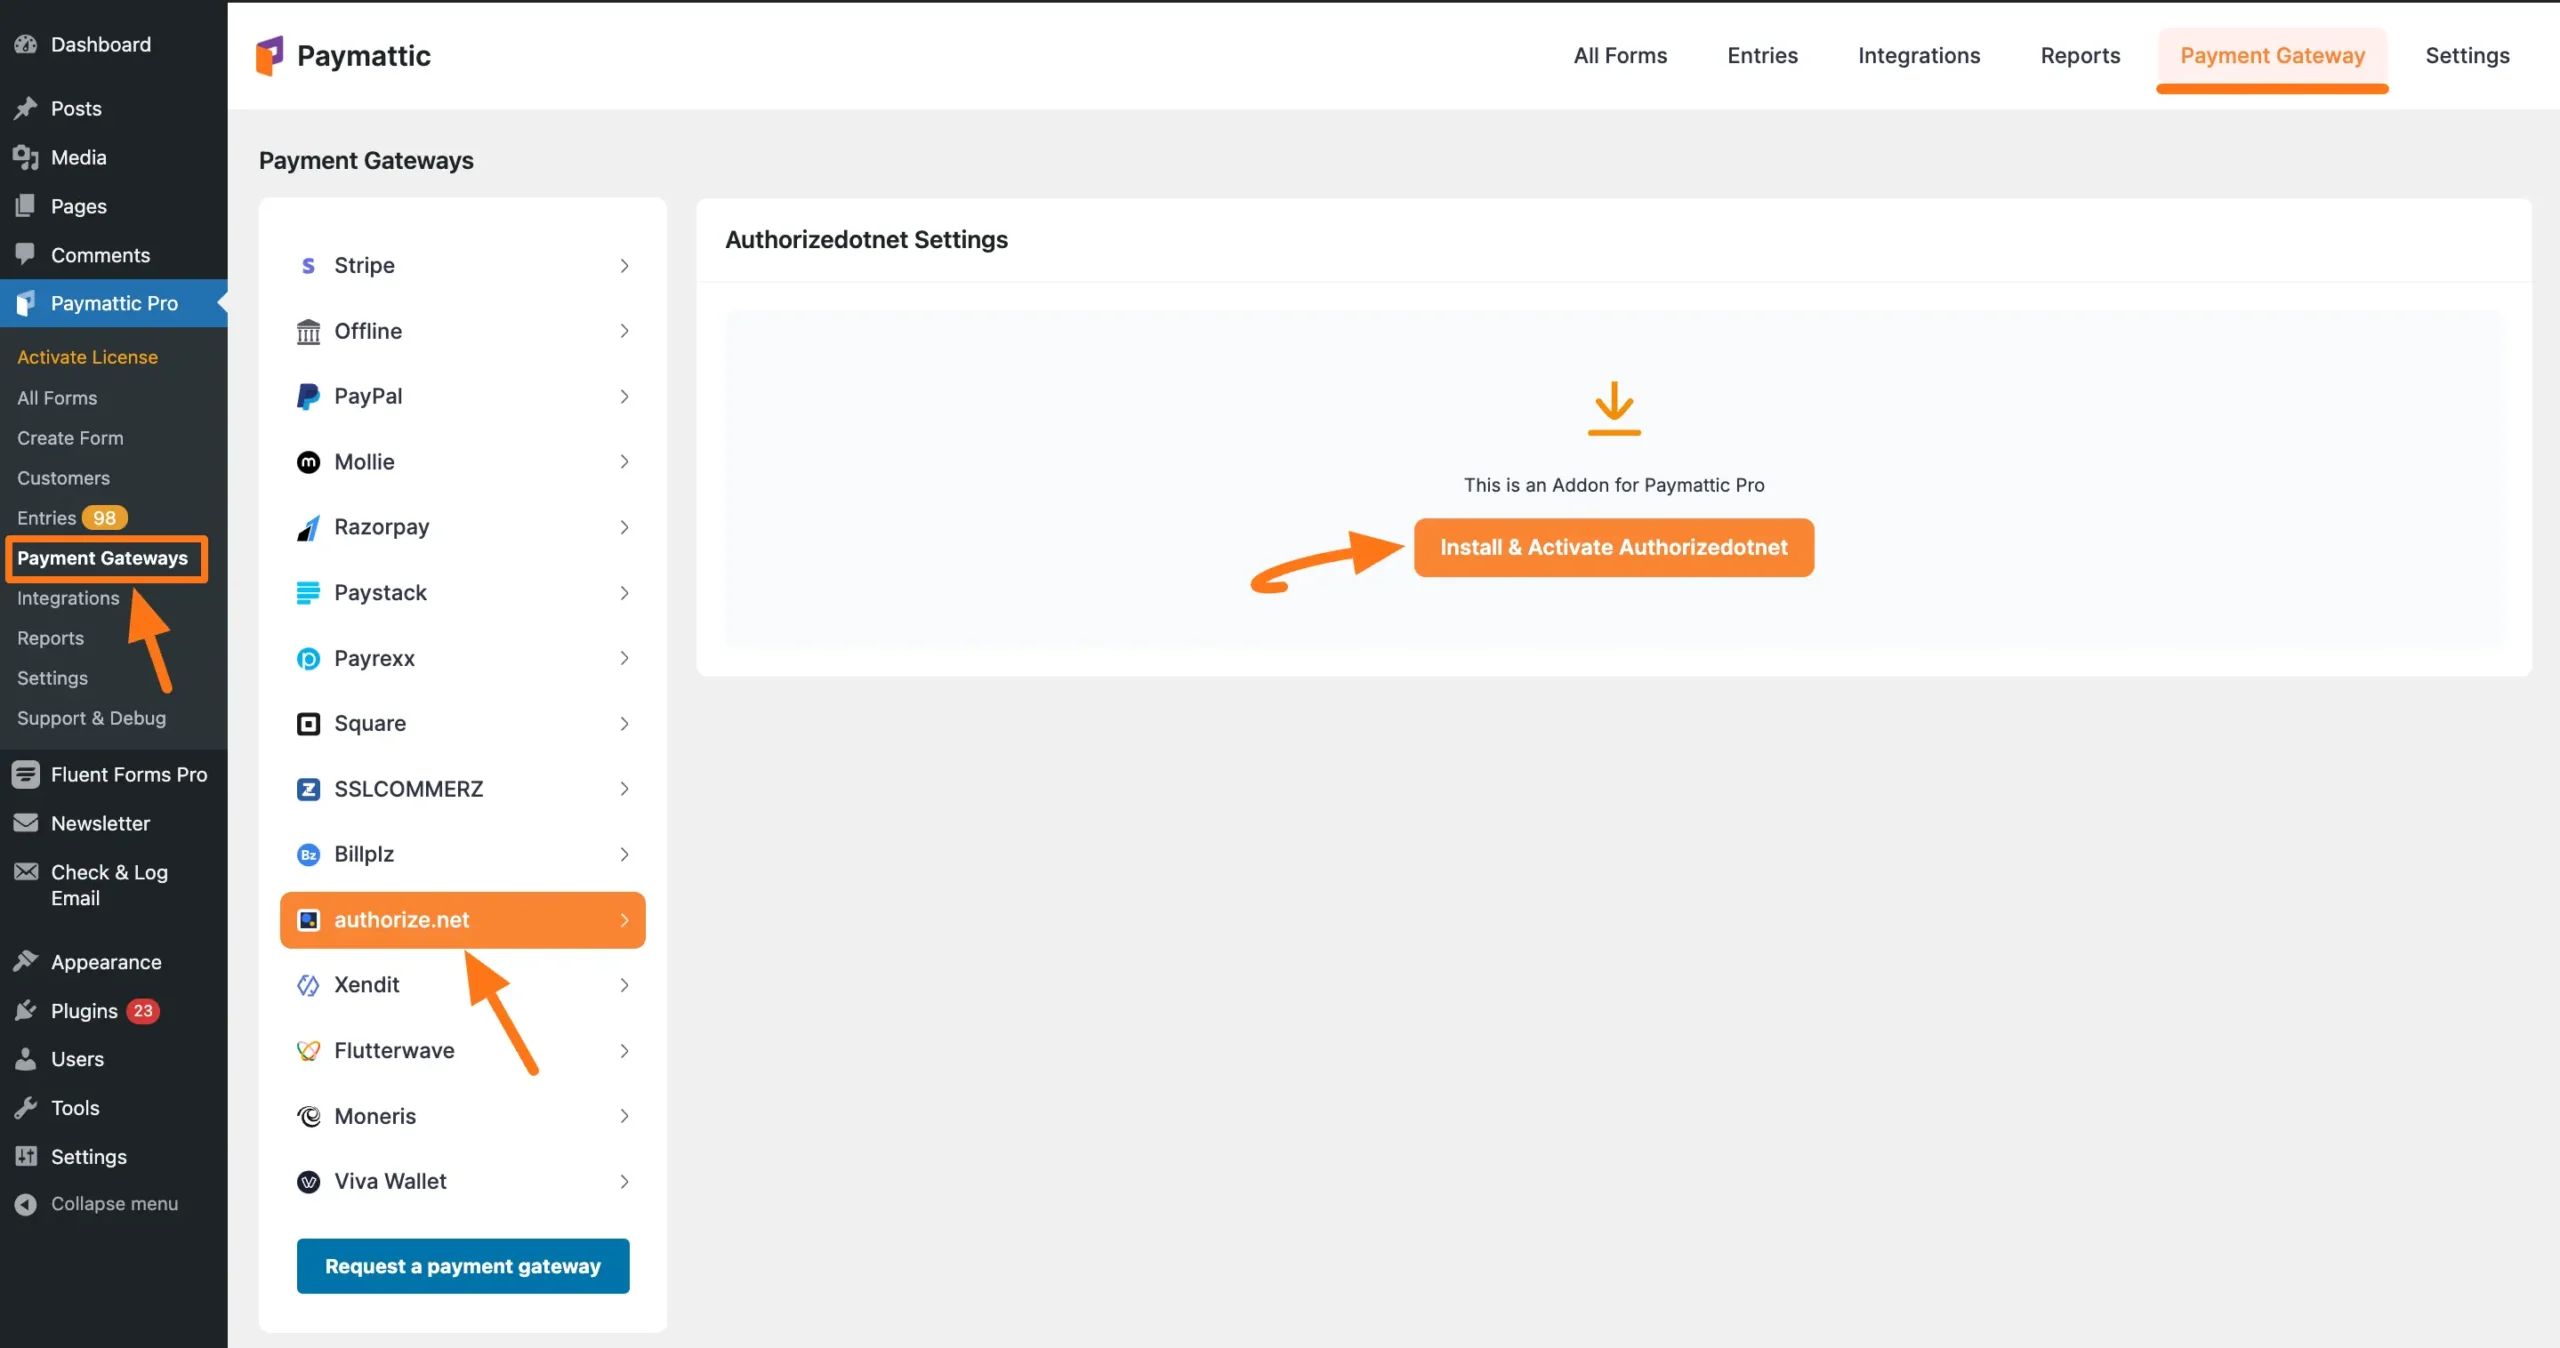
First, go to Payment Gateway from the Paymattic Navbar, click the Authorize.net tab from the left sidebar, and the Authorize.net Settings page will open.
Click the Install & Activate Authorizedotnet button to connect Authorize.net with Paymattic.
Note
This add-on needs to be installed the first time you integrate with Authorize.net.
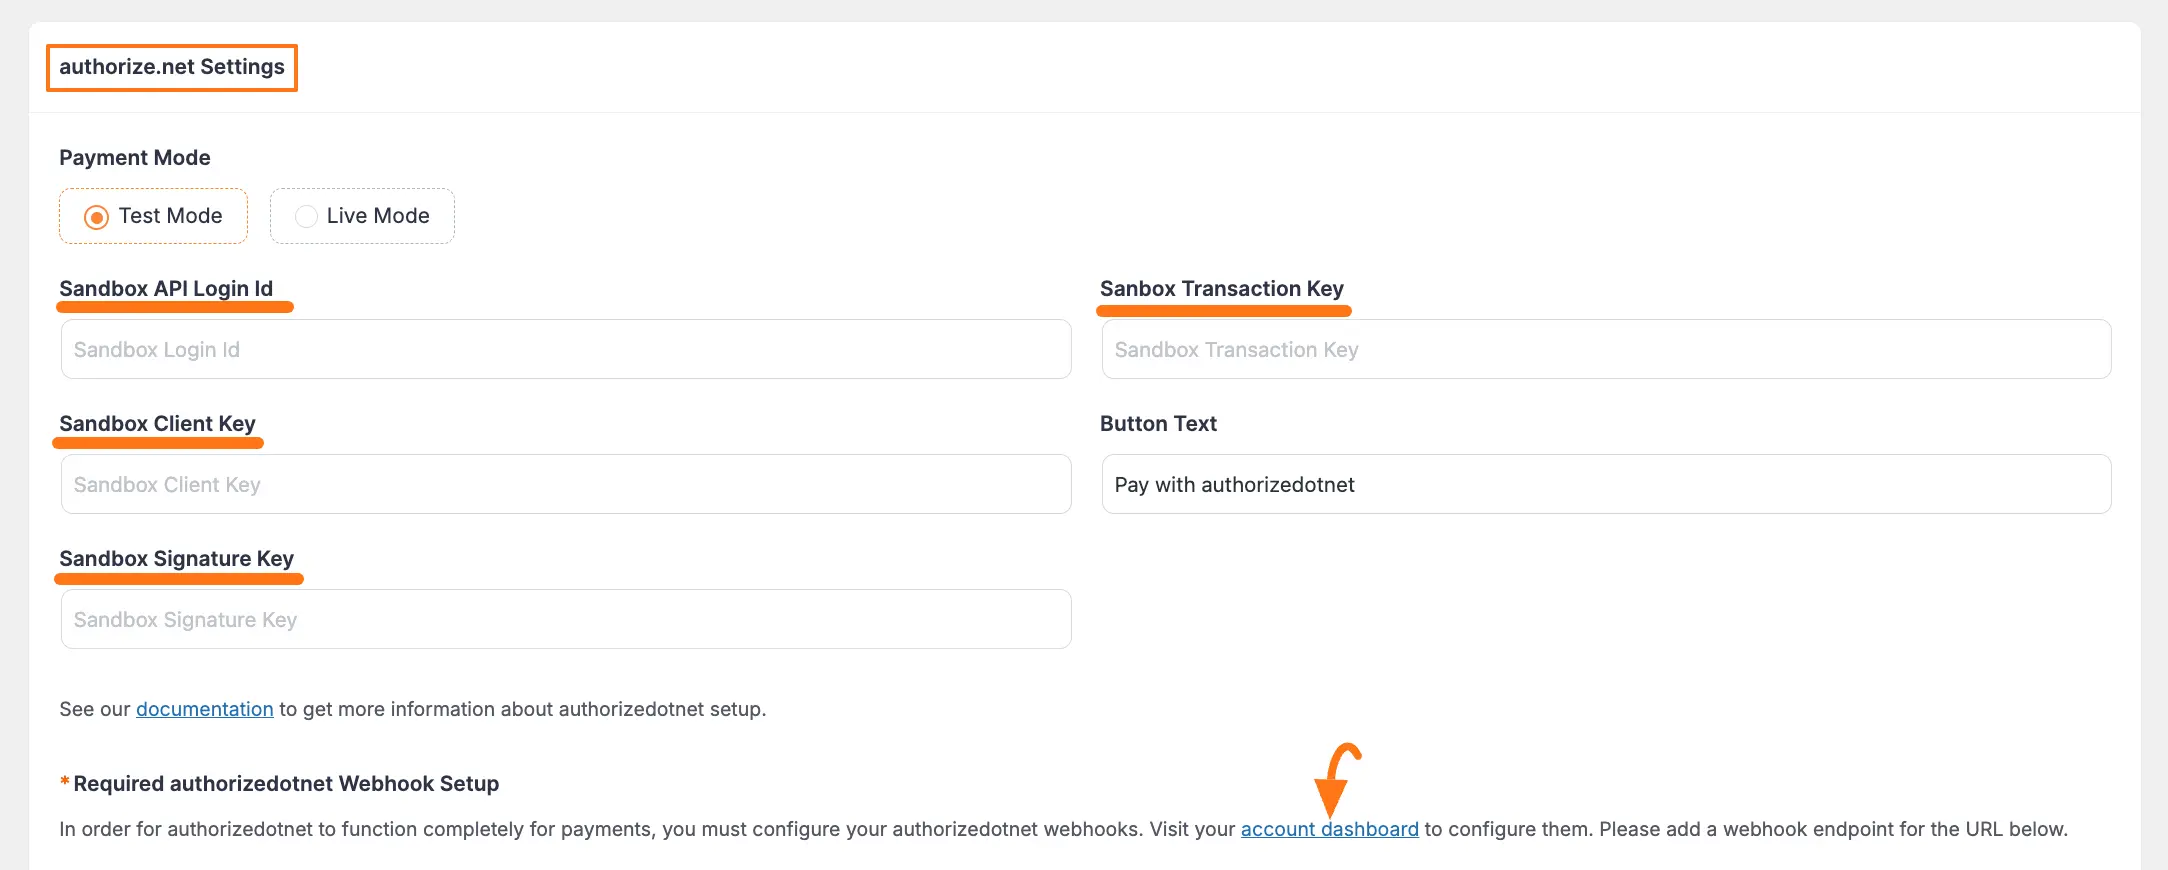
Once you are on the authorize.net Settings page, select any Payment Mode between Test (for test payments) and Live (for real payments) as both options follow the same configuration process, e.g., I choose the Test Mode.
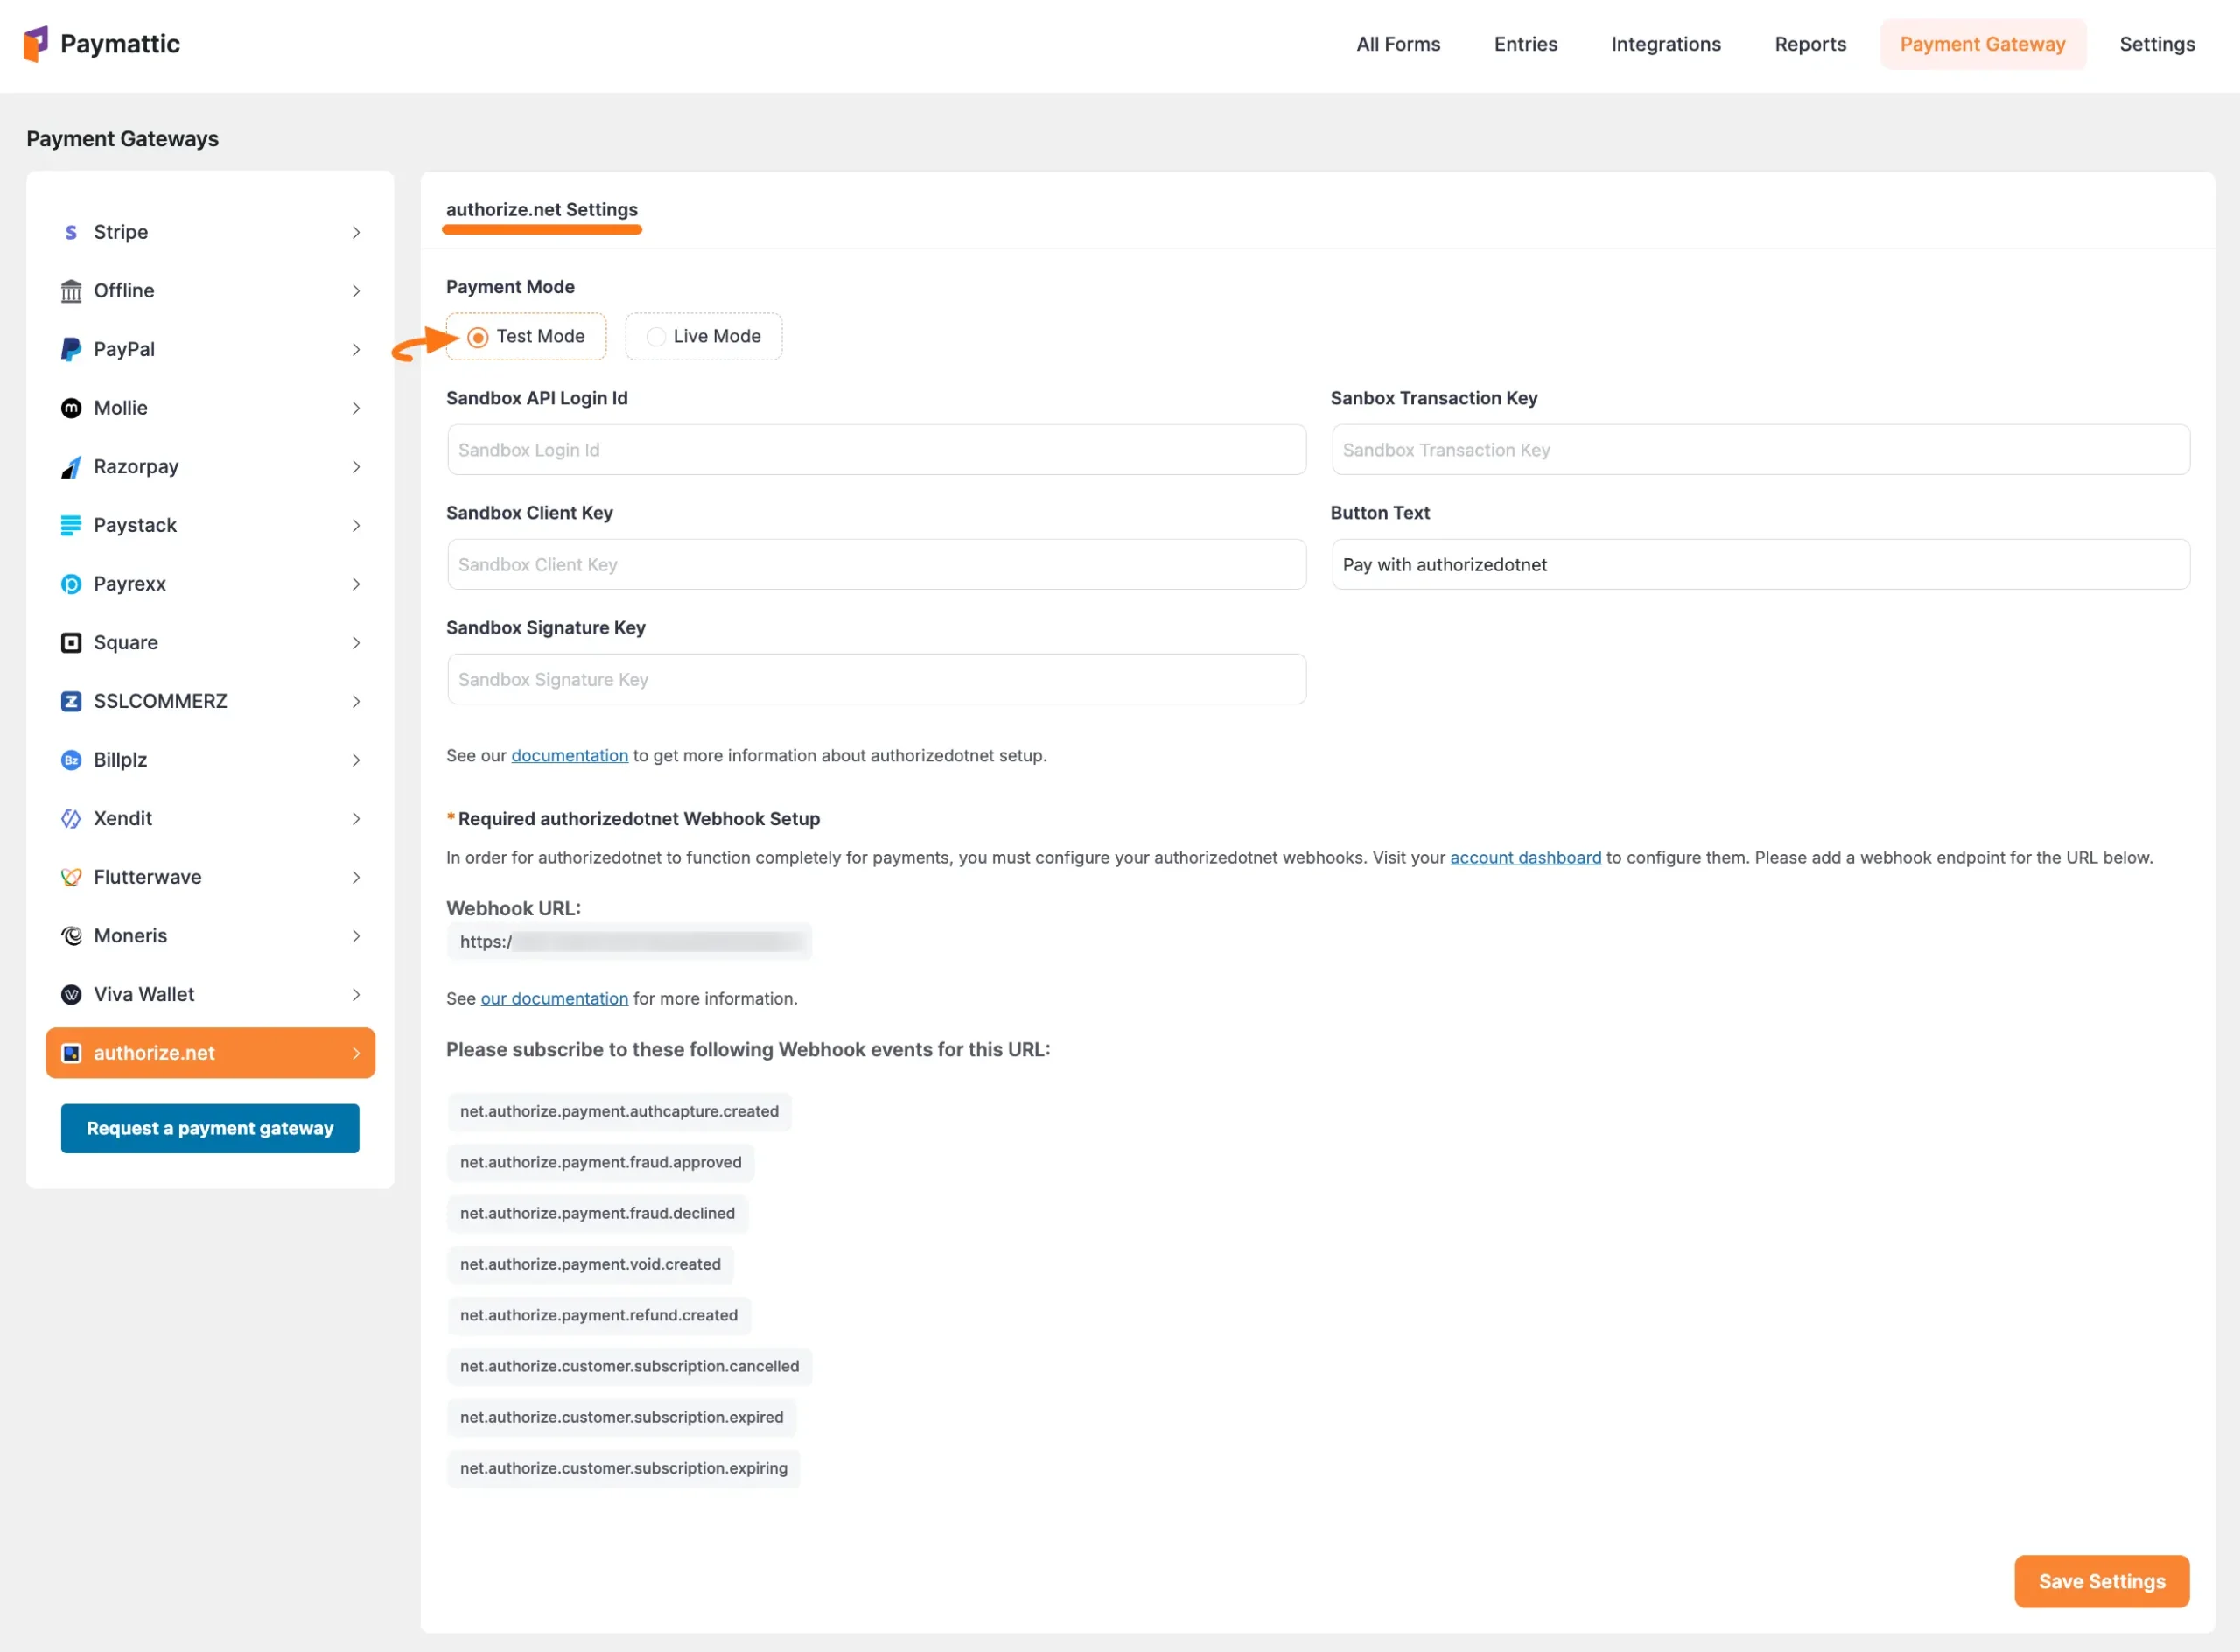
Then, you need to obtain the API Login ID, Transaction key, Client Key, and Signature key from your Authorize.net Account.
TIP
To easily get access to the dashboard of your authorize.net account, click the account dashboard link as shown in the screenshot below.
Get All the Required Credentials from Authorize.net
To learn how to get Publishable key and Secret Key from your Authorize.net, follow the steps with screenshots below:
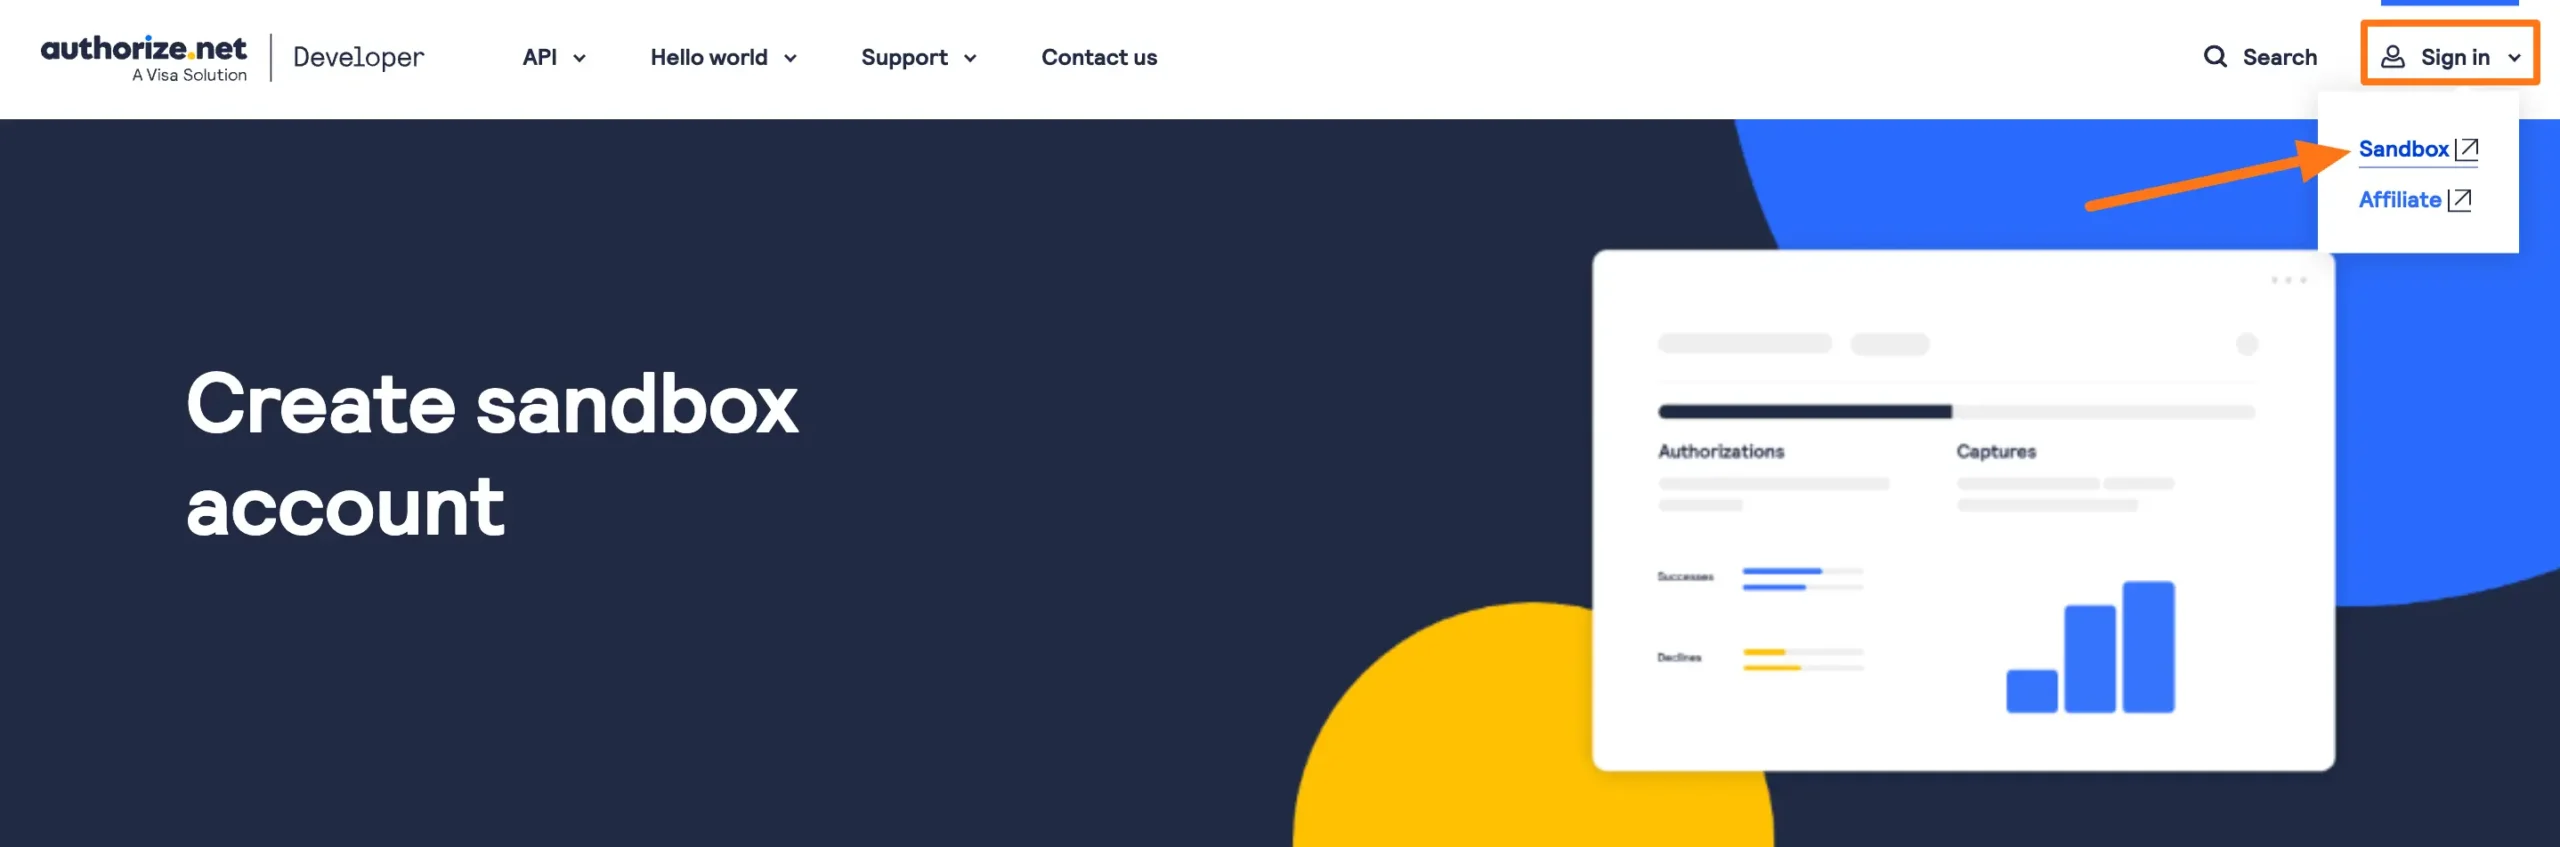
First, log in to your Authorize.net account from here. If you do not have an account, sign up from here.
Example
For example, I signed in to a Sandbox Account to show you the further process.
Once you log in to the Authorize.net Dashboard, go to the ACCOUNT section from the Navbar, and click the API Credentials & Keys tab under the Security Settings.

Here, you will get your desired API Login ID. Simply, copy it for later use. Also, to get Transaction and Signature Keys, scroll down to the Create New Key(s) section.
Now, select the New Transaction Key radio button, and click the Submit button.

Here is your desired Transaction Key. Copy it by clicking the Copy to Clipboard button.

Then, go to the API Credentials & Keys page again from the Account section, choose the New Signature Key radio button, and click the Submit button.
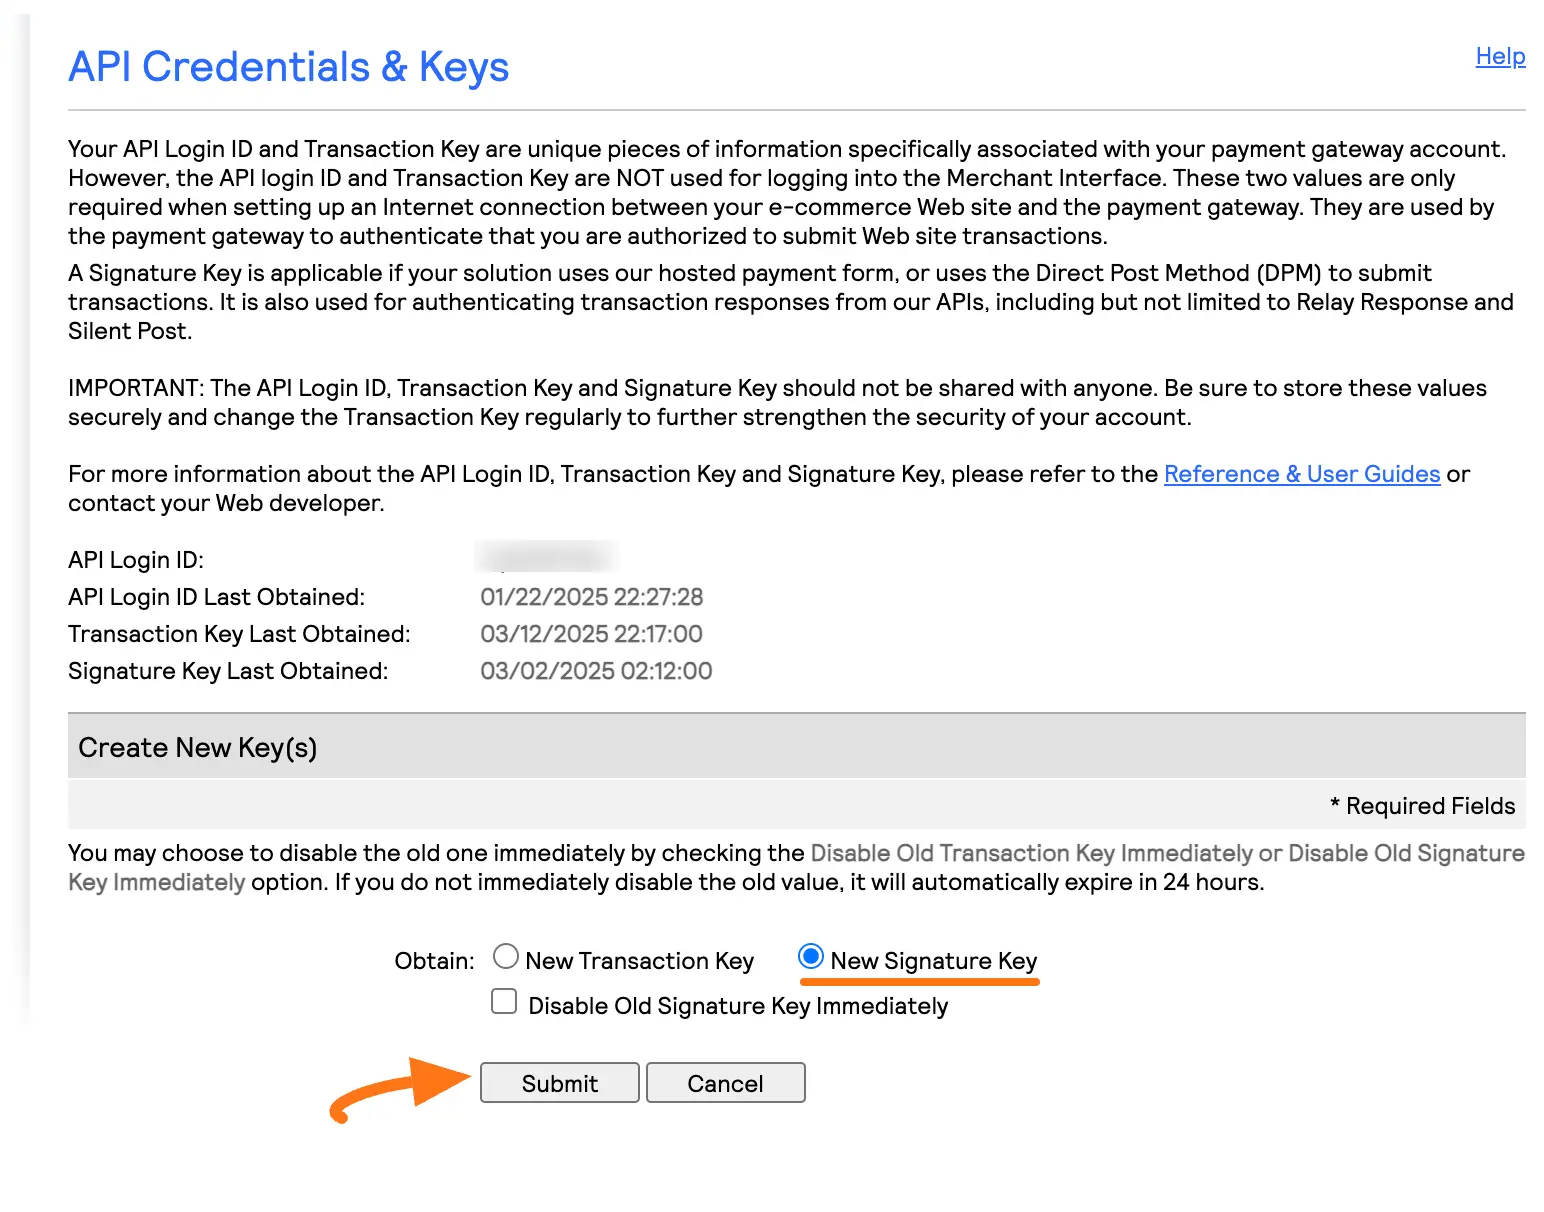
Here is your desired Signature Key. Copy it by clicking the Copy to Clipboard button.

Again, go to the ACCOUNT section from the Navbar, and click the Manage Public Client Key tab under the Security Settings.
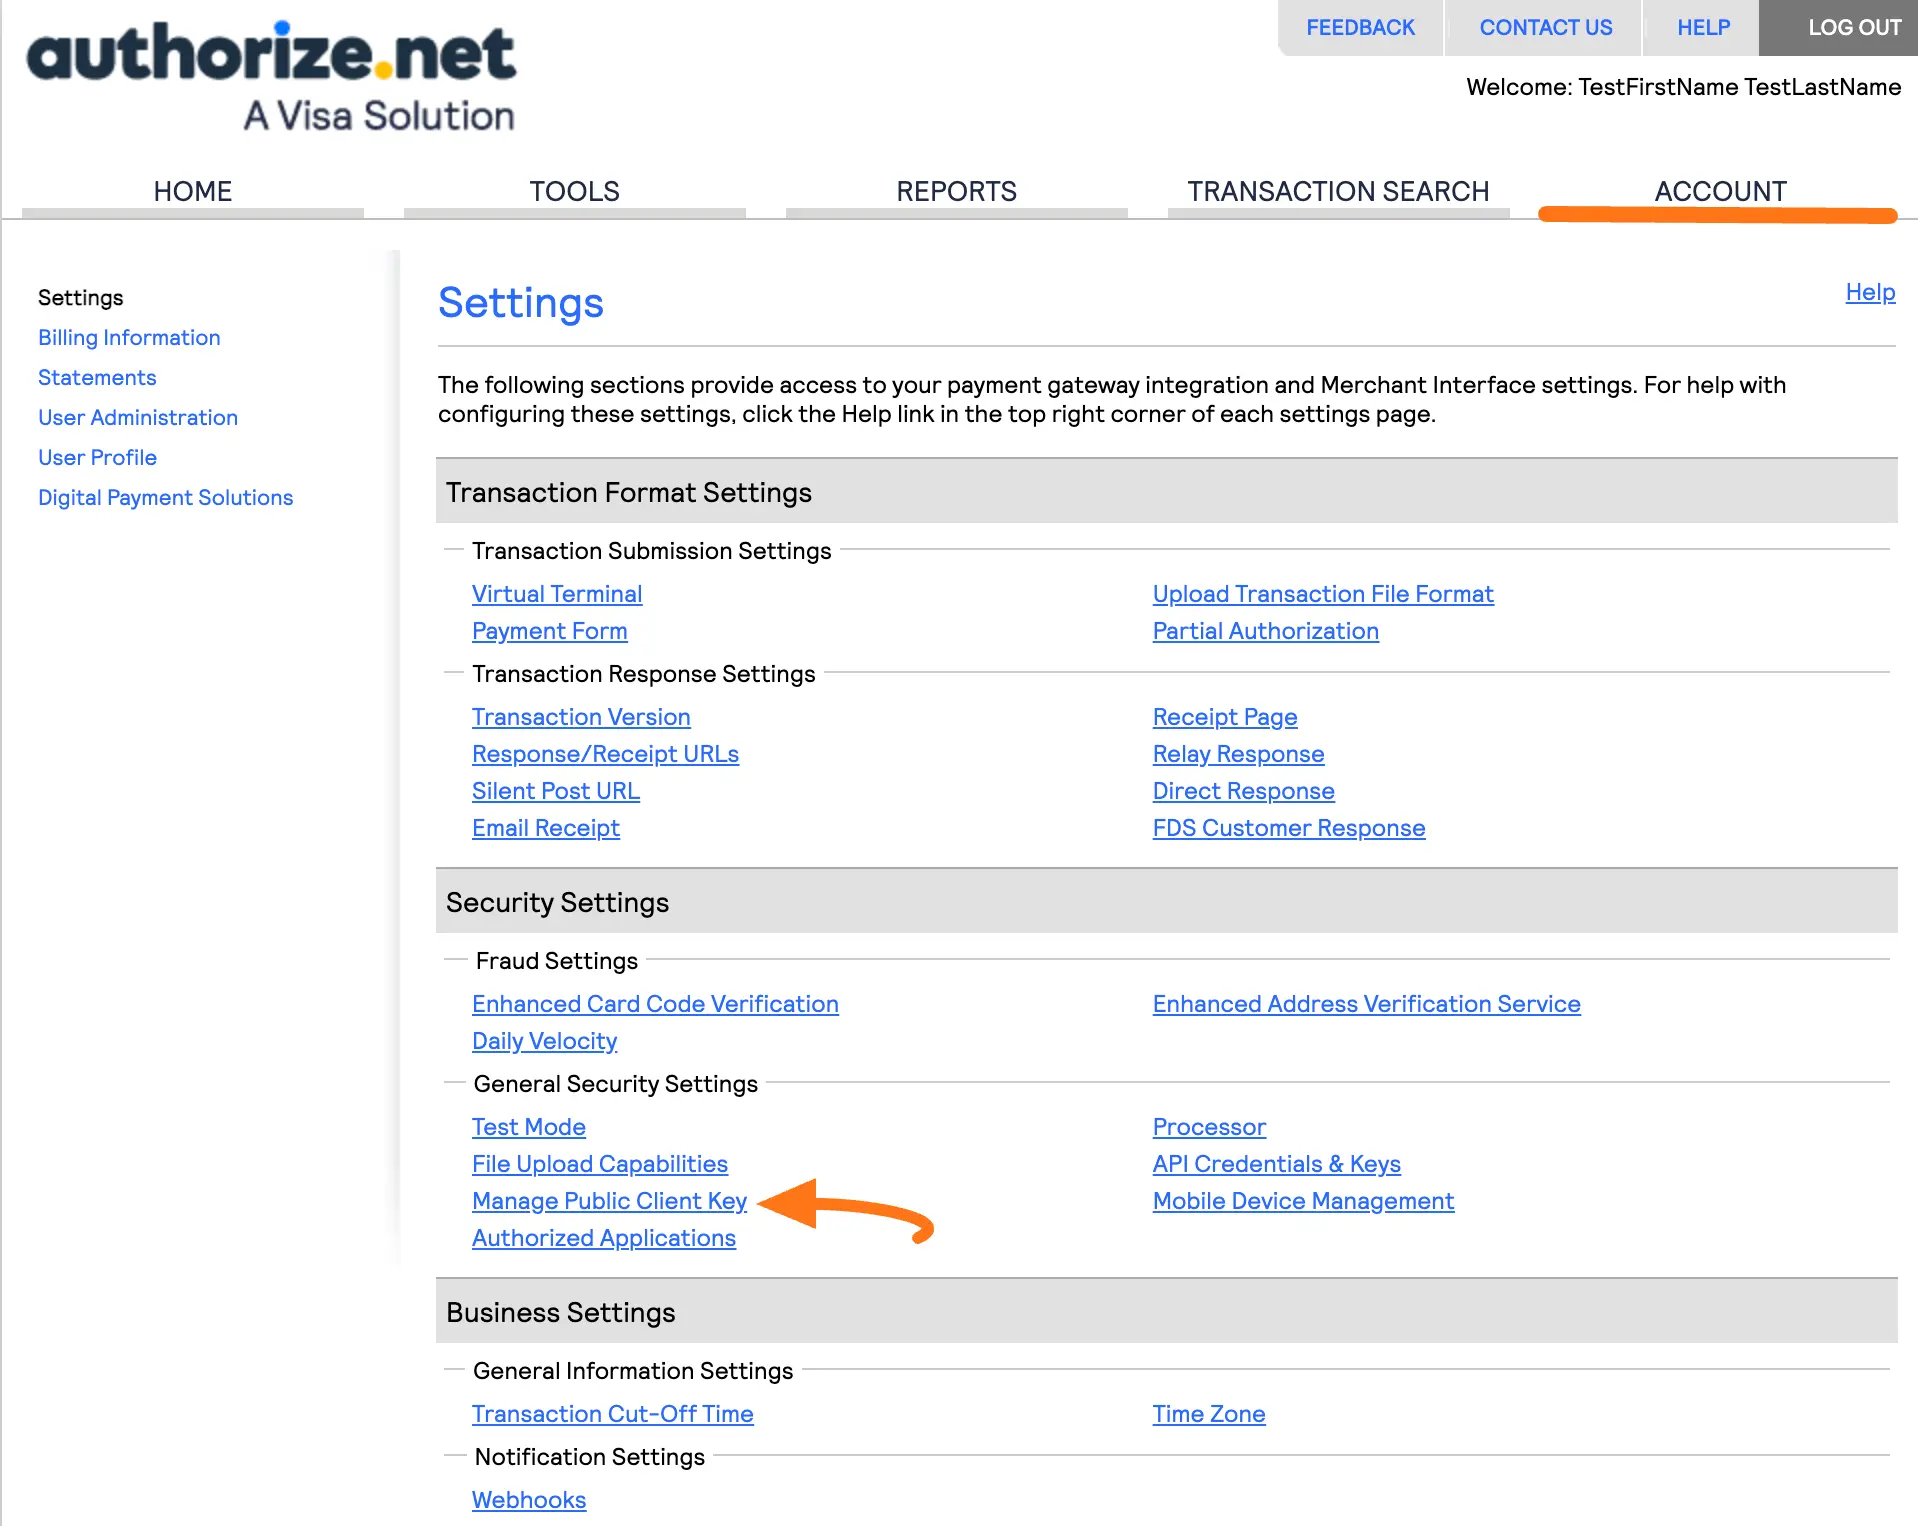
Here, you will get your desired Client Key. Simply, copy it for later use.

Provide All Credentials in Authorize.net Settings
Go back to Payment Gateway from the Paymattic Navbar, click the Authorize.net tab, and paste the copied API Login ID, Transaction Key, Signature Key, and Client key into the respective fields.
You can enter the Label of the Button Text that you want to be displayed in the payment form during checkout.
Finally, press the Save Settings button and your Authorize.net account will be integrated with Paymattic for your WordPress Site.

Setup Authorize.net Webhooks
To learn how to configure the Authorize.net Webhooks to your WordPress Site, follow the steps with the screenshots below:
Important
To ensure your Authorize.net dashboard and Paymattic dashboard are in sync, you must configure the Authorize.net Webhooks.
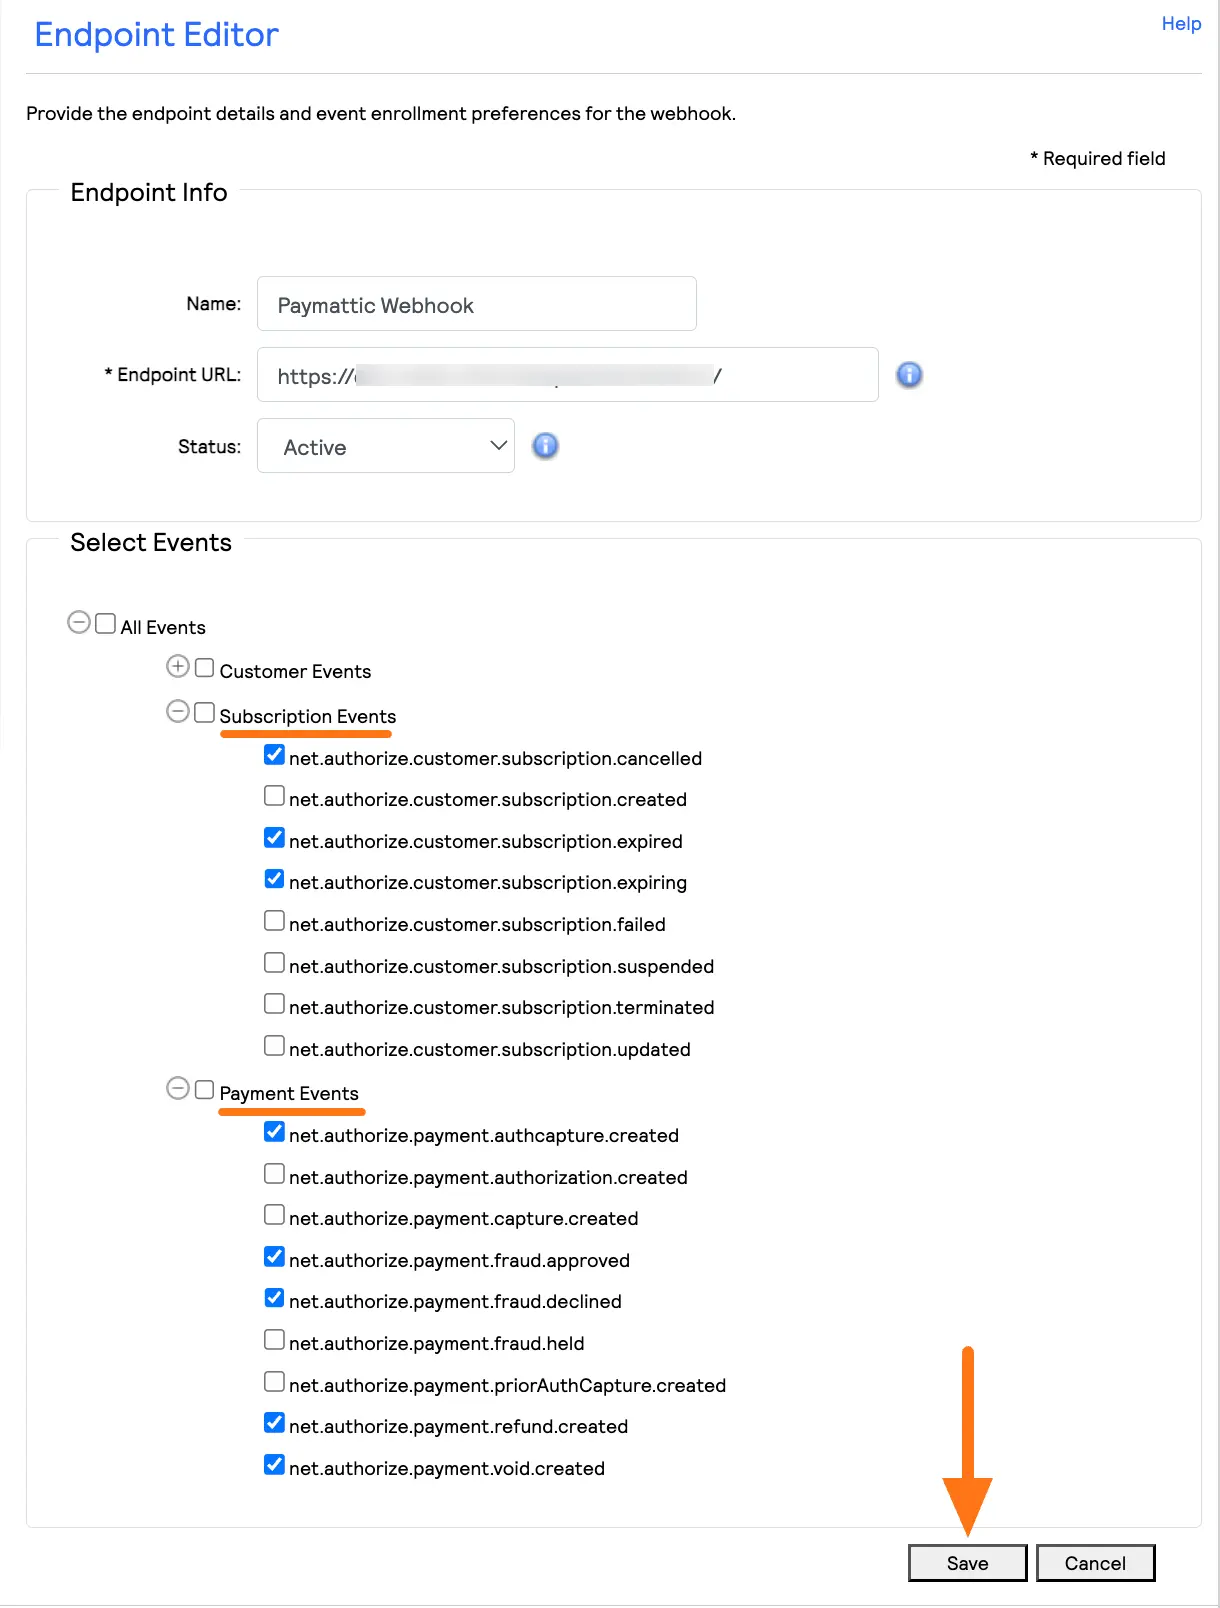
First, copy the Webhook URL and recommended Webhook Events for smooth transactions based on Authorize.net data related. You will need them later to configure Authorize.net Webhooks to your WordPress Site.

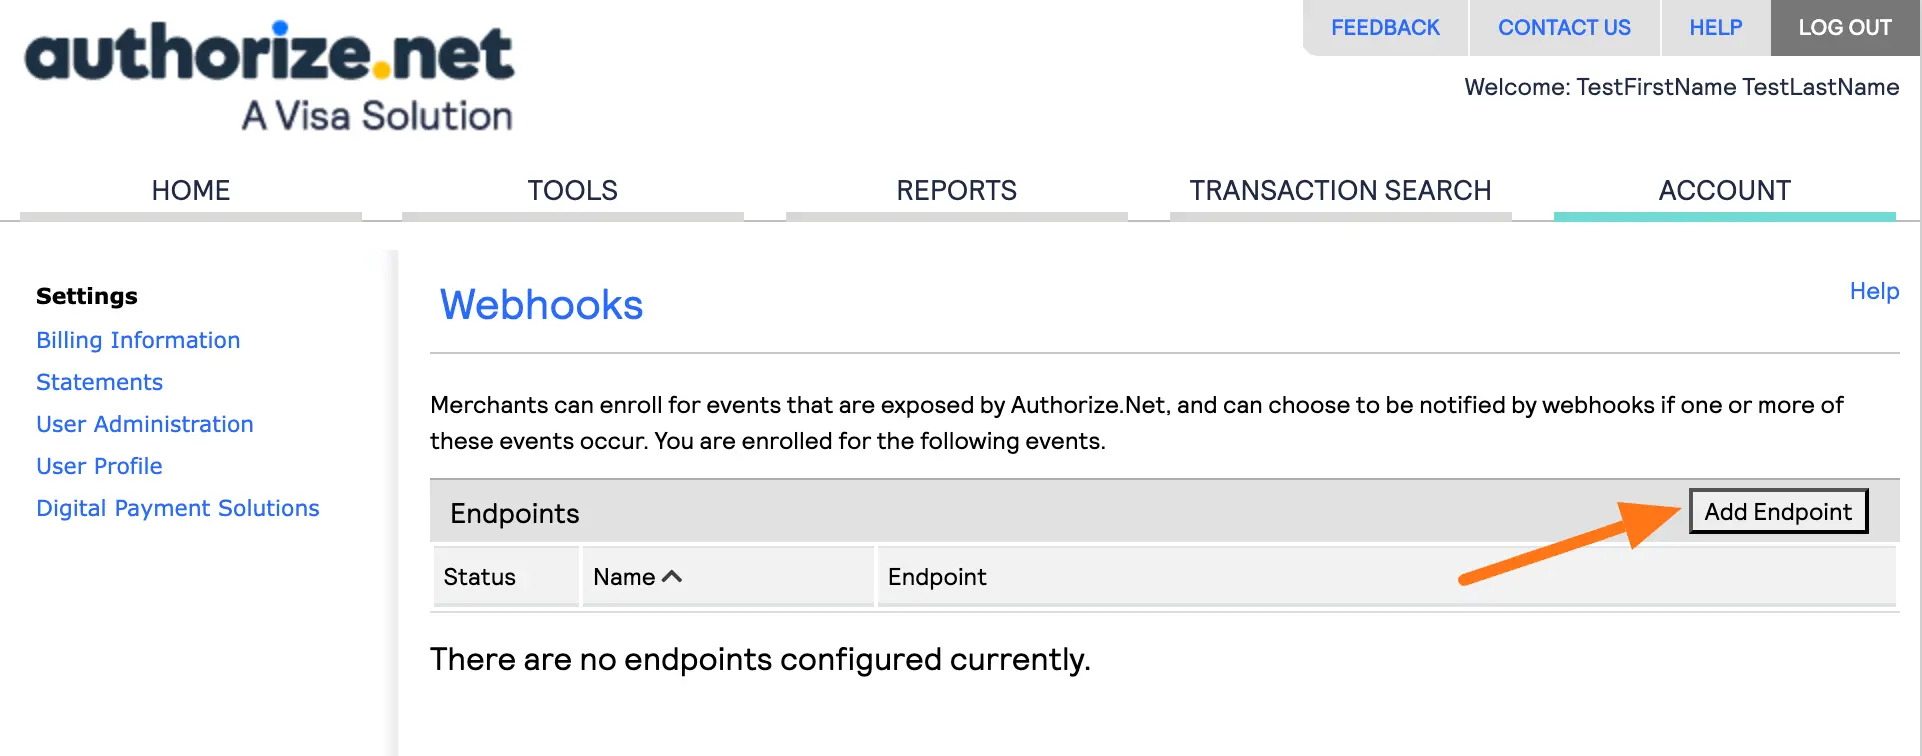
Now, visit your Authorize.net Dashboard, go to the ACCOUNT section from the Navbar, and click the Webhooks tab under Business Settings.

Now, Click the Add Endpoint button.
Now, go to the Endpoint Info section, provide a Name for your endpoint, paste the Webhook URL you copied from the Authorize.net Settings page into the Endpoint URL field, and select the Status as Active from the dropdown list.
Then, go to the Select Events section, and choose the events recommended by Paymattic for Authorize.net to send to your endpoint by opening the checkboxes options.
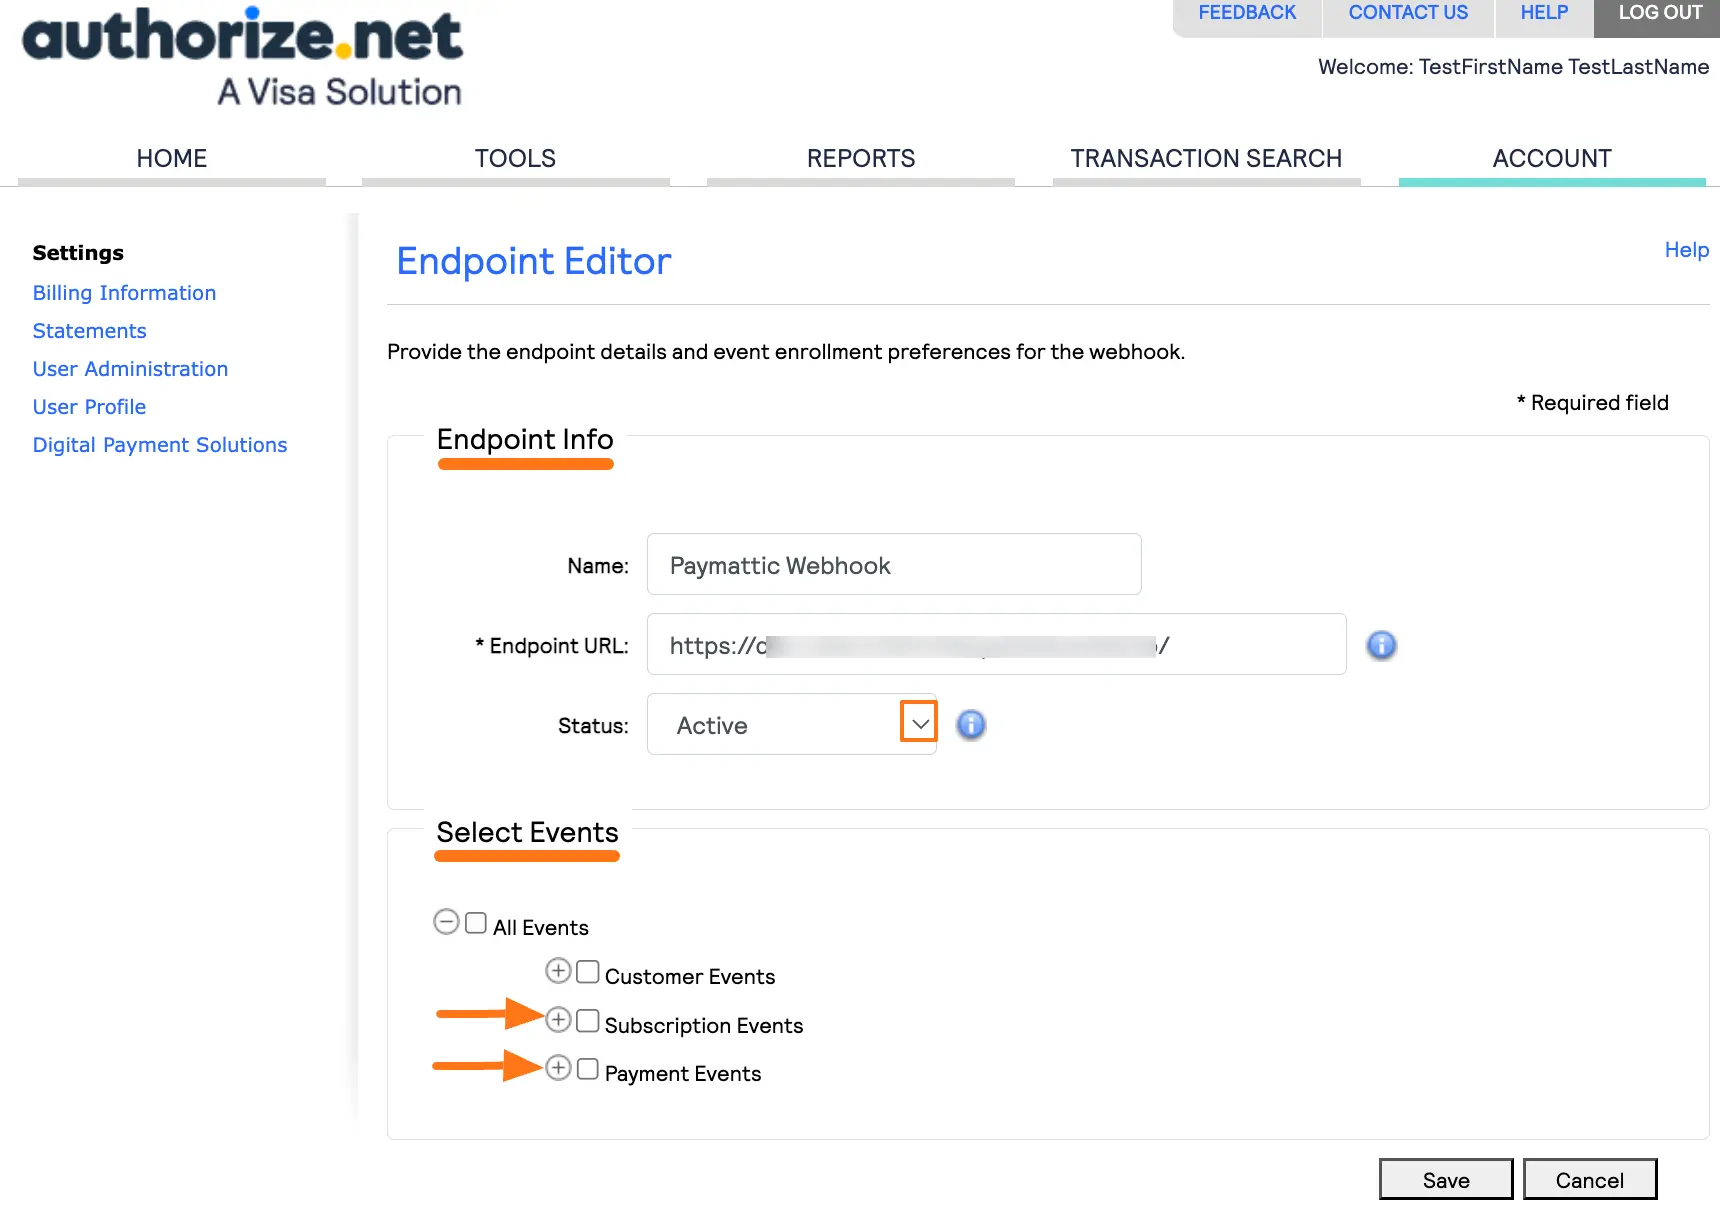
Now, choose the events recommended by Paymattic for Authorize.net to send to your endpoint. You can find your desired events by entering their Name or Description into the Events fields, and can select events by clicking the checkboxes.
Webhook Events
The Events recommended by Paymattic are:
- net.authorize.payment.authcapture.created: This triggers when a payment is authorized and captured (successfully charged).
- net.authorize.payment.fraud.approved: This triggers when a fraud-screened transaction is manually approved.
- net.authorize.payment.fraud.declined: This triggers when a transaction is declined due to fraud filters.
- net.authorize.payment.void.created: This triggers when a payment is voided (invalidated) before settlement.
- net.authorize.payment.refund.created: This triggers when a refund is successfully processed.
- net.authorize.customer.subscription.cancelled: This triggers when a customer's subscription is canceled.
- net.authorize.customer.subscription.expired: This triggers when a subscription reaches its end date and expires.
- net.authorize.customer.subscription.expiring: This triggers when a subscription is about to expire (usually a few days before).
Once you select all the suggested Webhook Events, click the Save button. And, the Authorize.net Webhooks will be configured with your WordPress Site!
Integrate Authorize.net in Forms
Once you finish setting up your Authorize.net payment gateway, you can easily integrate this payment method into your WordPress Site through Paymattic Forms.
To learn how to integrate the Authorize.net in Forms, follow the steps below:
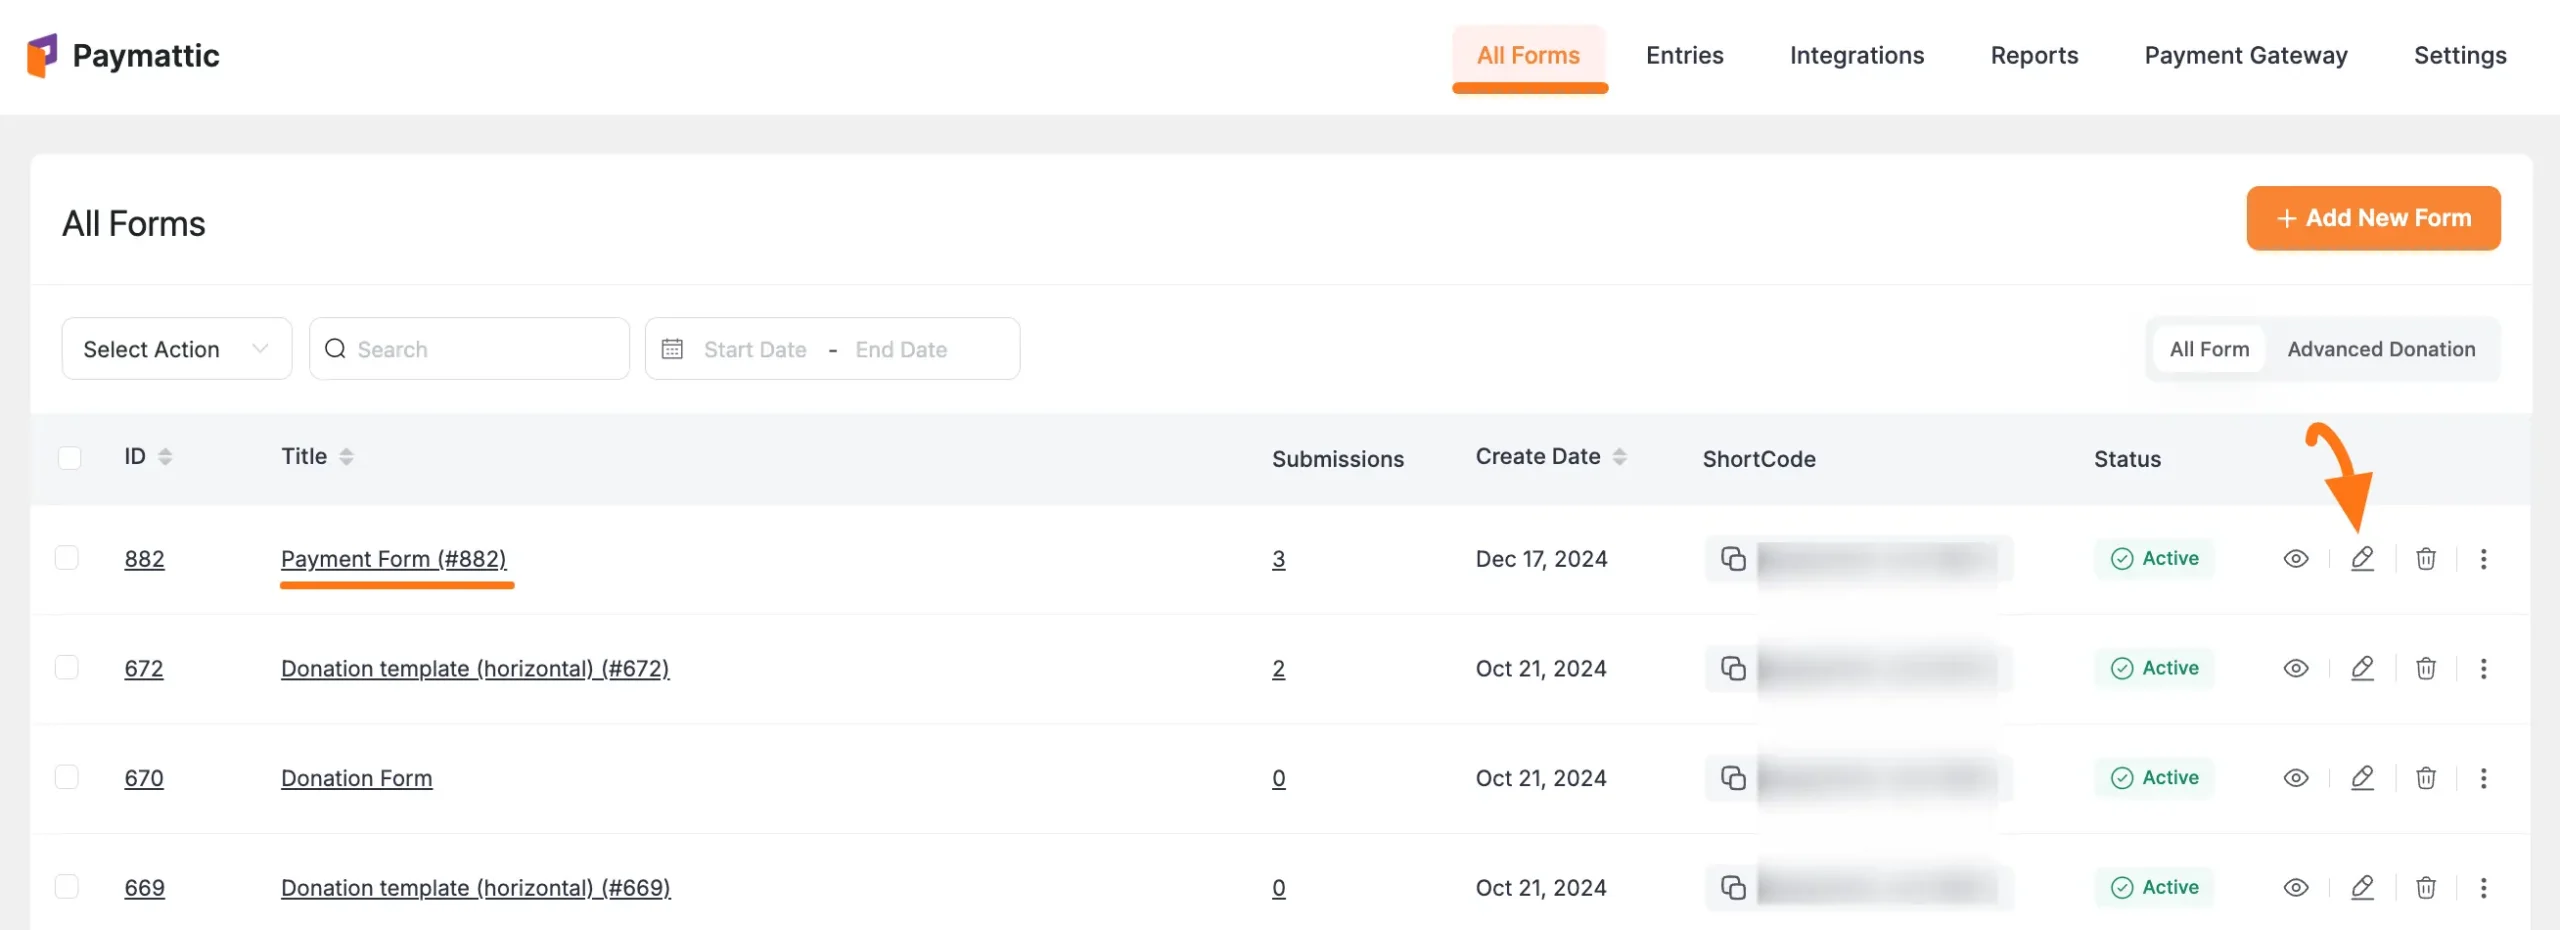
First, go to the All Forms section from the Paymattic Navbar, choose a Form, and click the Pencil/Edit icon to open the Editor page of that form.
Note
If you do not have any existing form, read the Create a Form from Scratch or Create a Form using Templates documentation. For example, I choose an existing form to show the whole process.
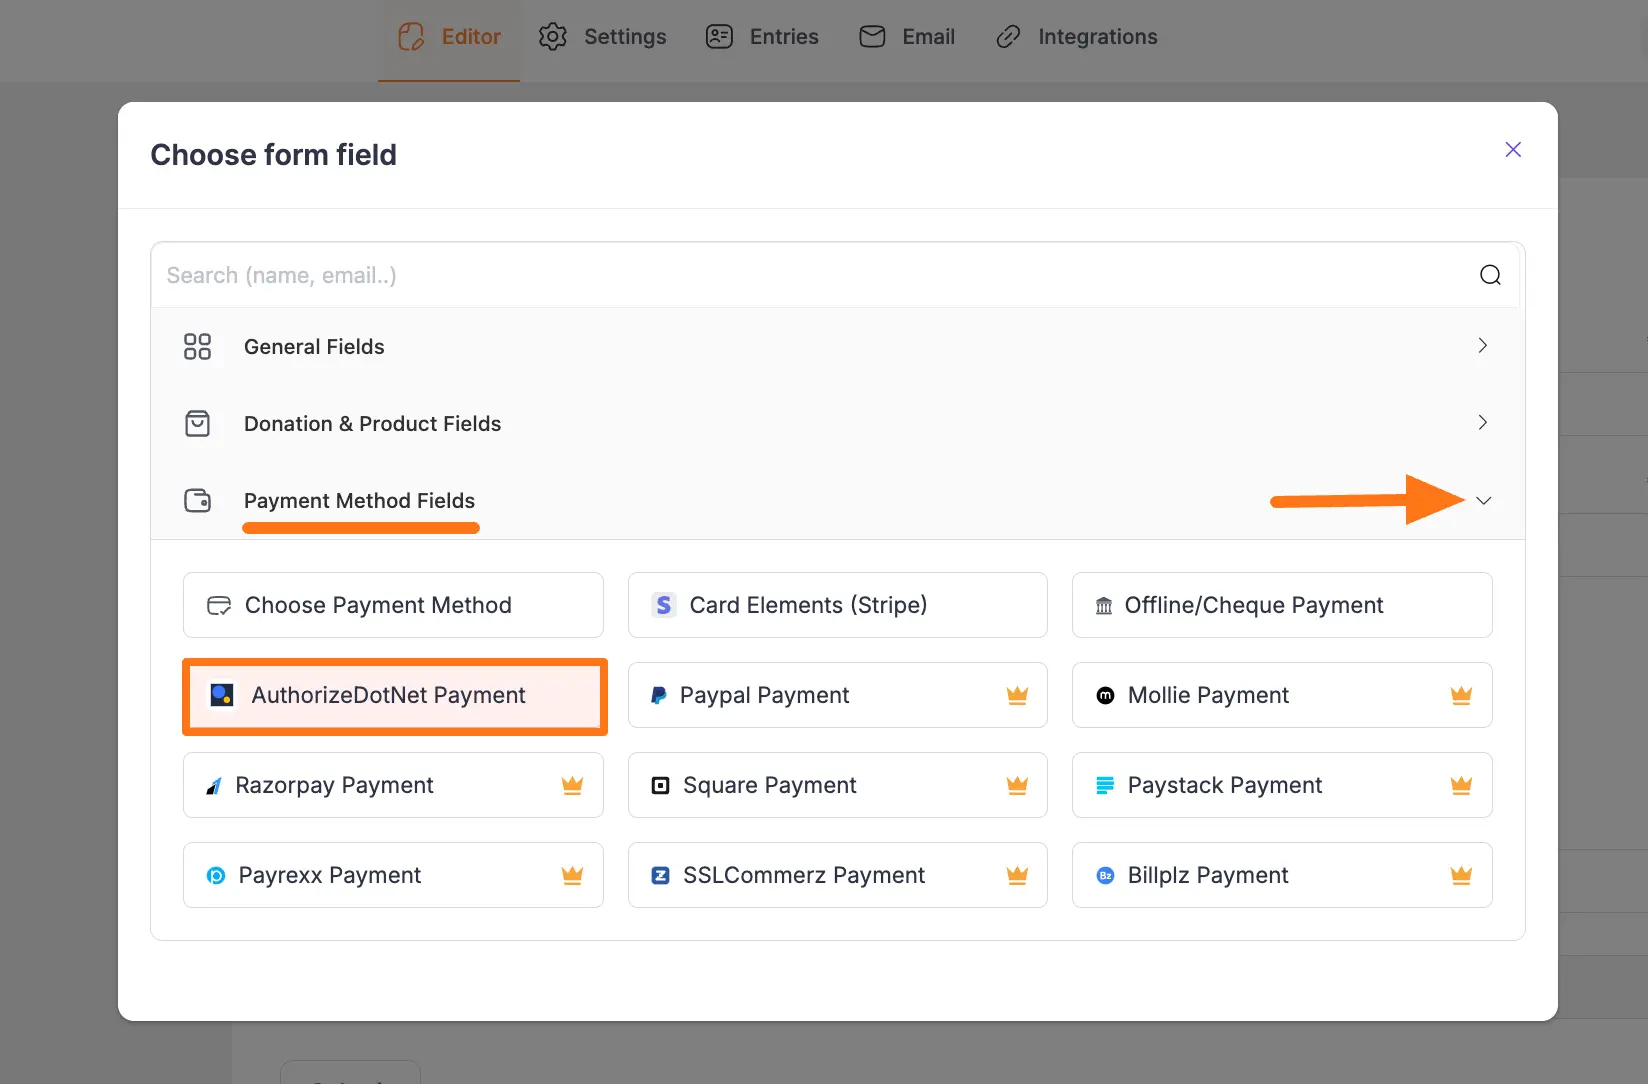
Once you open the Editor page, add the Payment Method fields by typing the "/" or clicking the Plus Icon placed at the bottom.
Important
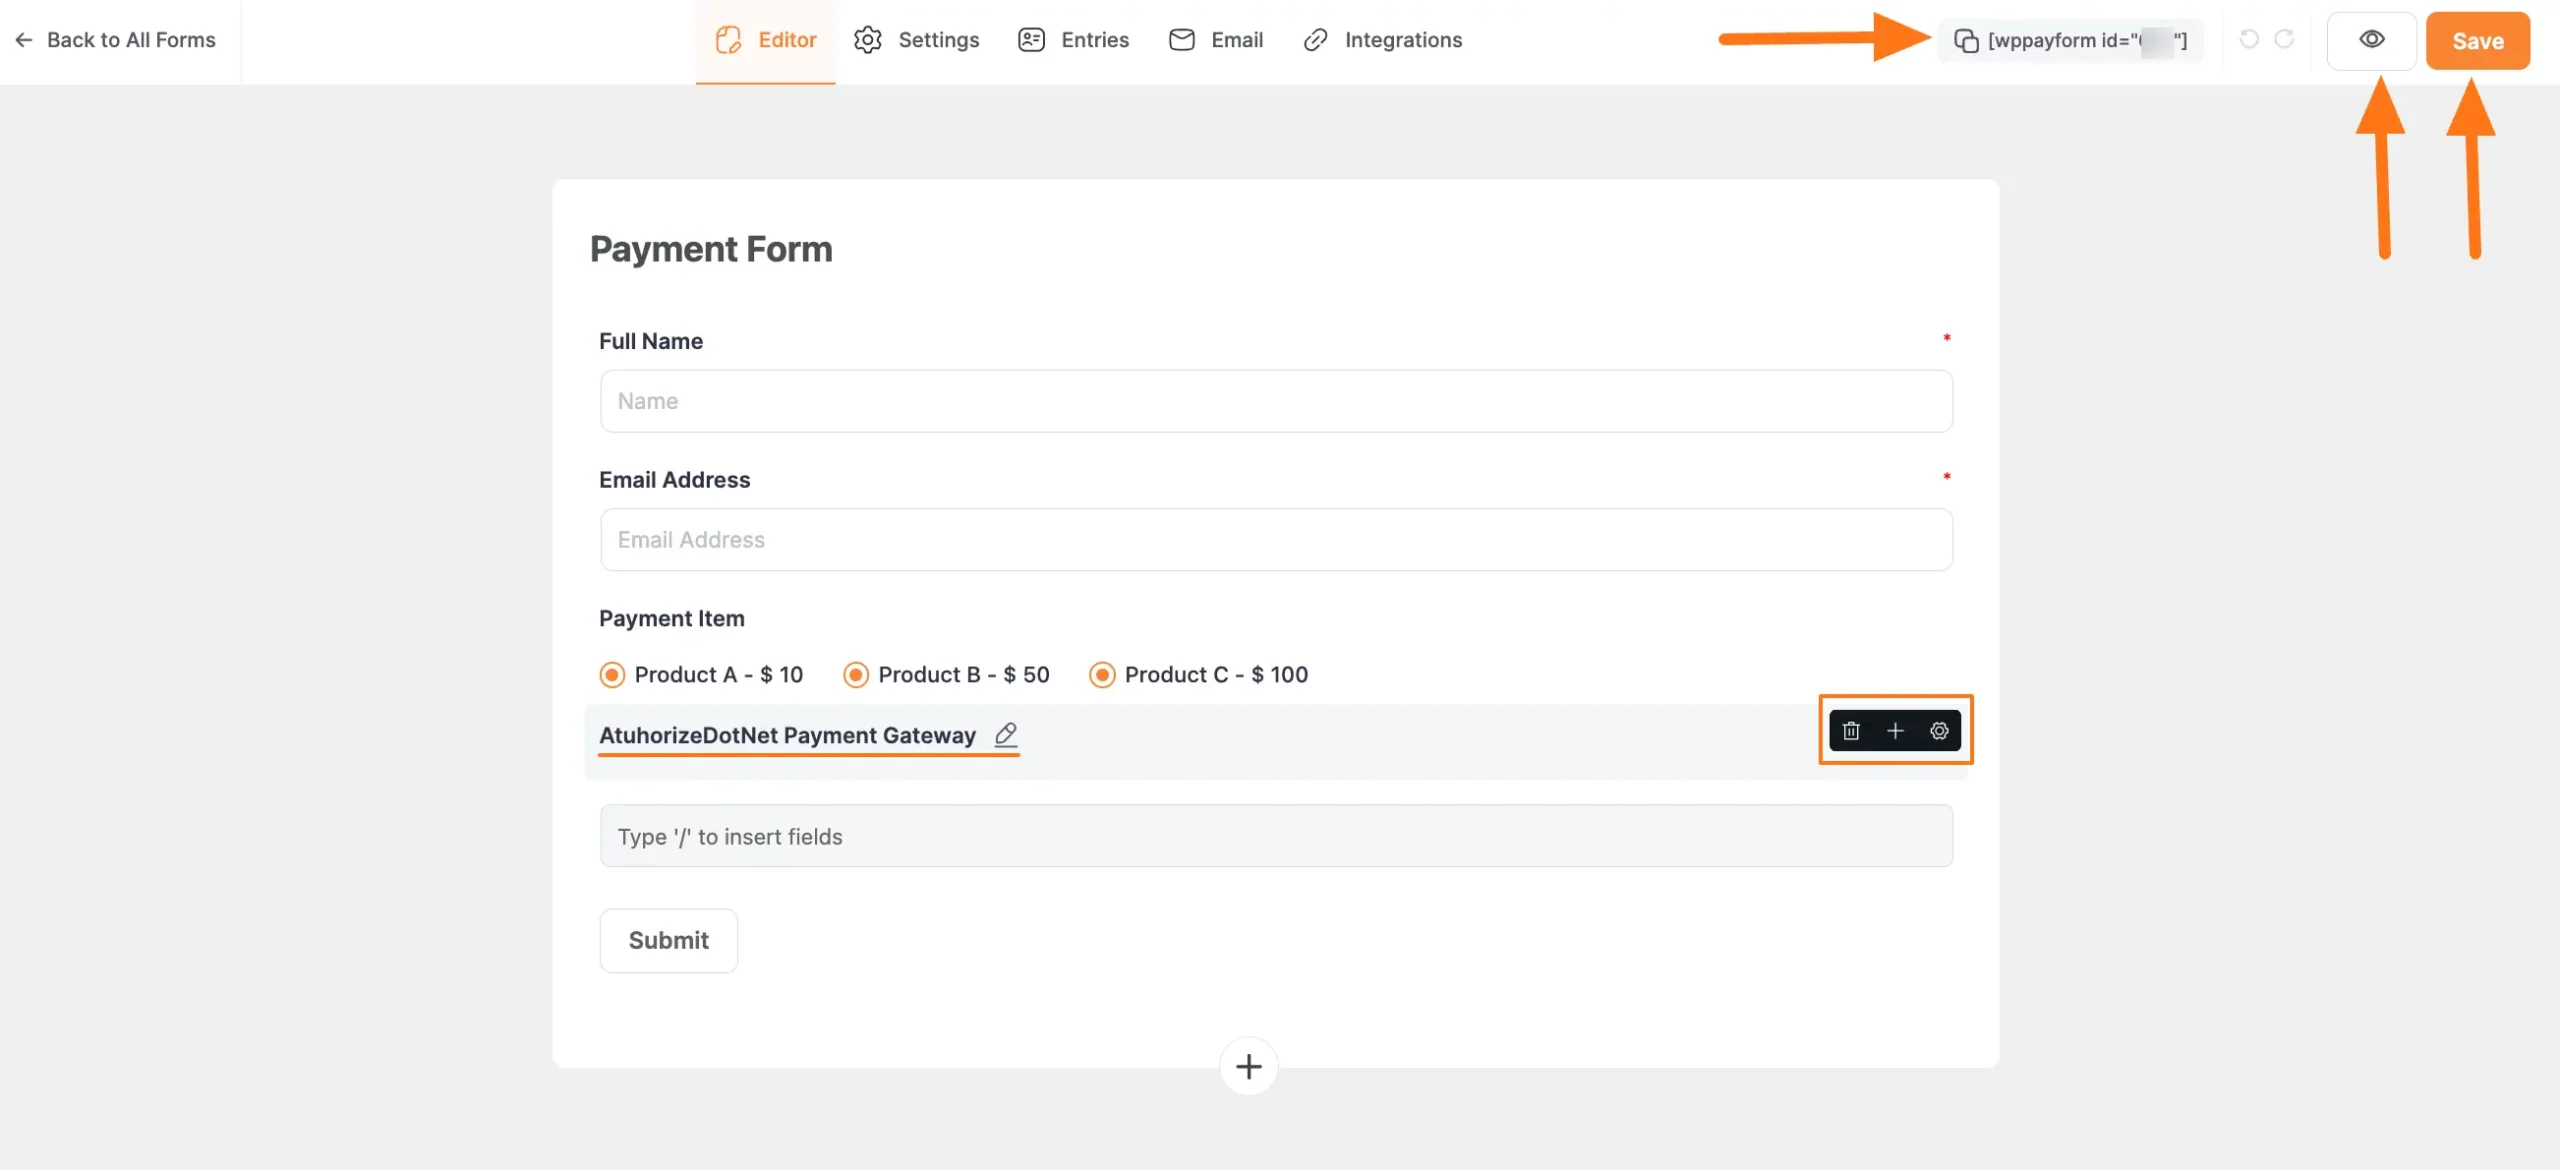
Remember, don't forget to add a product field in the form. For example, I am adding the Payment Item as a Product Field.
![]()
Now, open the Payment Method Fields section by clicking the Arrow Icon, and select the AuthorizeDotNet payment field to use this platform as the payment method for this form.
Important
Remember, the added payment method in your Form will not function unless you properly complete the configuration process of payment gateways.
To configure the Payment Gateway on your Site, click here and read the Payment Method Fields' Documentation you selected as a payment method.
Embed Form into Frontend
To integrate and display the form on a specific Page/Post, copy this Shortcode and paste it into your desired Page/Post.
Once you complete the edit, press the Save button to save all the changes you made. To see the preview of the form, click the eye icon.
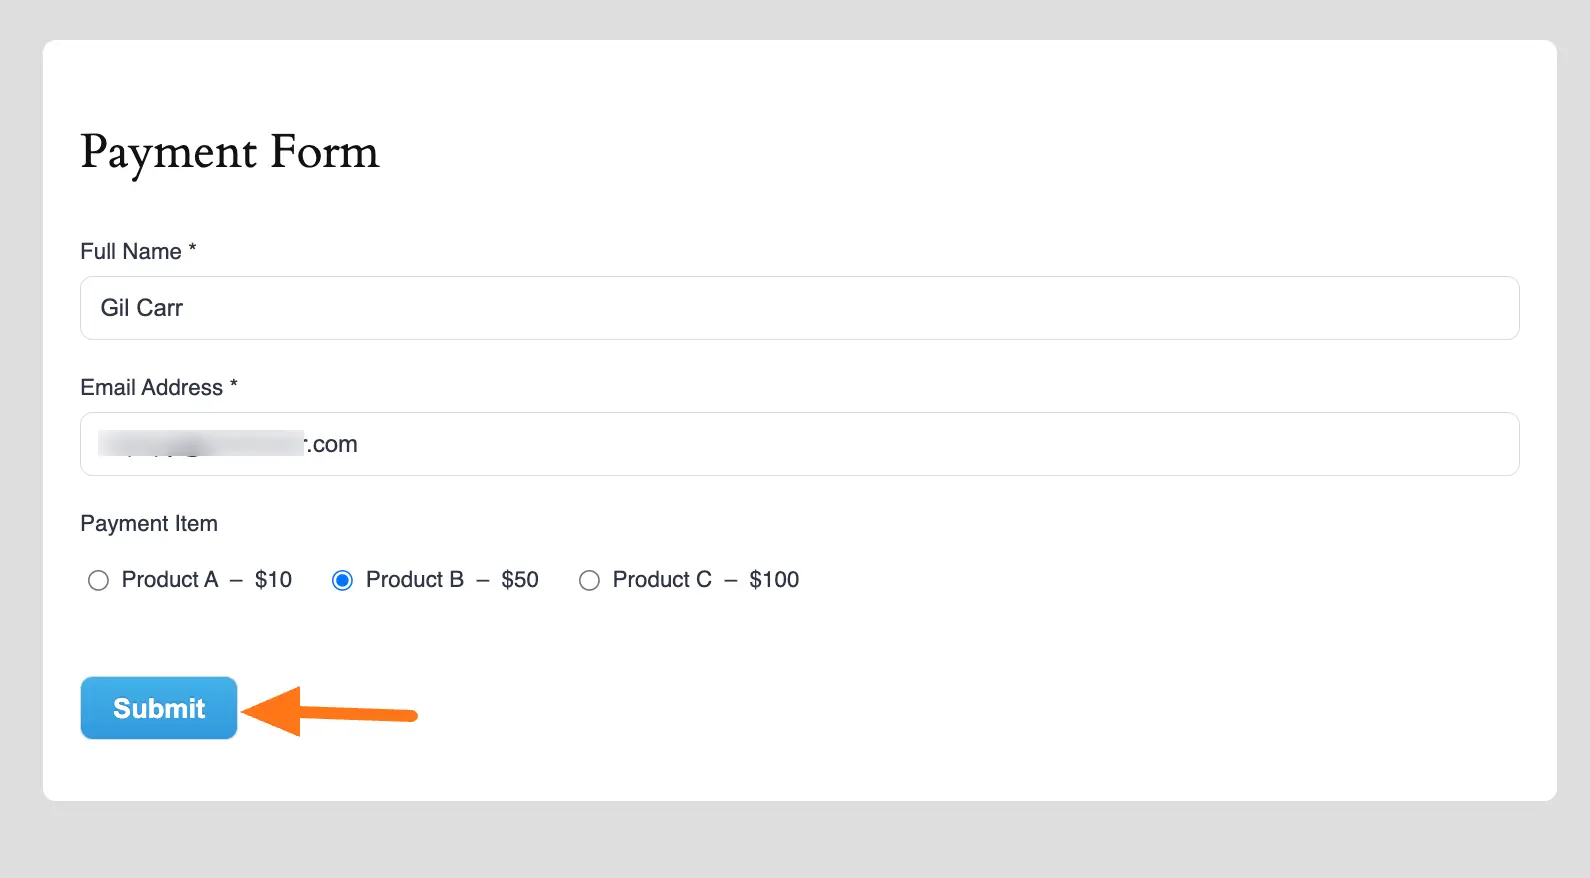
Form Preview
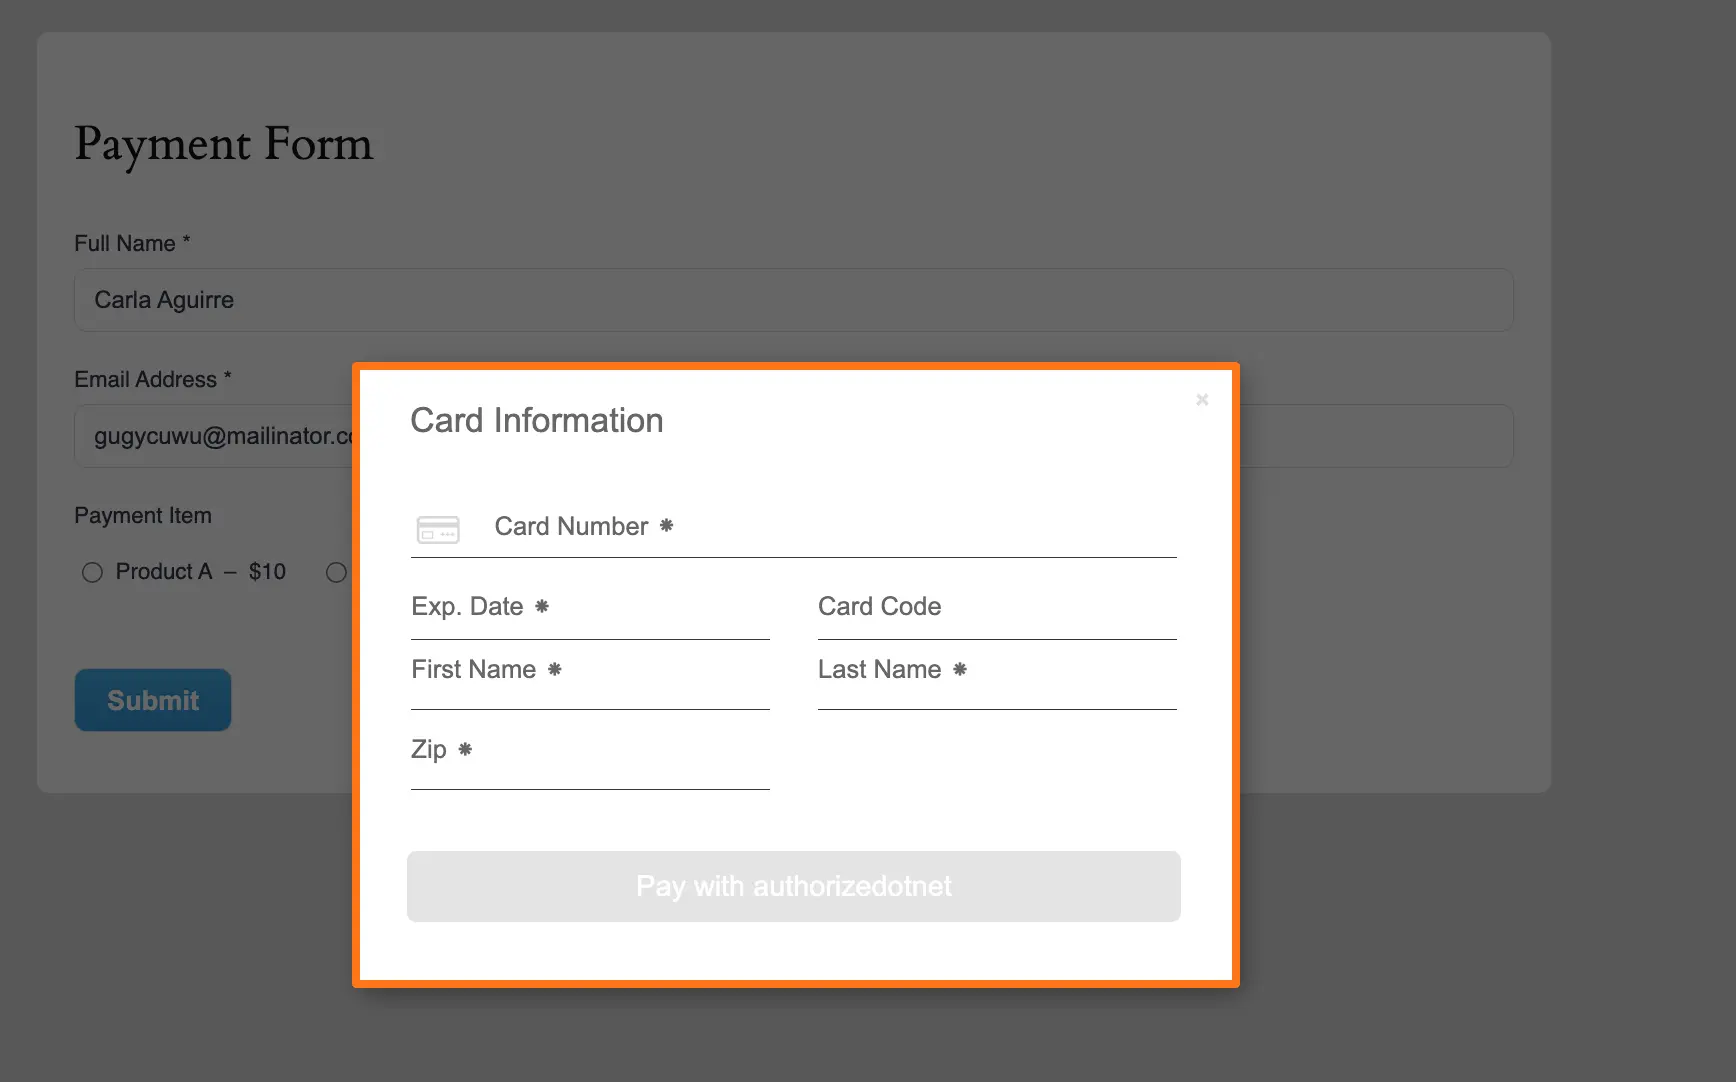
Here is the preview of the Form where you integrate the Authorize.net payment method you added. When a user fills the form and clicks the Submit button.
A pop up will appear as shown in the screenshot below to complete the payment process.
Need Help?
If you have any questions, concerns, or suggestions, please contact our @support team. Thank you.