How to Enable Stripe Payment Hold in Paymattic
Paymattic supports Stripe's payment hold feature, which allows you to temporarily reserve funds from a customer's payment method without immediately capturing them. This is useful when you need to verify order details or ensure product availability before finalizing a transaction.
Enable Place a Hold on a Payment
First, go to the All Forms section from the Pymattic Navbar, and open a Payment Form by clicking the Pencil icon with the Stripe payment method added.
If you do not have any existing Payment form, read this Documentation to learn how to Create a Payment Form.
For example, I choose an existing Payment Form to show the whole process.
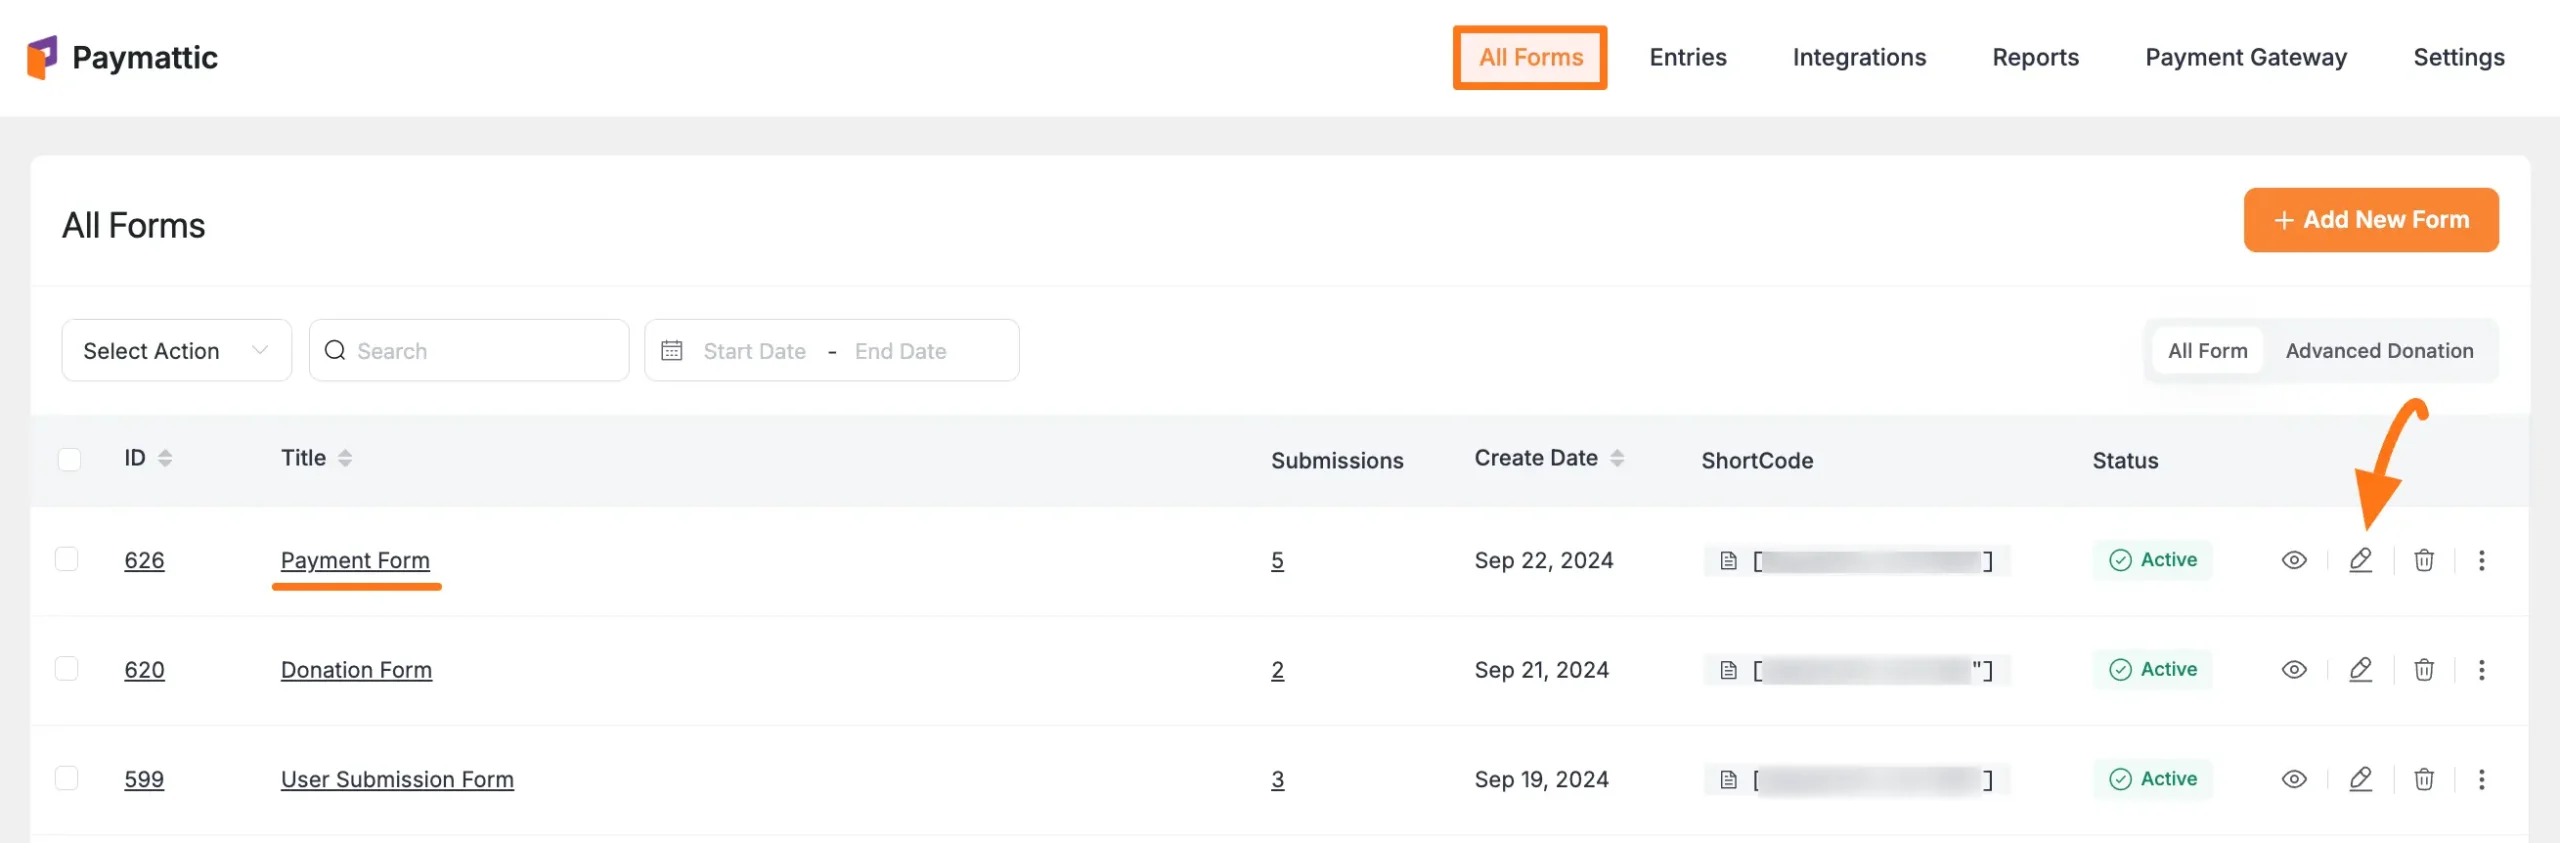
Once you open the Editor page, click on the Settings icon of the added Stripe payment method field.
![]()
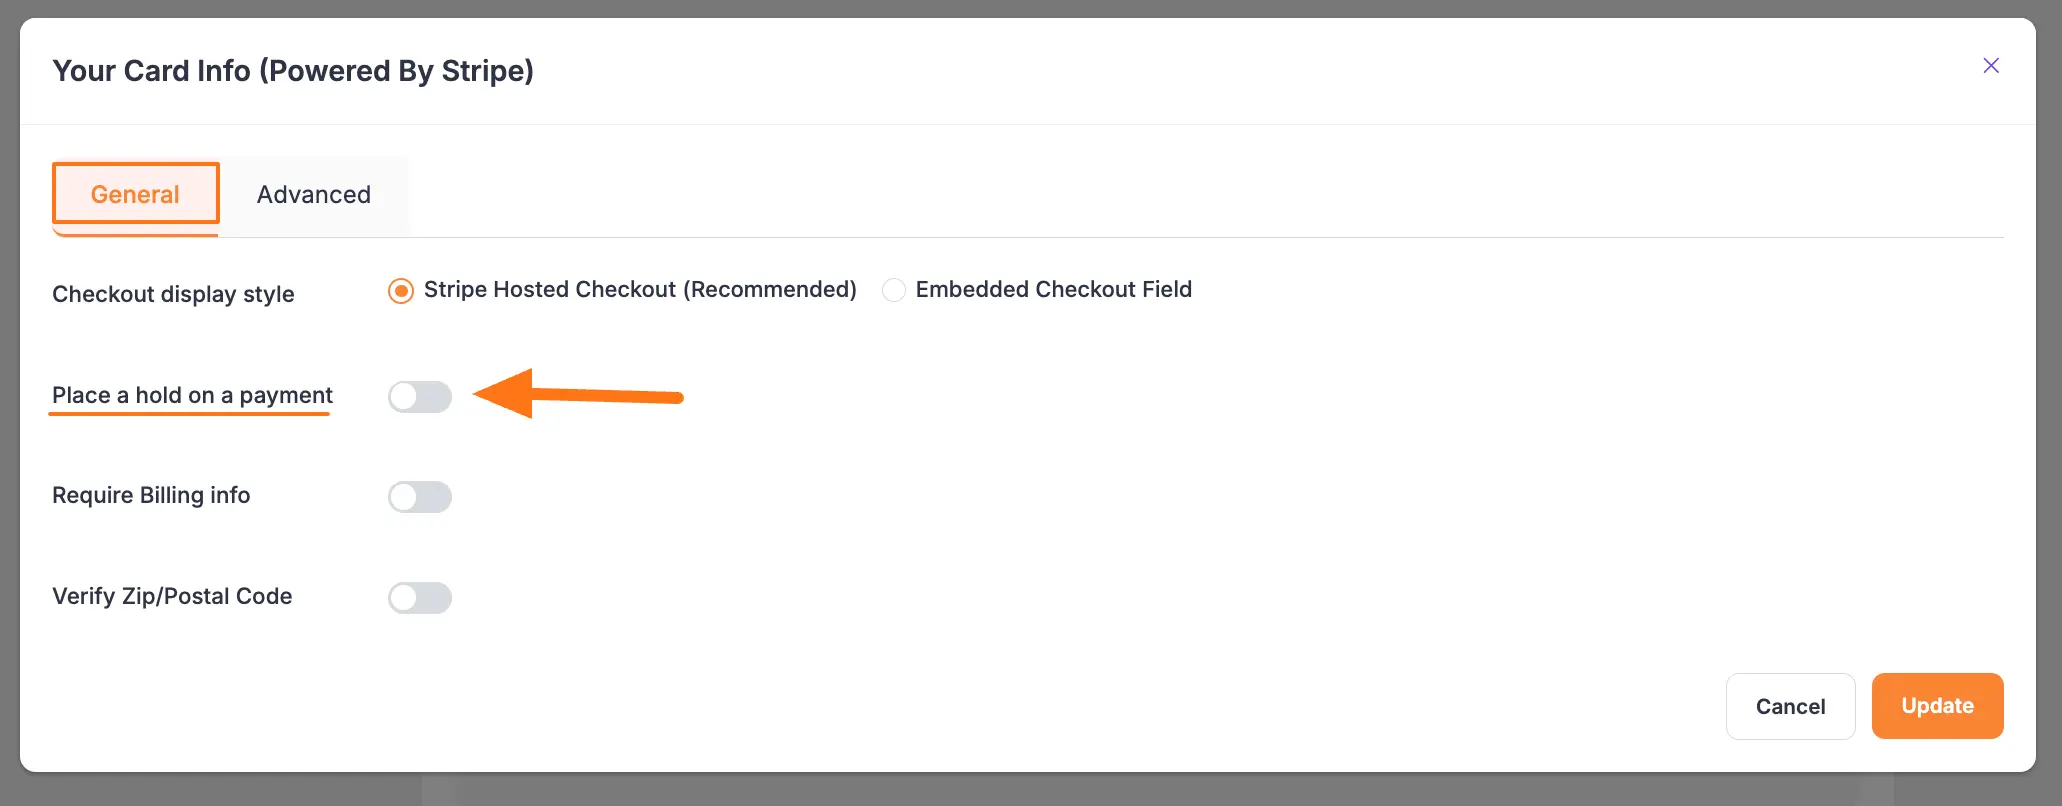
Now, click the Toggle button to enable the Place a hold on a payment option for Stripe.
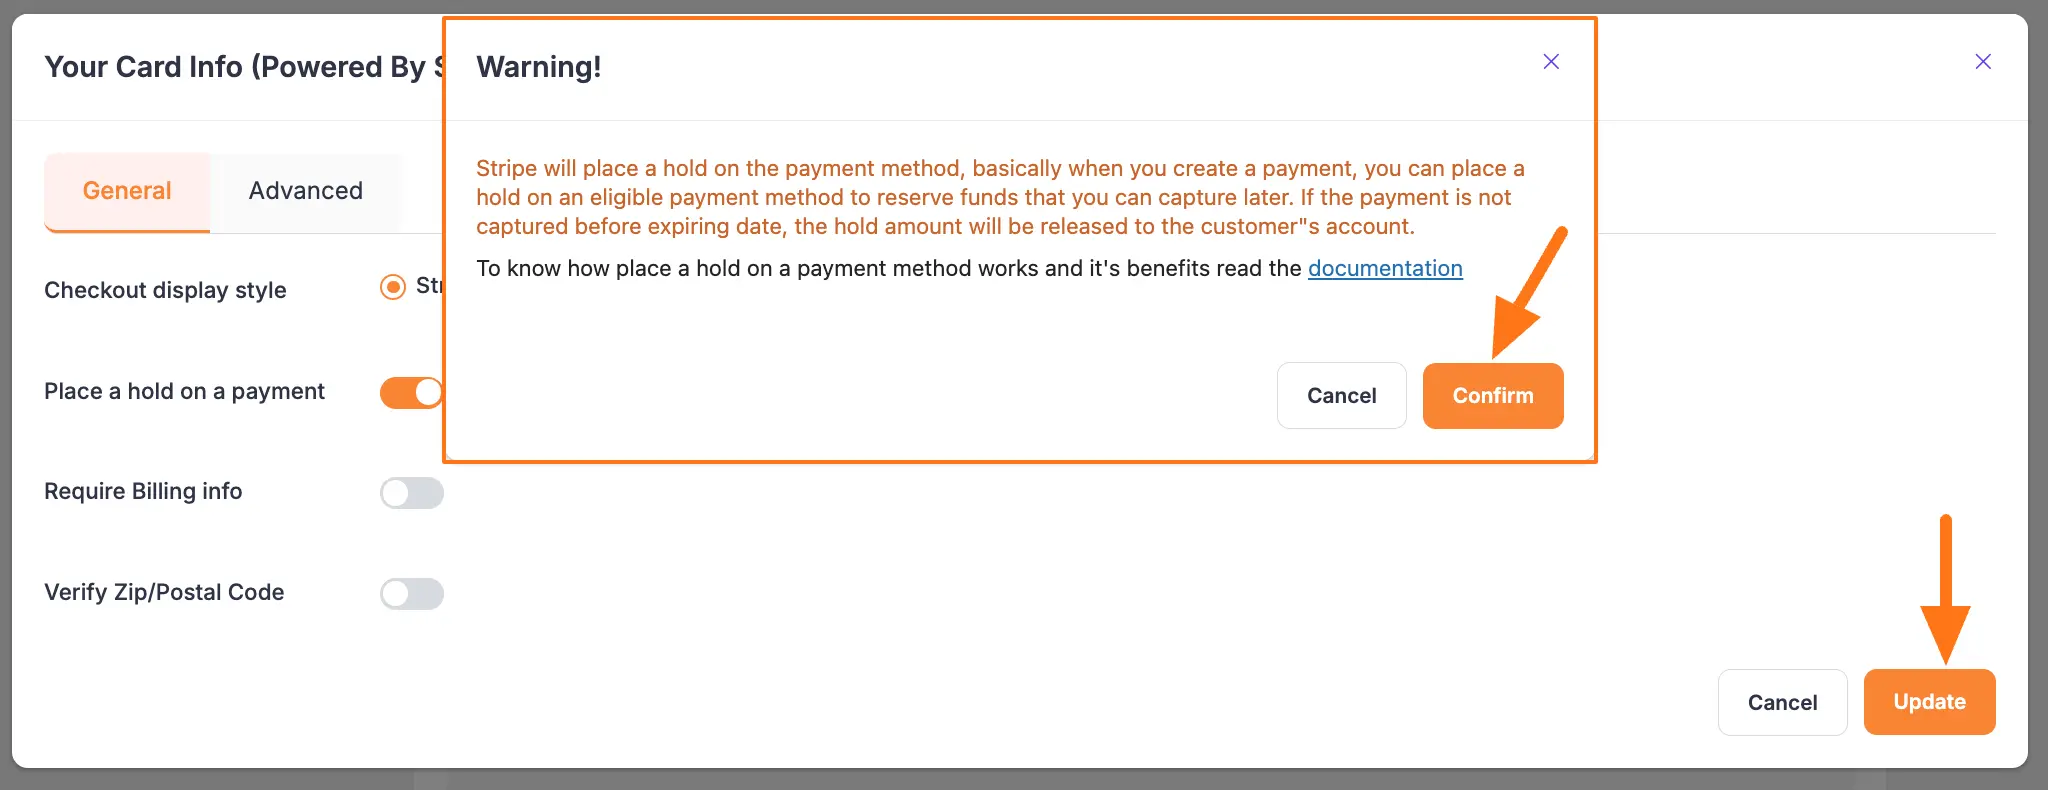
Then, a confirmation message will appear, click on the Confirm button, and then the Update button. And, your Place a Hold on a Payment option will be enabled!
Capture the Hold Payment
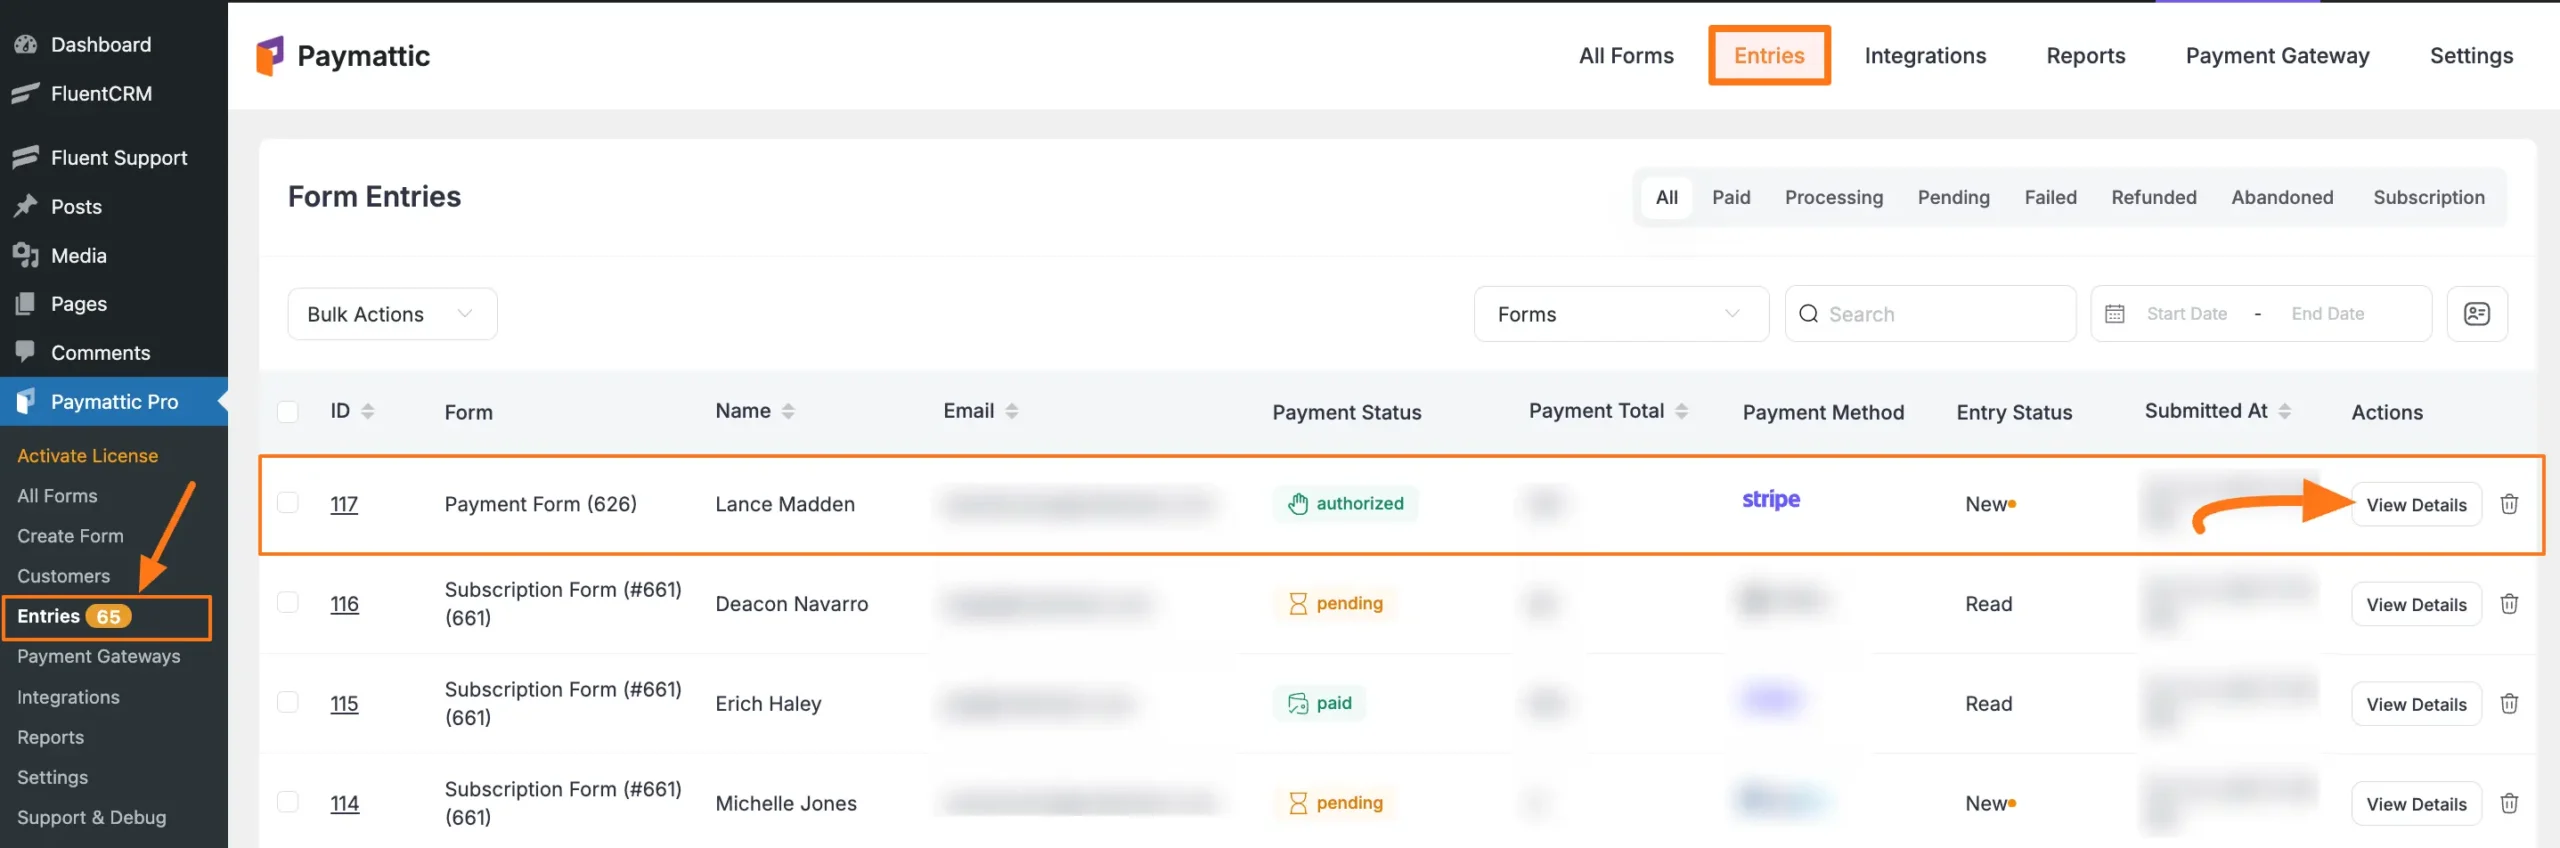
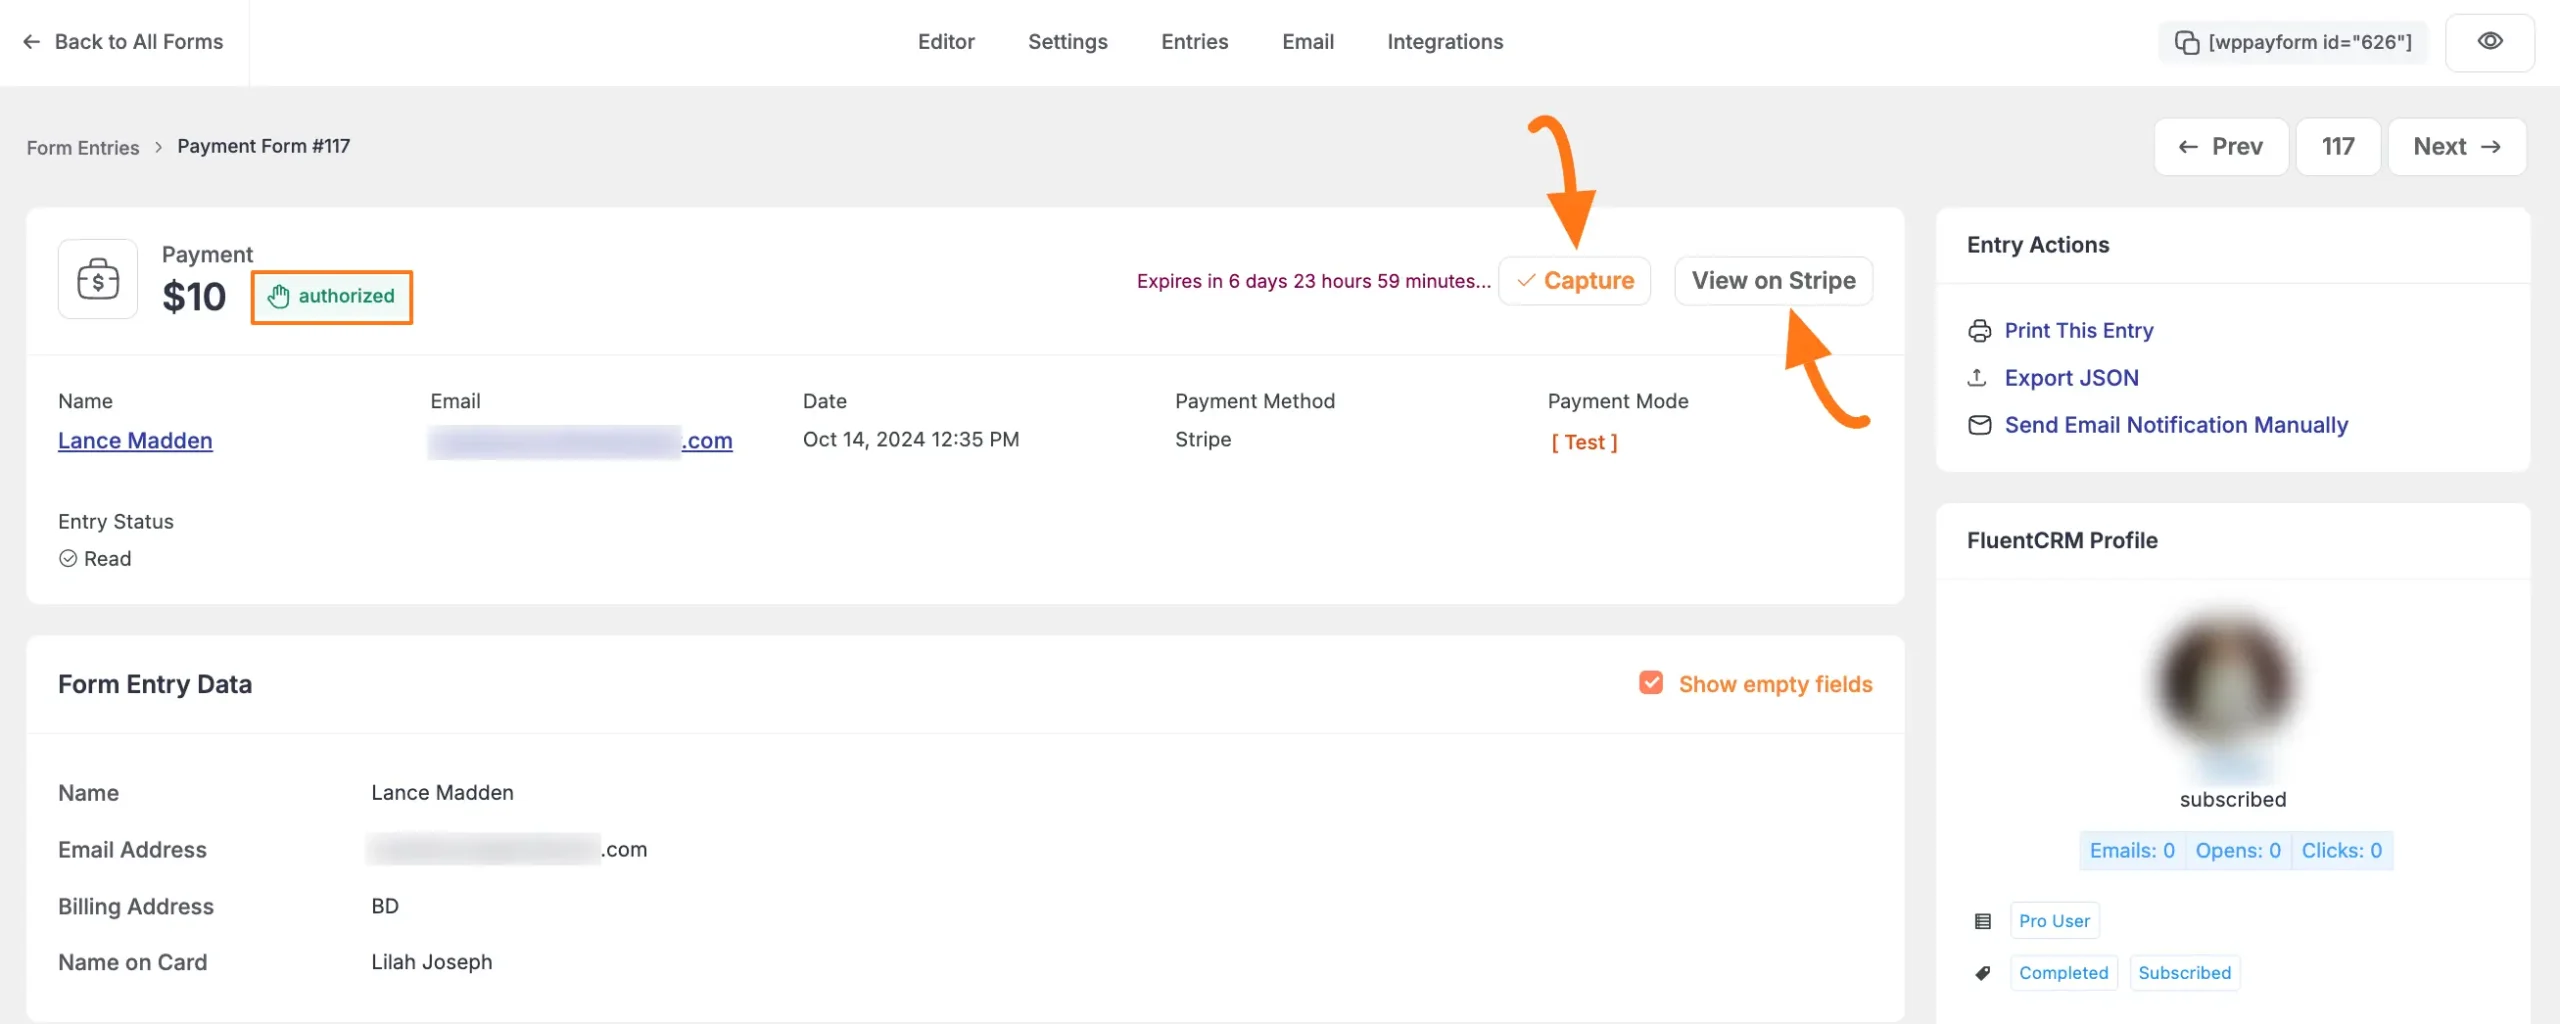
Once the Hold Payment option for Stripe is enabled in a specific Payment Form, Authorized payment status will appear in the form entries after each form submission.
First, go to Paymattic Dashboard from the WordPress Left Sidebar, click the Entries section, and click the View Details button of the desired authorized form entry.
Now, you can capture the payment by clicking the Capture button. Also, if you want to capture the payment amount from the Stripe dashboard, click the View on Stripe button.
Stripe Dashboard Capture
Remember, to capture the payment from Stripe Dashboard you have to add the ‘charge.capture‘ webhook. To know how to add this webhook you can follow this Documentation.
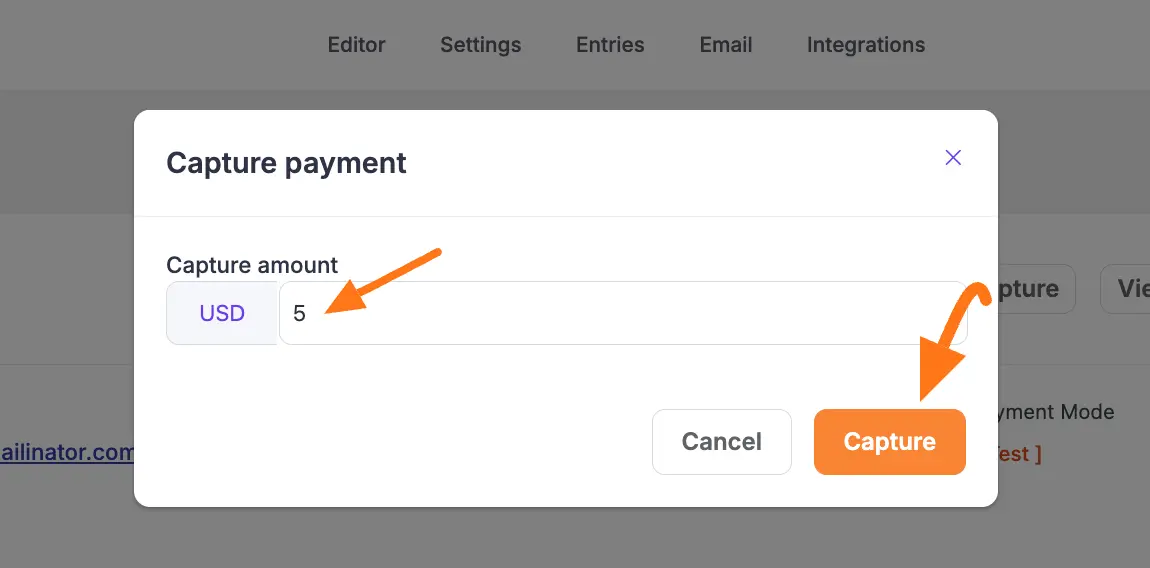
After clicking on the Capture button a Capture Payment popup will come. Now input the amount you want to capture and click the Capture button.
For example, here I captured 5 dollars out of 10 dollars.
Example: Capturing $5 from a $10 held payment:
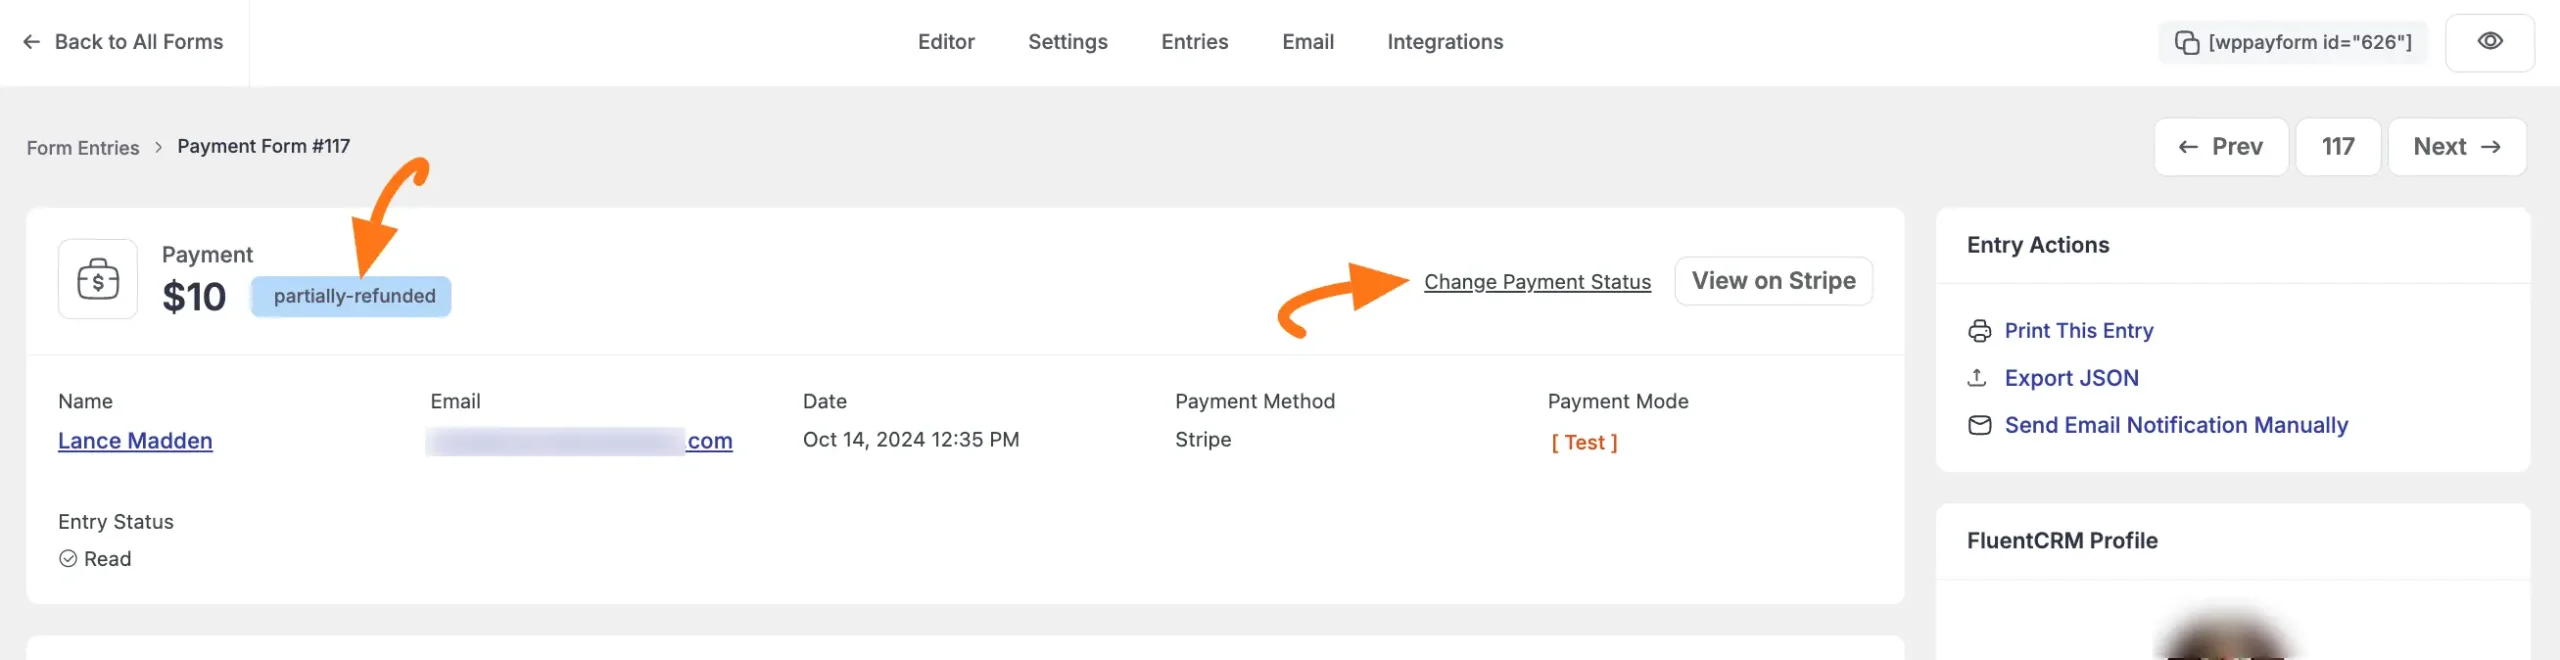
In your Payment Form Entries, now you will see that Uncaptured Paymnet has been Partially Refunded. You can also change the Partially Refunded payment status by clicking the Change Payment Status button.
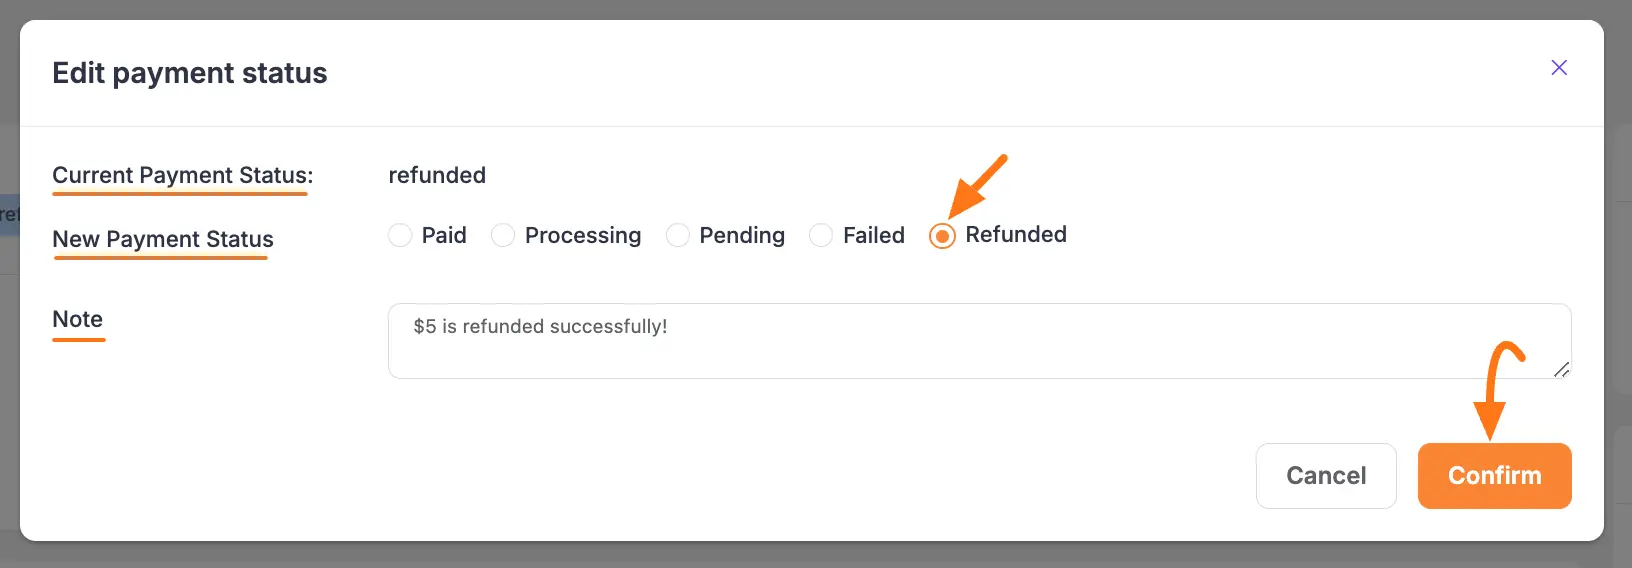
Now, select a new payment status that fits your needs and click the Confirm button. Also, if you want, you can add a Note for this entry during the status change.
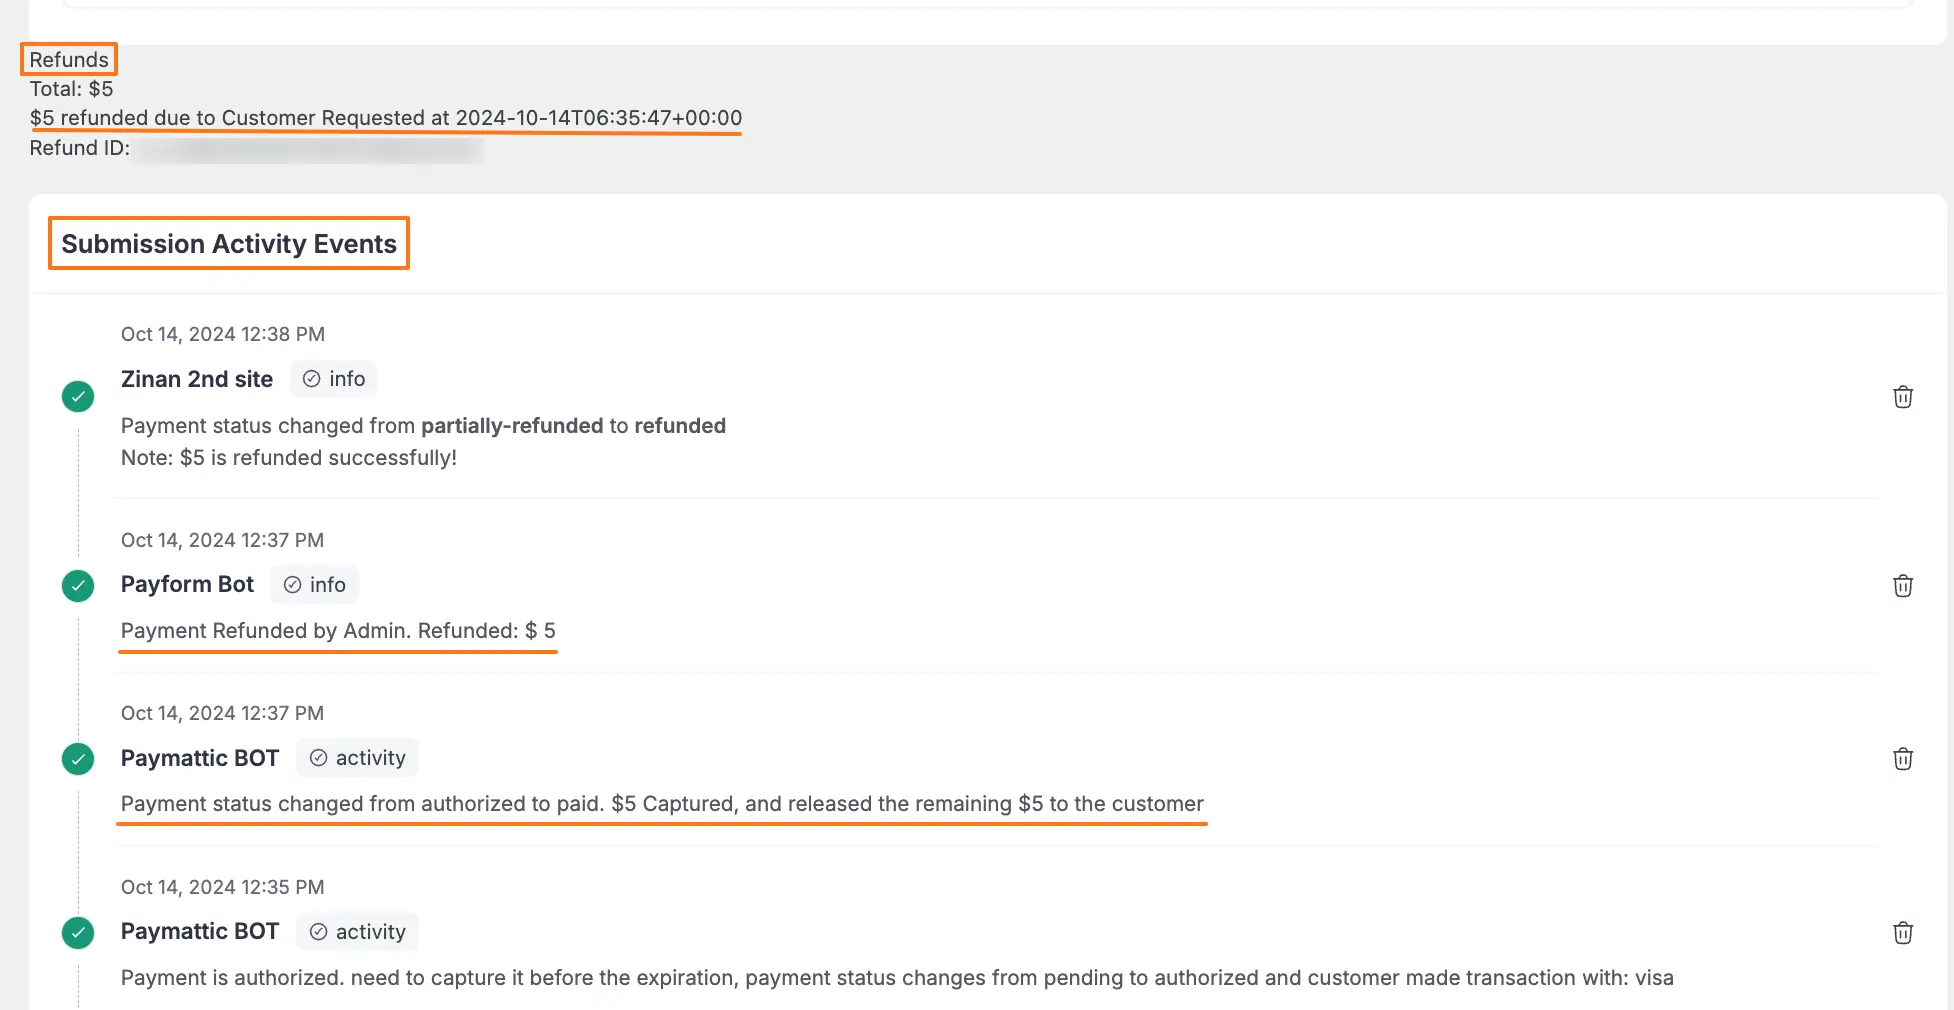
Payment Refund Activity Details
You will find all payment activity details, including refunded payments, in the Submission Activity Events section of the single entry page.
Find all payment activities, including refunds and captures, in the Submission Activity Events section of the entry details:
Need Help?
If you have any questions, concerns, or suggestions, please contact our support team.