How to Use the Donation & Product Fields
Paymattic provides 10 product fields to design a standard payment form for your WordPress Site. This article will give you an overview of Paymattic's General Fields.
Pro Features
Some fields require the Paymattic Pro plugin. Look for the star icon (⭐) in the field selector to identify premium features.
Getting Product Fields Section
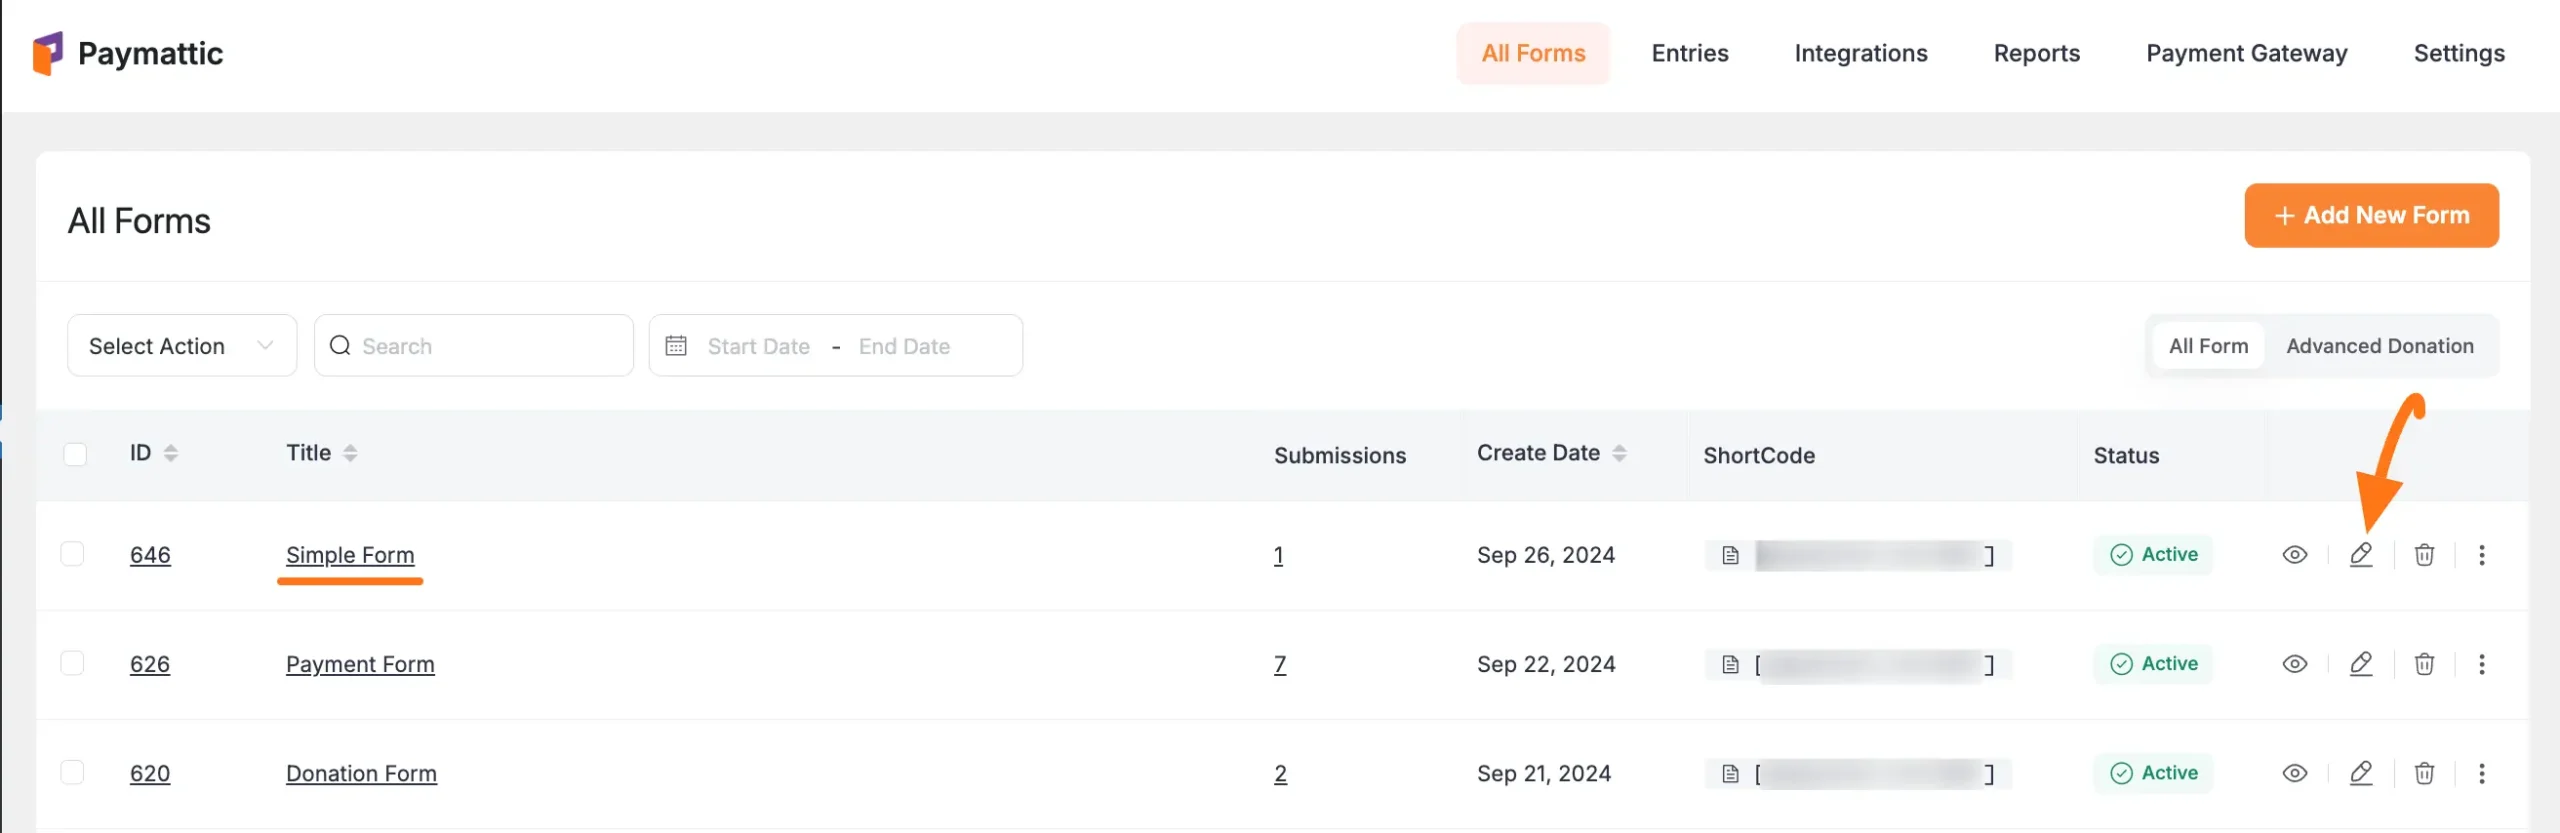
First, go to the All Forms section from the Paymattic Navbar, choose a Form, and click the Pencil/Edit icon to open the Editor page of that form.
For example, I choose an existing form to show the whole process.
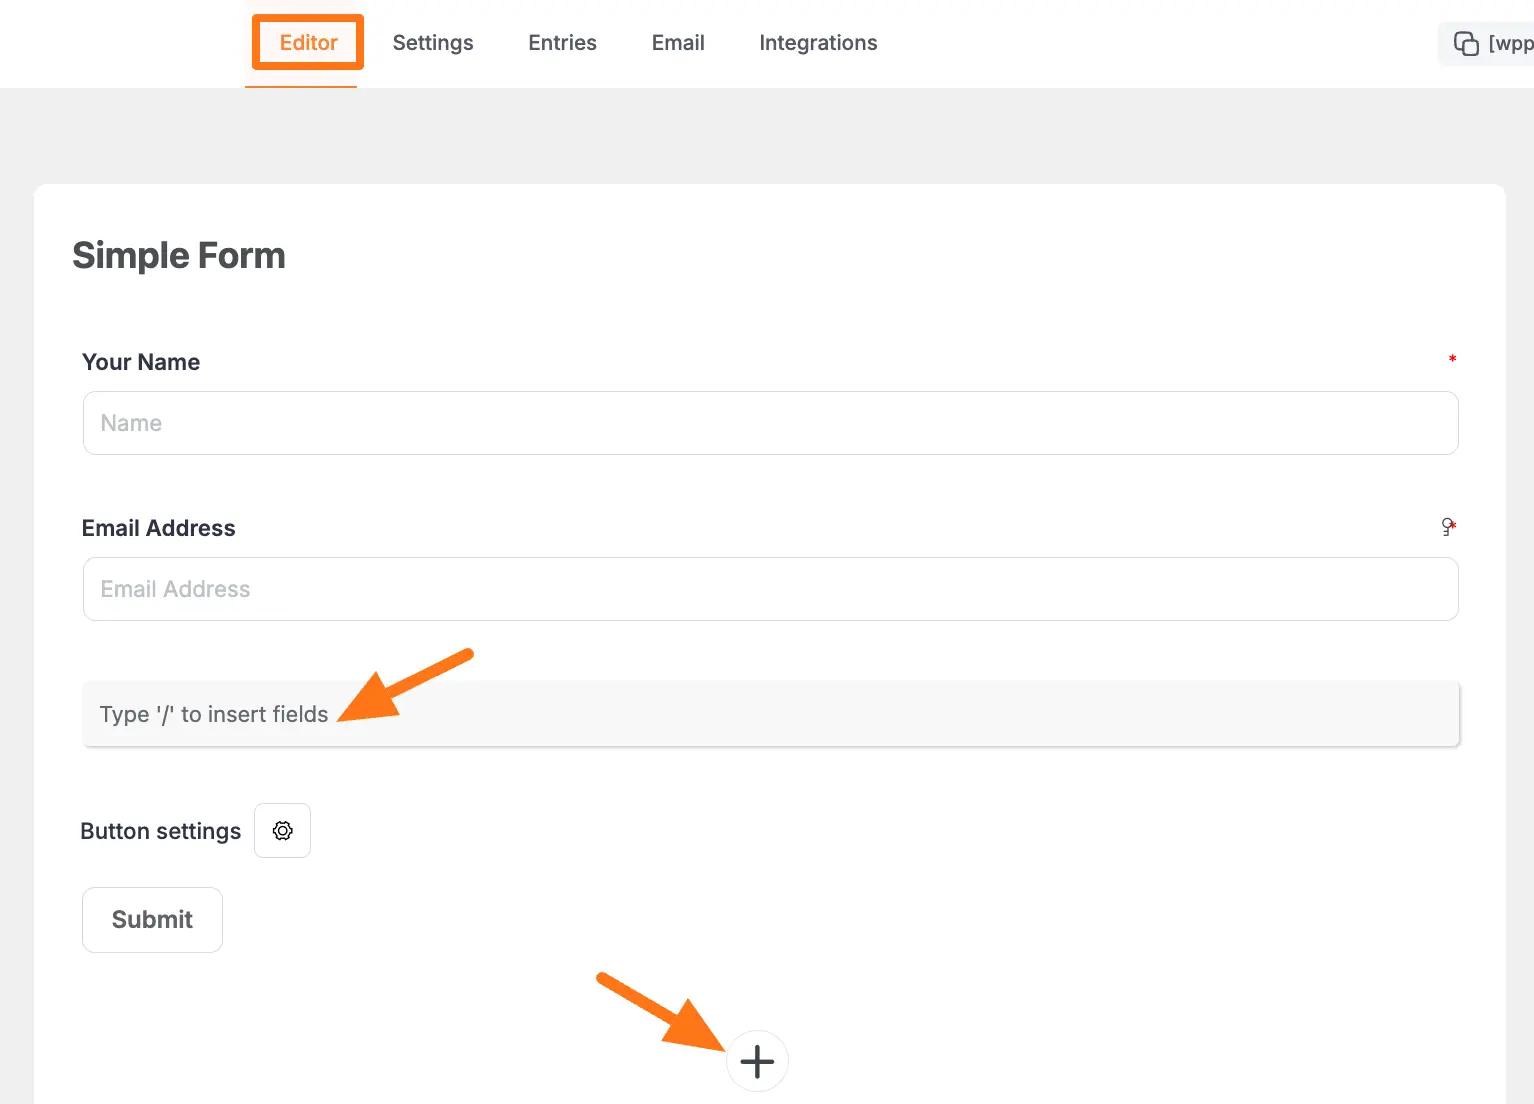
Once you open the Editor page, type the "/" or click the "+" icon placed at the bottom to get the Product Fields section.
On the Choose form field page, you will find all the desired Product fields under the Donation & Product Fields section.
Now, you can select any field/s according to your needs by simply clicking on its name.
Pro Features
Fields with a Star Sign (⭐) in the right corner are Pro features. You need to install and activate the Paymattic Pro plugin to use them.
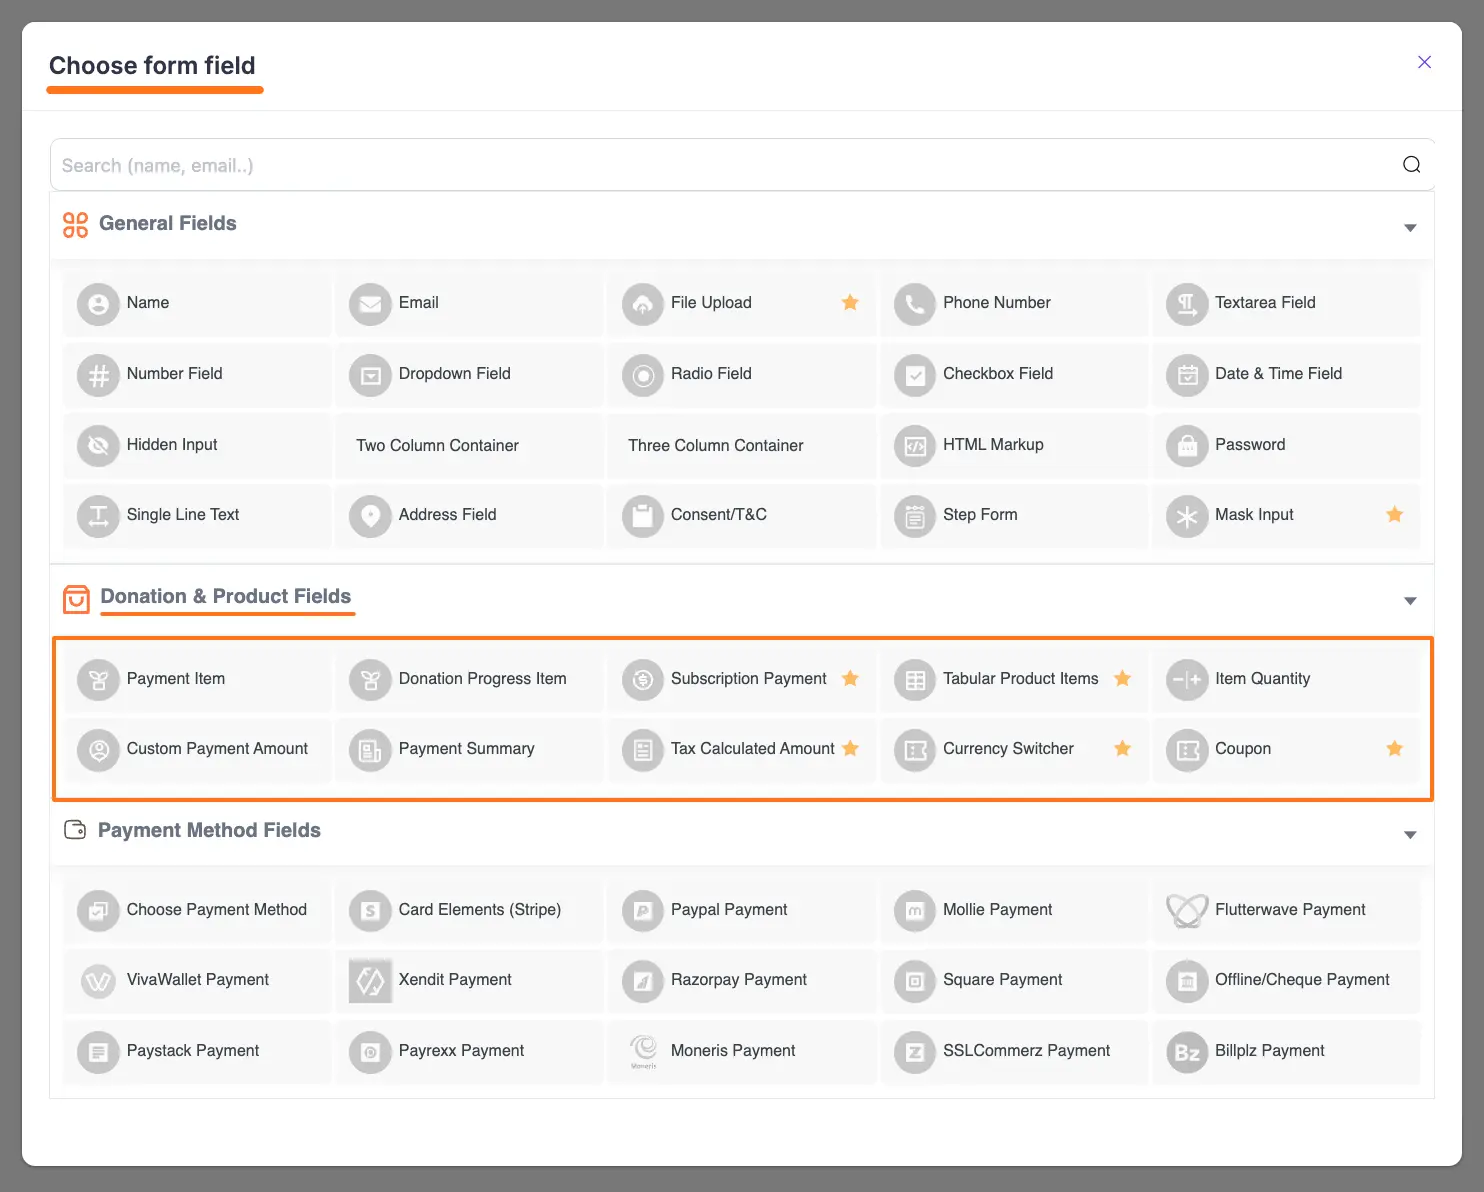
Available Donation & Product Fields
Here are all the available Product Fields with detailed documentation for each:
These are all the Product Fields you can use while creating forms in Paymattic.
If you have any further questions, concerns, or suggestions, please do not hesitate to contact our support team. Thank you.