How to Configure PayPal in WordPress with Paymattic
PayPal is a trusted global payment gateway that allows you to securely receive payments from your users. This article will guide you through configuring PayPal on your WordPress Site with the Paymattic plugin.
Prerequisites
To get access to the PayPal payment gateway, you need the Paymattic Pro Plugin.
Configuring PayPal Payment Method
Follow these steps to configure the PayPal payment gateway through Paymattic:
Step 1: Access PayPal Settings
- Go to Payment Gateway from the Paymattic Navbar
- Click the PayPal tab from the left sidebar
- The PayPal Settings page will open
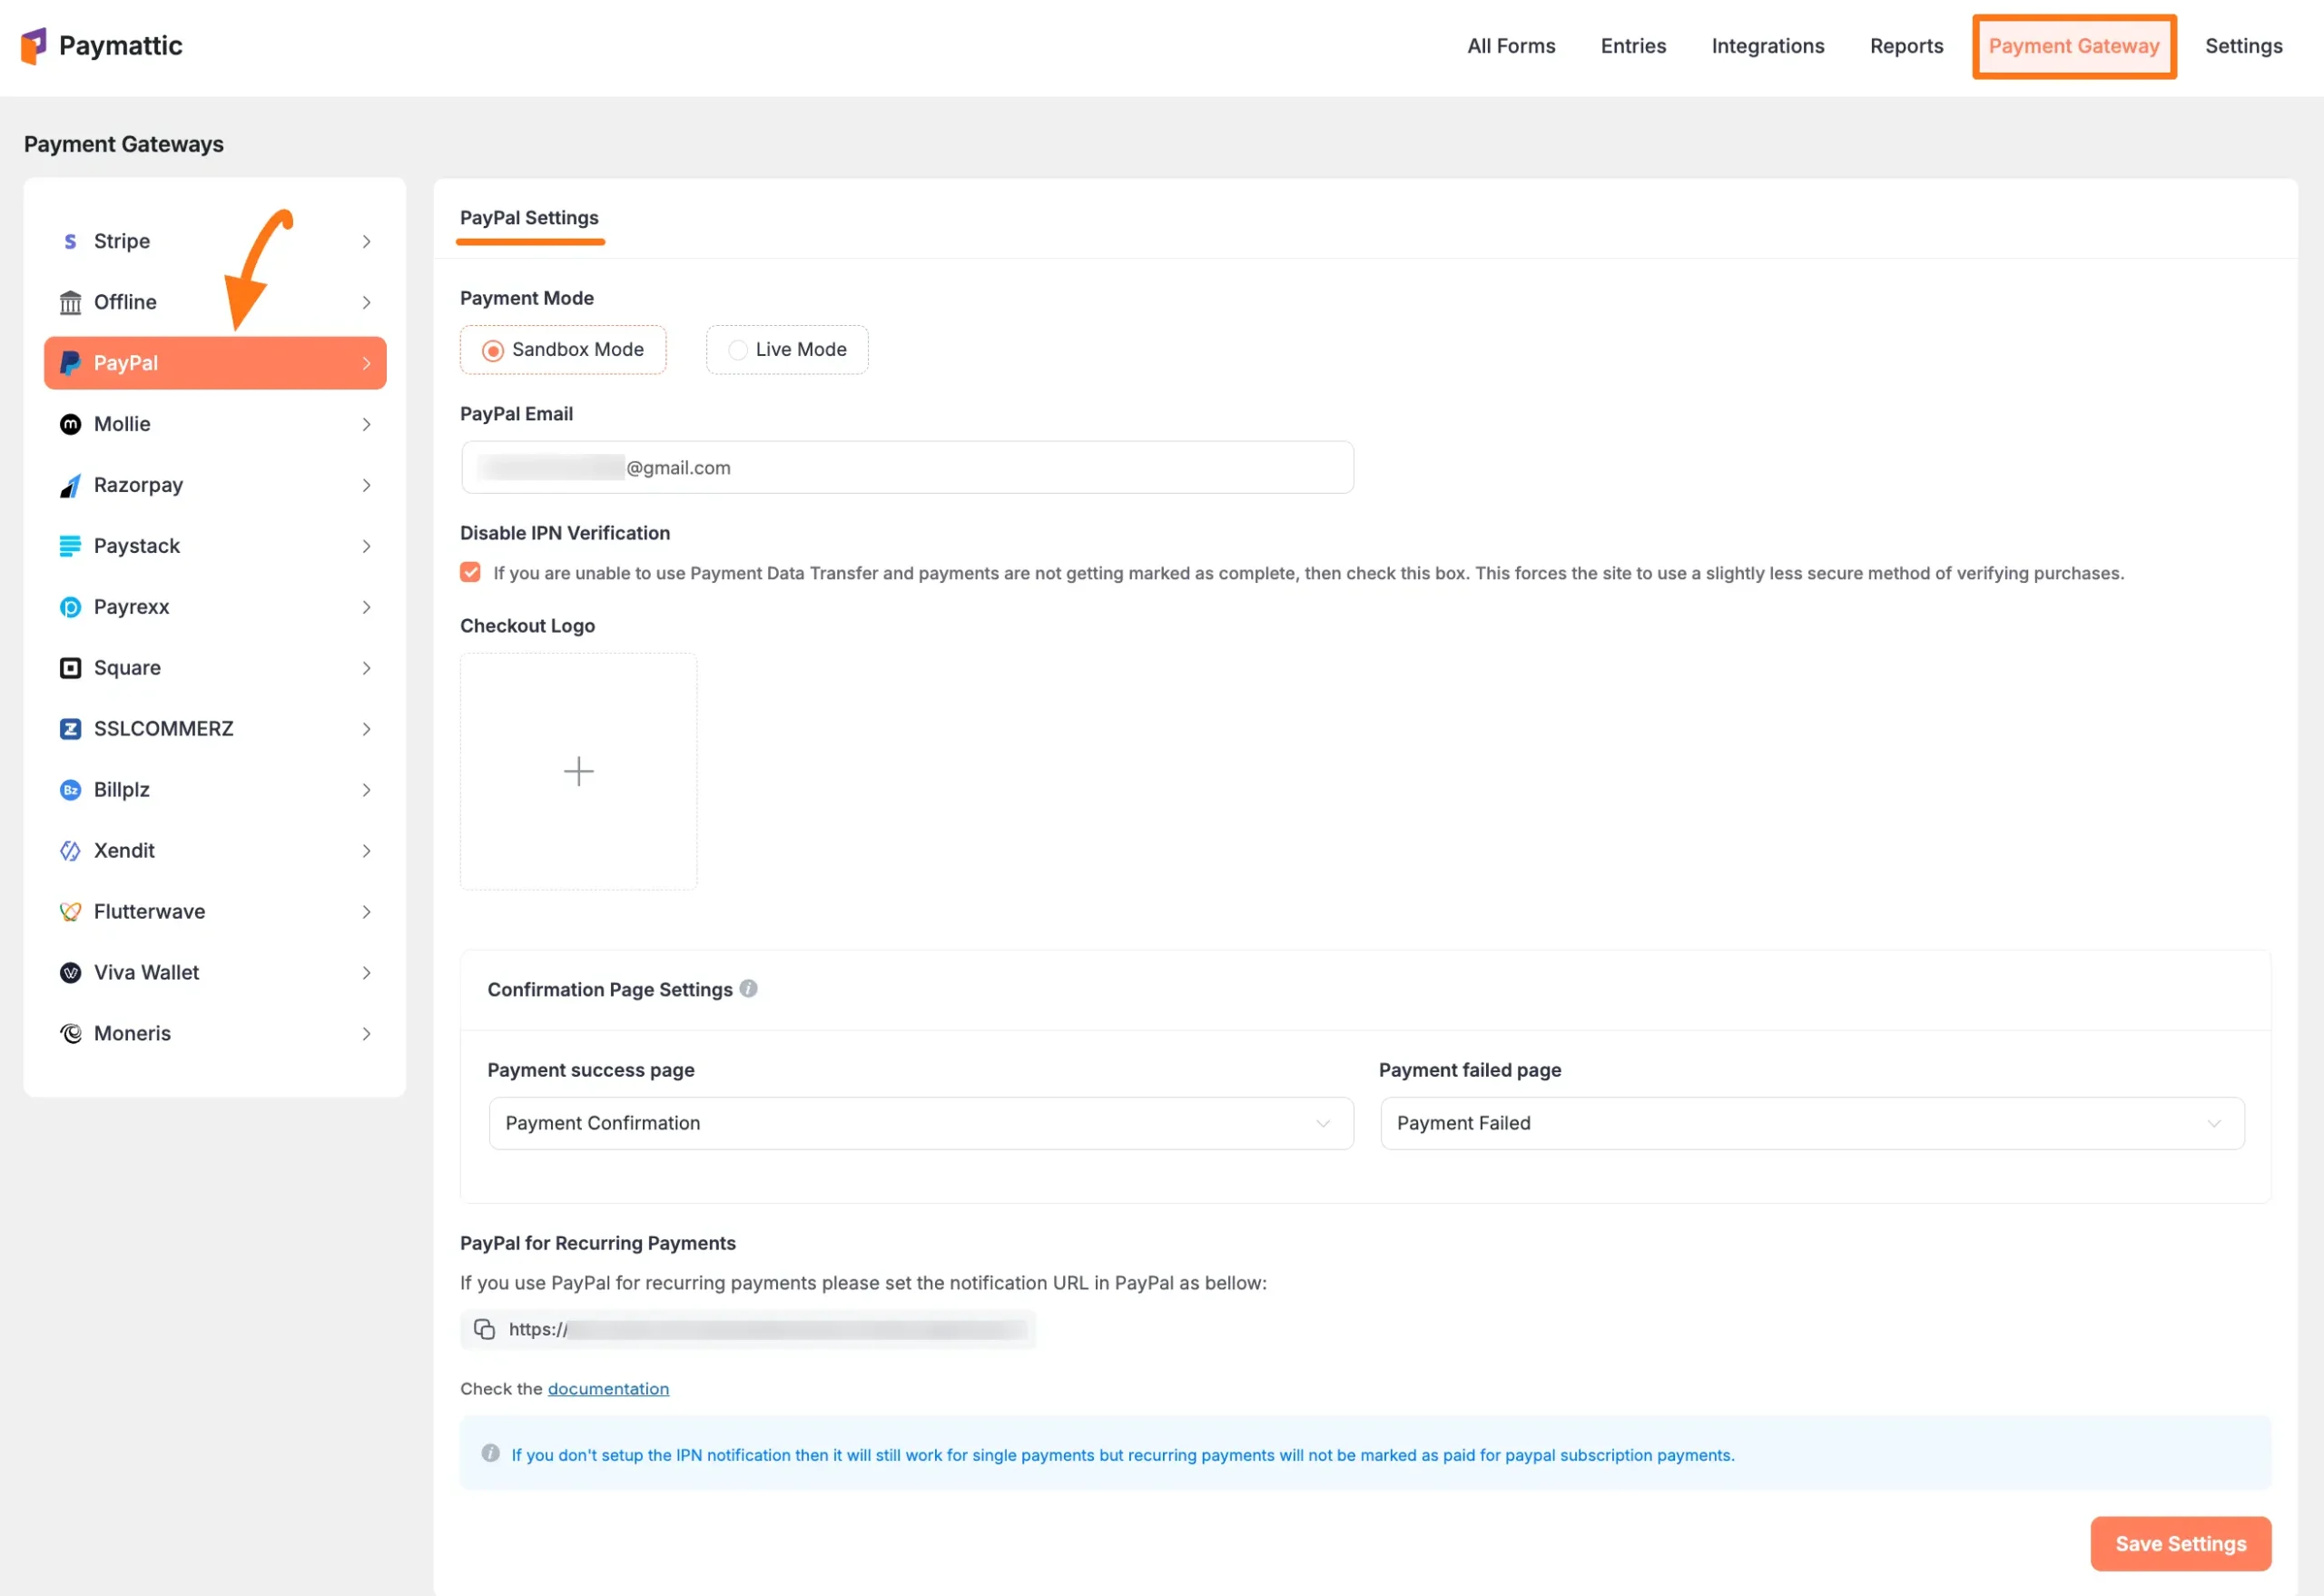
Step 2: Basic Configuration
Select Payment Mode: Choose between Sandbox (for test payments) and Live (for real payments). Both options follow the same configuration process. For this example, we will select Sandbox Mode.
Enter PayPal Email: In the PayPal Email field, enter the email address associated with your PayPal Account.
Save Settings: Click the Save Settings button to finalize the integration.
After saving, your PayPal account will be connected to your Paymattic plugin.

Step 3: Advanced Settings
IPN Verification & Checkout Logo
Once you configure PayPal, you can set up the IPN (Instant Payment Notification) Verification and Checkout Logo if needed.
Disable IPN Verification
Check this box if Payment Data Transfer is not accessible for you and payments are not being marked as complete.
- Note: This option allows the site to use a slightly less secure method of verifying purchases.
Checkout Logo
With this option, you can set a logo from your device to display during checkout. You can also remove the logo by simply clicking the Cross Icon.
Press the Save Settings button to save the changes you made on your PayPal Settings page.
![]()
Confirmation Page Settings
Configure where users will be redirected after payment:
- Payment Confirmation - for successful payments
- Payment Failed - for failed payments

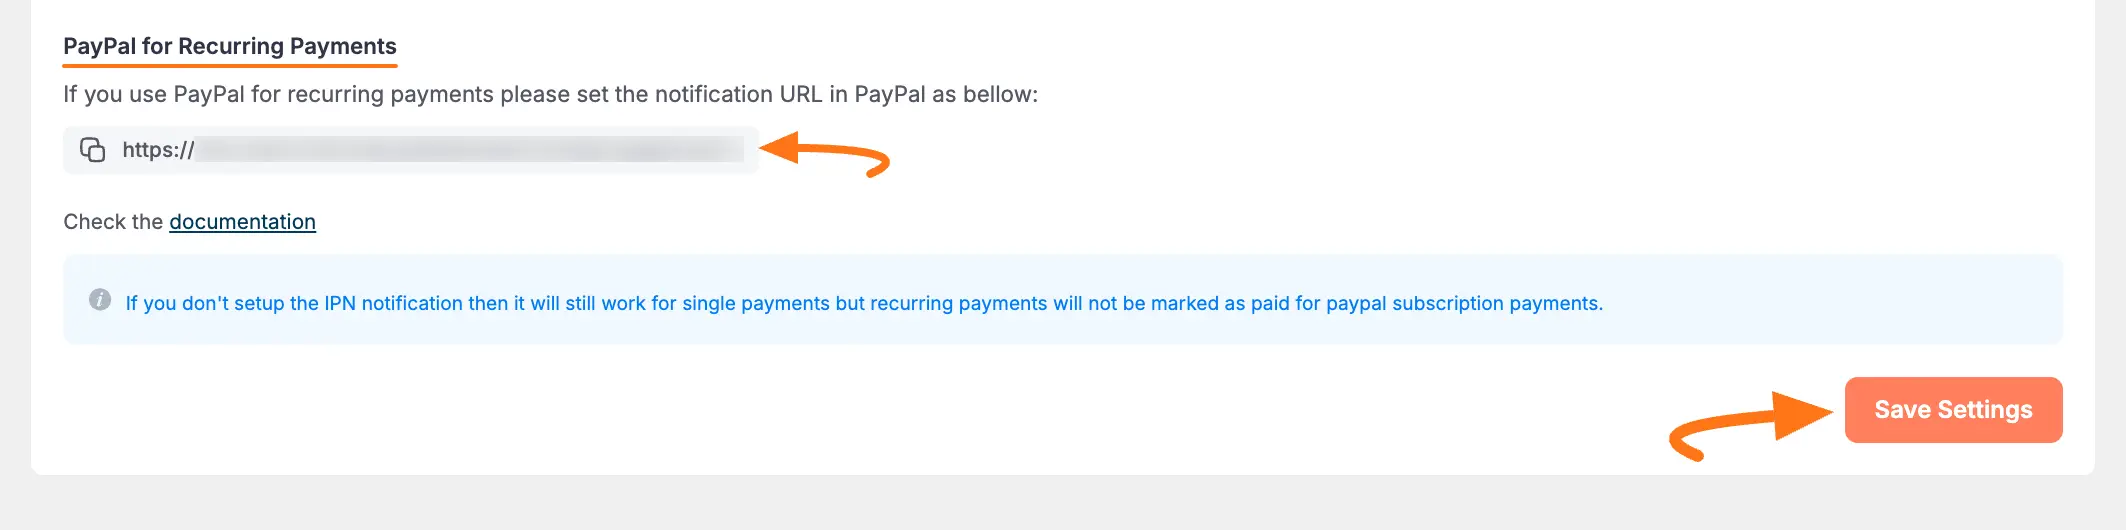
Recurring Payments Configuration
With this setting, you can enable notifications for recurring payments that happen in PayPal.
To correctly track subscription payments, you must set up PayPal's IPN (Instant Payment Notification).
- First, copy the provided
URLfrom this section. - Next, log in to your PayPal account and set this
URLin your IPN settings. This allows PayPal to send payment information back to your website.- Note: To learn exactly where to set the URL in your PayPal account, please read our detailed Documentation.
Important
If you do not set up the IPN (Instant Payment Notification), single one-time payments will still work correctly. However, recurring subscription payments will not be automatically marked as 'Paid' in your Paymattic records.
Once you are done, click the Save Settings button to save all the changes that you made.
Using PayPal in Forms
Once you've completed the setup, you can add PayPal to your forms:
For existing forms: Add it to any Payment Form
For new forms:
Learn more about adding payment methods
Note
The PayPal payment method will not function unless you complete the configuration process properly.
Form-Specific PayPal Settings
Need to customize PayPal settings for a specific form? Check out our guide on Form-Specific Payment Settings.
Need Help?
If you have any questions, concerns, or suggestions, please contact our support team. We're here to help!