How to Configure reCAPTCHA in WordPress with Paymattic
Paymattic integrates with Google reCAPTCHA to protect your WordPress forms from spam and automated submissions. This guide walks you through setting up reCAPTCHA in Paymattic.
Get the reCAPTCHA API Keys
Before configuring reCAPTCHA in Paymattic, you must get your API keys from Google reCAPTCHA. To learn how to get the reCAPTCHA Site and Secret keys, follow the steps with the screenshots below –
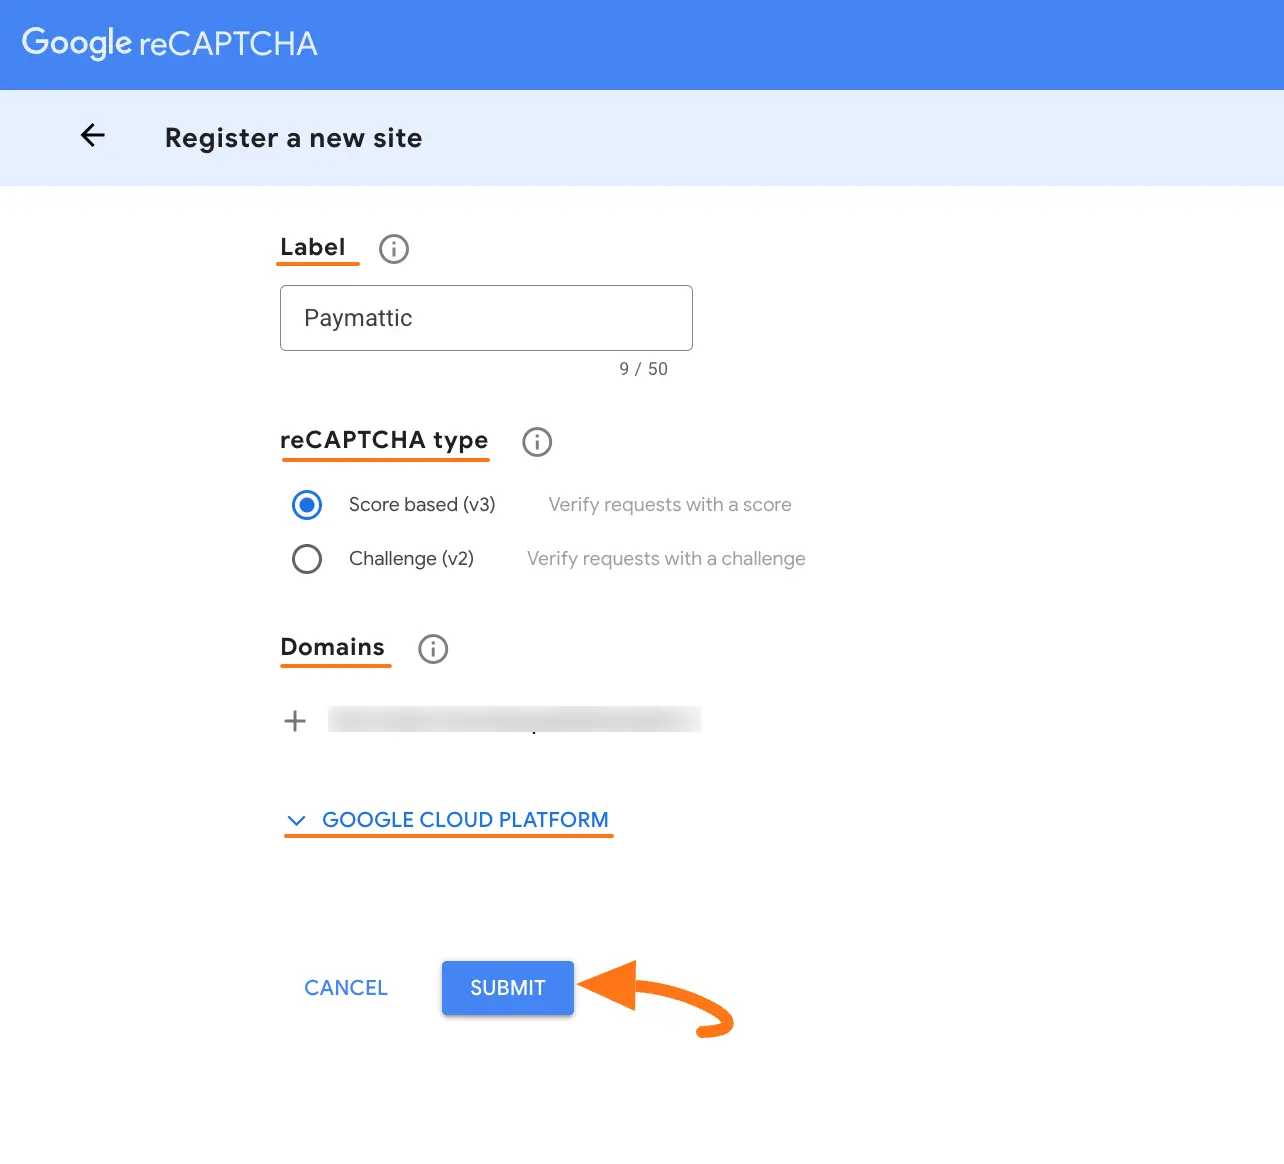
First, go to the Google reCaptcha Site, and click the Plus Icon.
![]()
Now, put a Name into the Label field to identify your website in the future and choose the reCAPTCHA type you prefer (v2 or v3) e.g., I choose V3.
Then, enter your website/s address in the Domains field to register your domain for a reCAPTCHA verification. Also, you can choose your project from the Google Cloud Platform dropdown.
Once you provide all the necessary information, click the Submit button and you will get your desired Site key and Secret key.
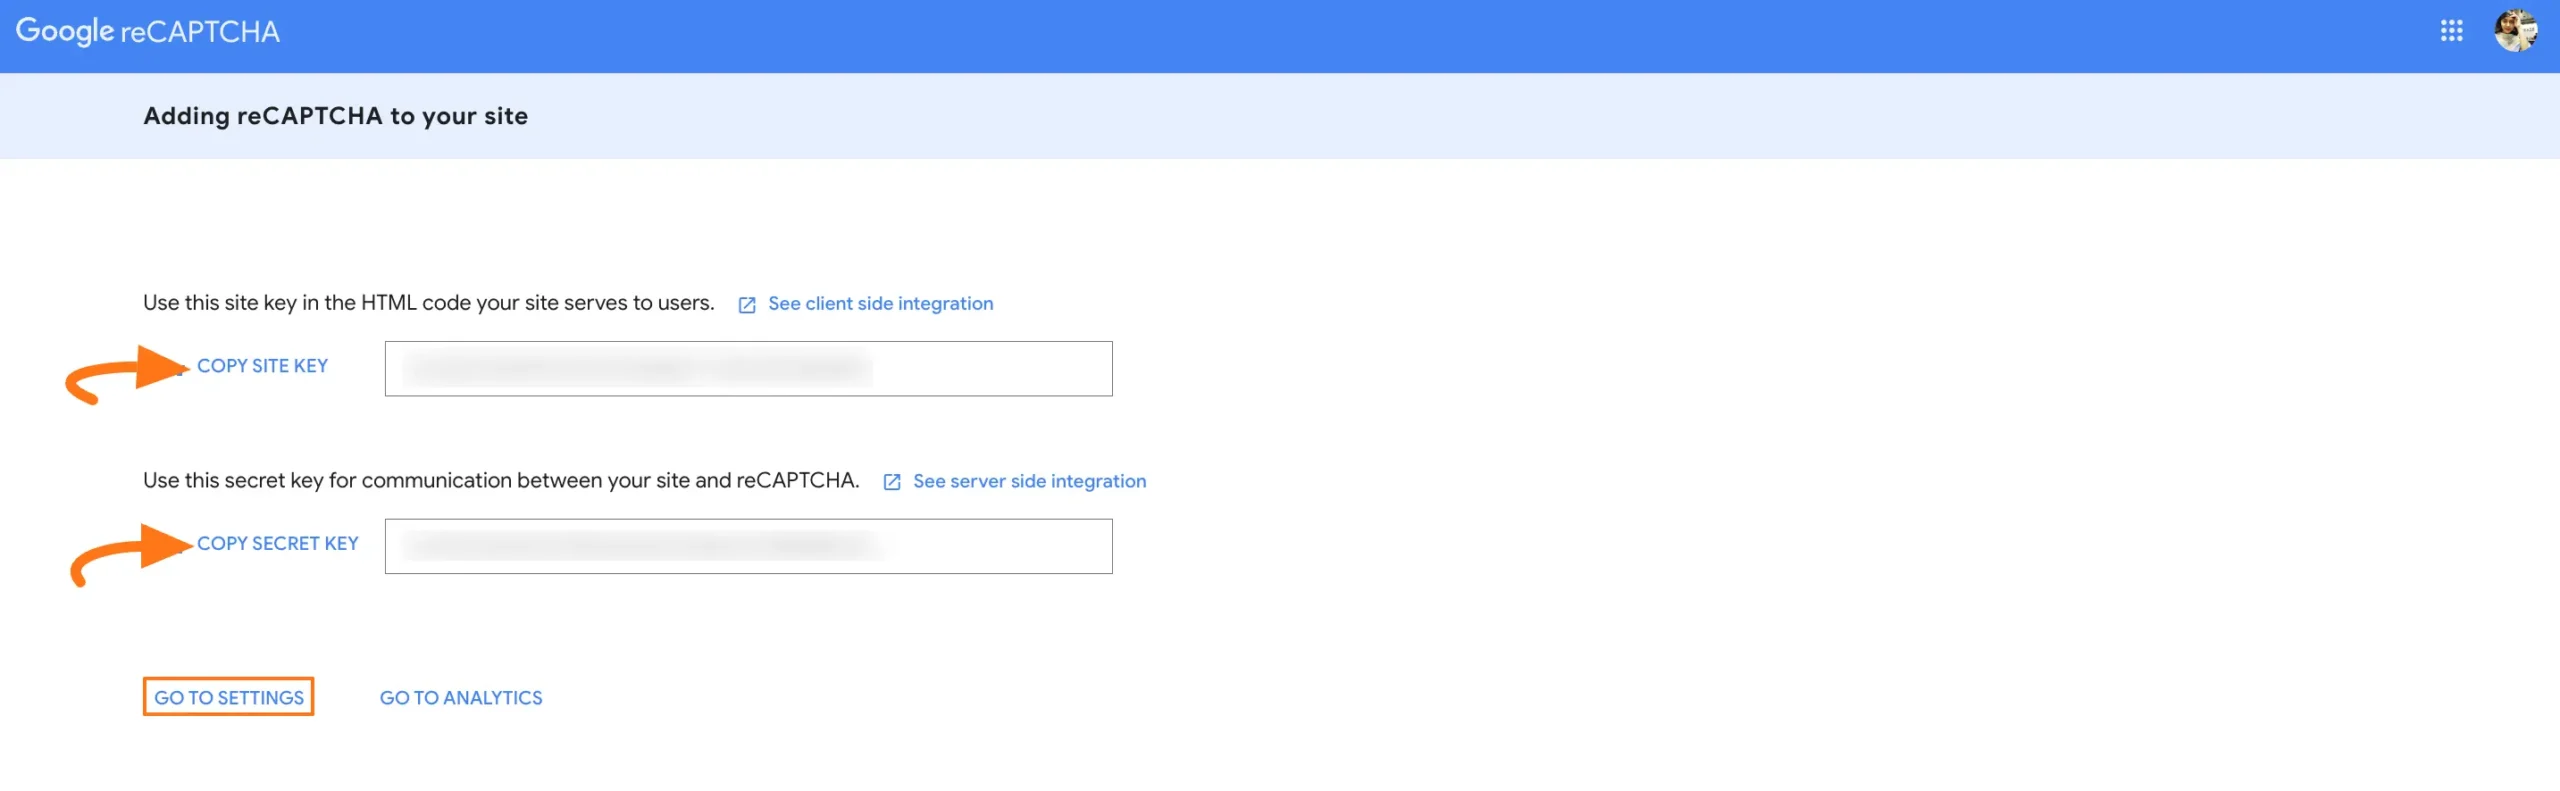
Here, you will get your desired Site key and Secret key. Simply, copy them by clicking the Copy Site Key and Copy Secret Key buttons.
For additional settings, click the Go To Settings button and the Settings page will appear.
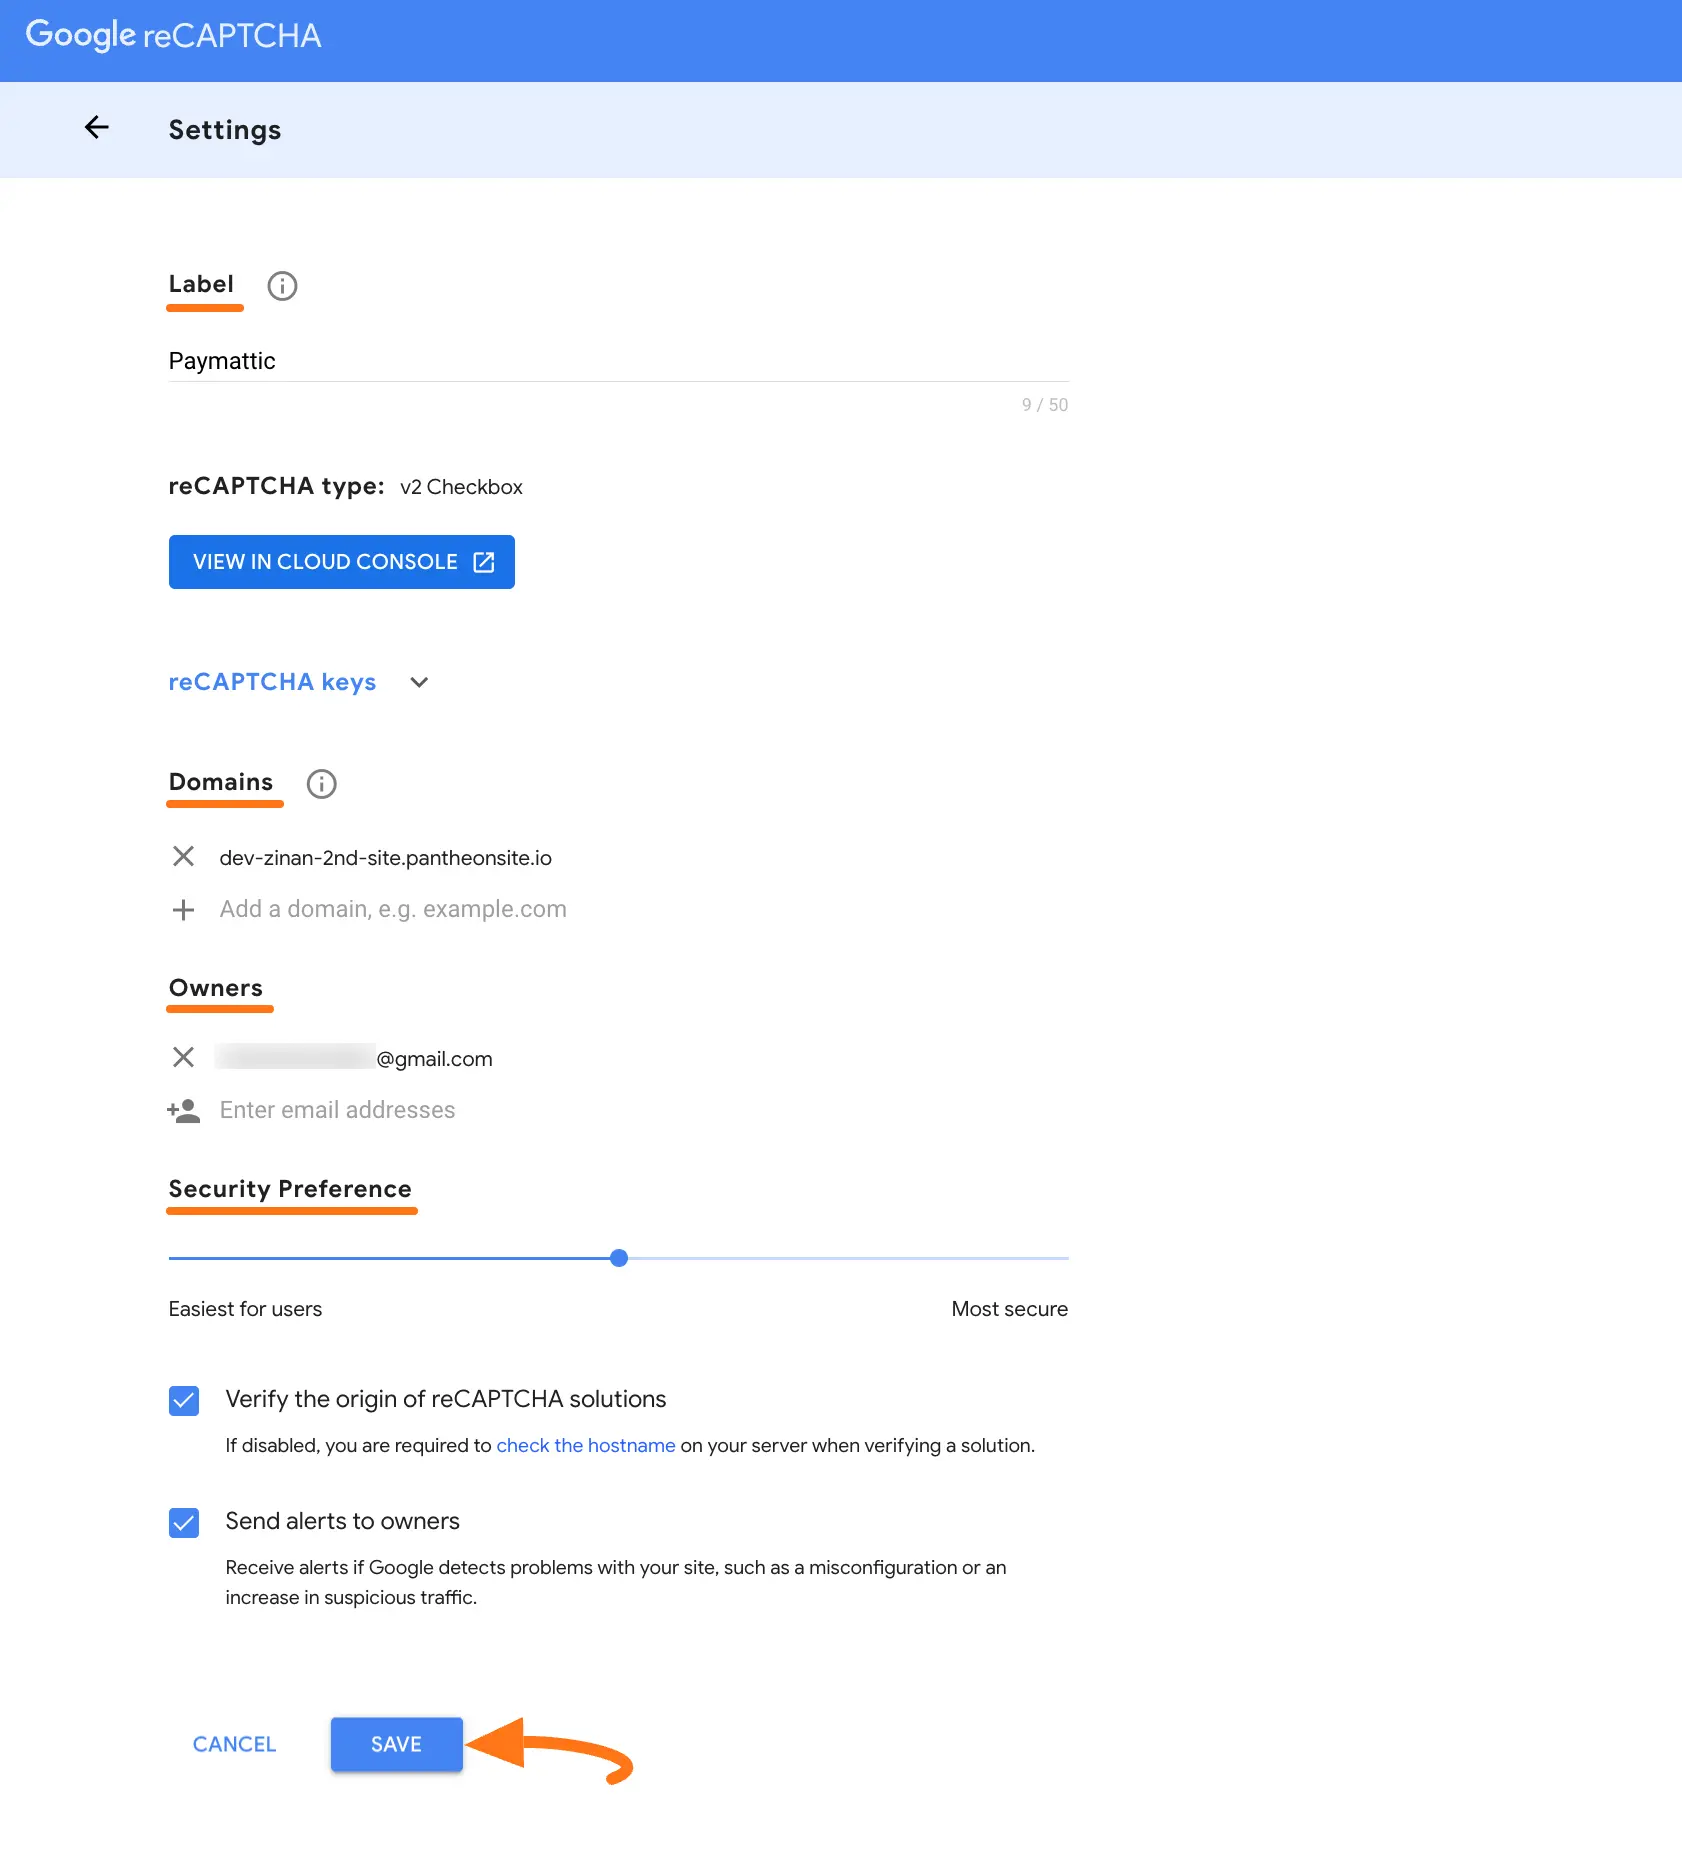
On the settings page, you can edit the name under the Label field, see the reCAPTCHA type and keys, and change or add the Domain.
Also, you can change the existing owner’s email address or add an admin email to manage reCAPTCHA in the Owners field. Plus, you can set the security preference according to your needs.
Finally, click the Save button and all your changes will be saved.
Configuring reCAPTCHA
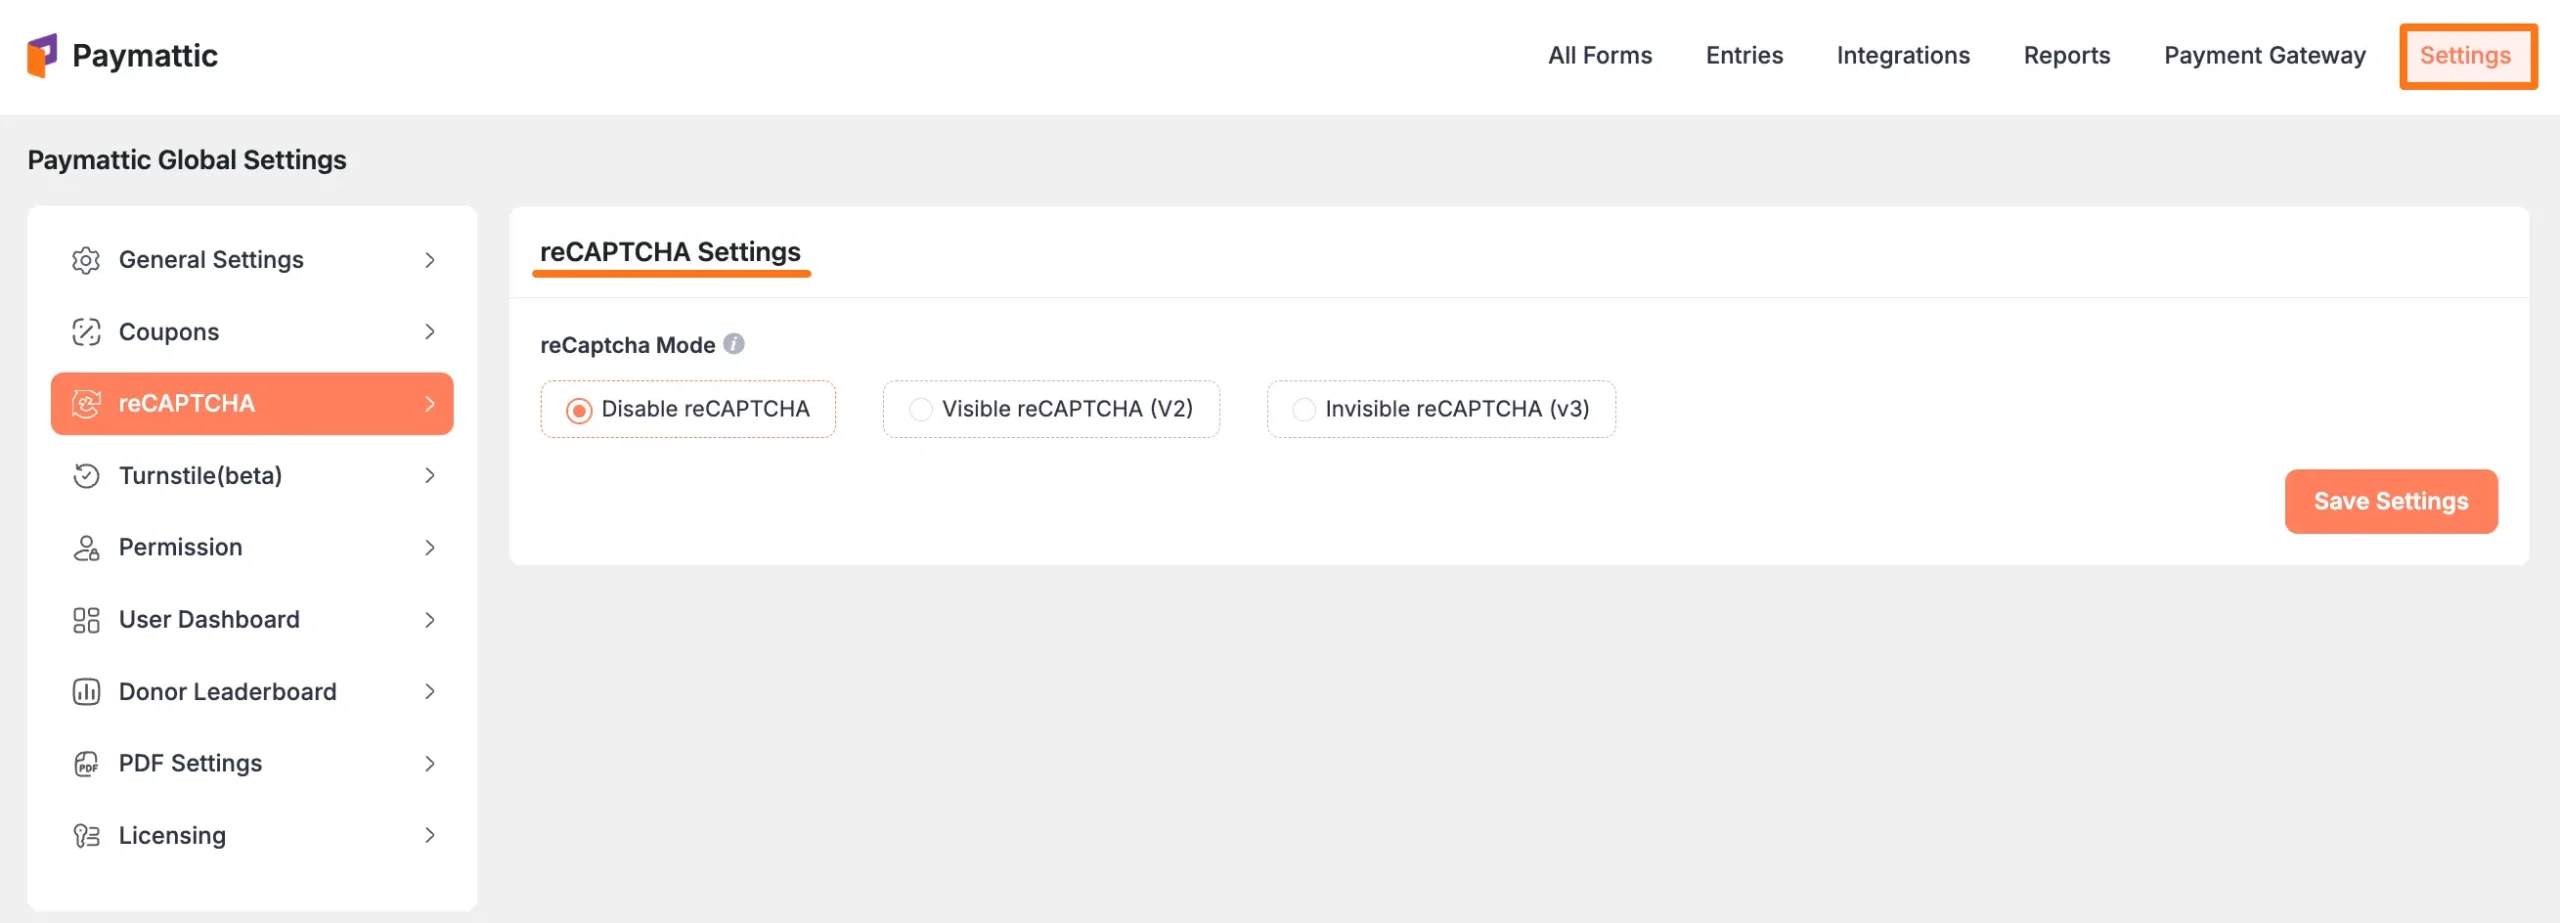
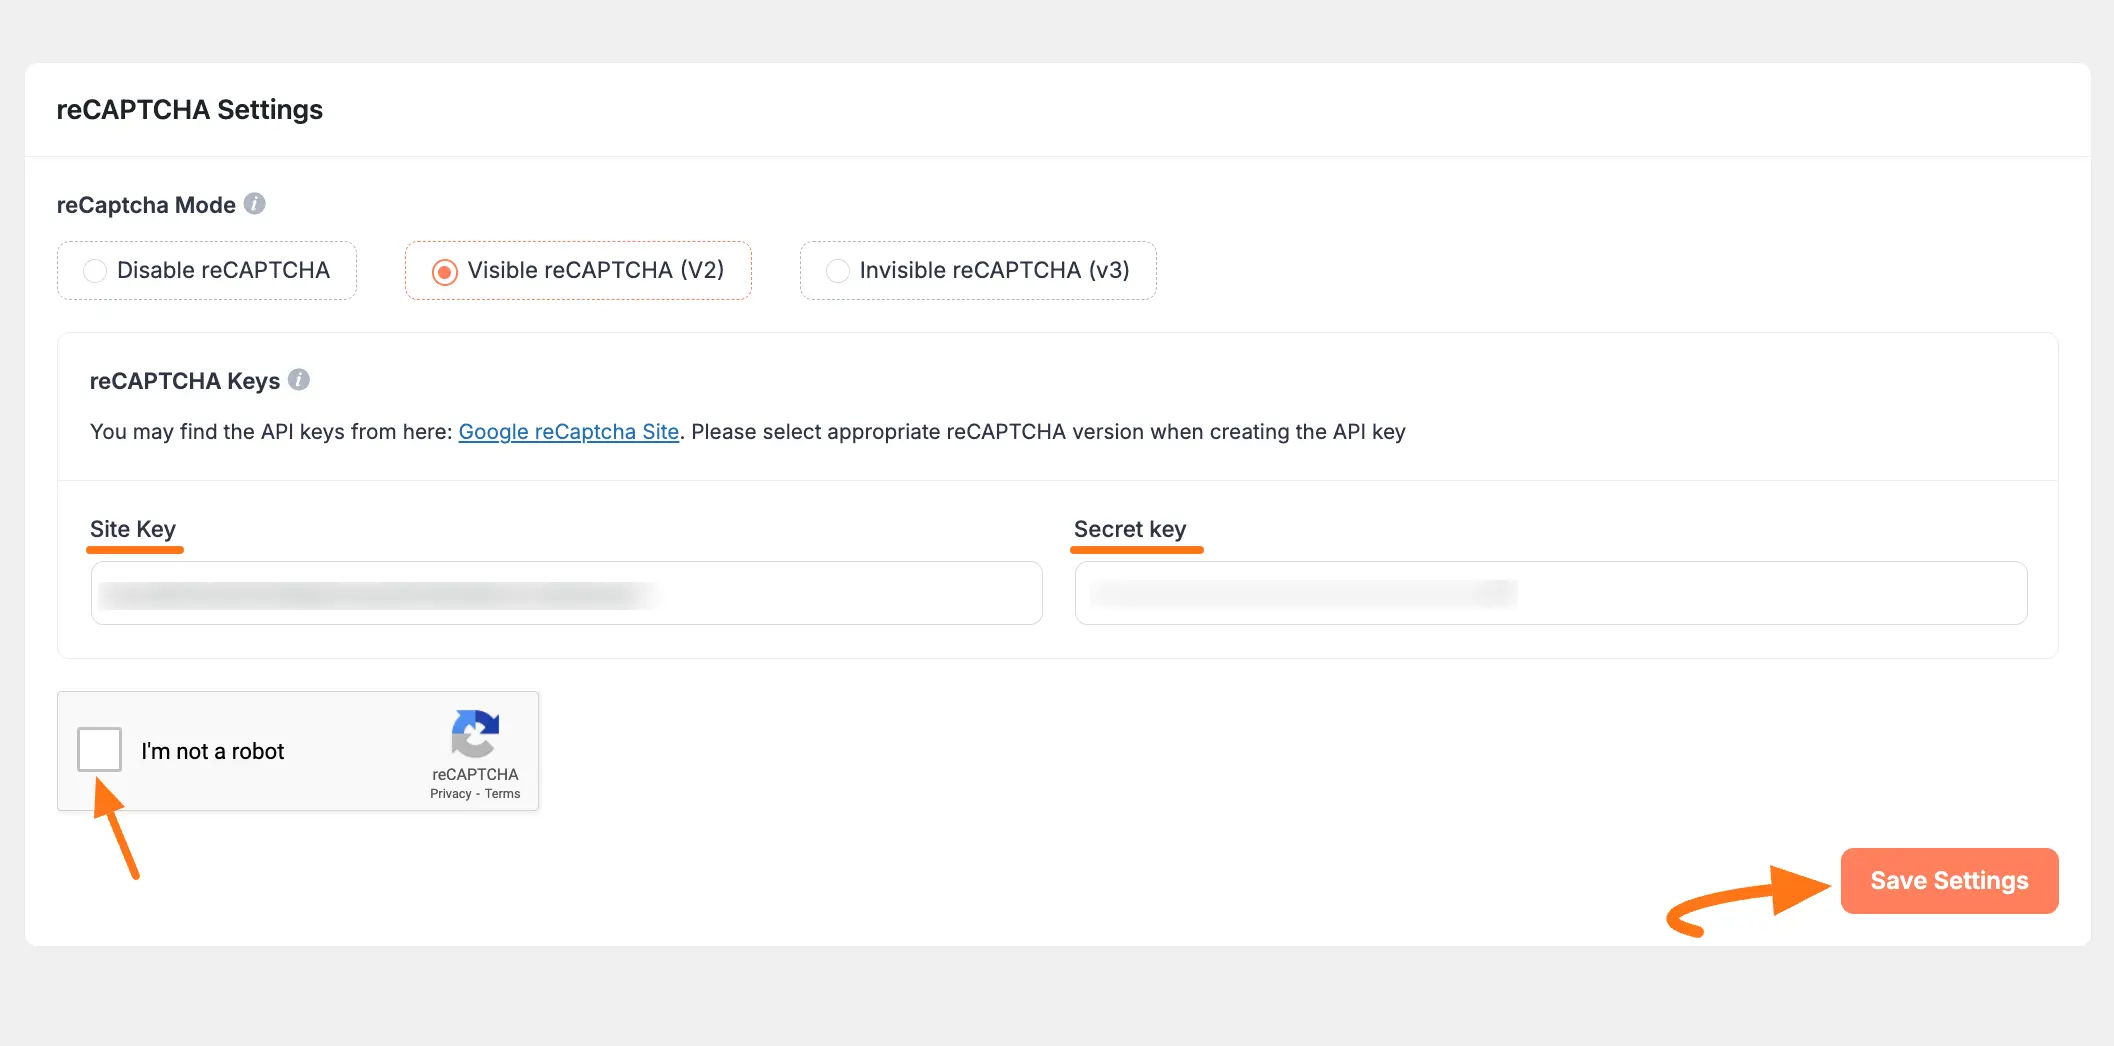
First, go to Settings from the Paymattic Navbar, click the reCAPTCHA tab from the left sidebar, and three options appear. These are:
- Disable reCAPTCHA: You can use this option if you don’t want to enable reCAPTCHA. This option will be selected by default.
- Visible reCAPTCHA (V2): This requires users to check a box indicating they are not a robot i.e., it verifies the request with a challenge.
- Invisible reCAPTCHA (V3): Operates in the background and scores the user’s interaction to determine if they are a bot i.e., it verifies the request a score.
Now, select a reCAPTCHA type between V2 or V3 to configure reCAPTCHA with Paymattic. For example, I choose V2 to show the process.
Paste the Site Key and Secret Key into the respective fields you copied from the Google reCAPTCHA Site and click the I’m not a robot checkbox.
Finally, press the Save Settings button and your reCAPTCHA will be configured.
Adding reCAPTCHA in Forms
Once you have successfully configured the reCAPTCHA with Paymattic, it’s time to integrate this with your payment form.
First, go to All Forms from the Paymattic Navbar, choose the form you wish to work on, and click the Pencil/Editor icon, e.g., I choose the Donation form to show the process.
New Forms
Need to create a form? See our guides for creating from scratch or using templates.

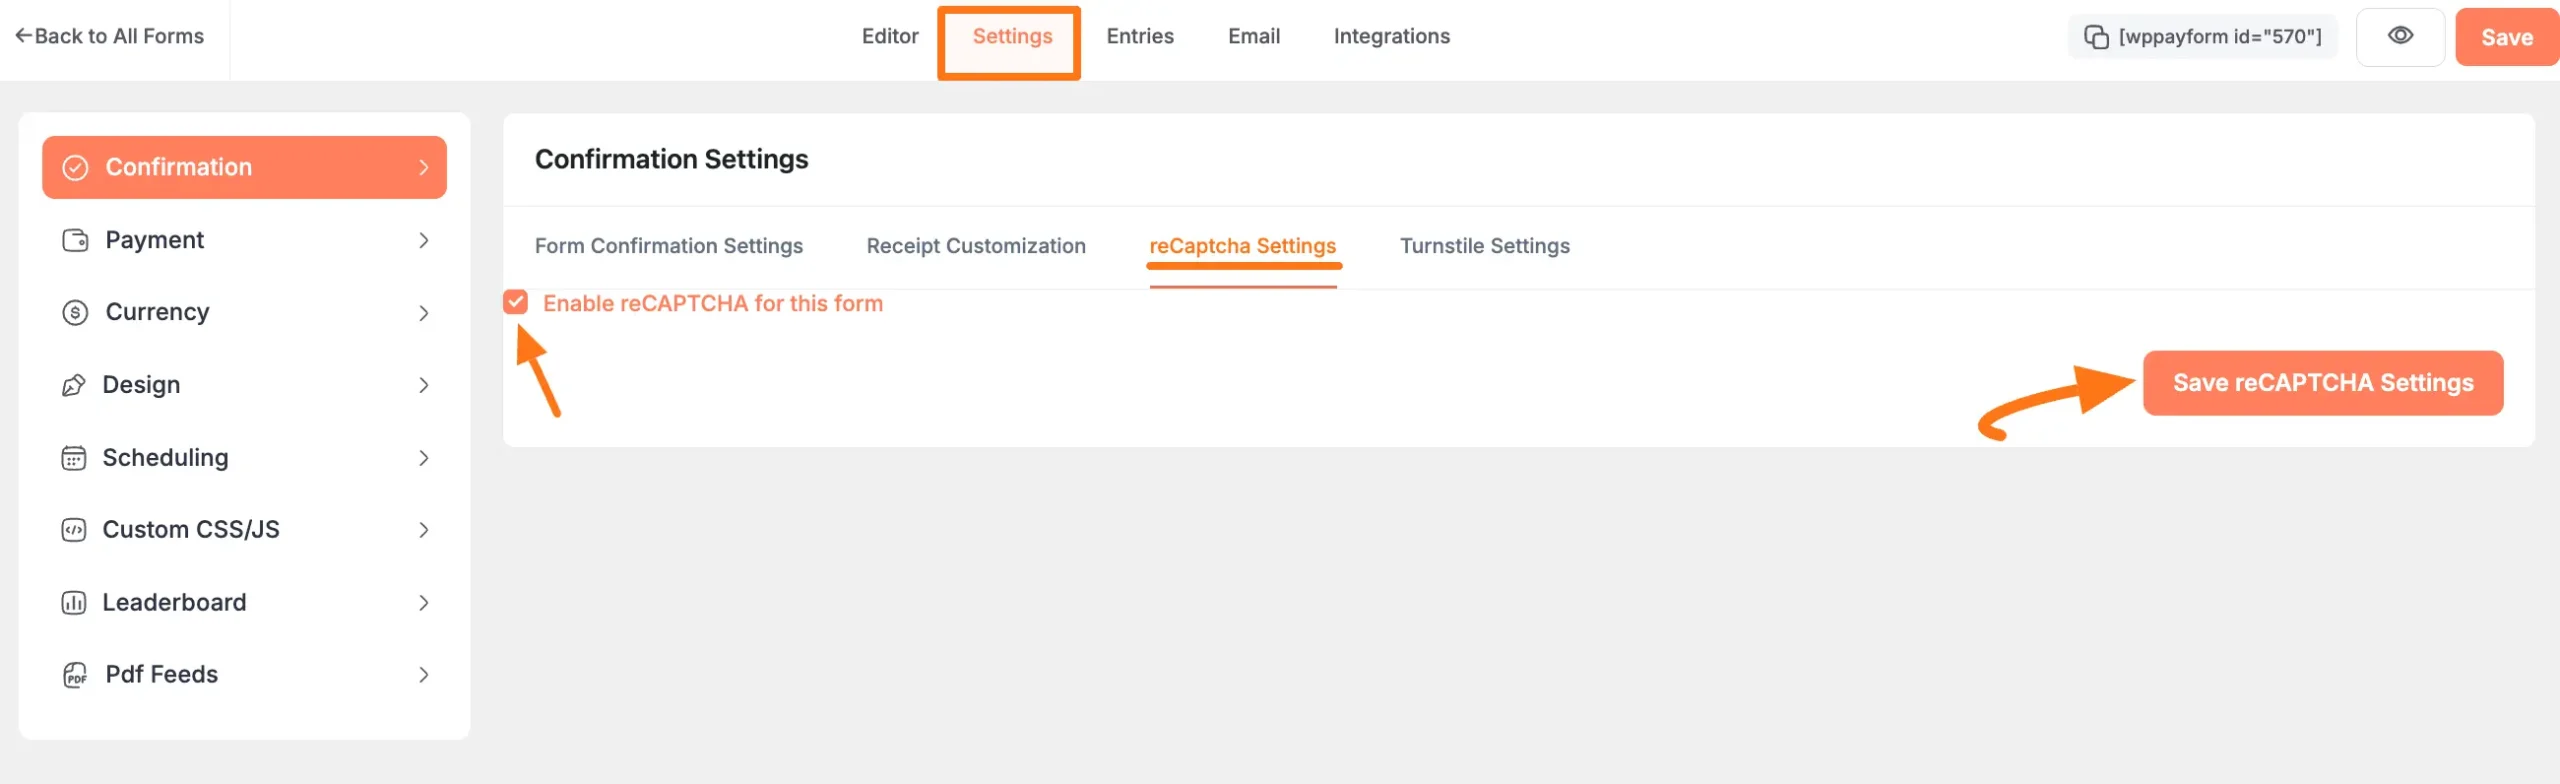
Go to SettingsS, open the SConfirmationS tab from the left sidebar, go to SreCAPTCHAS Settings, and check the SEnable reCAPTCHA for this formS option.
Finally, click the SSave reCAPTCHAS Settings button and the reCAPTCHA will be integrated with your Paymattic form.
This way you can easily add reCAPTCHA to your WordPress payment form!
Need Help?
If you have any questions, concerns, or suggestions, please contact our support team.