How to Set Form Scheduling and Restriction Settings in WordPress?
In Paymattic, the Scheduling settings option allows you to restrict the number of total form submissions, schedule the form to be active at a specific time range, and set mandatory login requirements. This article will guide you through the process of Scheduling and Restricting Forms in Paymattic.
Scheduling & Restricting Form Submissions
To learn how to schedule forms and restrict/limit the amount of form submissions/entries, follow the steps with the screenshots below –
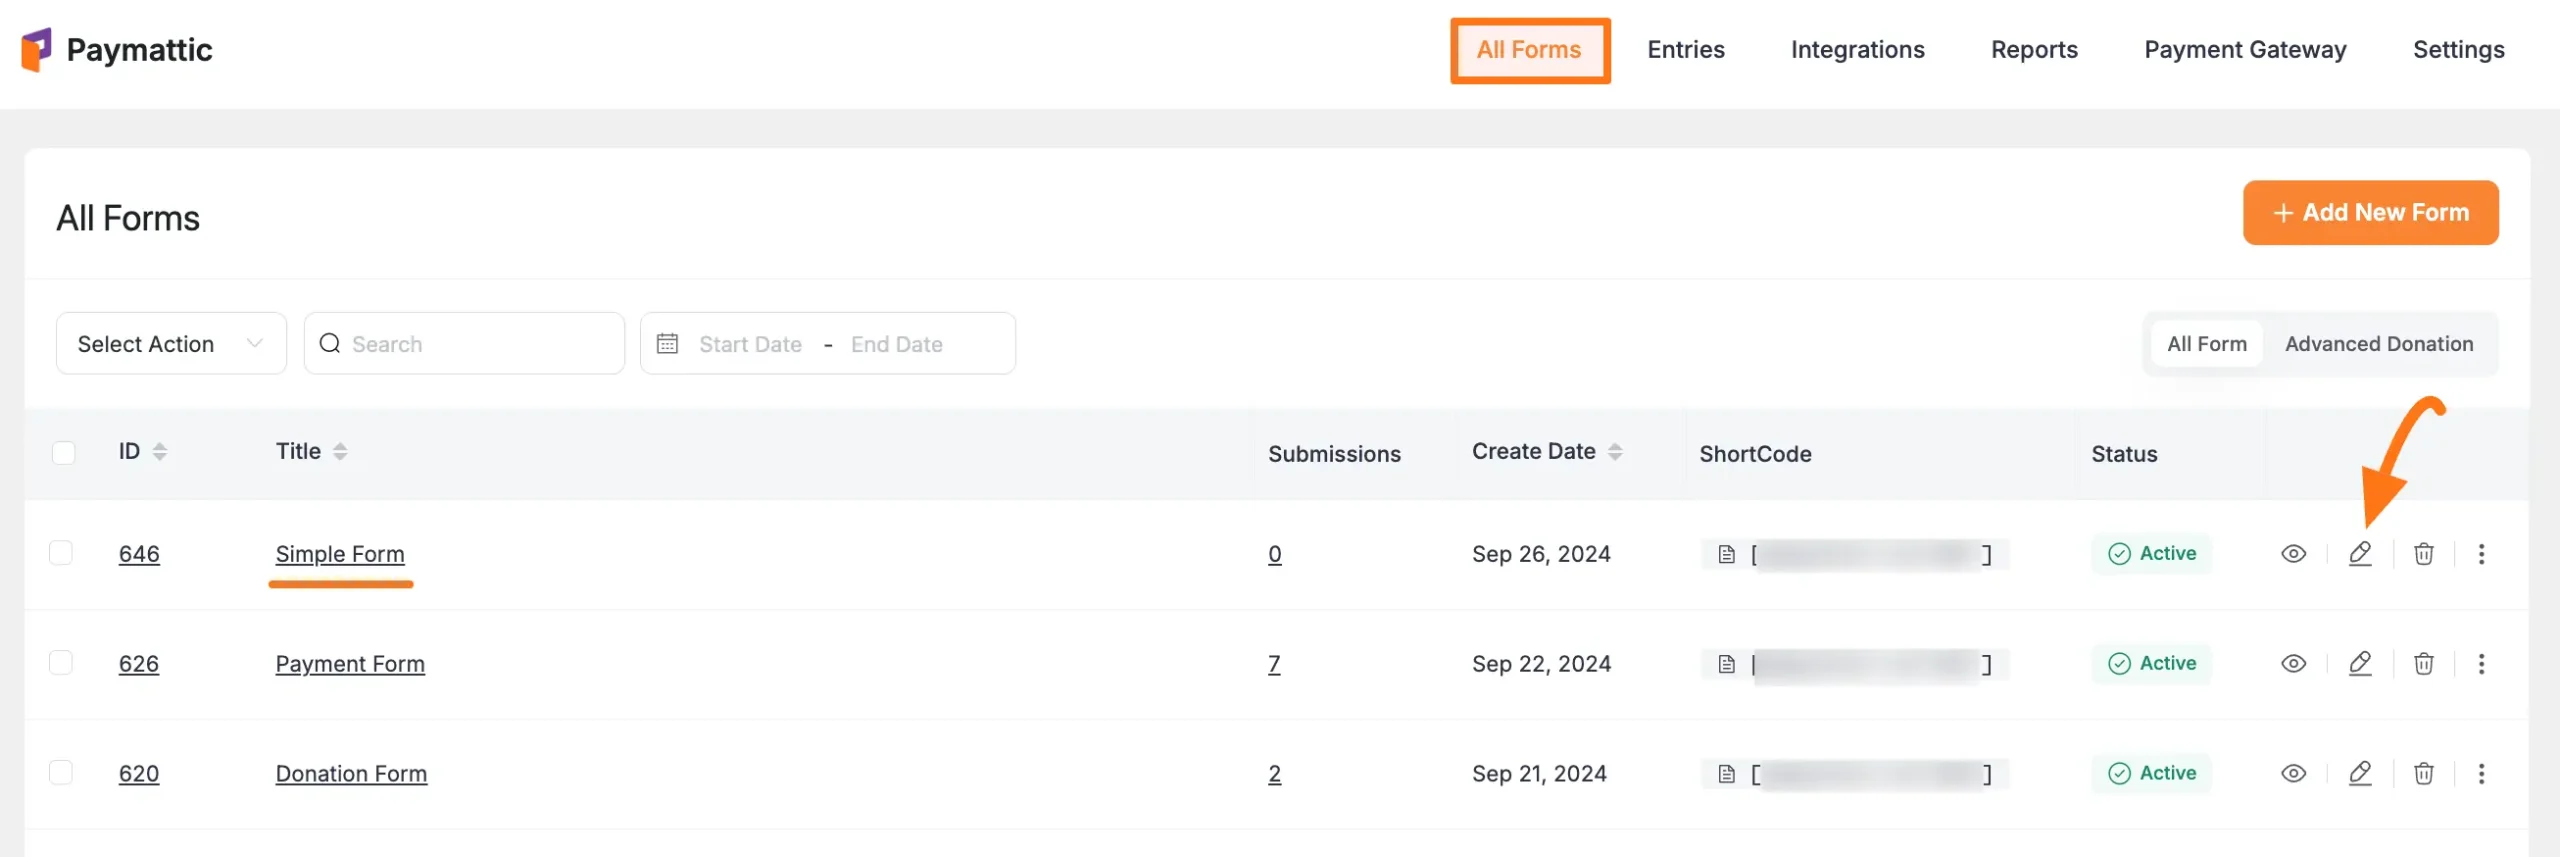
First, go to the All Forms section from the Paymattic Navbar, choose a Form, and click the Pencil/Edit icon to open the Editor page of that form.
For example, I choose an existing form to show the whole process.
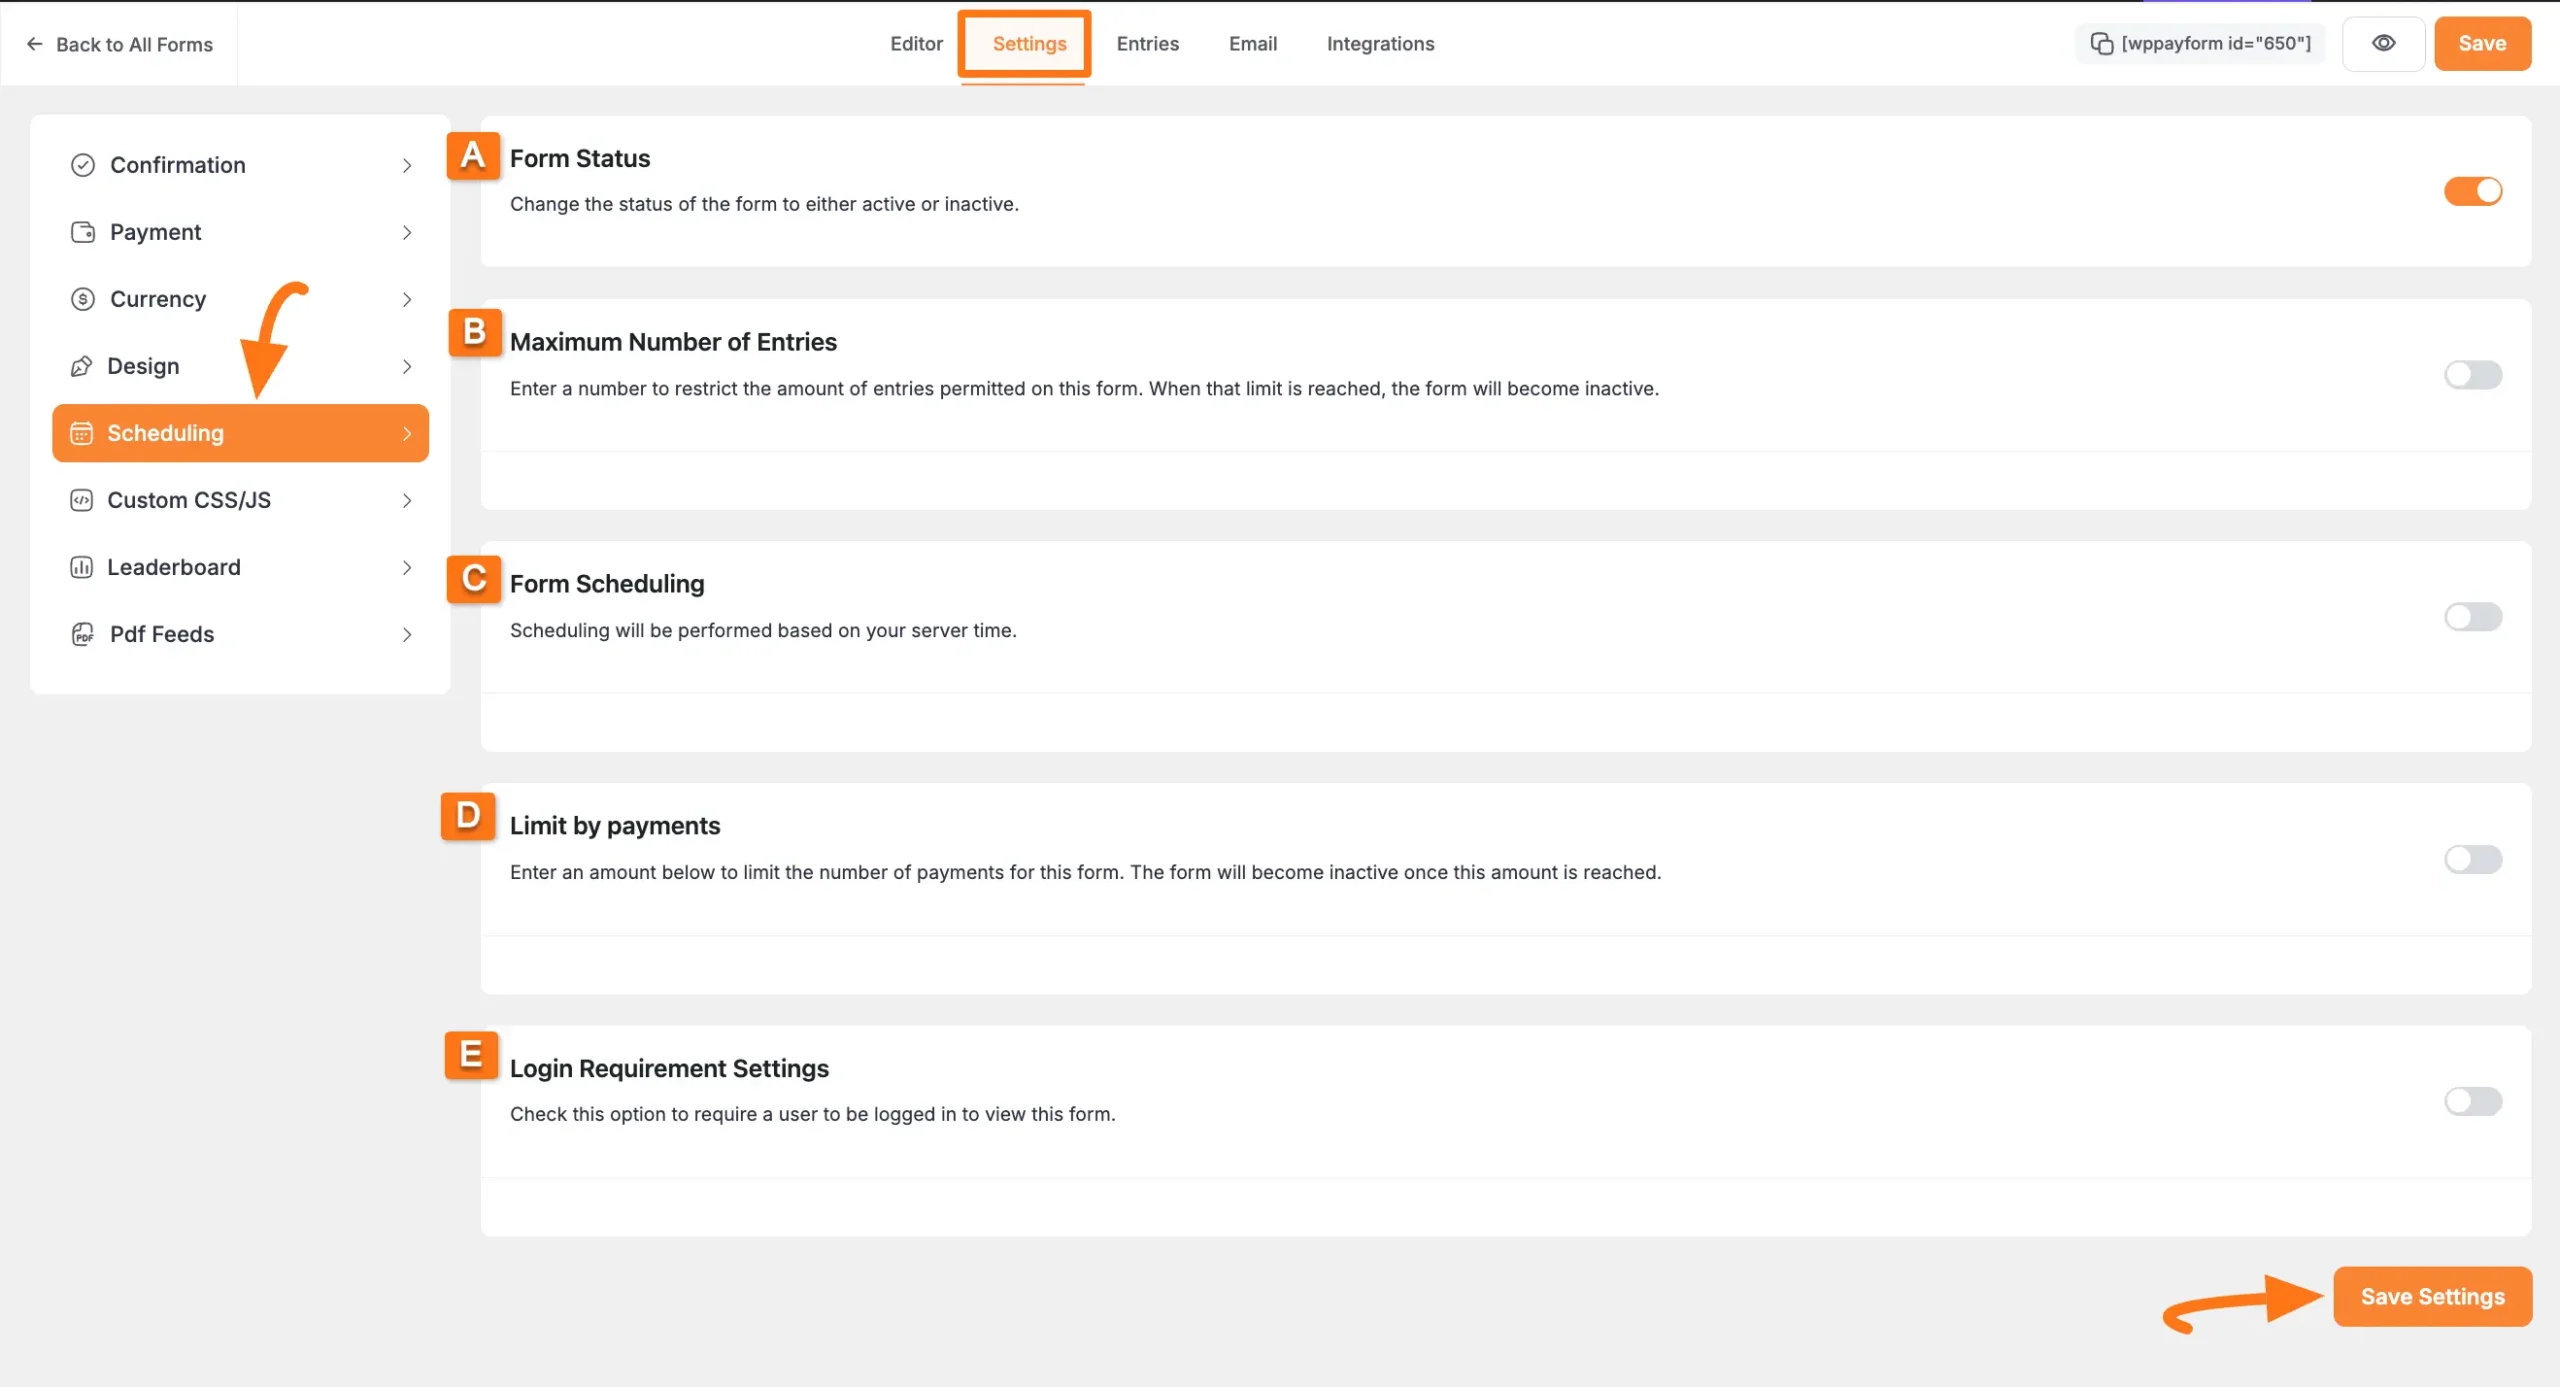
Once you open the Editor page, go to the Settings tab from the left sidebar, and you will get the Scheduling settings option to schedule or restrict form submissions.
After completing the setup, click the Save Settings button to save all your changes.
All the settings options of Scheduling mentioned above are explained below:
A. Form Status
Enable this option if you want the ability to change the status of your forms to either active or inactive.

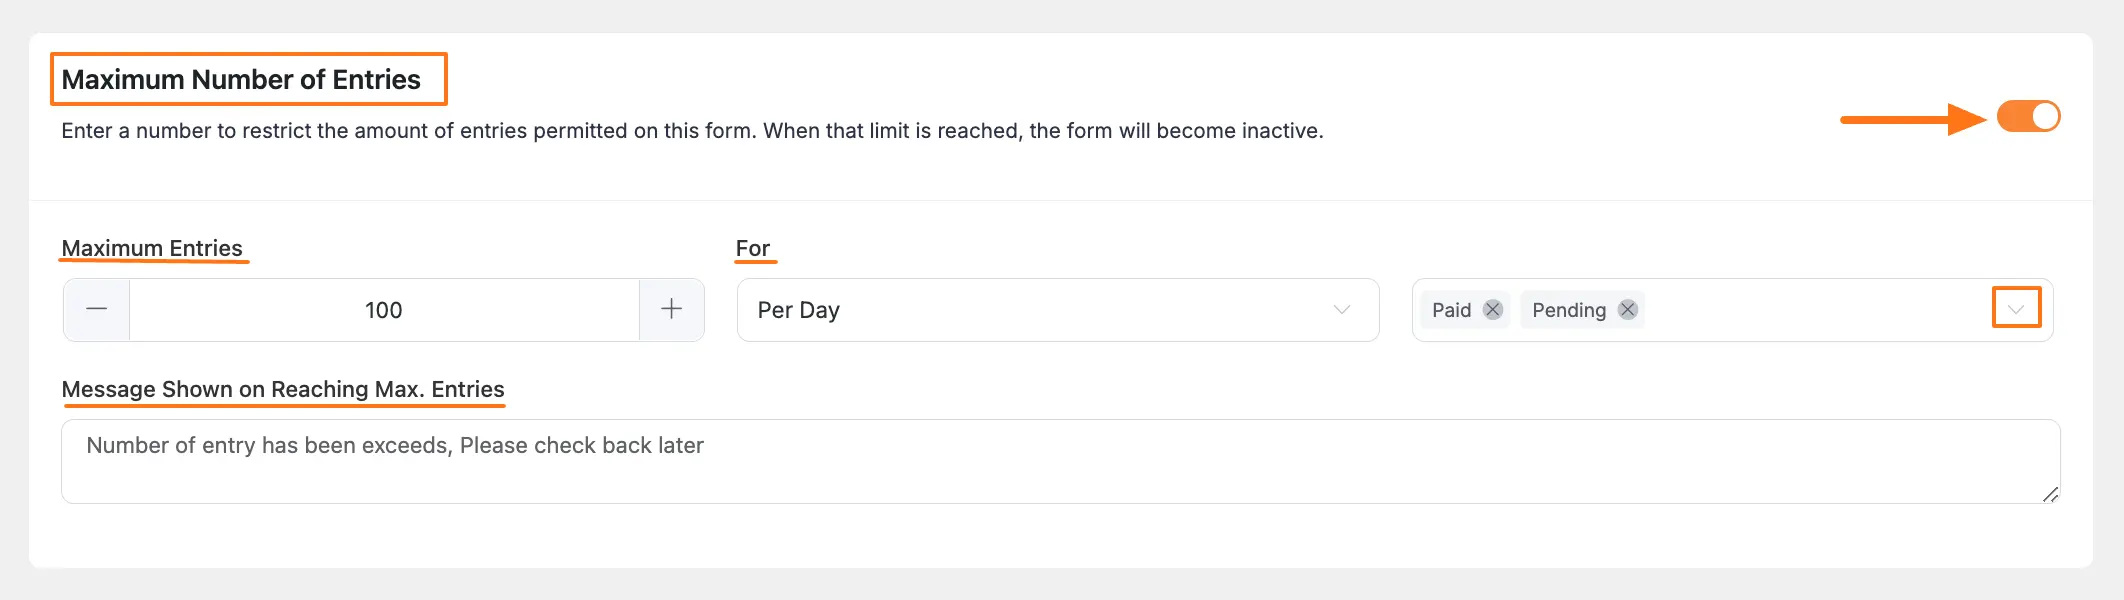
B. Maximum Number of Entries
Enable this option if you want to set a number to restrict/limit the form submissions for a specific form. It will deactivate the form submissions after the set number of entries has already been submitted.
You can set the limit based on submission type (Paid, Processing, Pending, Failed, Refunded, or Abandoned) for a pre-defined time interval (Per Day, Week, Month, Year, or Total Entries).
You can also put a custom message that will be shown to users when the form exceeds the maximum number of submissions.
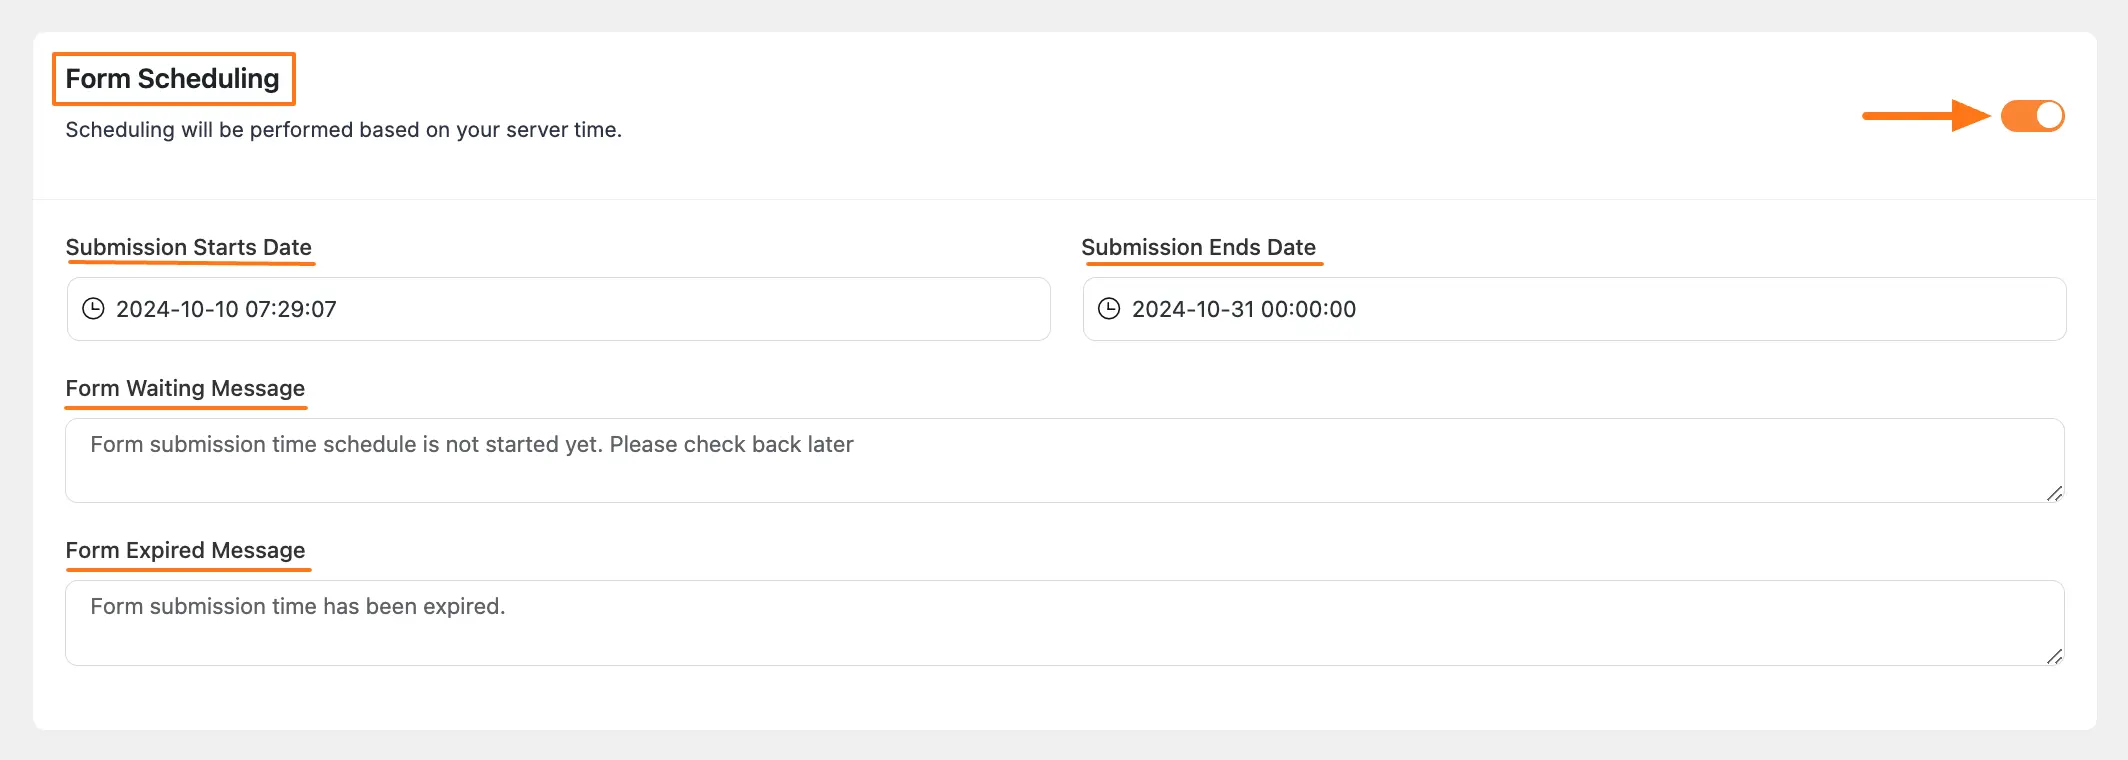
C. Form Scheduling
Enable this option if you want to specify a time when the form is active. The system will maintain the scheduling based on the server time.
You can define the Submission Starts Date and Submission End Date. Put a custom message in the Form Waiting Message field to be displayed before the form is active.
You can also set a Form Expired Message to be shown when the form submission time is over.
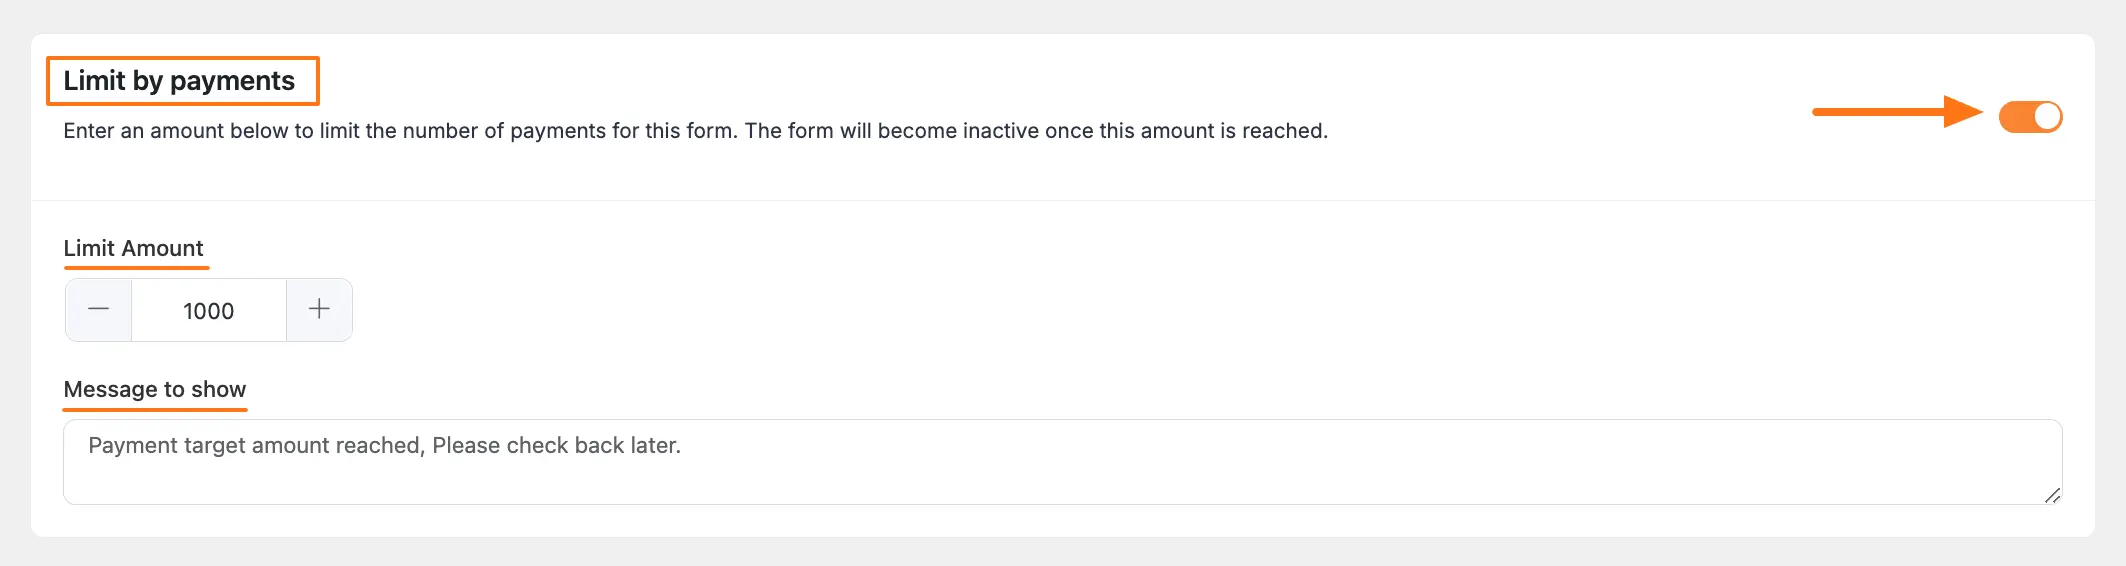
D. Limit by Payments
Enable this option if you want to Limit the number of form entries allowed for this form. The form will become inactive when that number is reached.
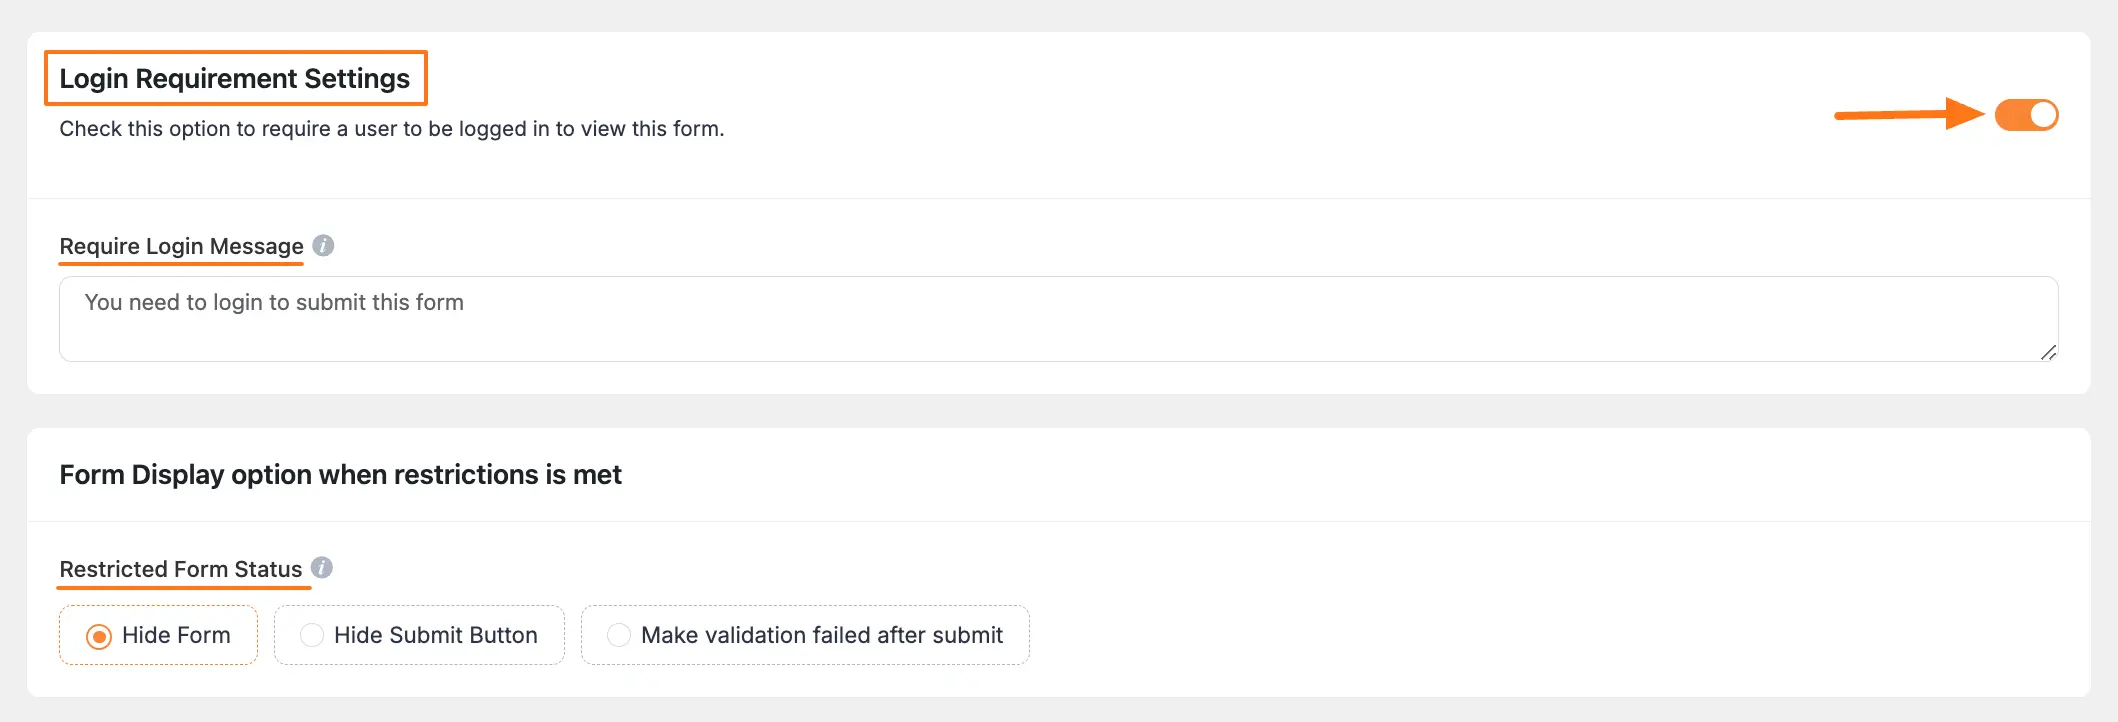
E. Login Requirement Settings
Toggle the switch to make login requirements mandatory for users to fill up the form.
- Require Login Message: Enter a message to be displayed to users who are not logged in (shortcodes and HTML are supported).
- Form Display option when restriction is met: Here you can set the form status when a restriction is met. You can select one of the three choices such as hide the form, hide the submit button, or make form validation fail after submission.
This is how to set Form Scheduling & Restriction Settings in Paymattic! If you have any further questions, concerns, or suggestions, please do not hesitate to contact our @support team. Thank you.