How to Integrate Moneris Payment Gateway in Paymattic
Moneris is one of Canada's leading payment processors, offering secure and reliable services to help you accept payments on your WordPress site. Integrating Moneris with Paymattic allows you to leverage their trusted network directly from your payment forms.
This detailed article will guide you through the entire process of configuring the Moneris payment gateway with your Paymattic plugin.
Prerequisites
To get access to the Moneris payment gateway, you need the Paymattic Pro Plugin.
Configuring the Moneris Payment Method
The Moneris integration is a multi-step process that involves activating the add-on in Paymattic, getting three separate credentials from your Moneris account, and then entering them back into Paymattic. Follow these steps carefully to ensure a successful setup.
Step 1: Install and Activate the Moneris Add-on
The Moneris gateway connects to Paymattic via a dedicated add-on. Your first step is to activate it.
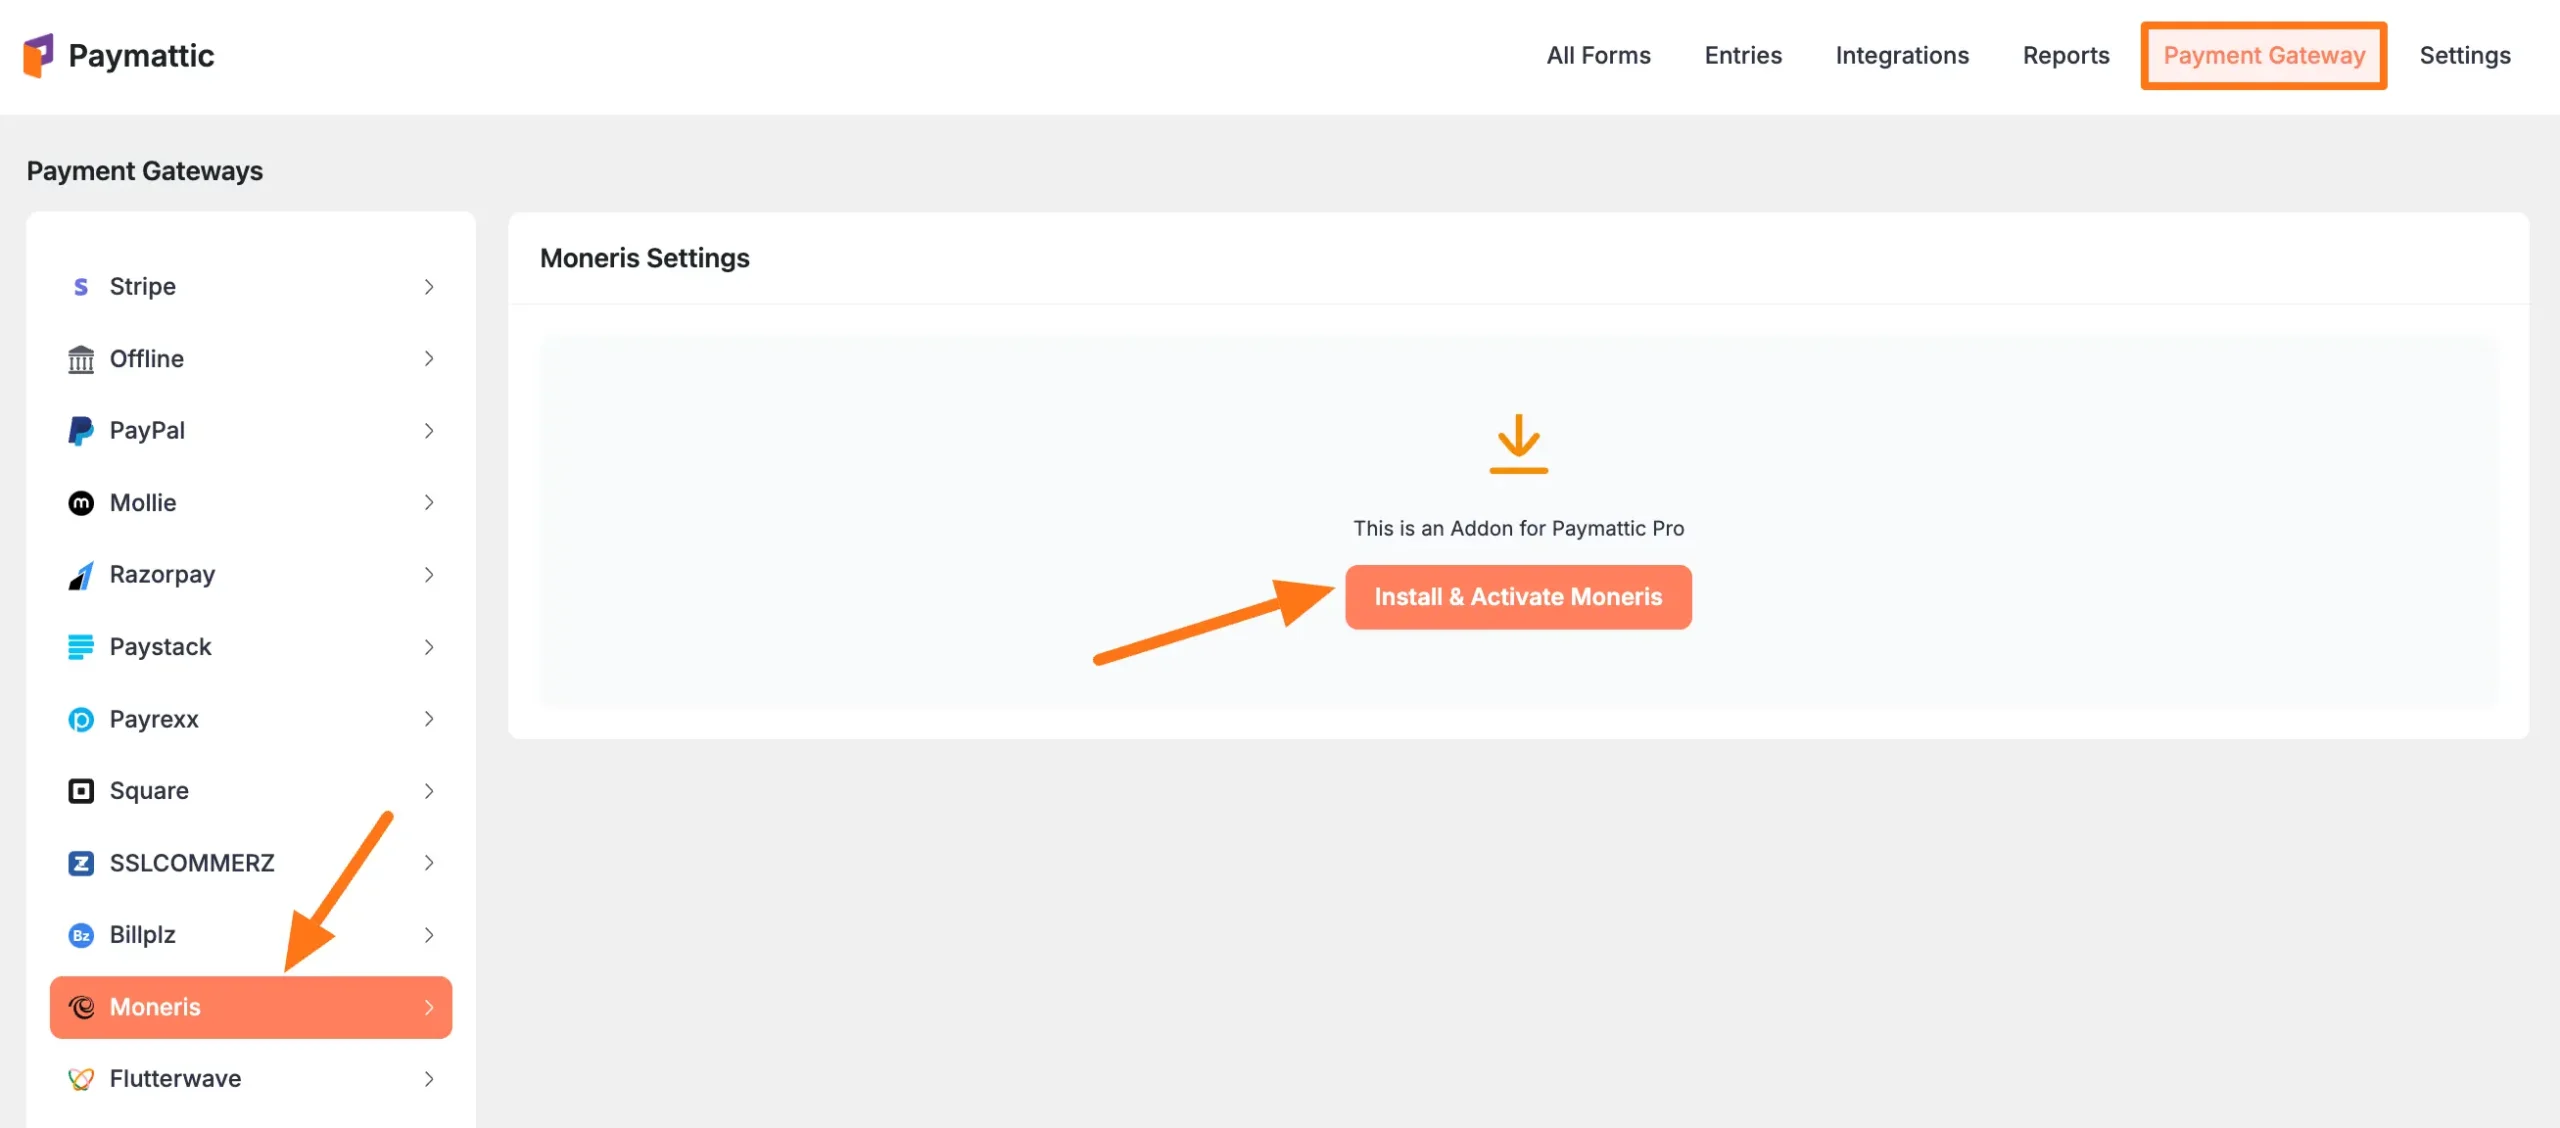
- From your WordPress dashboard, navigate to Paymattic → Payment Gateway.
- Select the Moneris tab from the left sidebar to open the Moneris Settings page.
- Click the Install and Activate Moneris button to enable the module.
Note
This add-on only needs to be installed the first time you integrate with Moneris.
Step 2: Set the Payment Mode
After activation, you can begin the basic configuration.
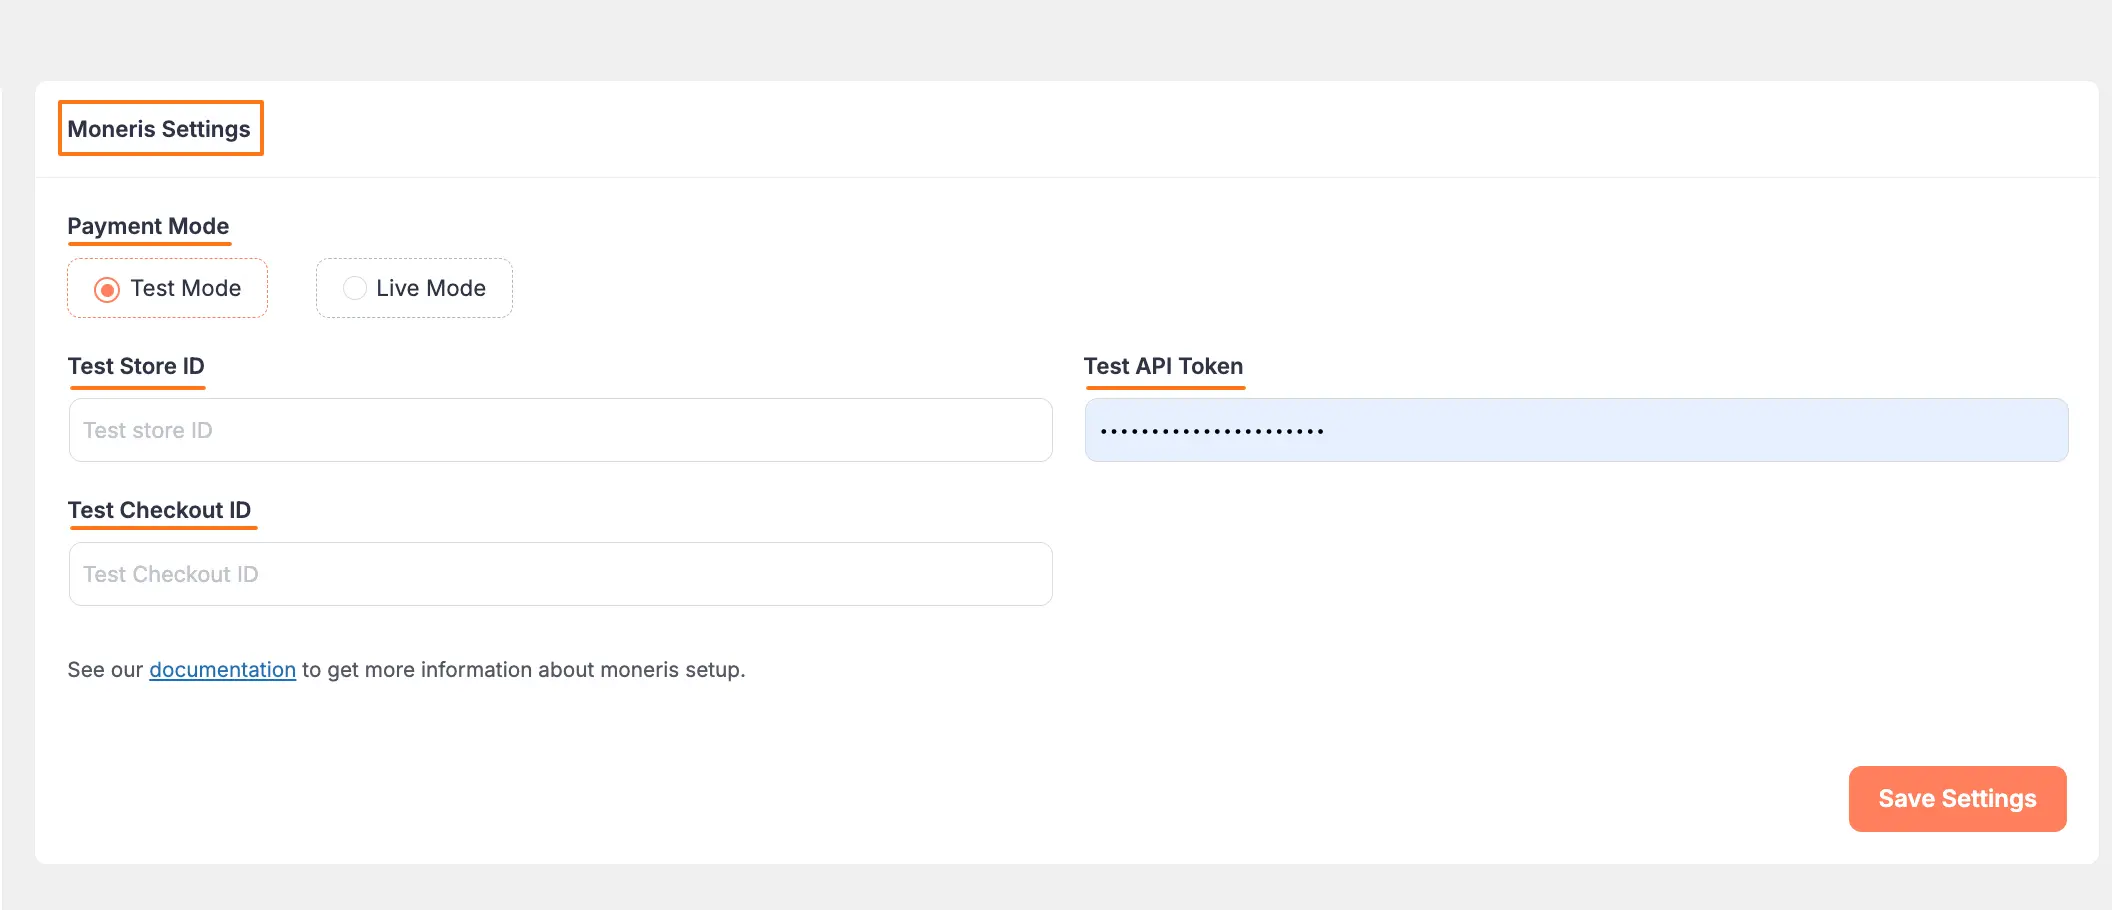
Select your Payment Mode:
- Test Mode: This lets you test your forms using Moneris's sandbox environment without processing real money.
- Live Mode: Select this when you are ready to accept real payments.
Both modes follow the same configuration steps. For this guide, we'll use Test Mode.
Identify Required Credentials: To complete the integration, you will need to retrieve three pieces of information from your Moneris account: a Store ID, an API Token, and a Checkout ID. The next steps will show you how to find them.
Step 3: Retrieve Your Credentials from Moneris
This is the most detailed part of the process. We will walk through how to log in to your Moneris account and find all three required keys.
Open a new browser tab and log in to your Moneris Account.
TIP
If you don't have an account, sign up here.
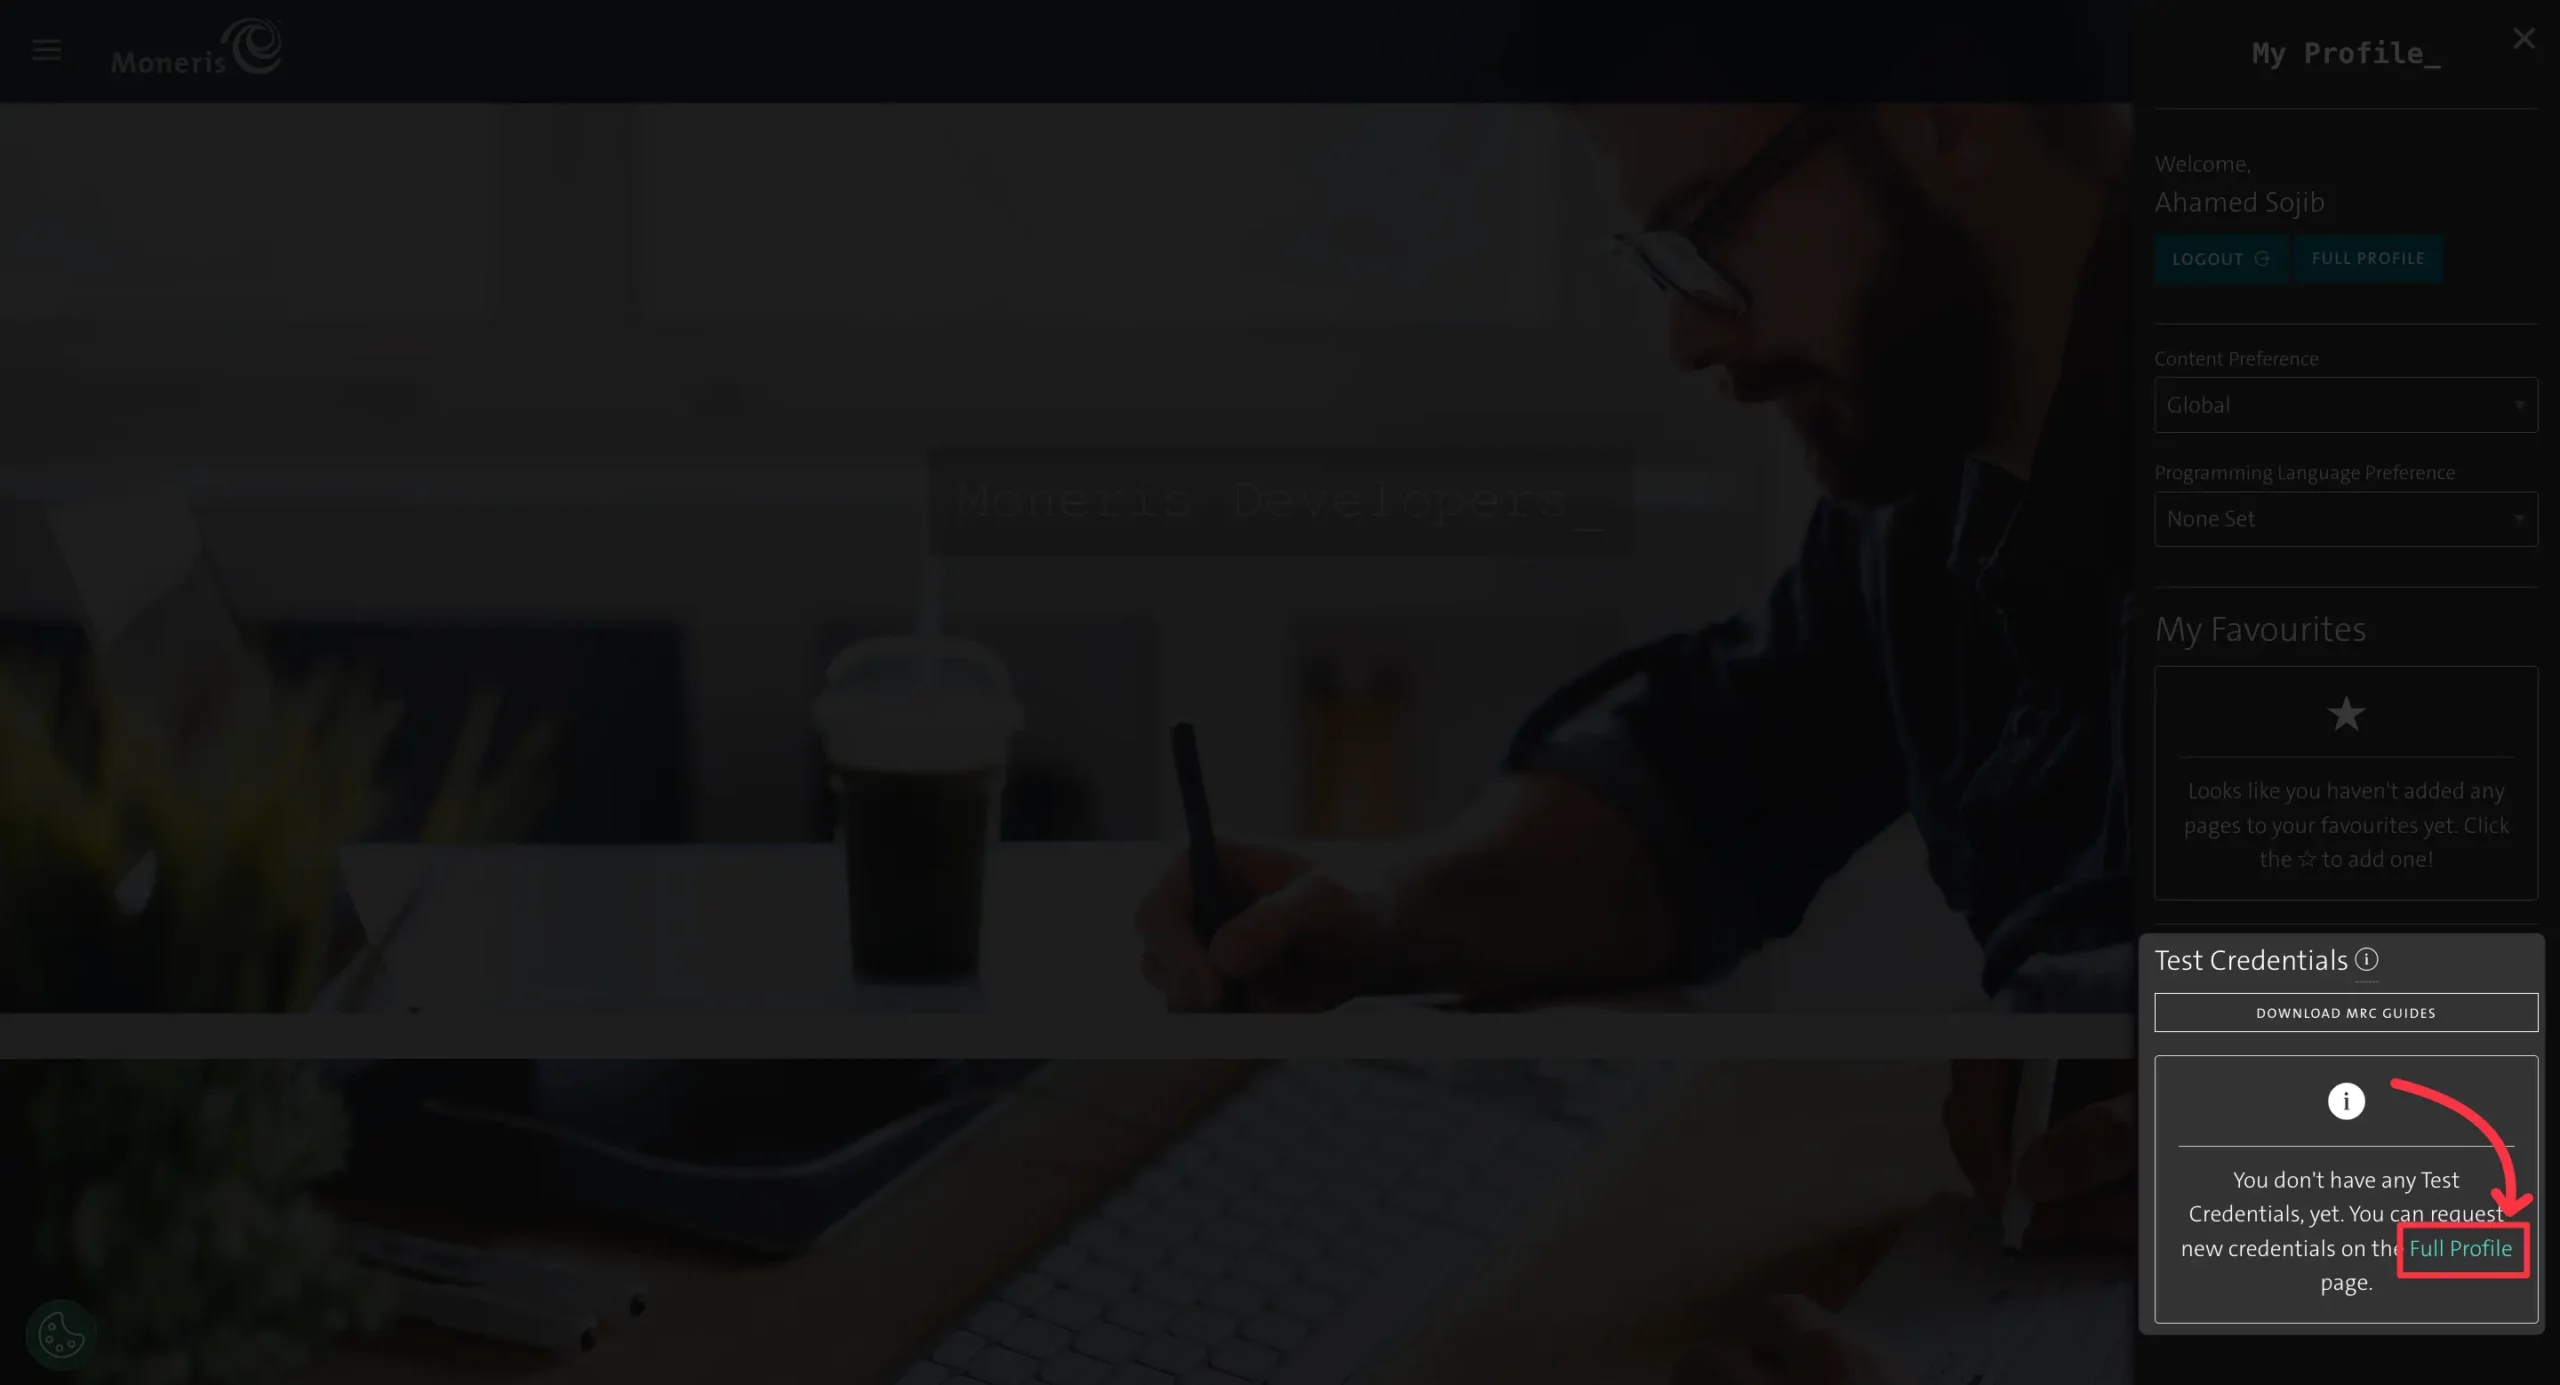
To get your test credentials, you first need to complete your profile. From the Moneris dashboard, go to Profile Details in the right sidebar and click Full Profile in the Test Credential section.
Important
You must complete your Profile Details to get the credentials.
Getting Your Store ID & API Token
Let's start by getting the first two credentials.
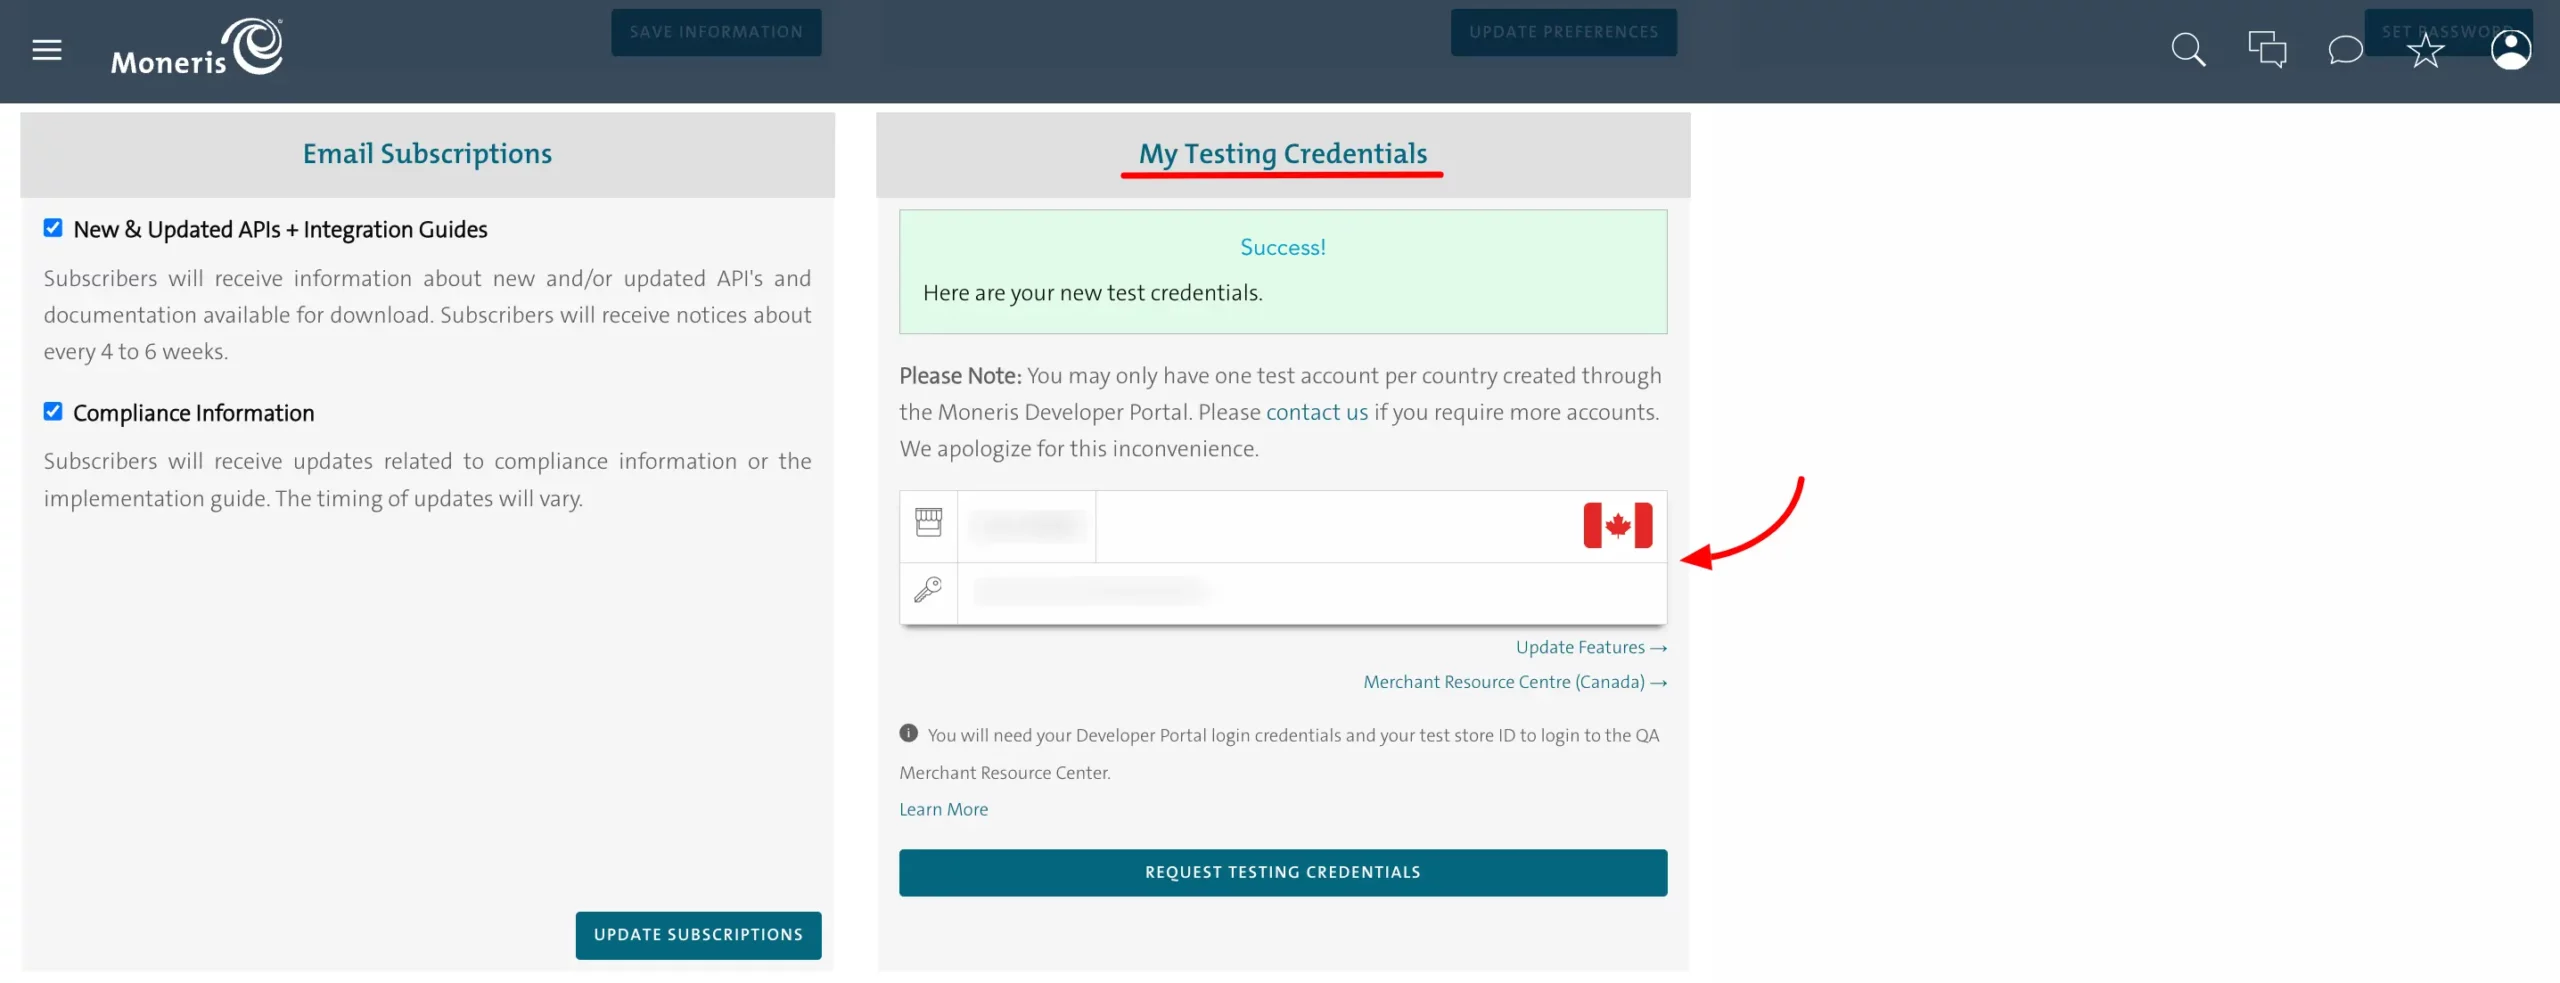
- In your profile, fill in all the necessary details and click the Request Testing Credentials button.
- After submitting your details, Moneris will display your test credentials.
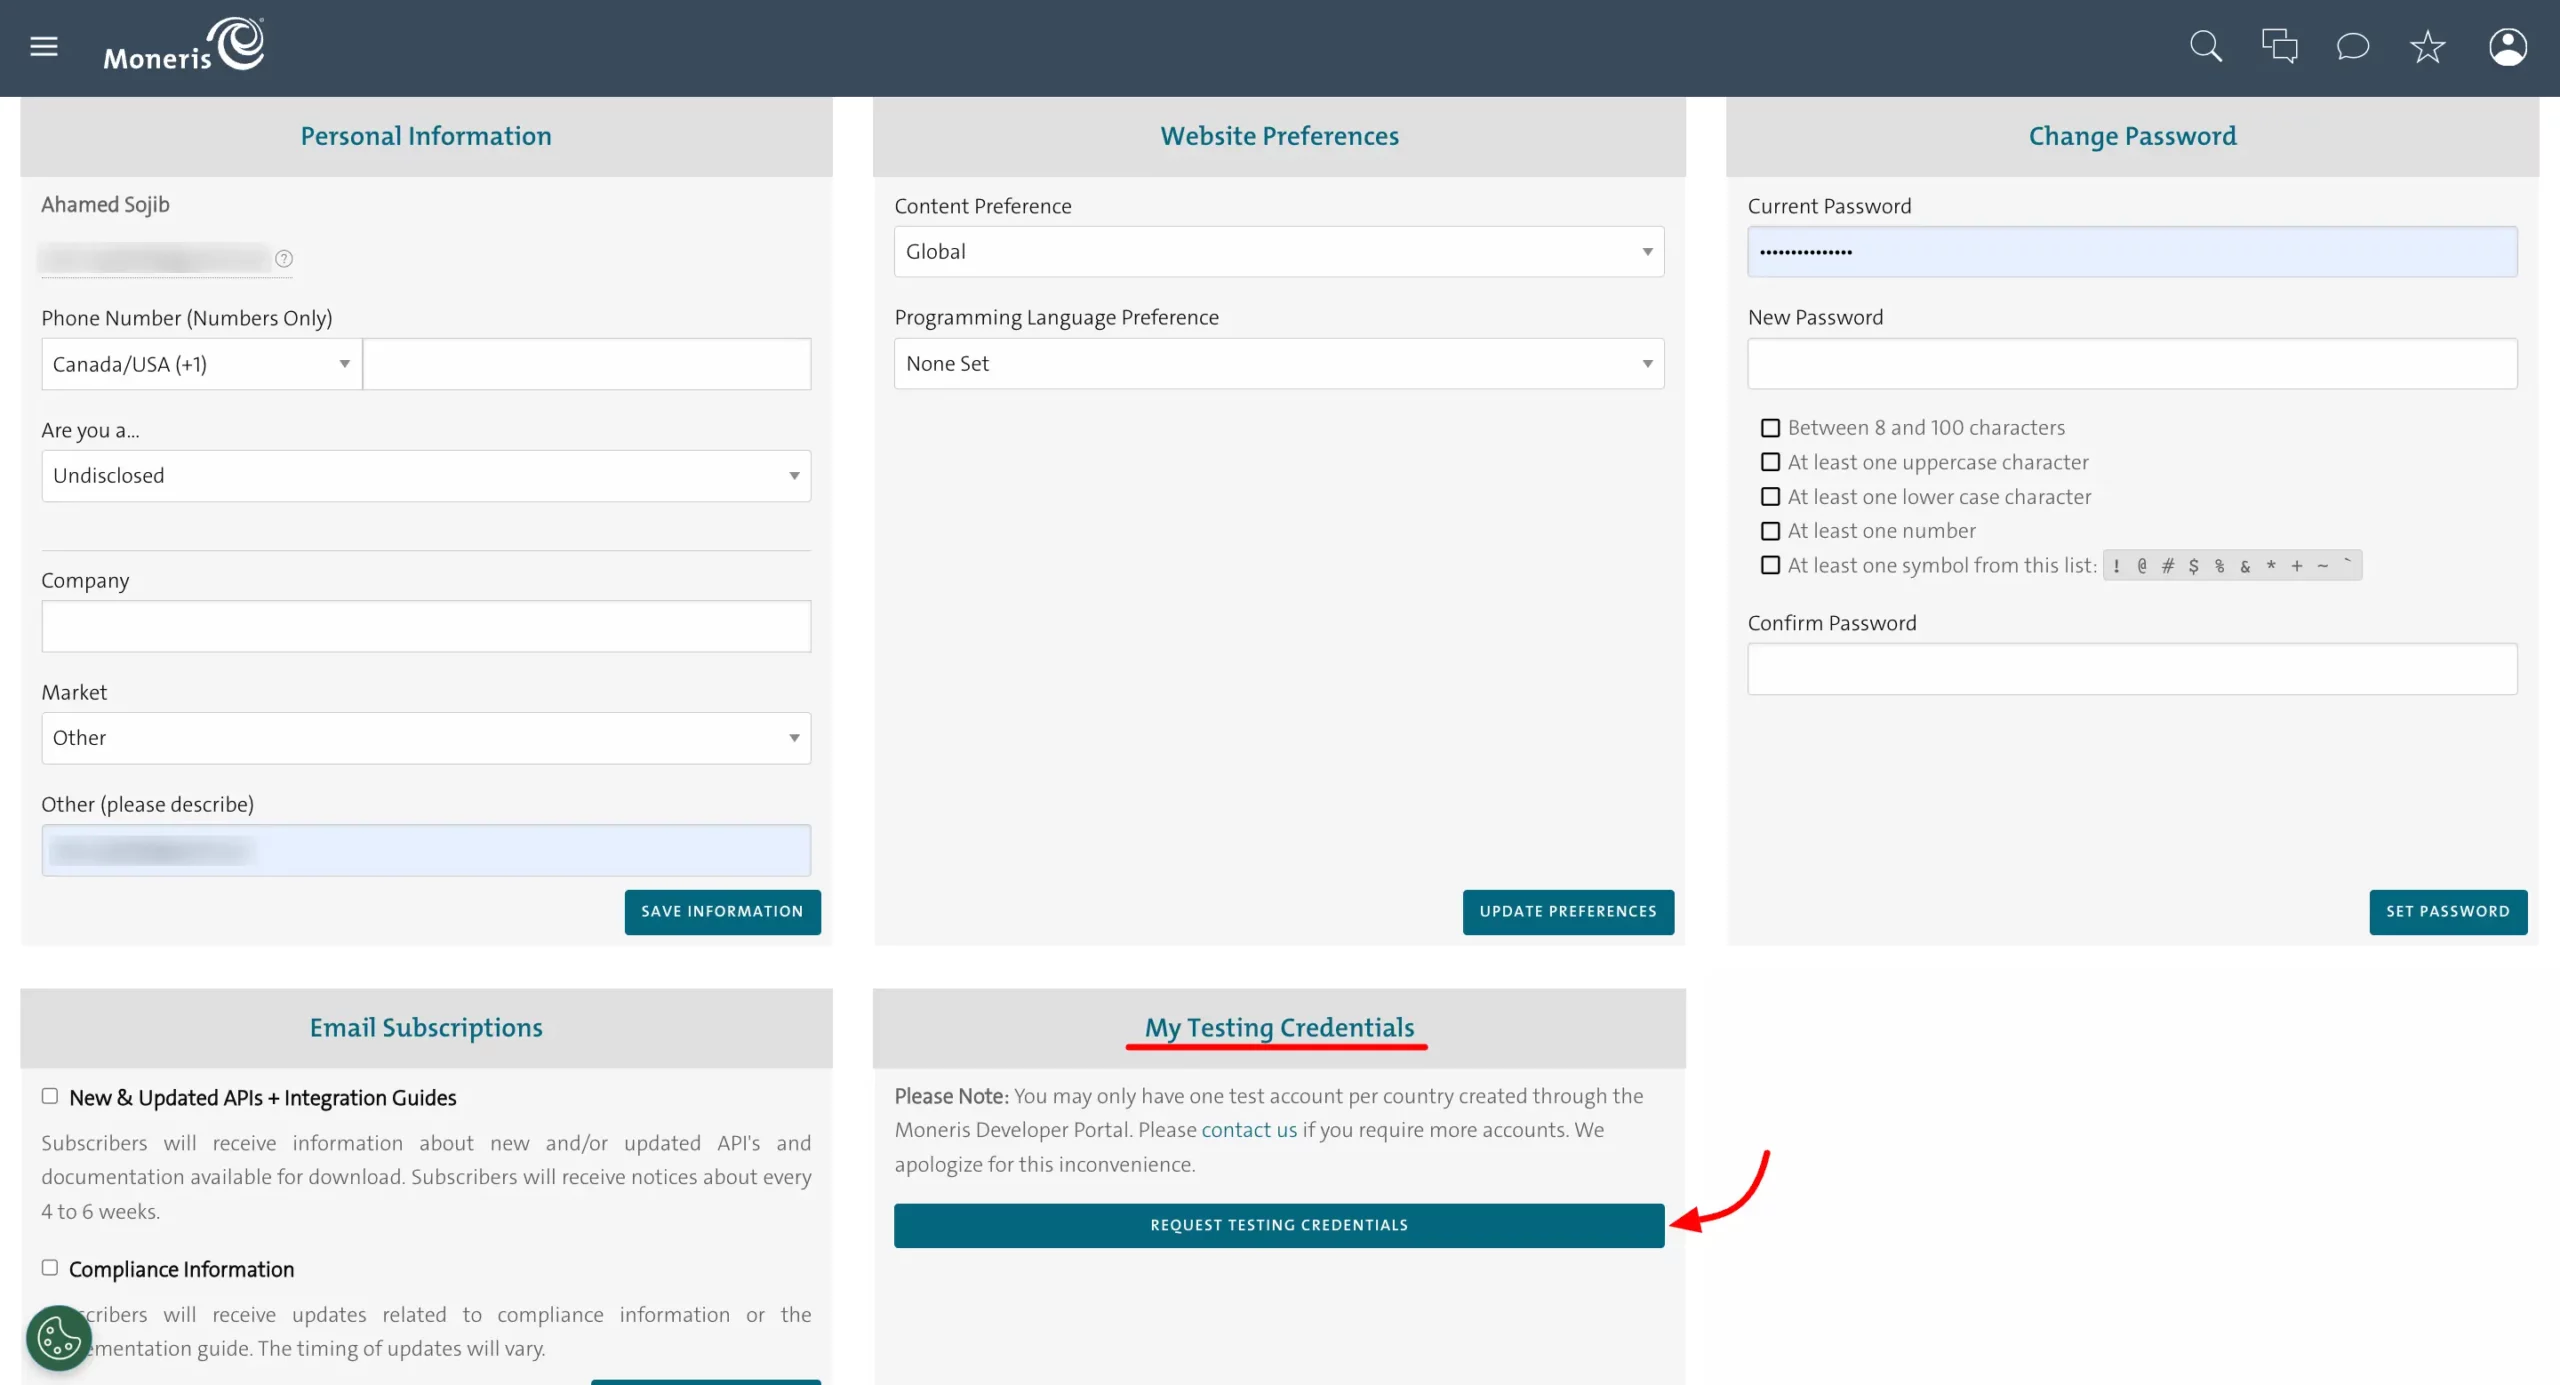
- Carefully copy your Store ID and API Token.
Getting Your Checkout ID
The Checkout ID is found in a different area called the Merchant Resource Center.
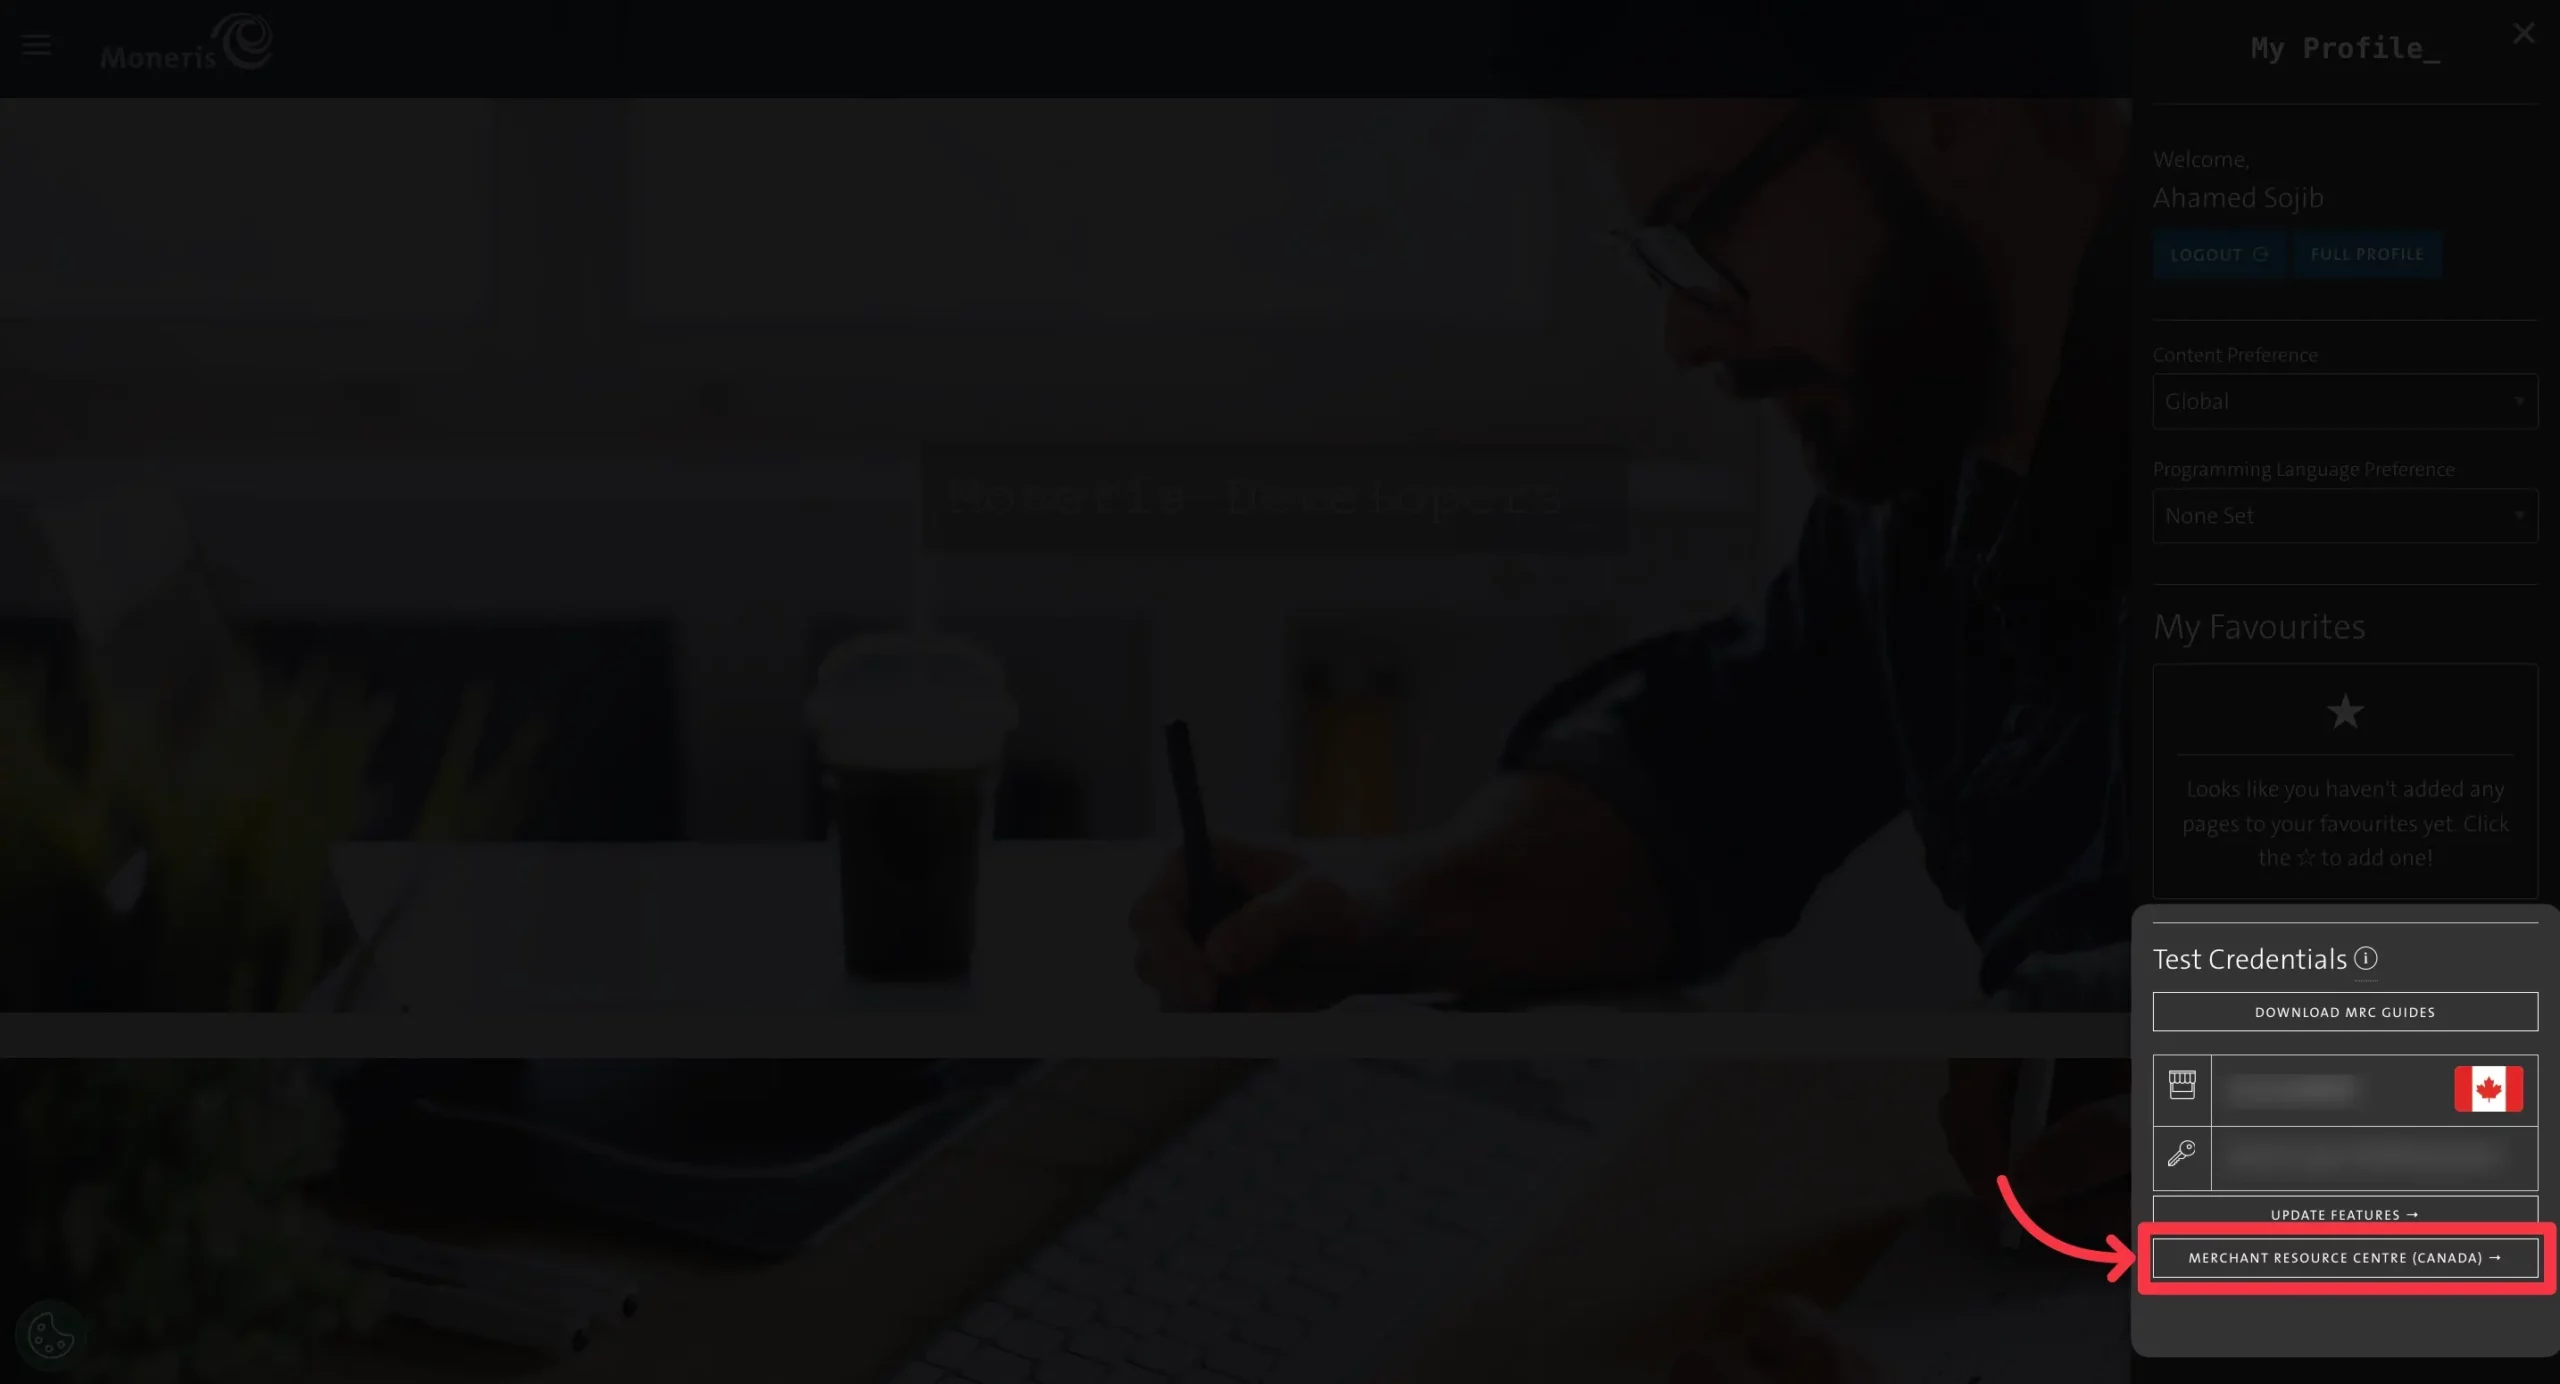
- Return to your Moneris Profile page. In the Test Credential section, click the Merchant Resource Center button located below your credentials.
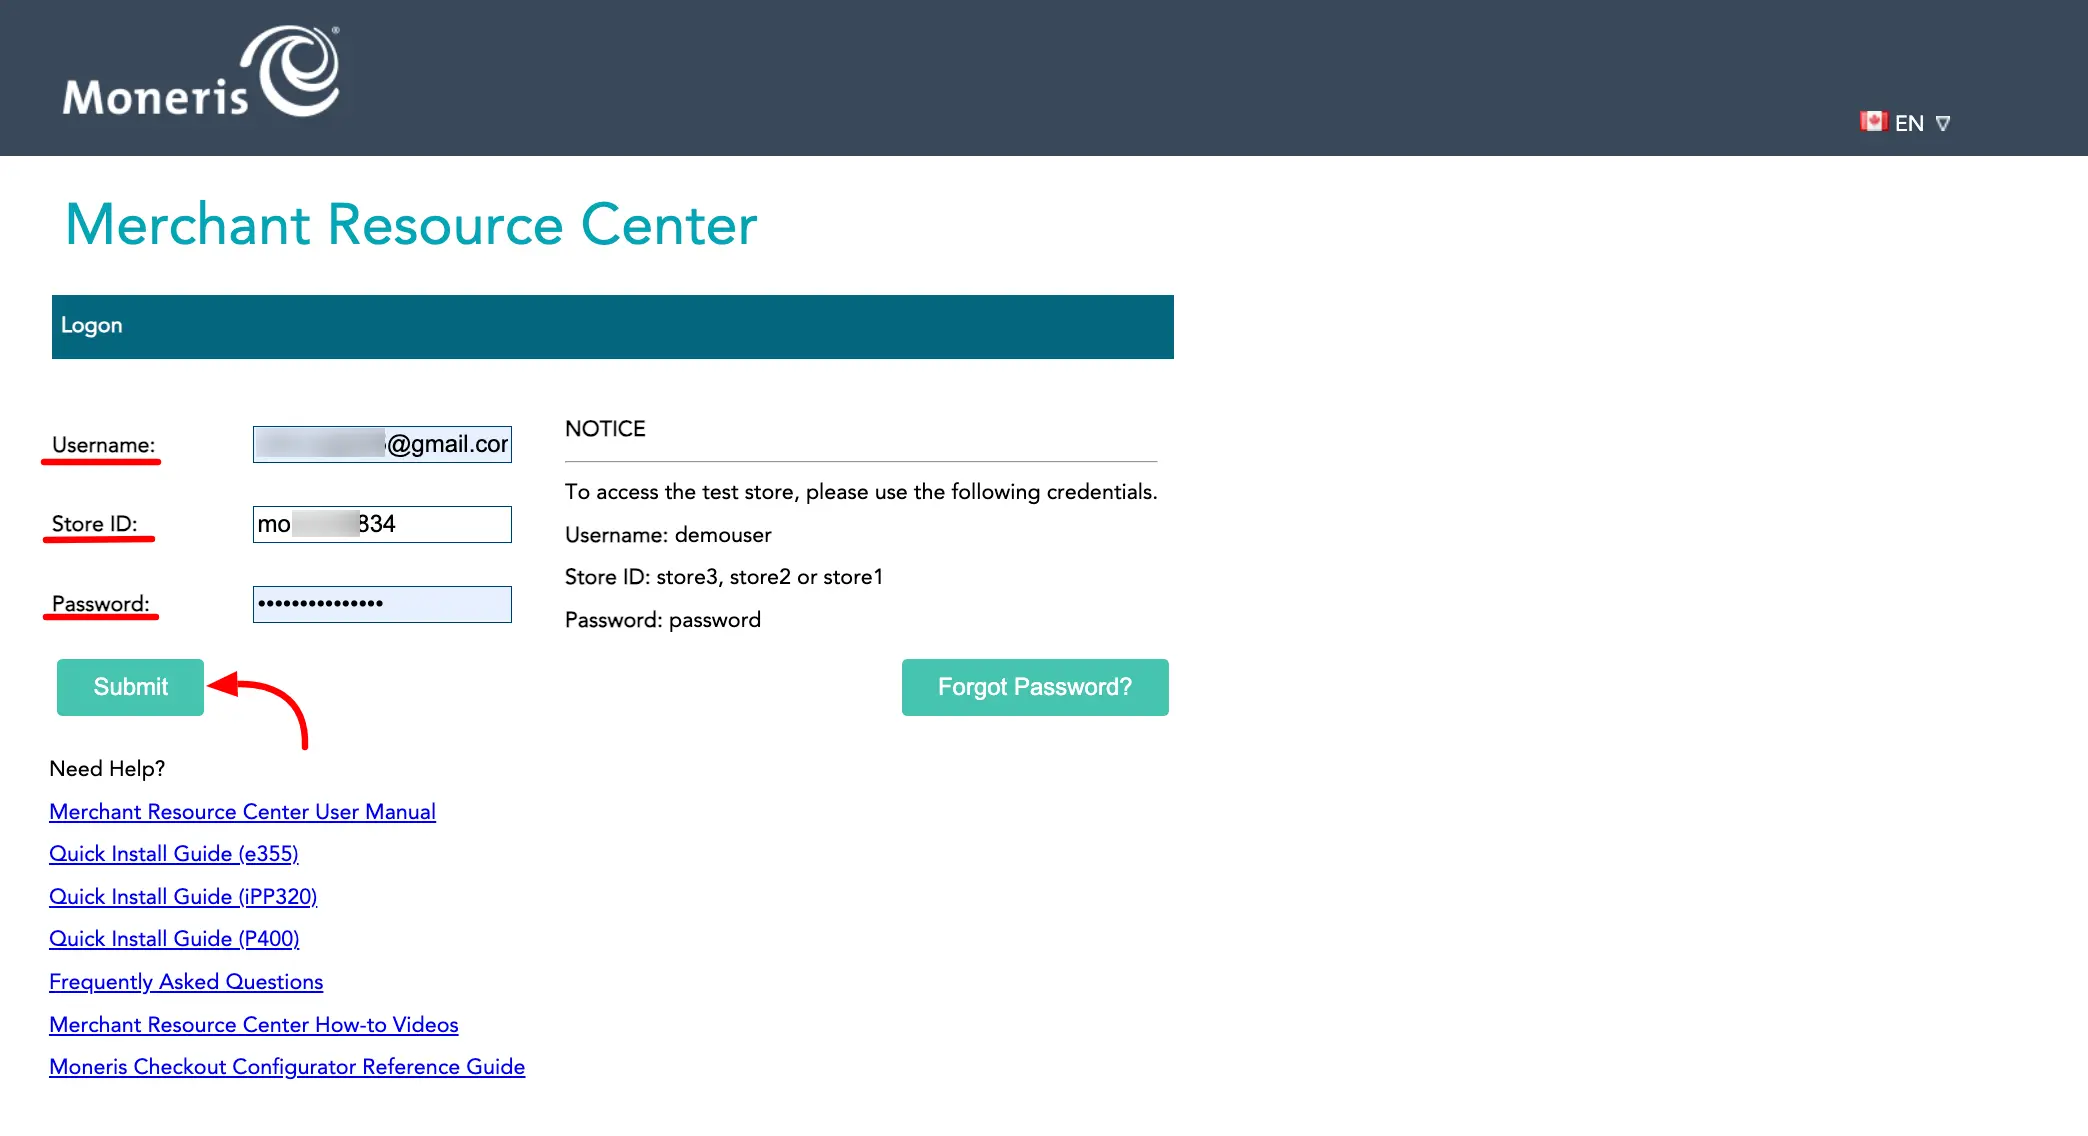
- You will be taken to a new login screen. Log in to the Resource Center using your Username, Store ID, and Password, then click Submit.
Live Mode Access
For Live Mode, use this URL to access the Merchant Resource Center. The configuration steps remain the same.
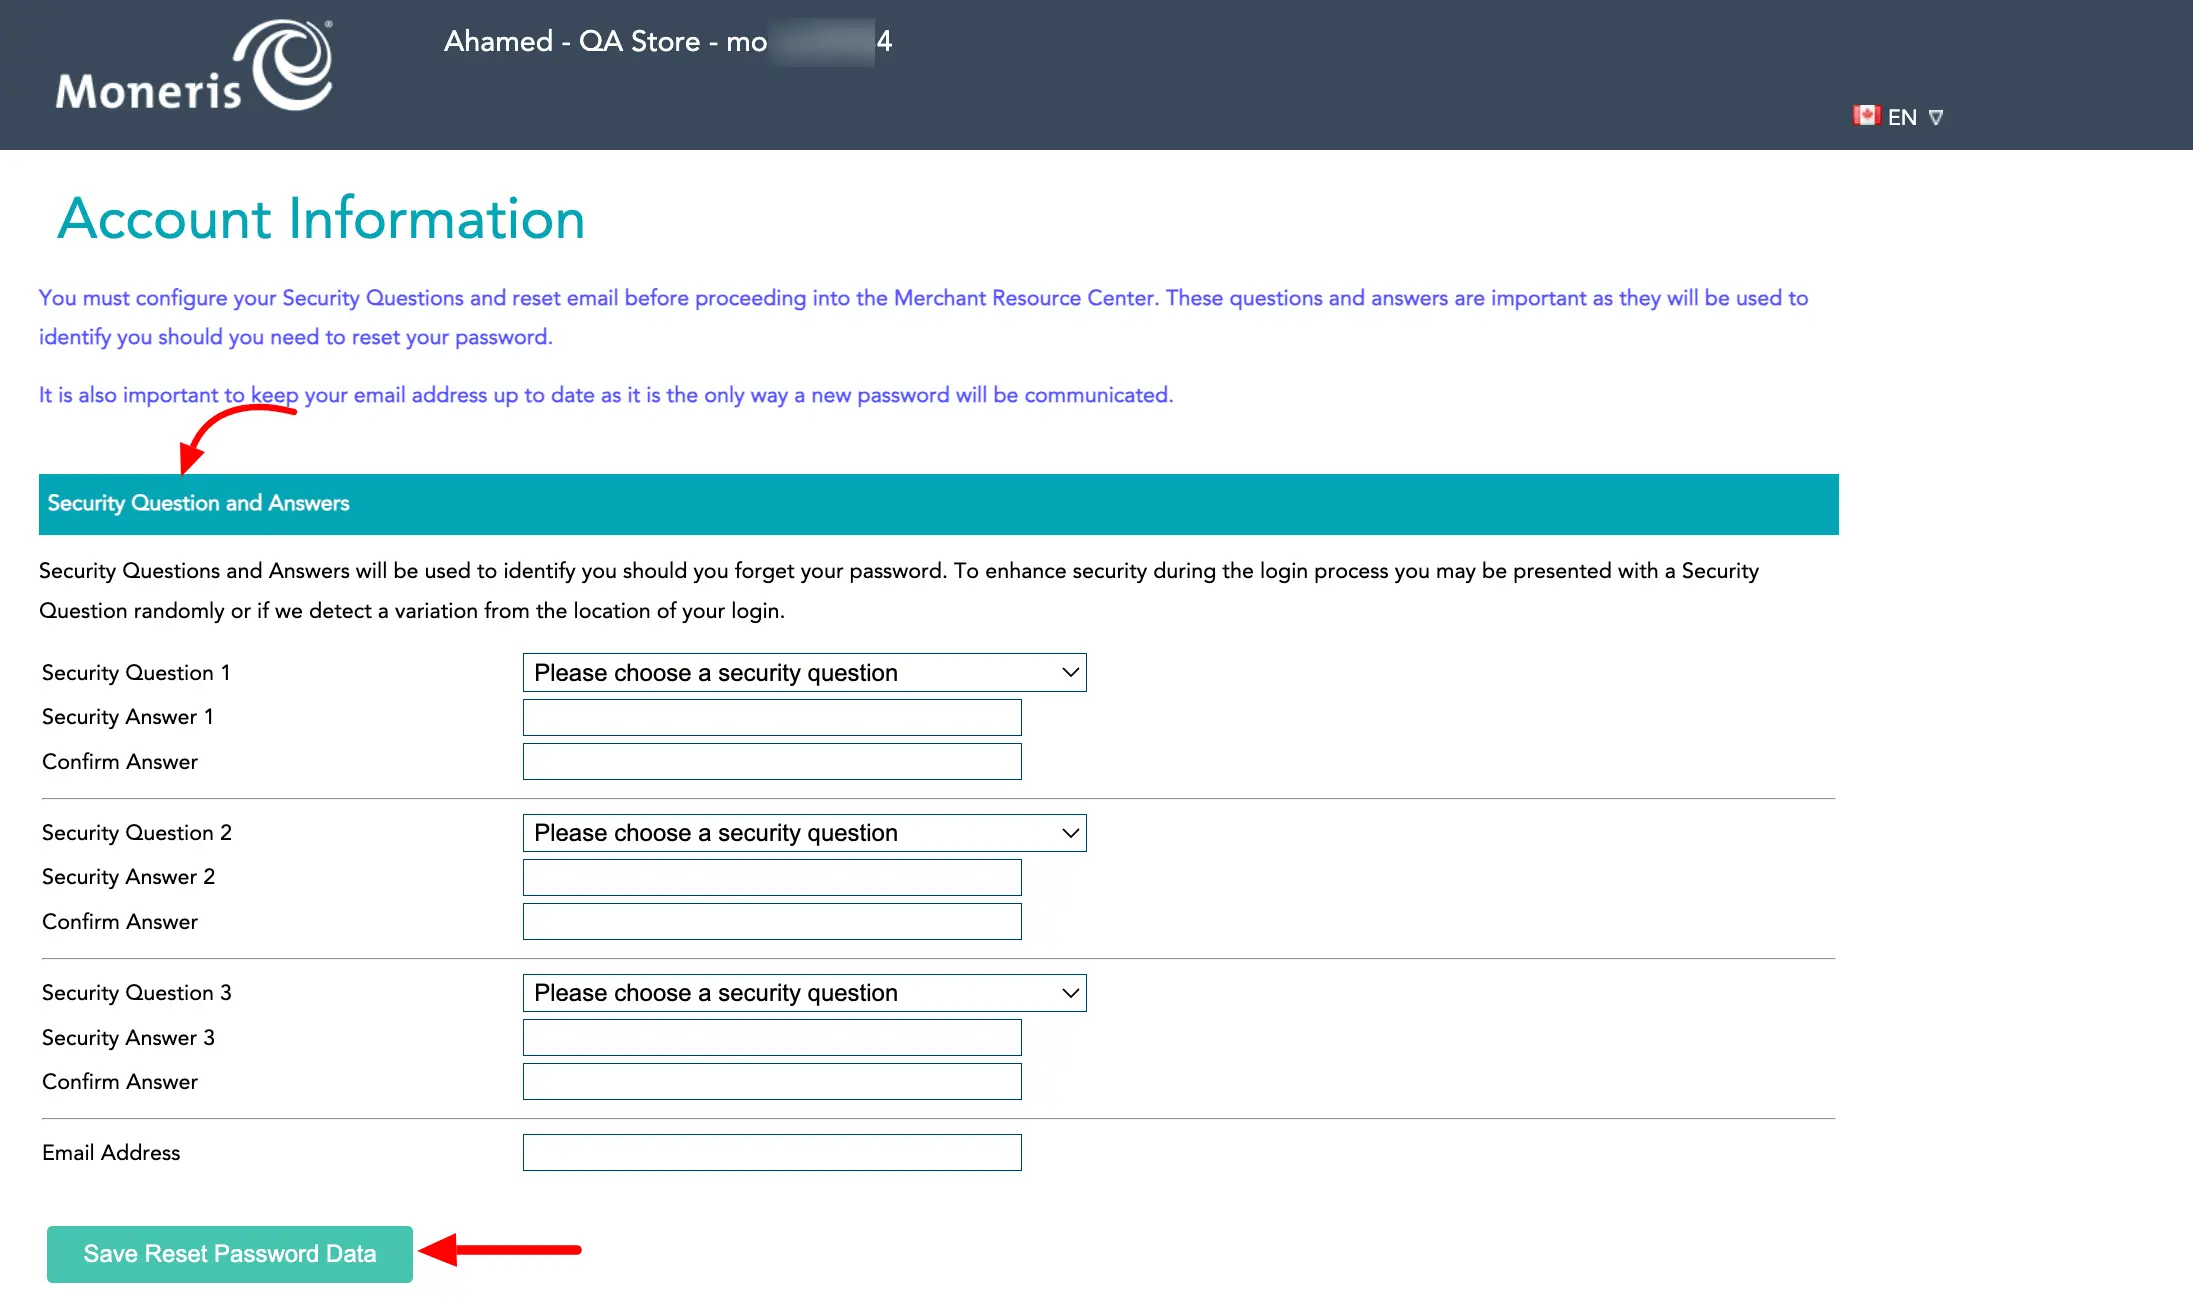
- For security, you will be prompted to set up security questions. Add your questions and answers, then click Save Reset Password Data.
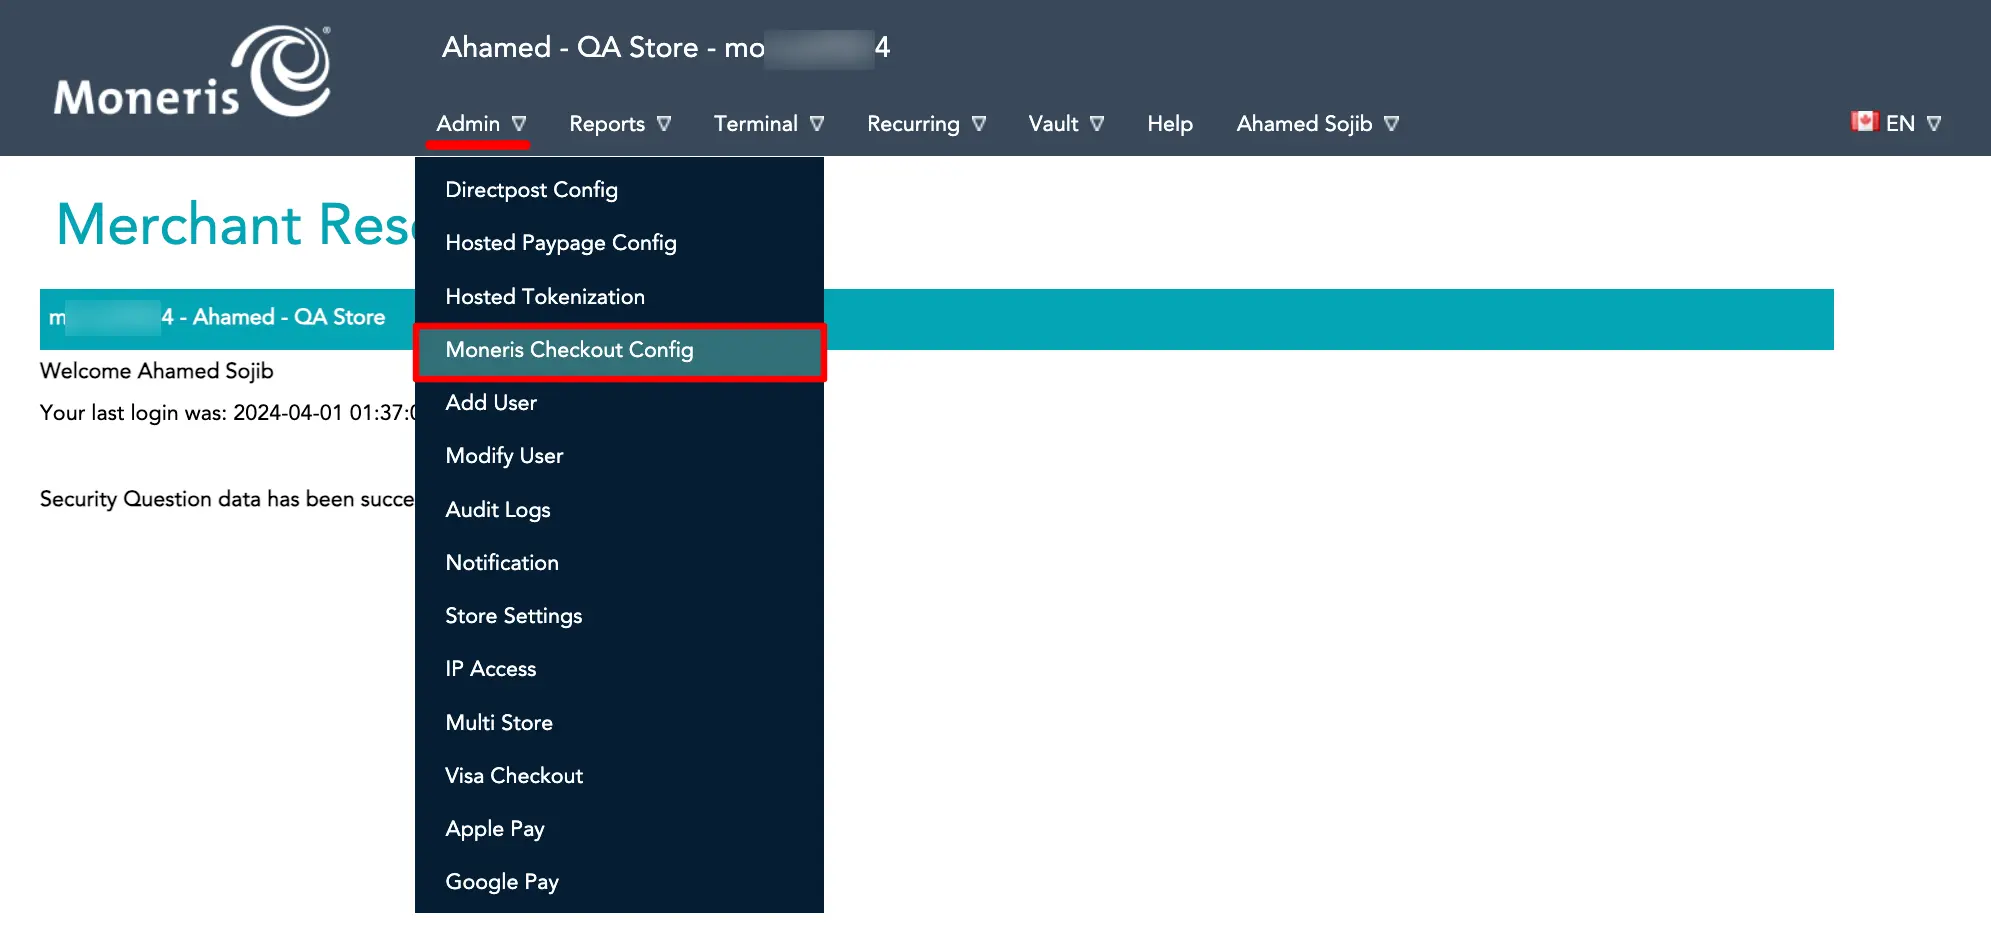
- Once inside the Merchant Resource Center, click on Admin in the main navigation bar and select Moneris Checkout Config from the menu.
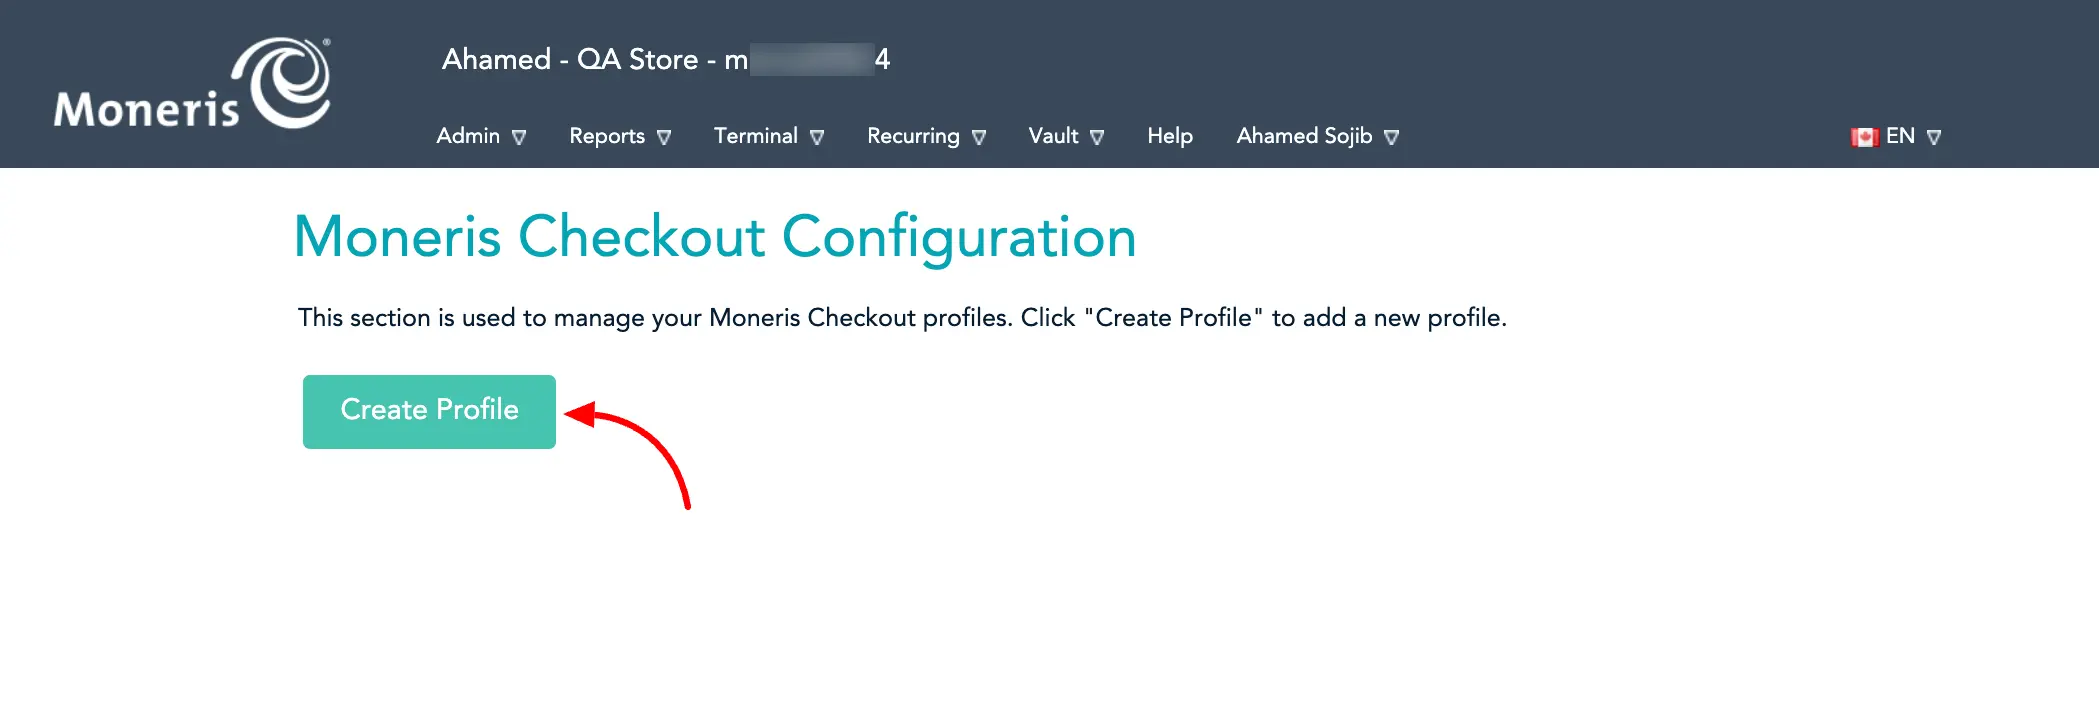
- On the Checkout Configuration page, click the Create Profile button to set up a new checkout profile.
Checkout Page Settings
Important Settings
Configure these key settings for optimal integration:
- Checkout Type: Use Moneris Checkout Forms for Payments
- Order Summary: We recommend disabling Product Images
- Customer's Personal Details: Make Email field mandatory
- Payment Security: If you enable AVS (Address Verification System), the billing address field in Paymattic becomes mandatory
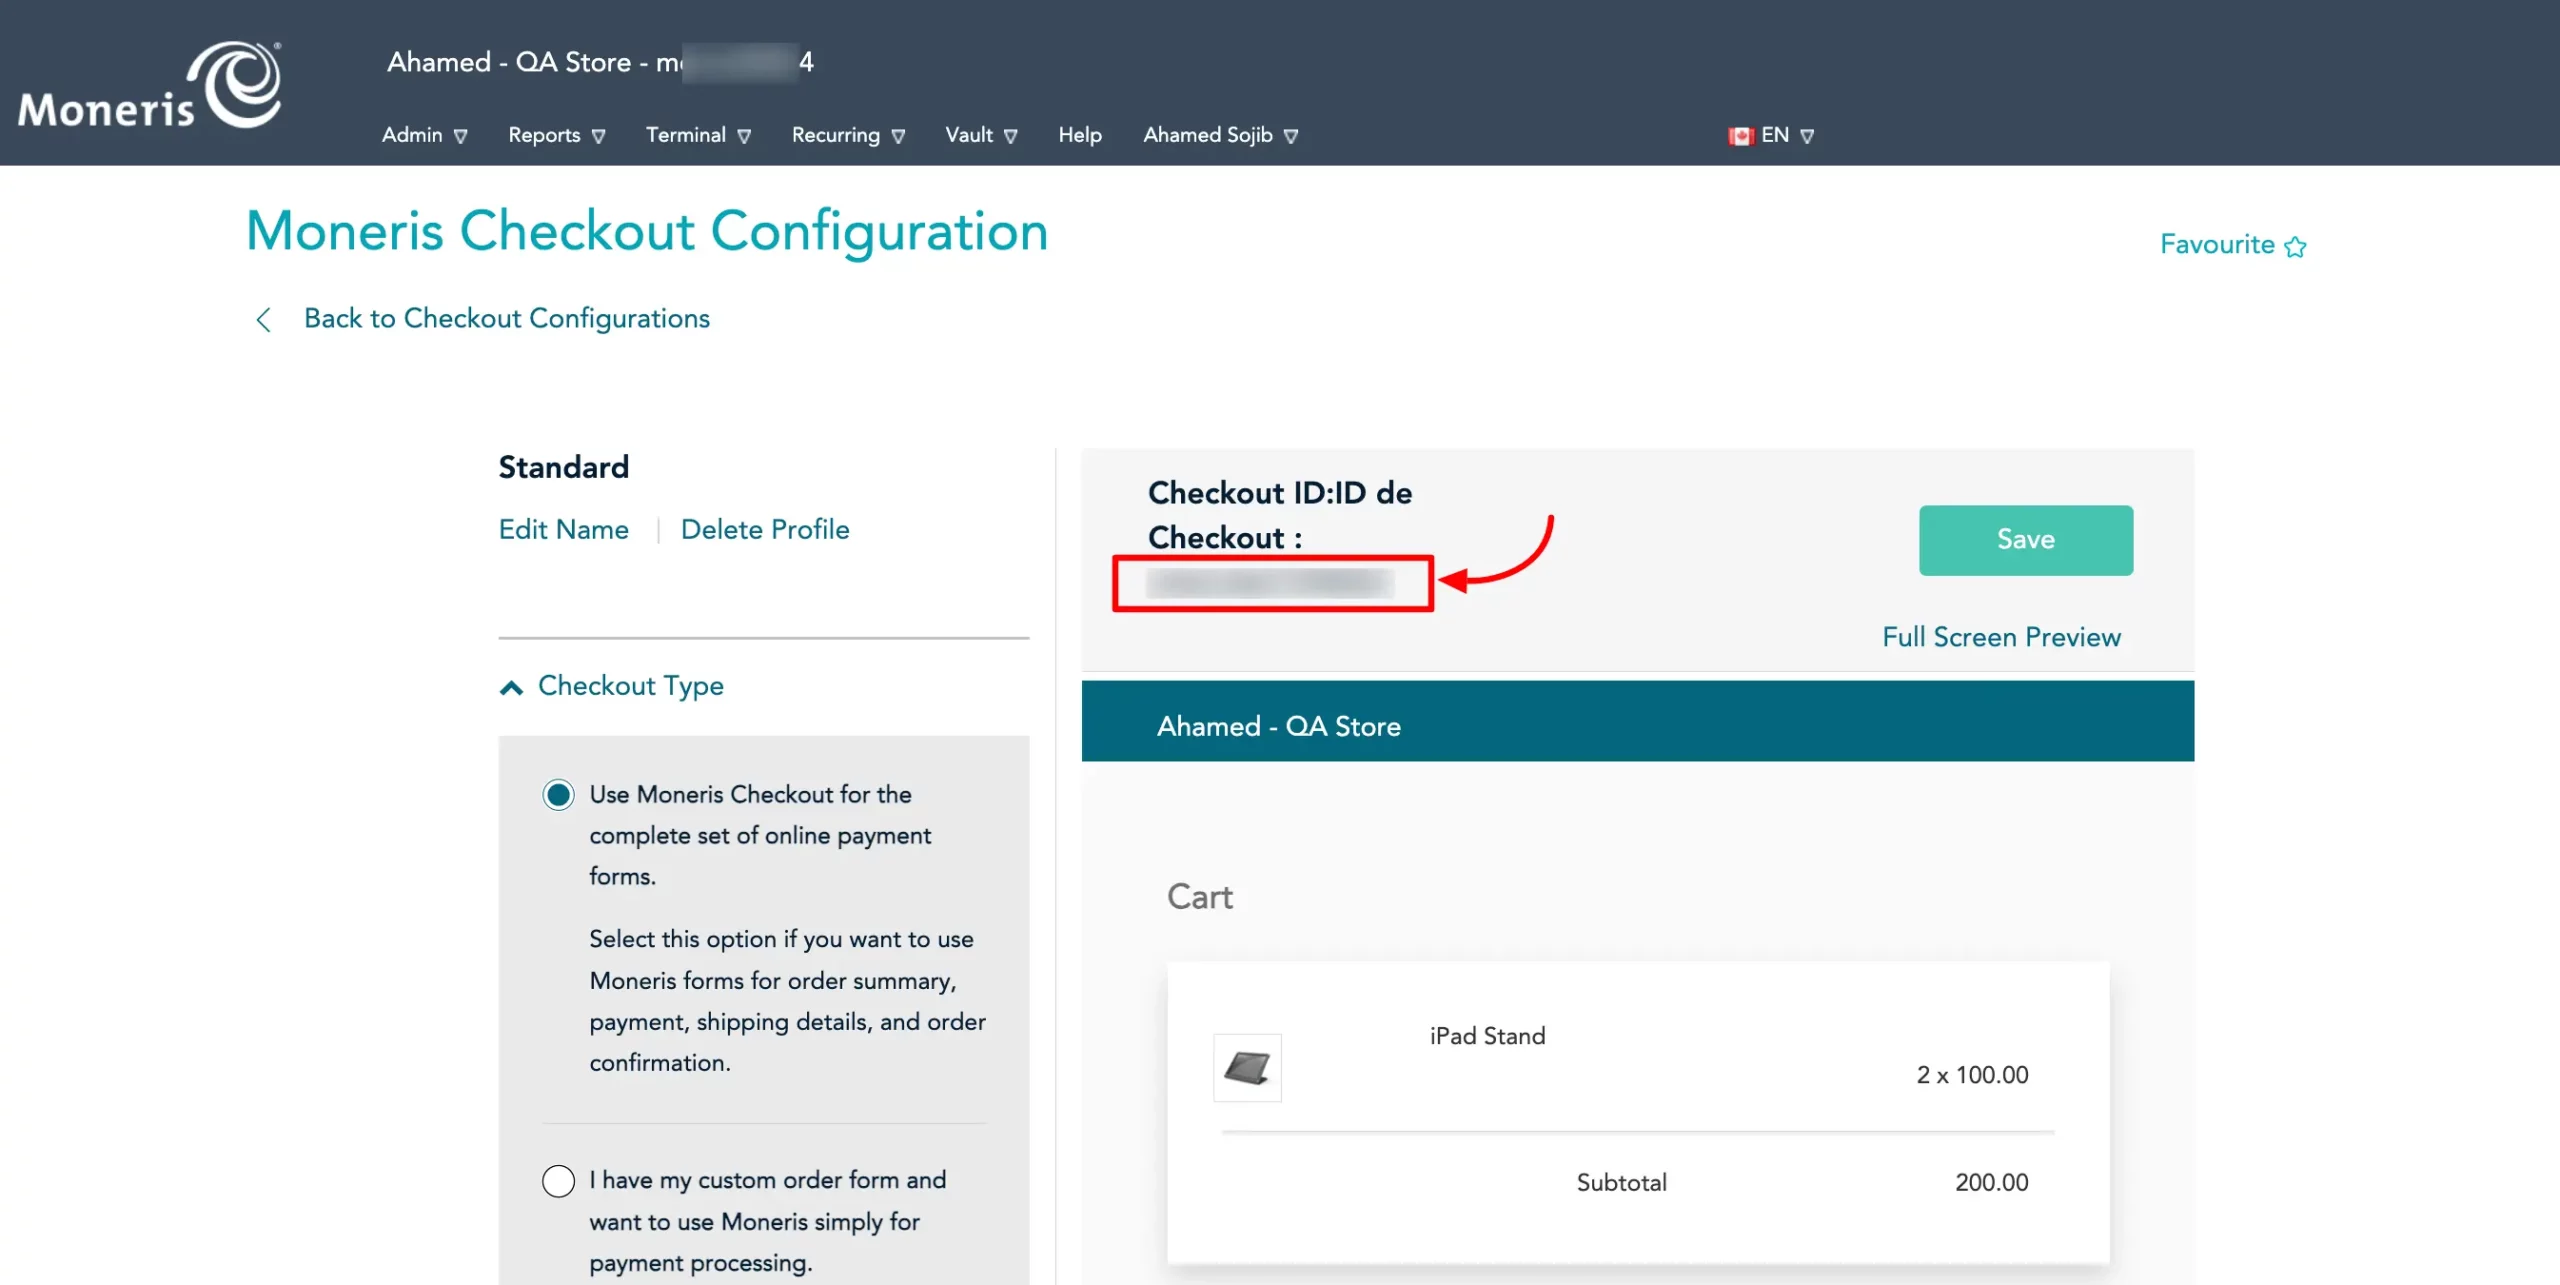
- After configuring and saving your checkout profile, the system will generate your Checkout ID. Find the Checkout ID in your profile list, copy it, and save it for the final step.
Step 4: Finalize the Configuration in Paymattic
With all three credentials—Store ID, API Token, and Checkout ID—copied, you can now complete the setup in your WordPress dashboard.
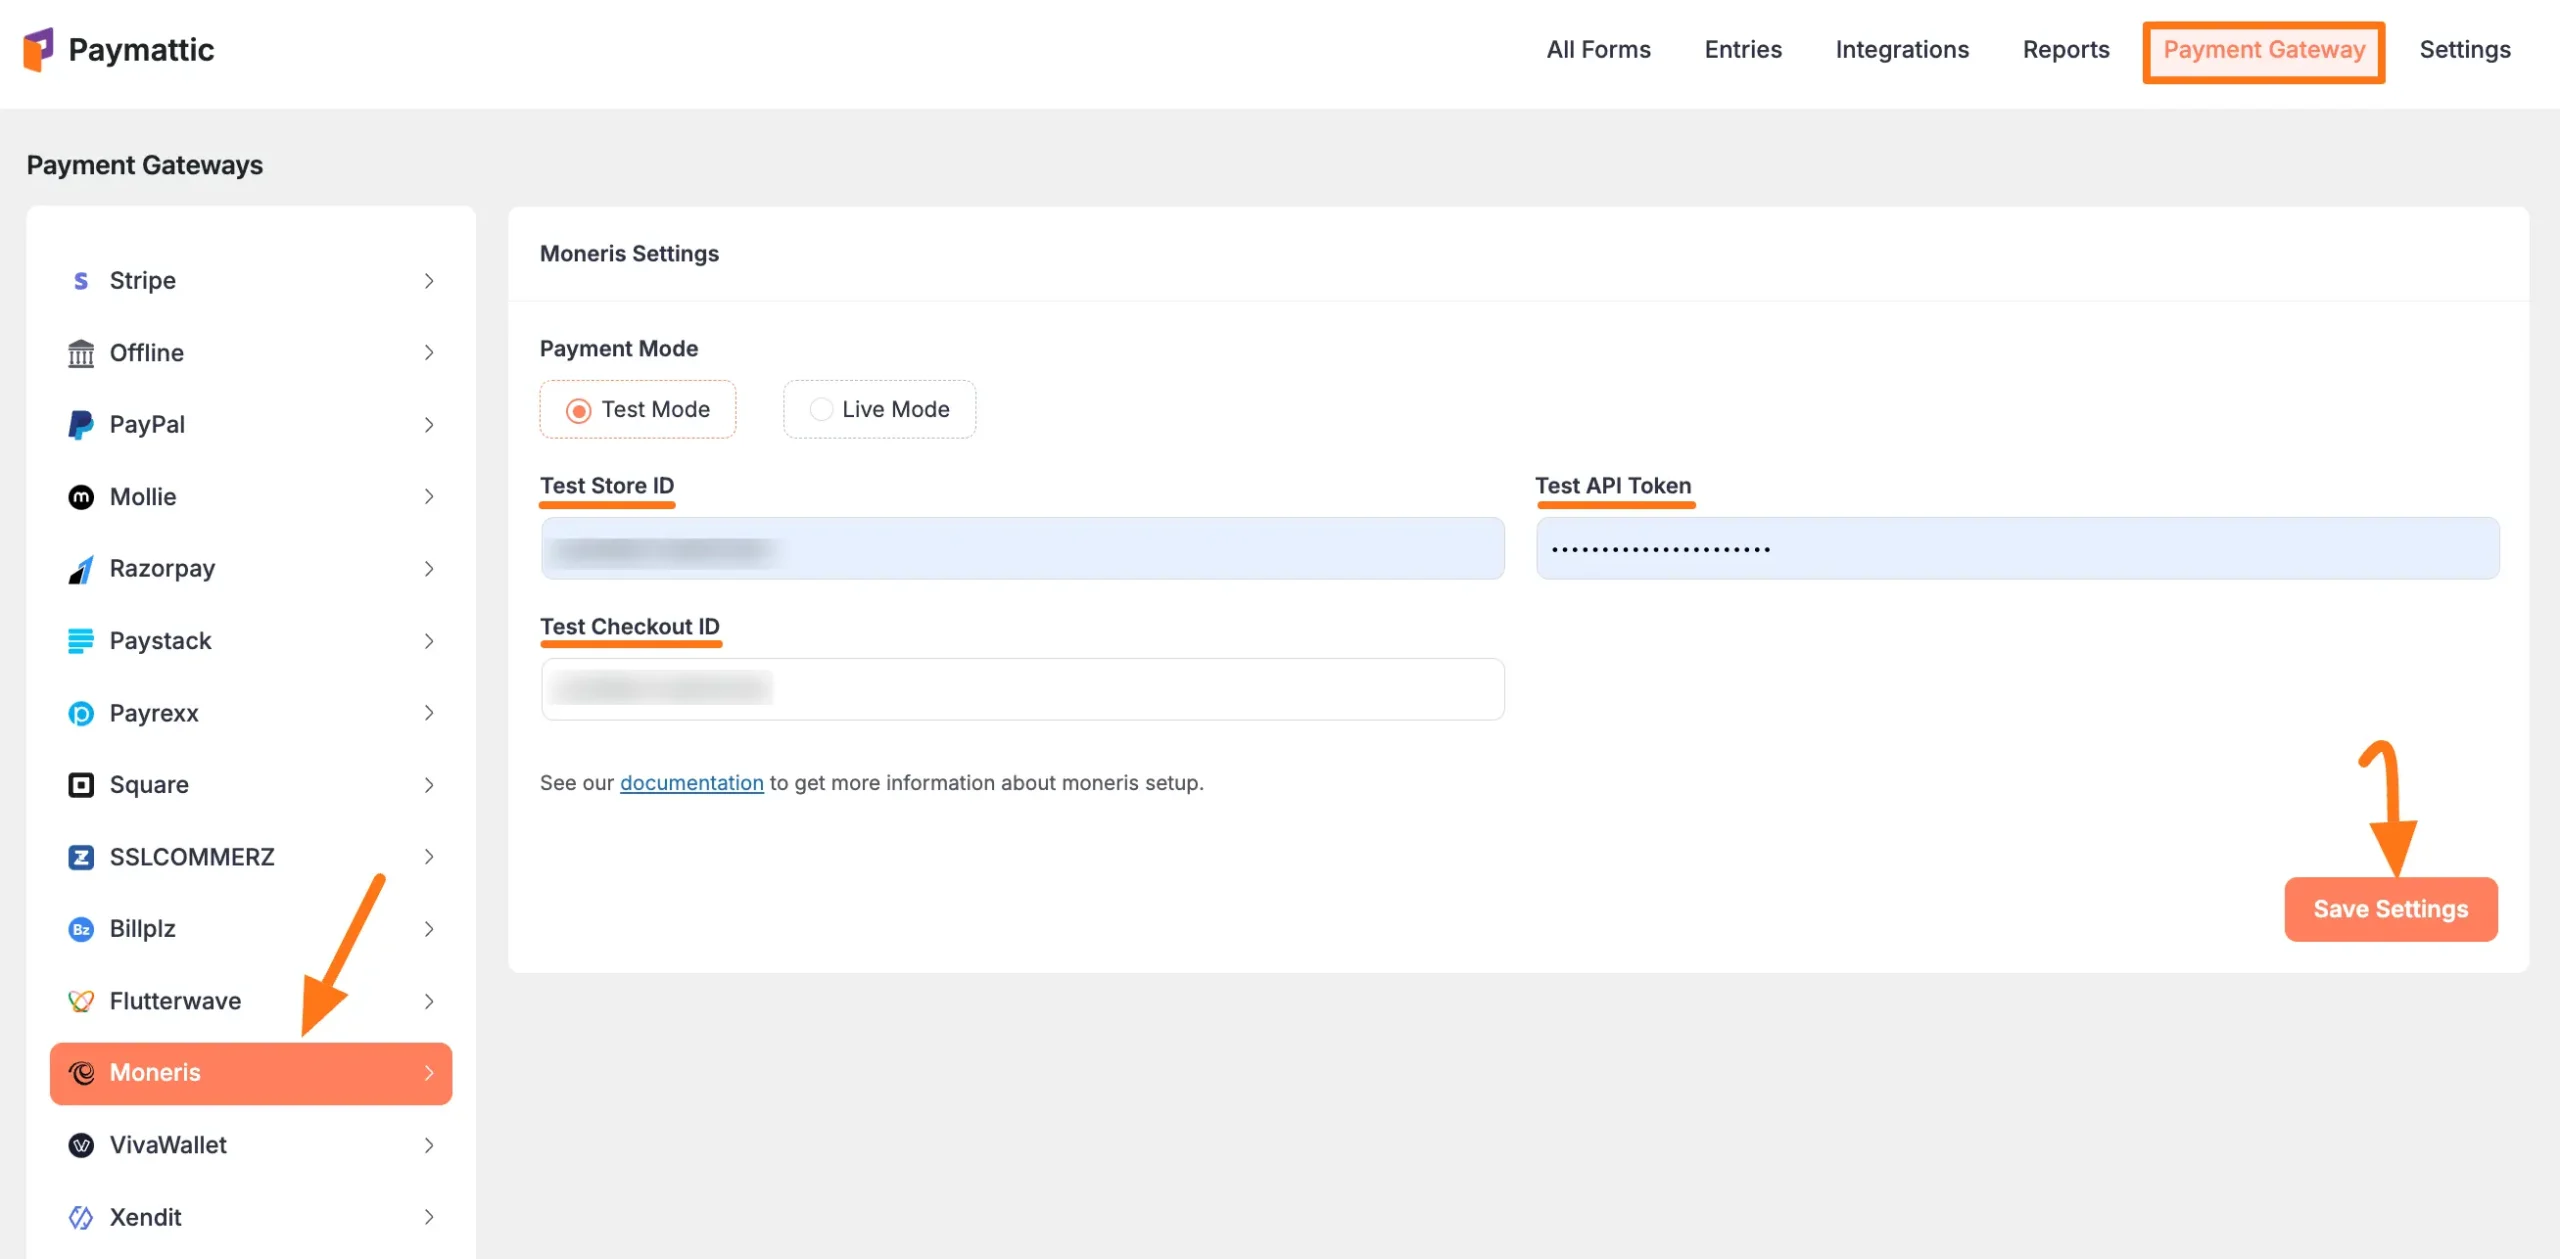
- Return to the Paymattic → Payment Gateway → Moneris tab.
- Carefully paste the three credentials into their respective fields.
- Double-check that all information is correct, then click the Save Settings button to complete the integration.
Enabling Moneris in Your Payment Forms
Now that the global integration is active, you can enable Moneris as a payment option in your individual forms.
- For existing forms: Add it to any Payment Form.
- For new forms:
- Learn more about adding payment methods.
Note
The Moneris payment method will not function unless you complete the configuration process properly.
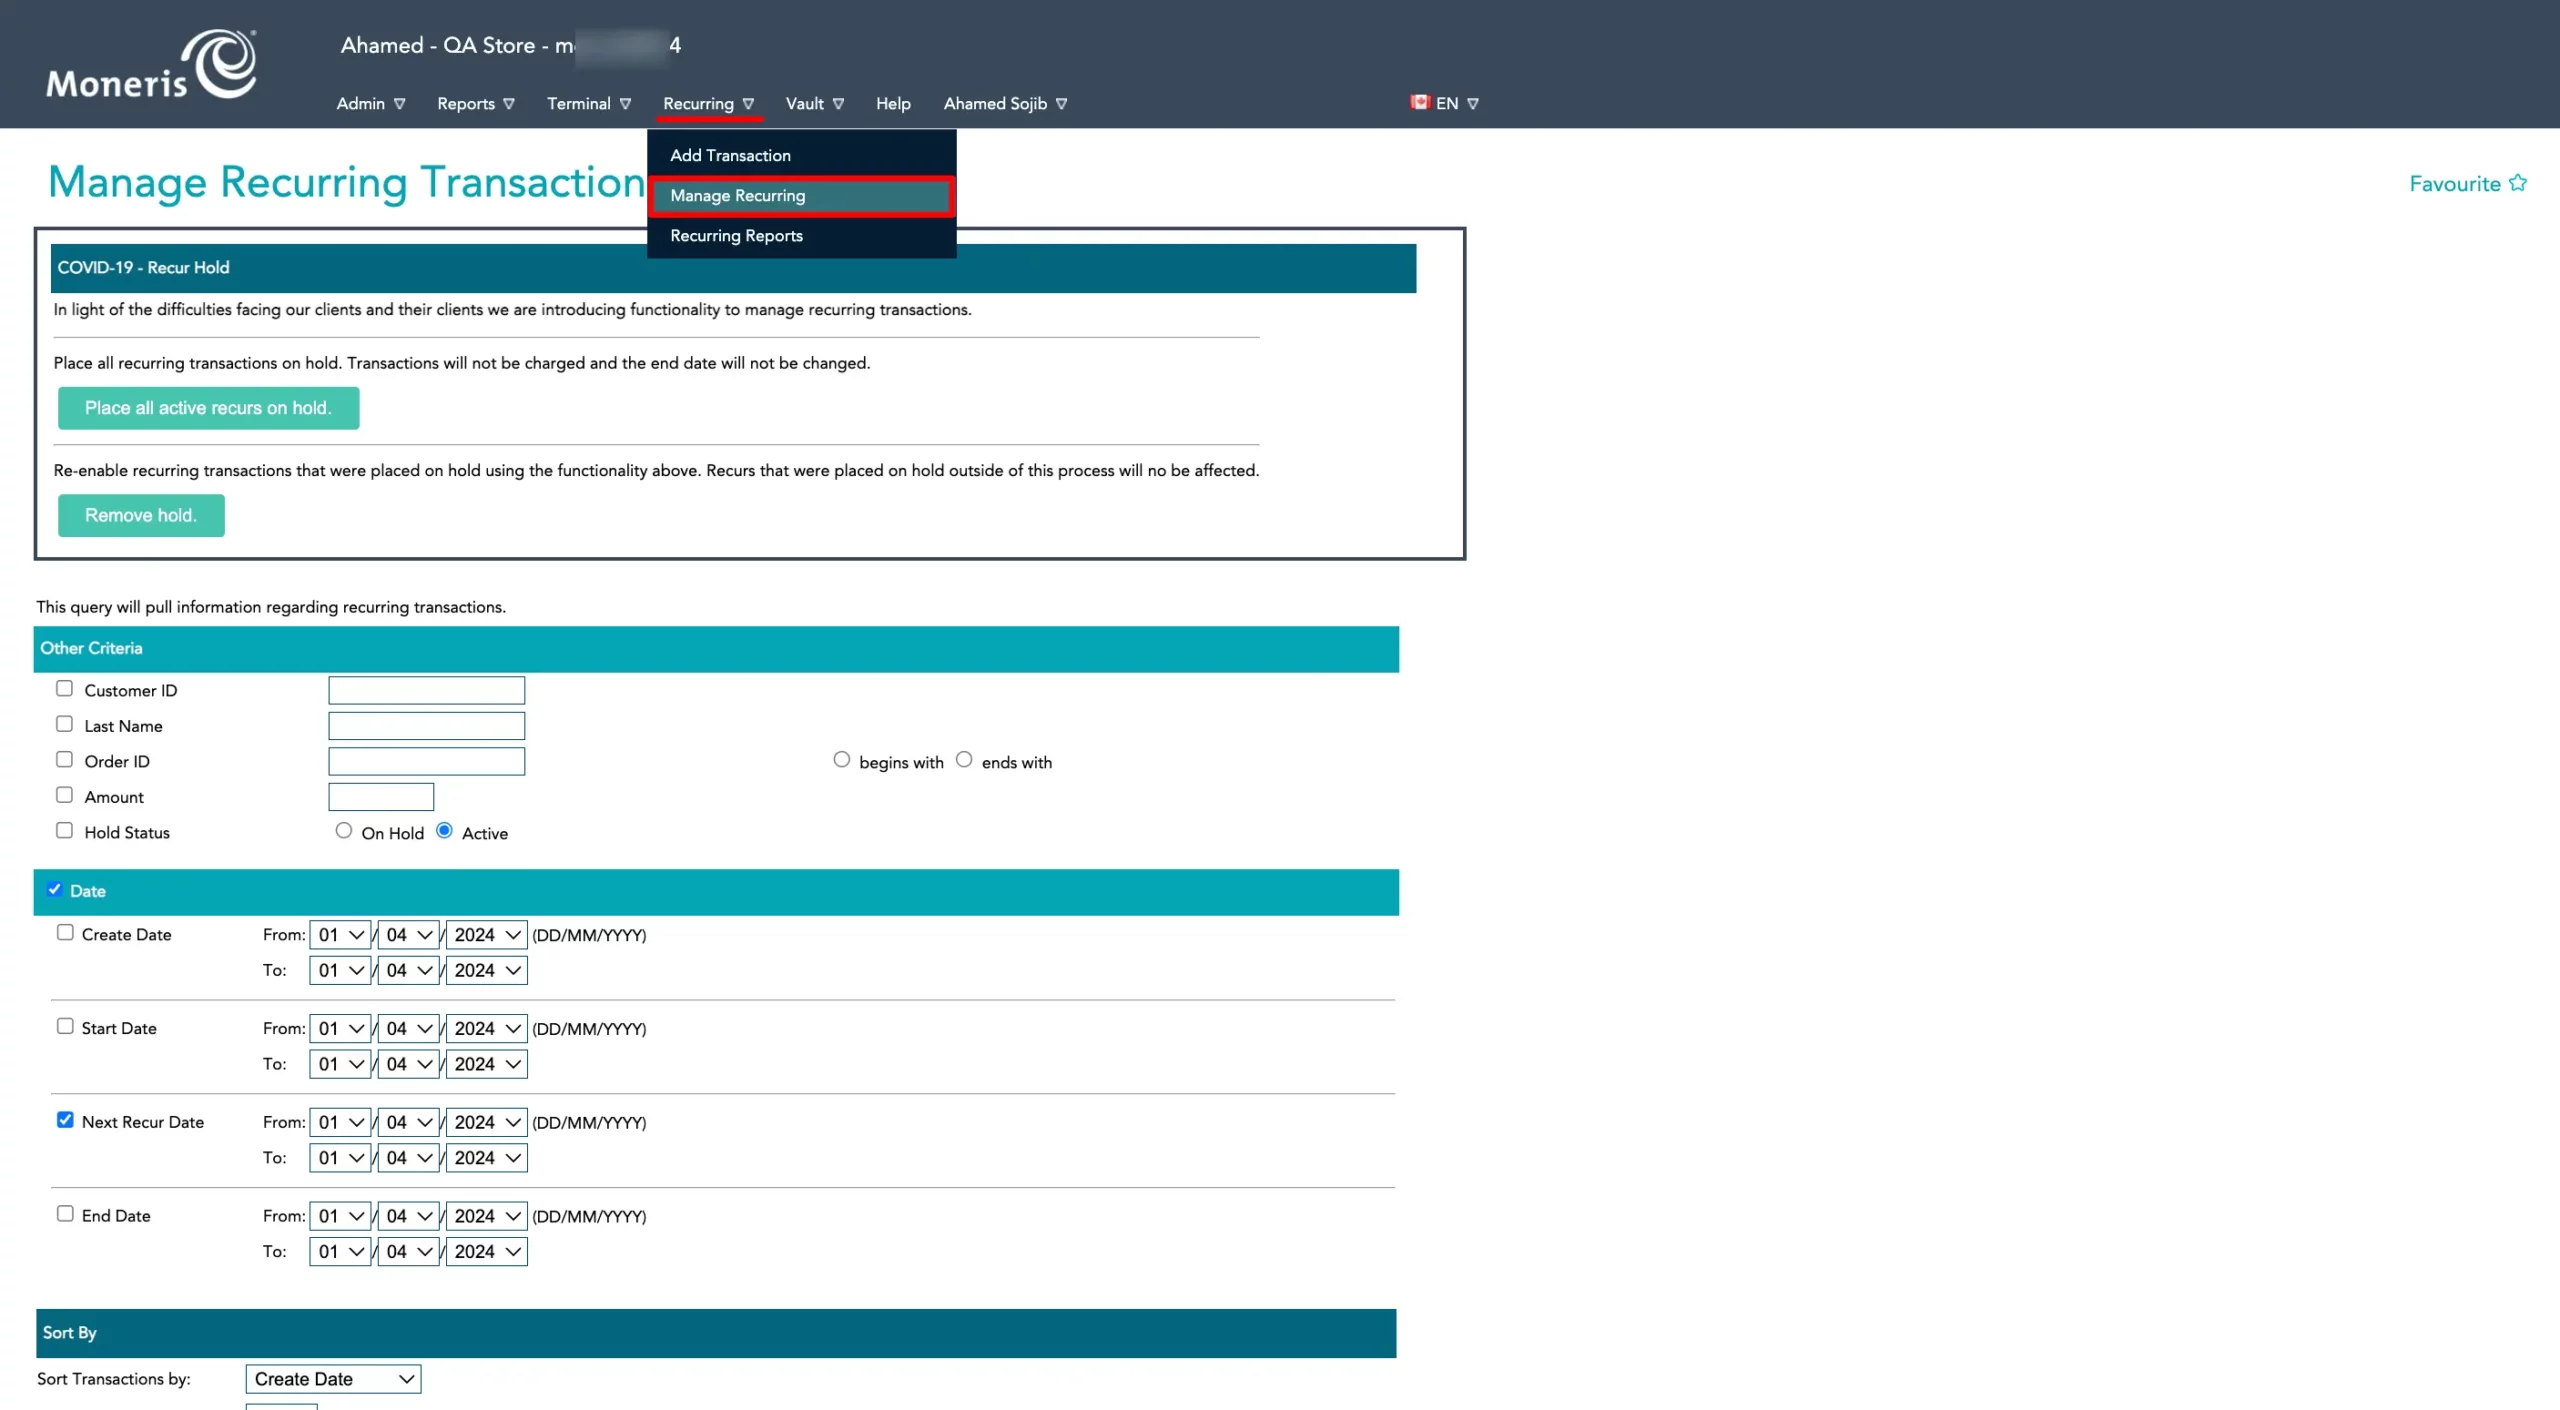
Managing Recurring Payments with Moneris
If you use Moneris for subscription payments, you can manage these transactions directly from the Merchant Resource Center.
- Go to Recurring in the main navigation bar.
- Select Manage Recurring to view and manage your active subscriptions on the Manage Recurring Transaction page.
Need Help?
If you have any questions, concerns, or suggestions, please contact our @support team. We're here to help!