How to Add Tax Calculation to Forms in WordPress with Paymattic
Paymattic provides a powerful Tax Calculated Amount field that automatically calculates and applies tax to your form items. This guide will show you how to set up and customize tax calculations in your forms.
Pro Feature
The Tax Calculated Amount field requires the Paymattic Pro Plugin.
Adding Tax Calculation
Step 1: Access Form Editor
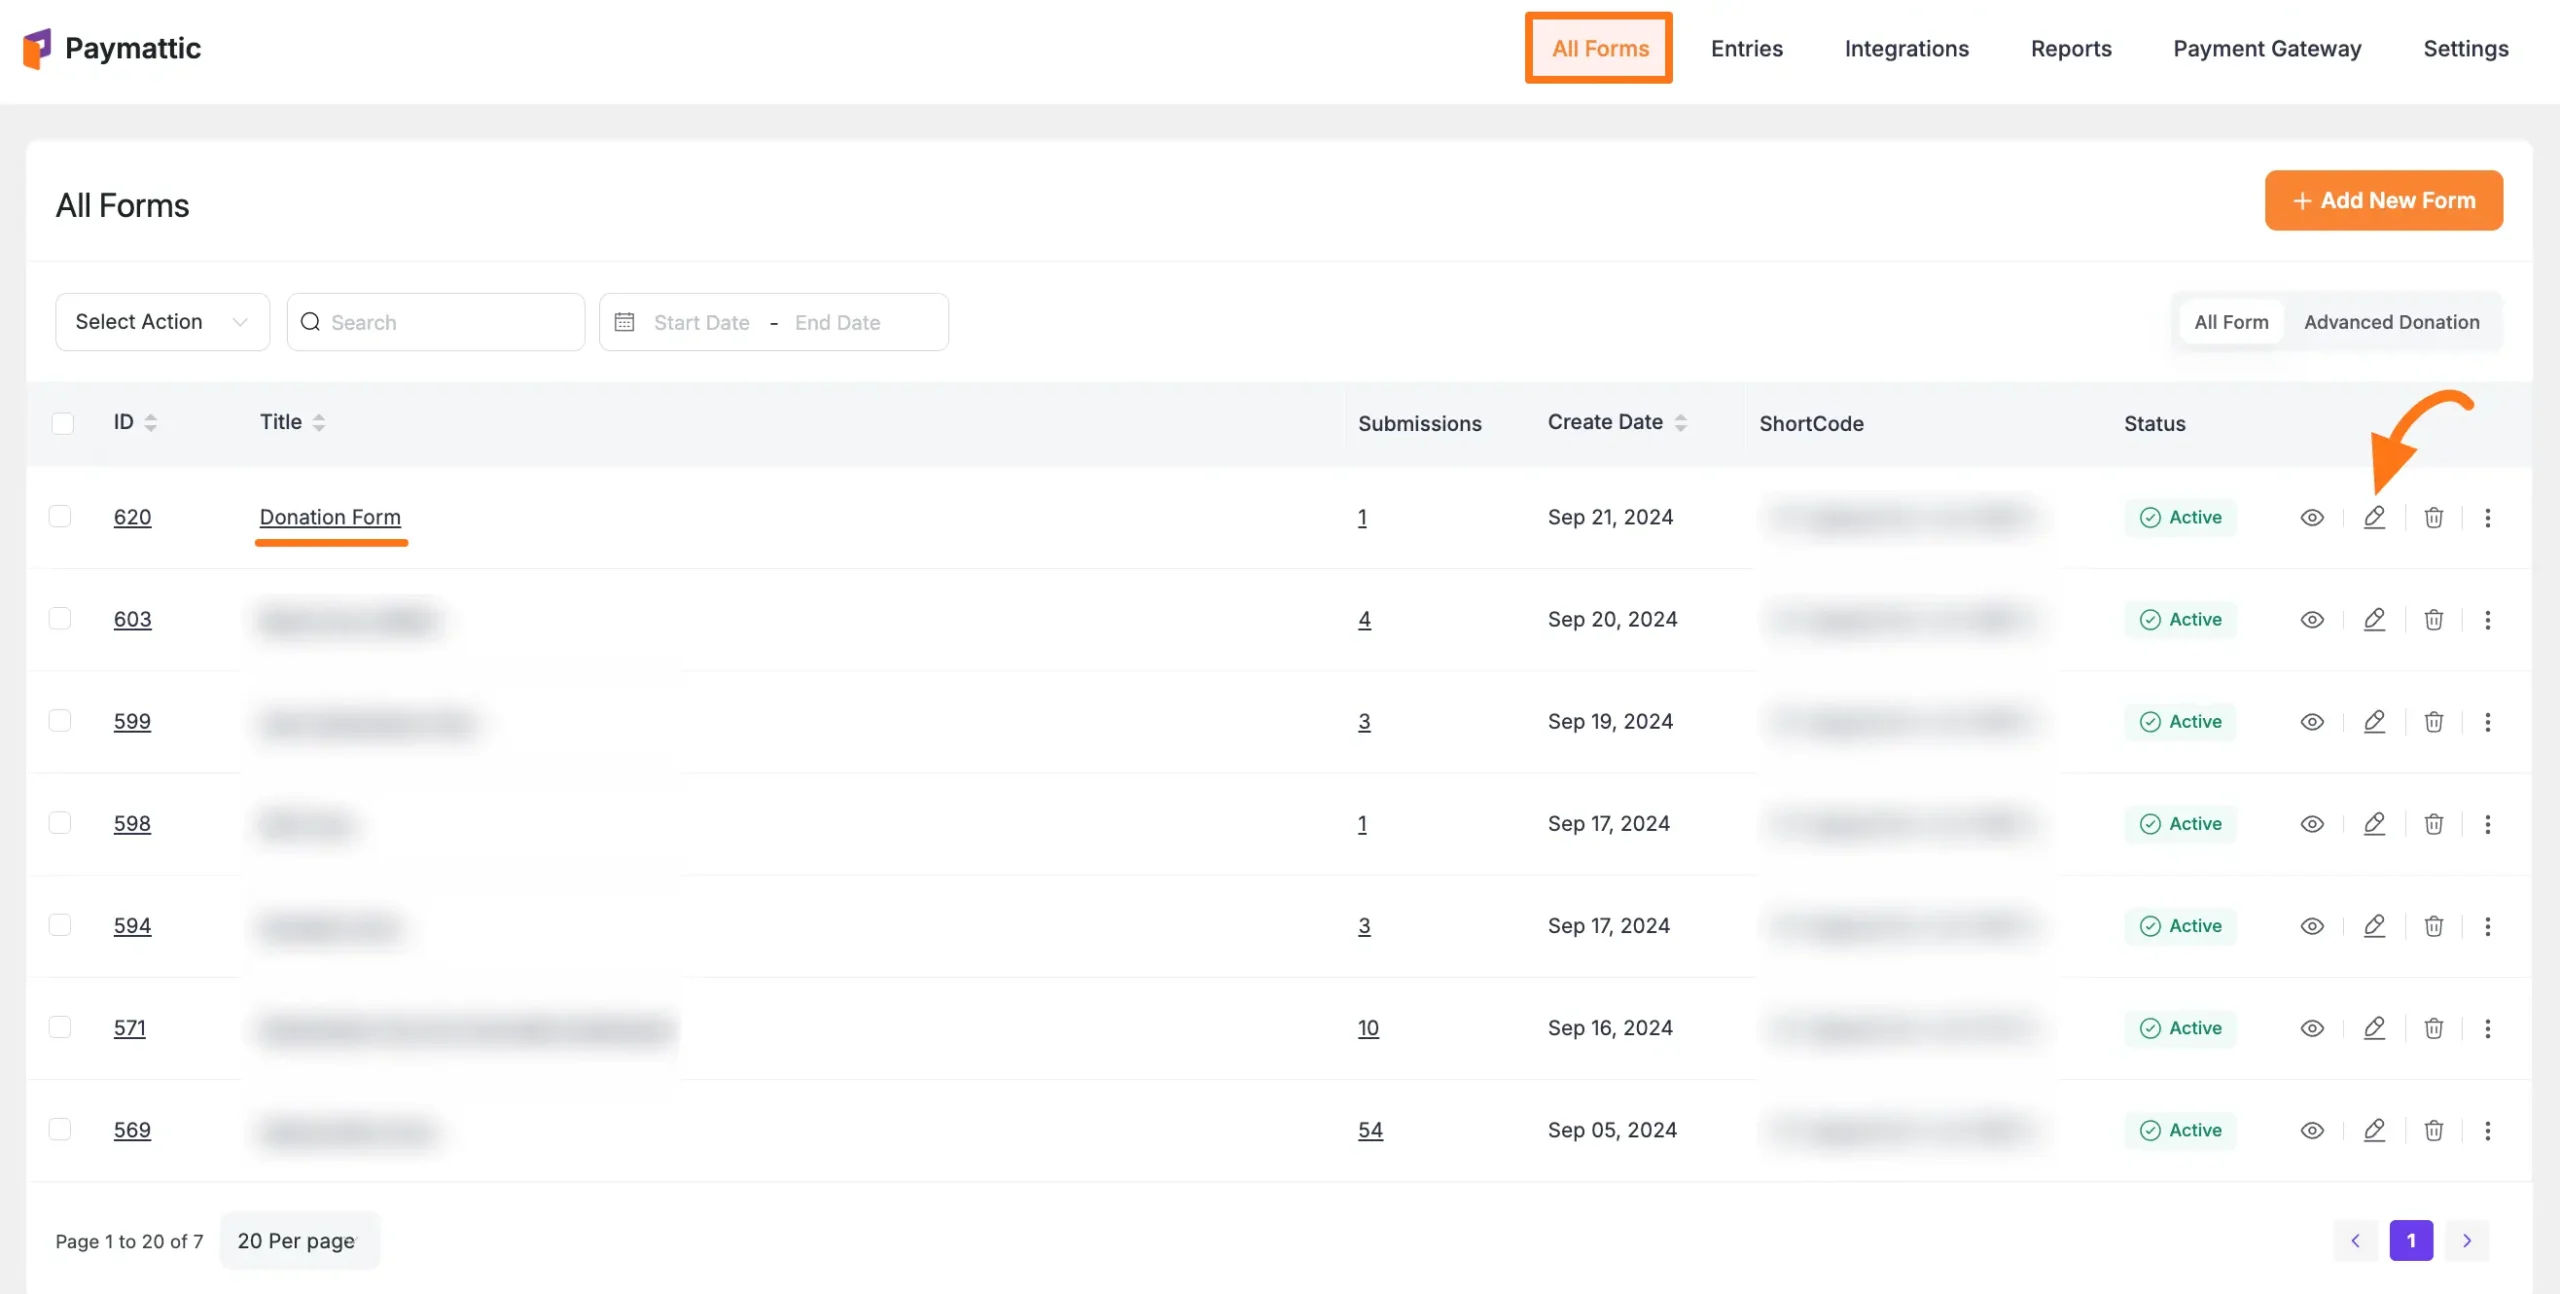
- Go to All Forms from the Paymattic Navbar
- Select your target form
- Click the Pencil/Edit icon to open the editor
Step 2: Add Required Fields
Required Fields
Your form must include these fields in order:
- Name Field
- Email Field
- Payment Item Field (for the item being taxed)
- Tax Calculated Amount Field (added below)
- Payment Method Field (for processing payments)
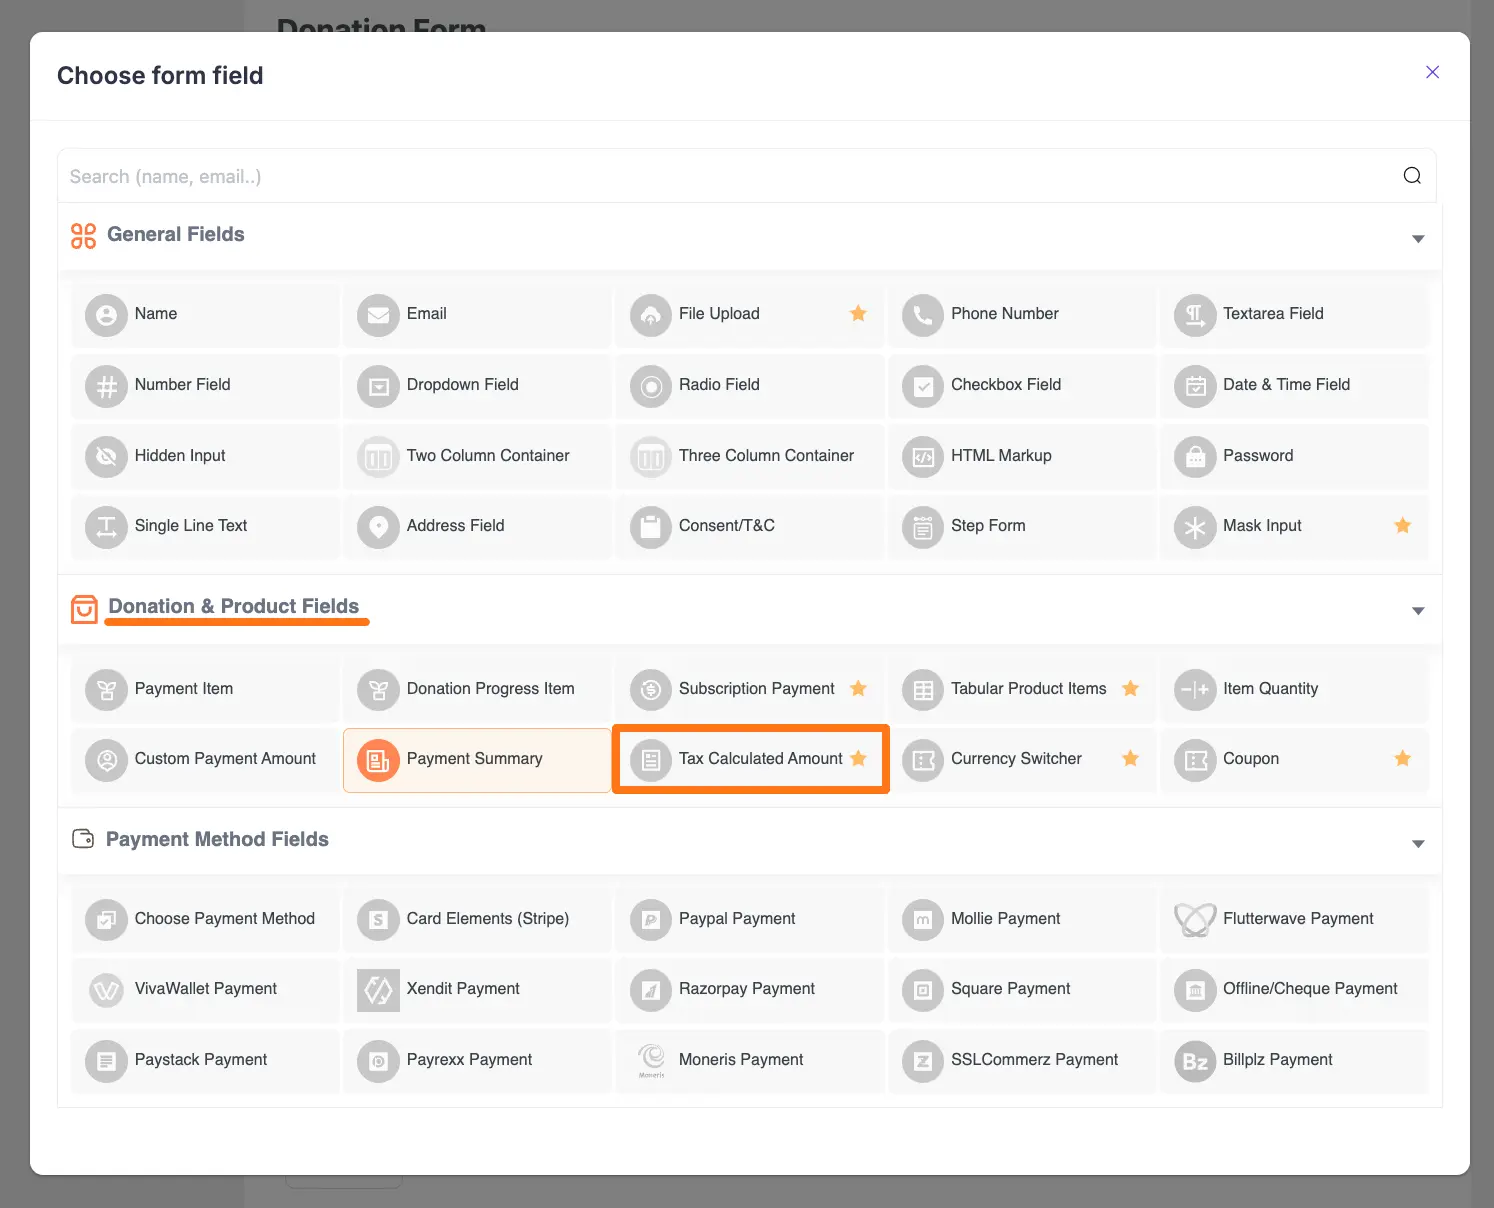
Add the Tax Calculated Amount field in two ways:
- Type "/" in the editor
- Click the Plus Icon at the bottom
![]()
Select "Tax Calculated Amount" under "Donation & Product Fields":
Configuring Tax Calculation
To customize the field, click the Settings Icon in the right corner:
![]()
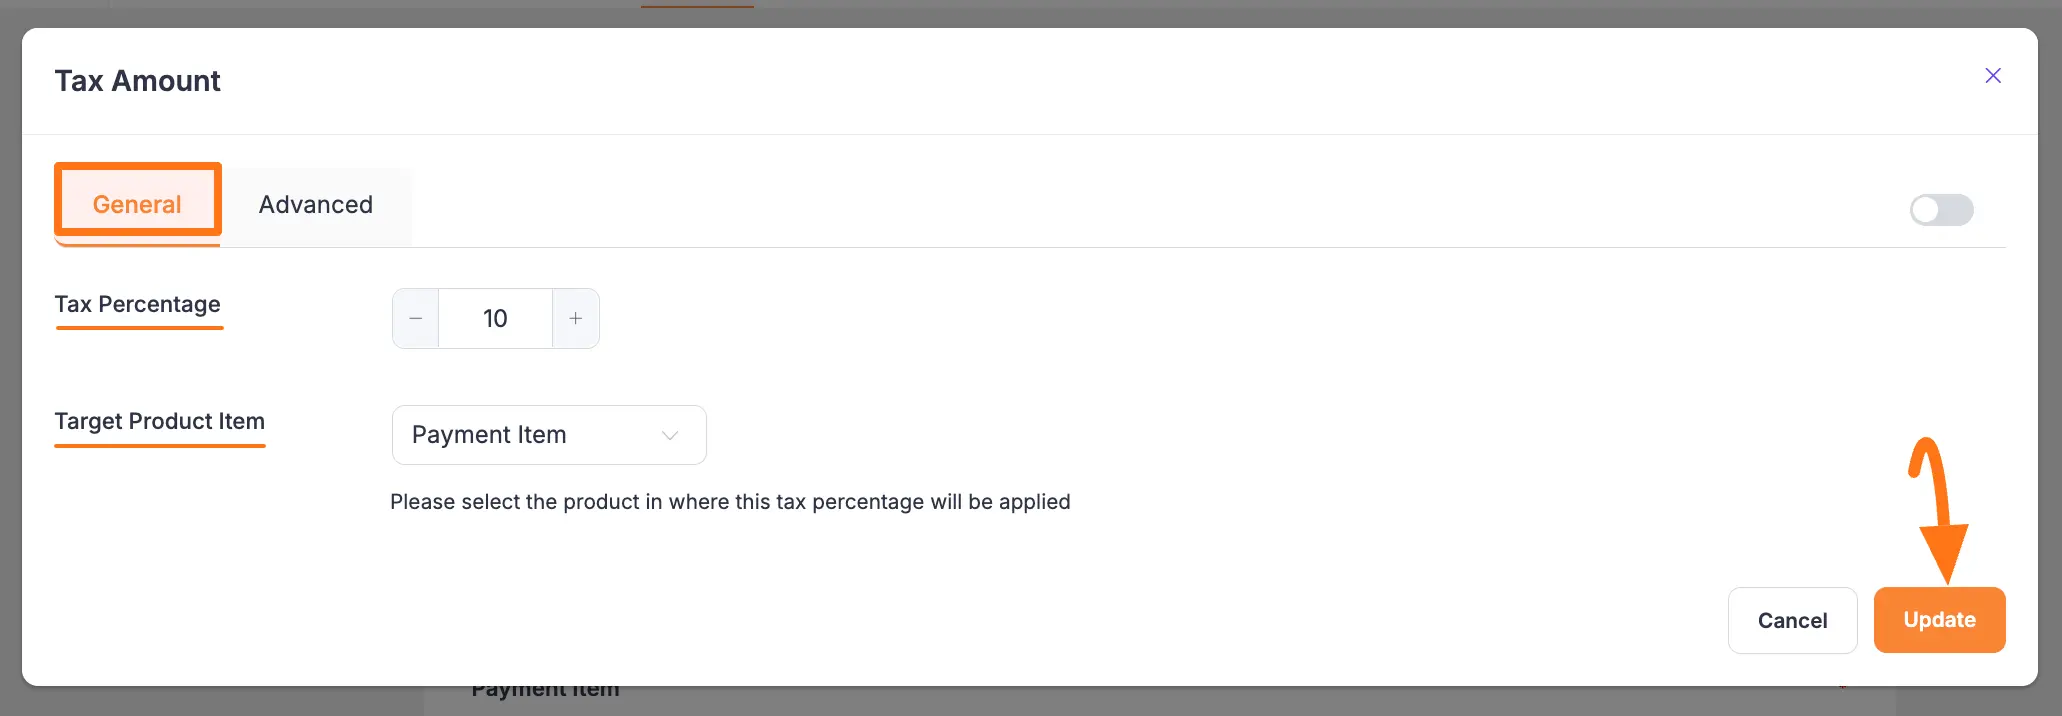
General Settings
This guide explains the settings found under the General Tab for the Tax Calculated Amount field. This field is used to apply a percentage-based tax to a specific payment item in your form.
[Screenshot of the General Tab settings for the Tax Calculated Amount field.]
Tax Percentage
Here, you can set the tax rate that will be applied. Enter the percentage as a number without the percent sign (for example, enter 8 for an 8% tax).
Target Product Item
From this dropdown menu, you must select the Payment Item field to which this tax will apply. The calculation will be based on the amount of the selected product.
- Important Note: Remember to use a separate Tax Calculated Amount field for each Payment Item field that requires tax. One tax field can only target one payment item.
Once you finish, click the Update button at the top of the form editor to save all your configurations.
Important
Use separate Tax Calculated Amount fields for each Payment Item field that needs different tax rates.
Advanced Settings
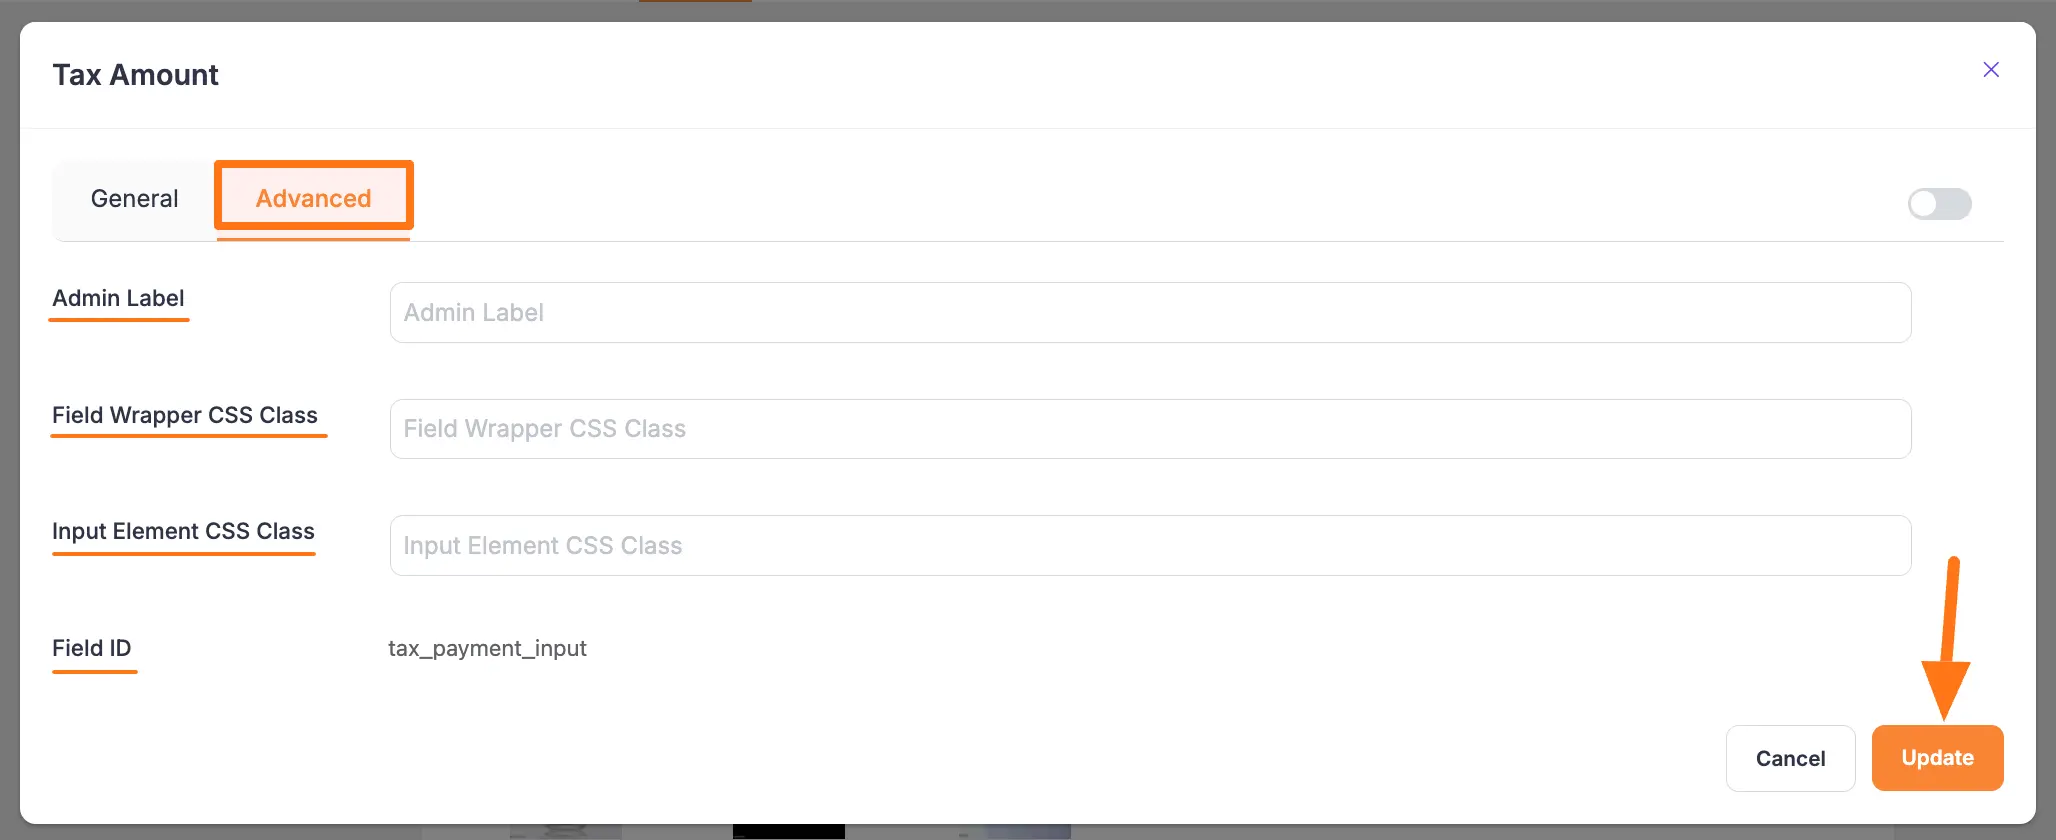
Once you complete the General settings for your field, you can go to the Advanced tab to find more technical options.
Admin Label
This label is for internal use only. The text you enter here will be used as the field’s label in the admin backend (for example, on the Entries page). It will not be visible to the public, making it useful for adding notes or clarifying a field's purpose for your team.
Field Wrapper CSS Class
This is used for adding a custom CSS class to the entire field container (the wrapper). This allows you to apply unique styling like borders, margins, or background colors to the whole field element.
- Note: To learn more, see our guide on applying Custom CSS to forms.
Input Elements CSS Class
This is used for adding a custom CSS class specifically to the <input> element itself. Use this to control the font, color, or other styles of the input box where data is entered or displayed.
Field ID
This option displays the unique ID assigned to the form field. It is primarily used for custom development, such as targeting the field with custom JavaScript or for integration purposes.
Once you finish, click the Update button to save all your configurations.
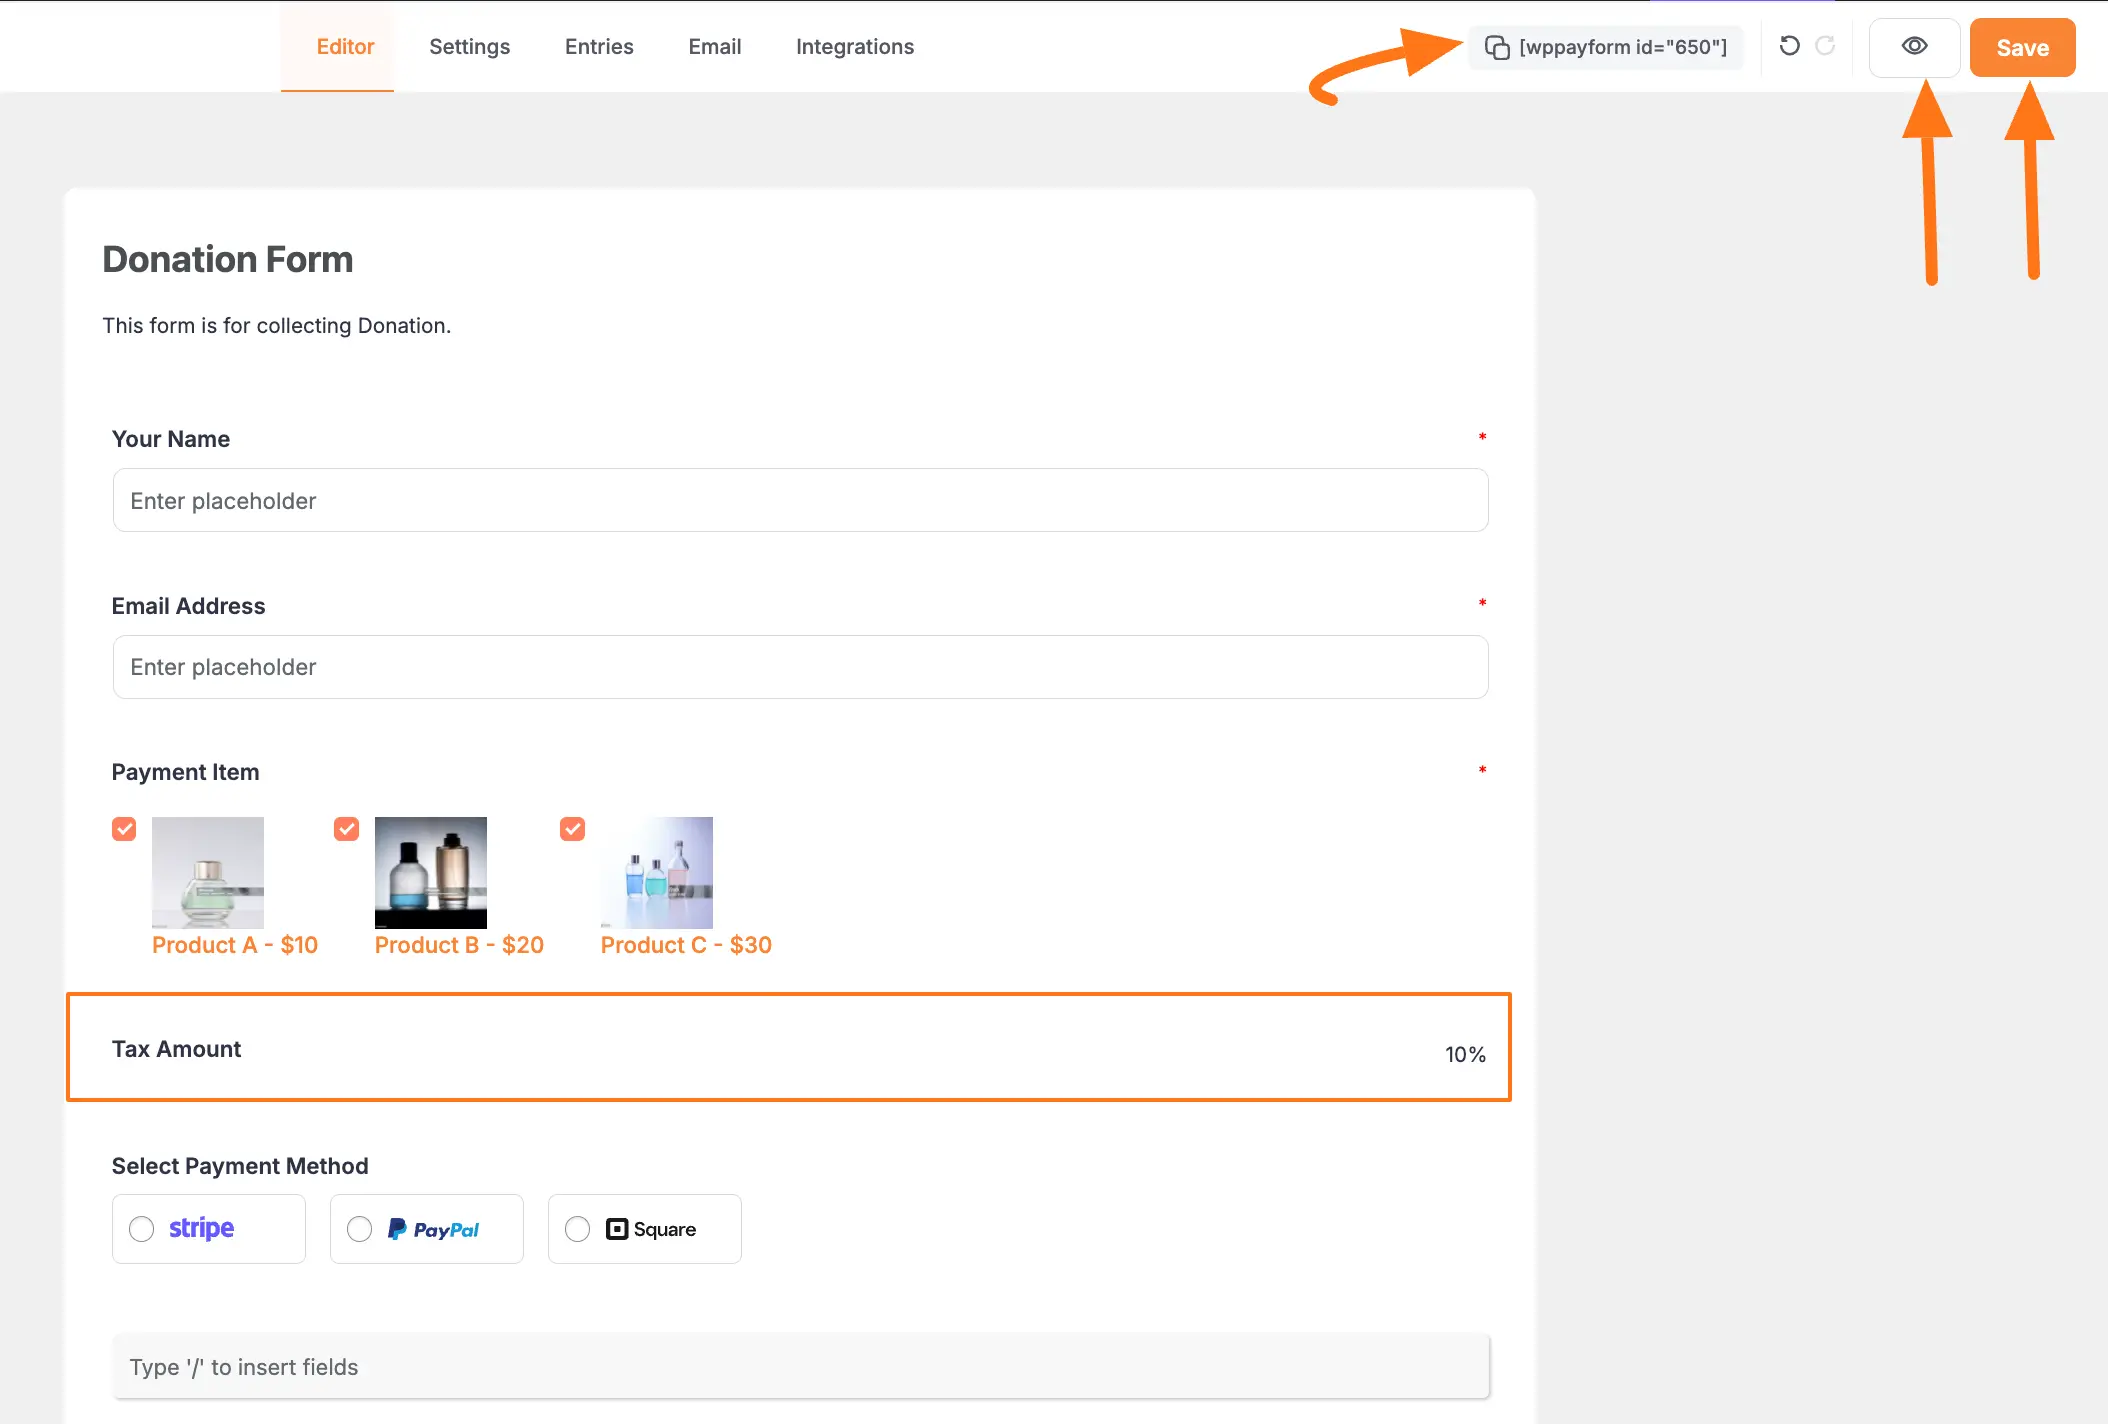
Preview
Here's how your tax calculation will appear to customers:

Best Practices
Tax Configuration Tips
Rate Setting:
- Use accurate tax rates
- Consider regional variations
- Update rates as needed
- Document tax policies
Display:
- Show tax calculation clearly
- Include rate information
- Explain any special rules
- Use clear labels
Organization:
- Group related items
- Keep tax fields near items
- Use consistent naming
- Consider tax categories
Compliance:
- Verify tax calculations
- Keep tax records
- Follow local regulations
- Consider tax zones
Testing
Always test your tax calculations:
- Verify calculations are correct
- Test different tax rates
- Check rounding behavior
- Test with various amounts
- Verify tax totals
Need Help?
Our support team is ready to assist with any questions about tax calculations!