How to Add Subscription Payment Item Fields in Paymattic?
In Paymattic, the Subscription Payment field allows you to create forms with Subscription Items for collecting Recurring Payments. This article will guide you on how to embed the Subscription Payment field to the WordPress Site through Paymattic.
WARNING
Subscription Payment is a premium feature and you need Paymattic Pro Plugin to use this field.
Adding Subscription Payment Field
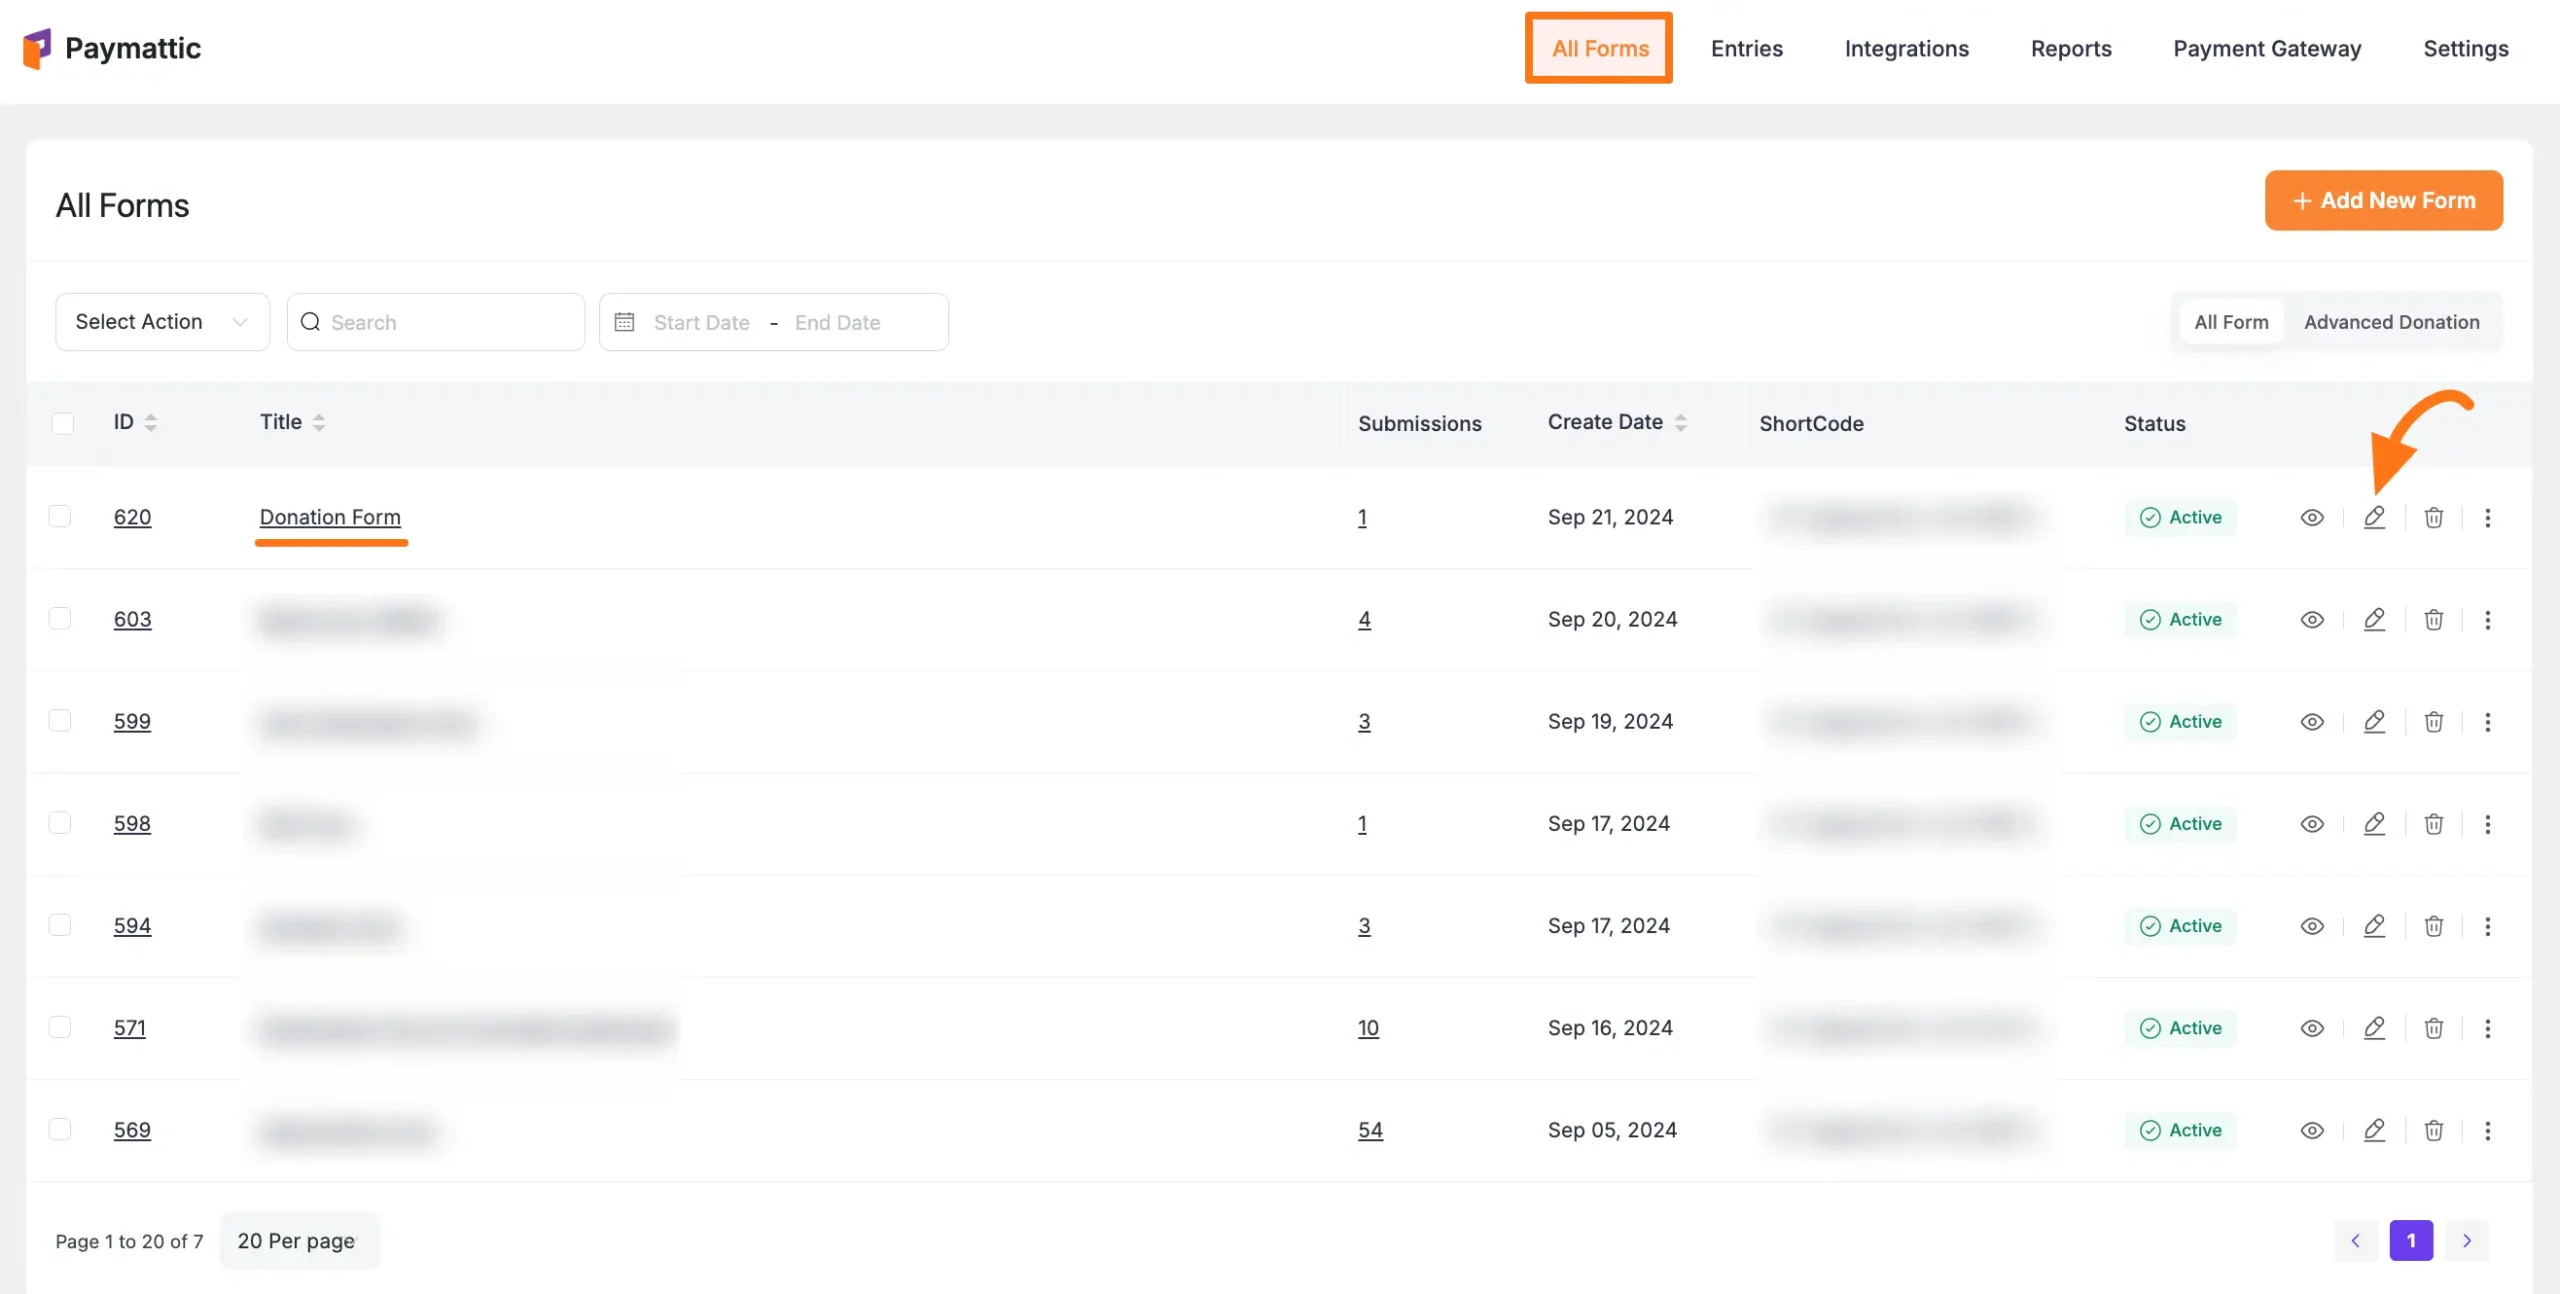
First, go to the All Forms section from the Paymattic Navbar, choose a Form, and click the Pencil/Edit icon to open the Editor page of that form.
For example, I choose an existing form to show the whole process.
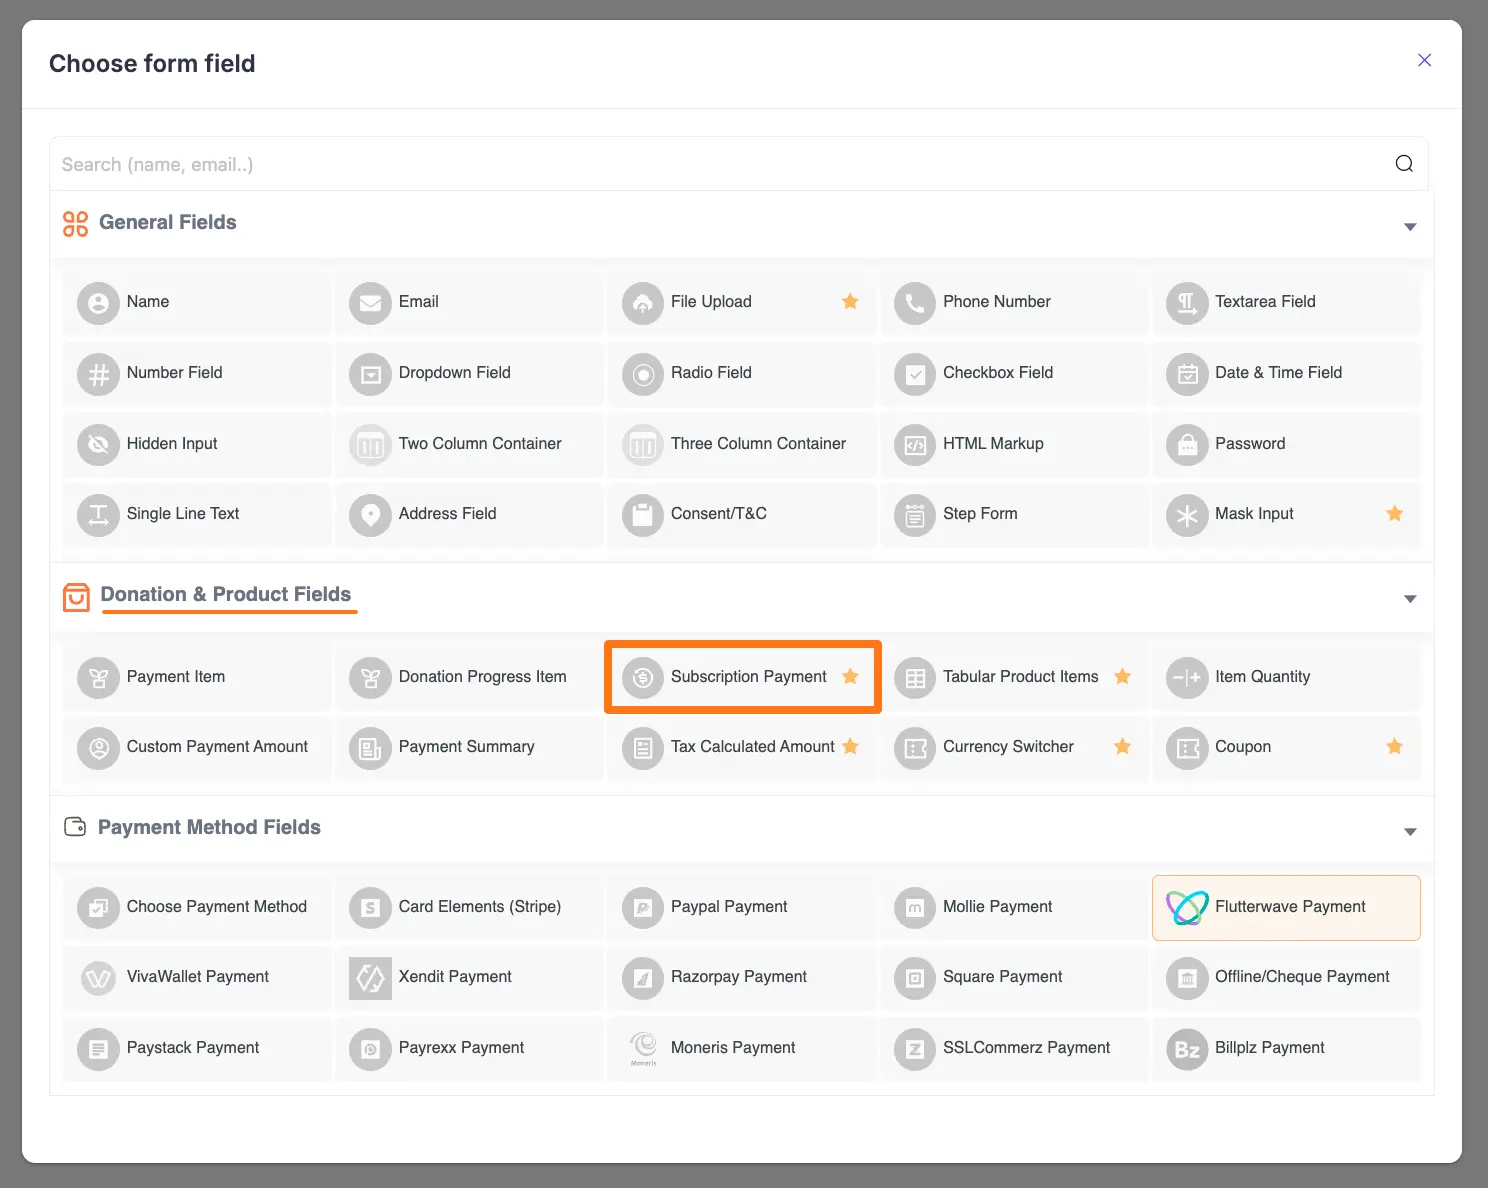
Once you open the Editor page, add the Payment Item fields by typing the "/" or clicking the Plus Icon placed at the bottom.
![]()
For example, I choose the Plus Icon option to select the Subscription Payment field under the Donation & Product Fields section from the Choose Form Field page.
TIP
Also, do not forget to add a Payment Method Field for collecting payments.
Editing/Customizing the Field
You can see the Subscription Payment and other necessary fields are added to the form.
TIP
You can edit their field name and settings. To learn more about form editing, read this Documentation.
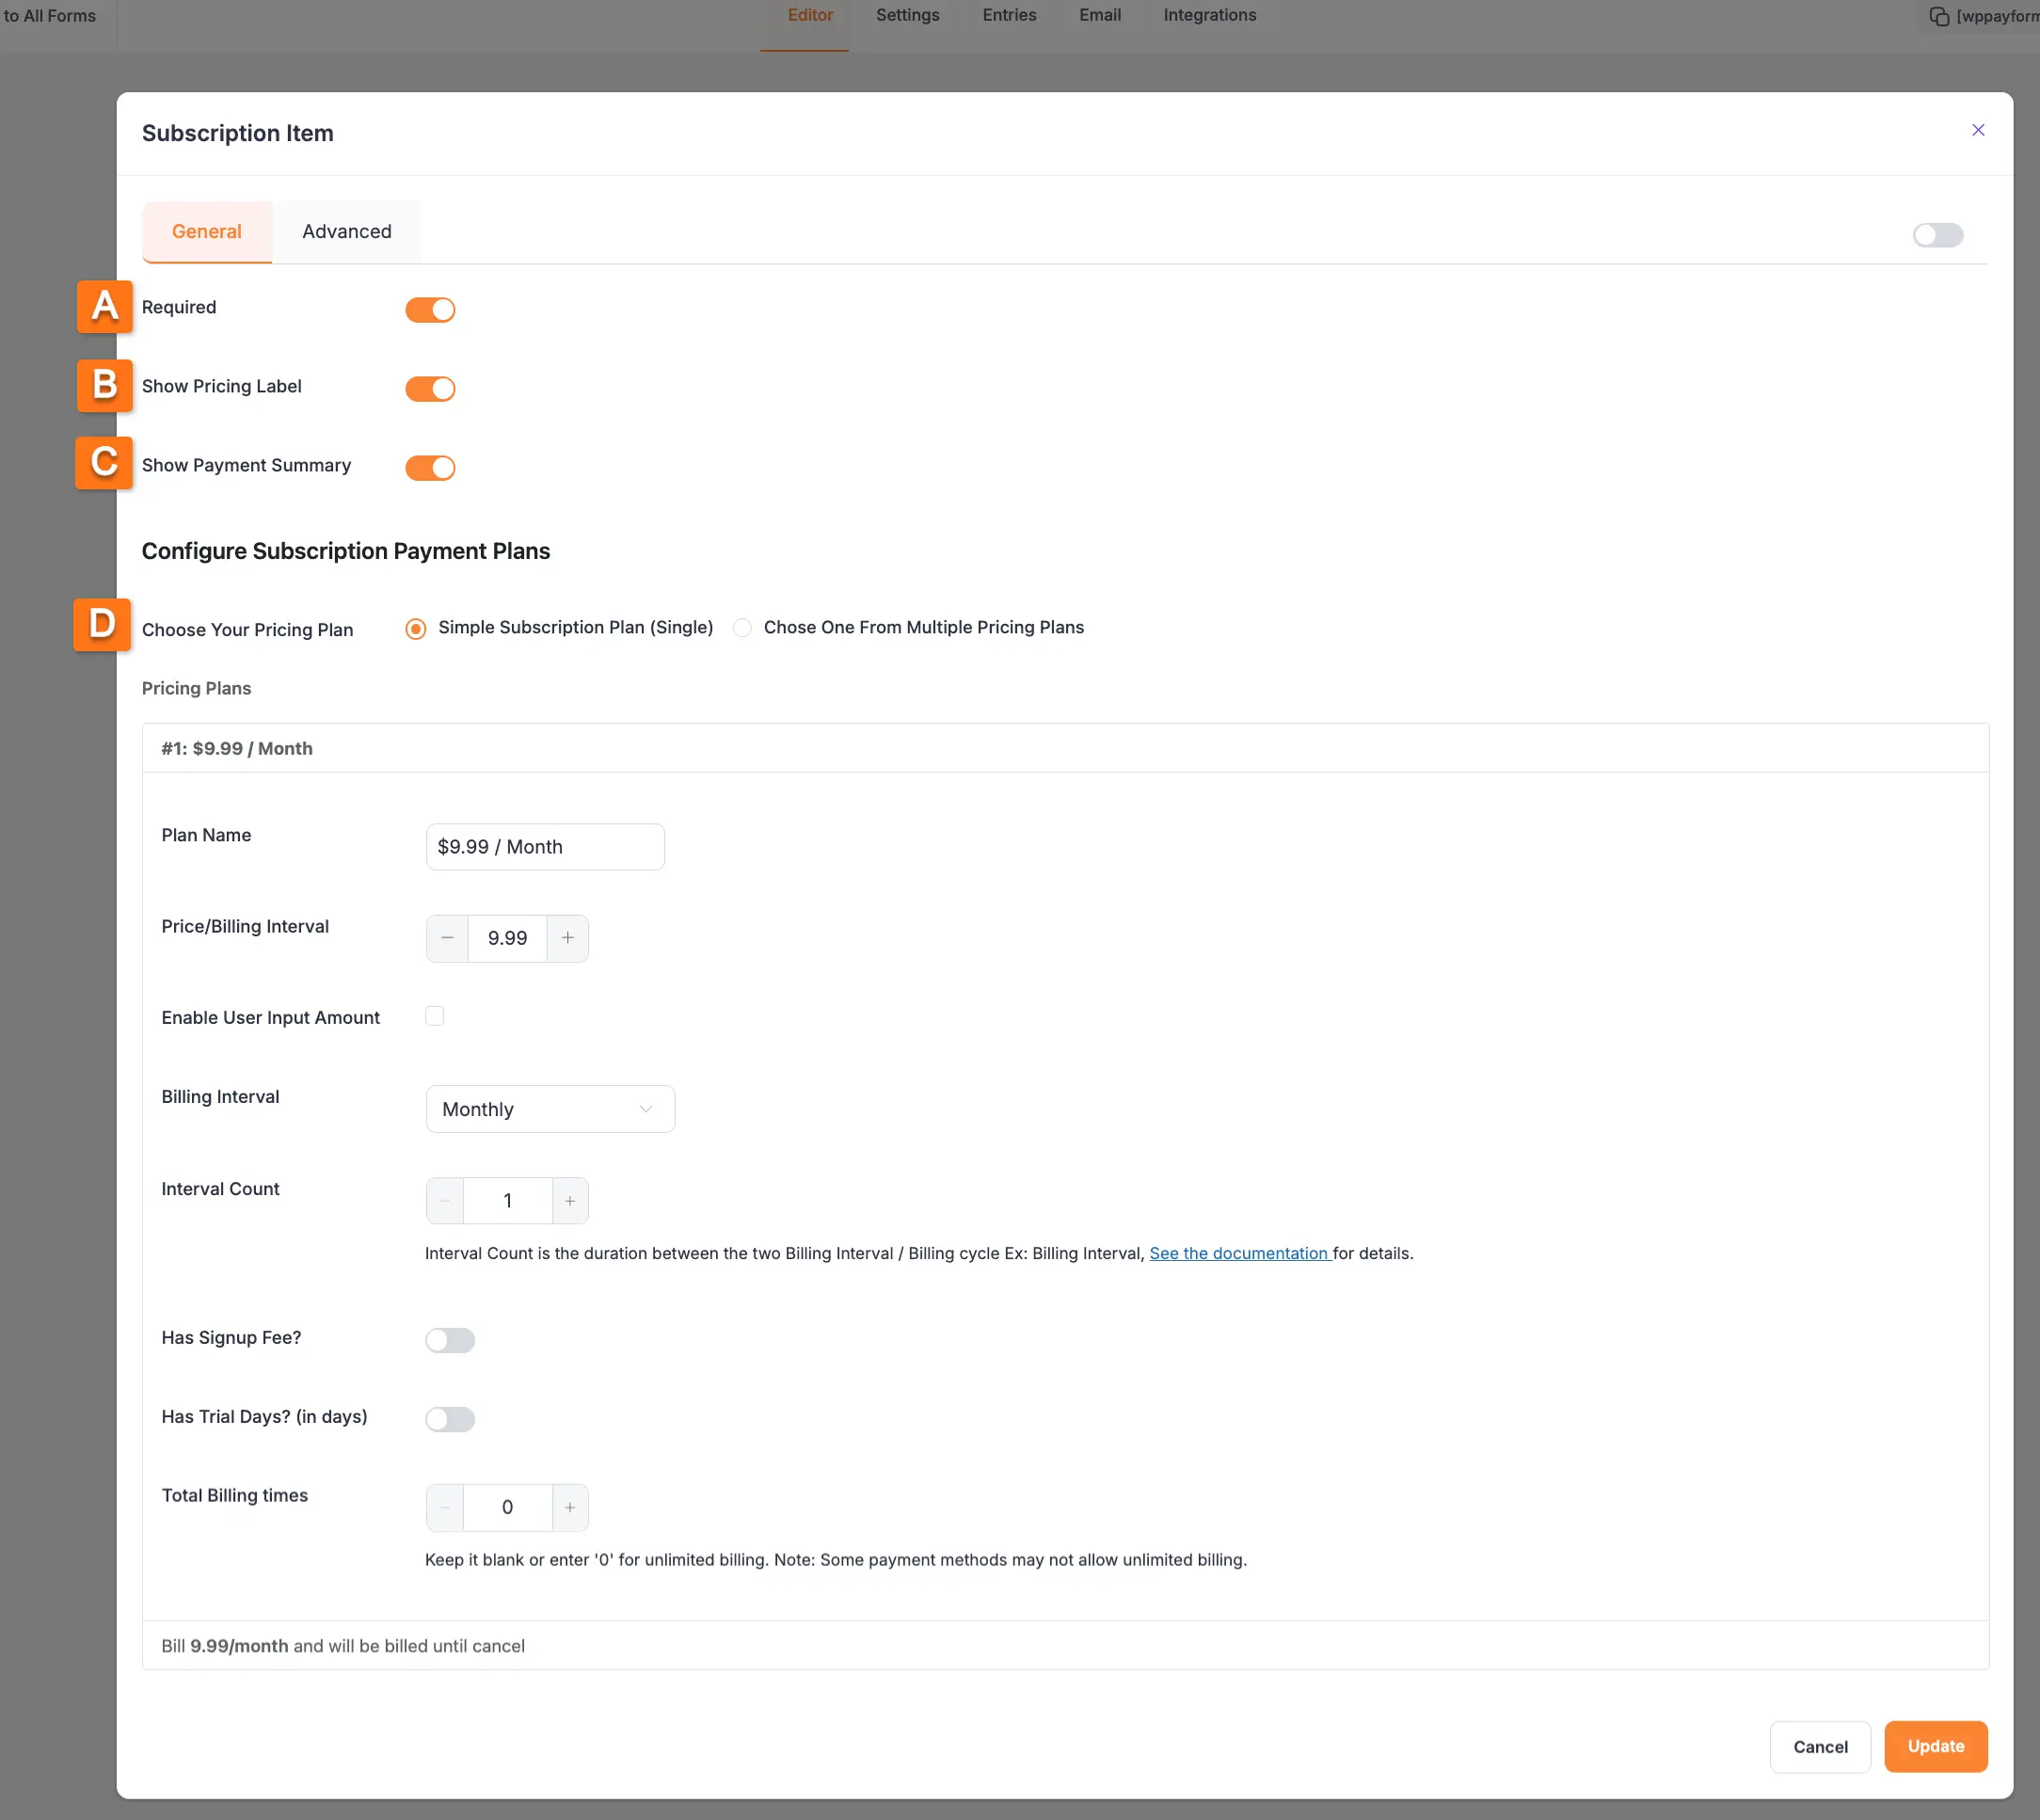
Specifically, to edit the Subscription Payment field according to your needs, click the Settings Icon from the right-side corner.
![]()
Now, a pop-up page will appear with various settings options for customizing the field.
General Settings
Under this tab, you will find all the General settings for customizing the field according to your needs.
All the Settings under the General tab mentioned above are briefly explained below –
A. Required
Enable this option to make this field mandatory for users to fill in for a successful submission.
B. Show Pricing Level
Enabling this option will show the pricing label in the form.
C. Payment Summary
This option will display the pricing plan's summary of Subscription Items in the form.
D. Choose Your Pricing Plan
Here, you will get two different options to set your pricing plan for the subscription payment. These are:
- Simple Subscription Plan (Single)
- Choose one from Multiple Pricing Plans
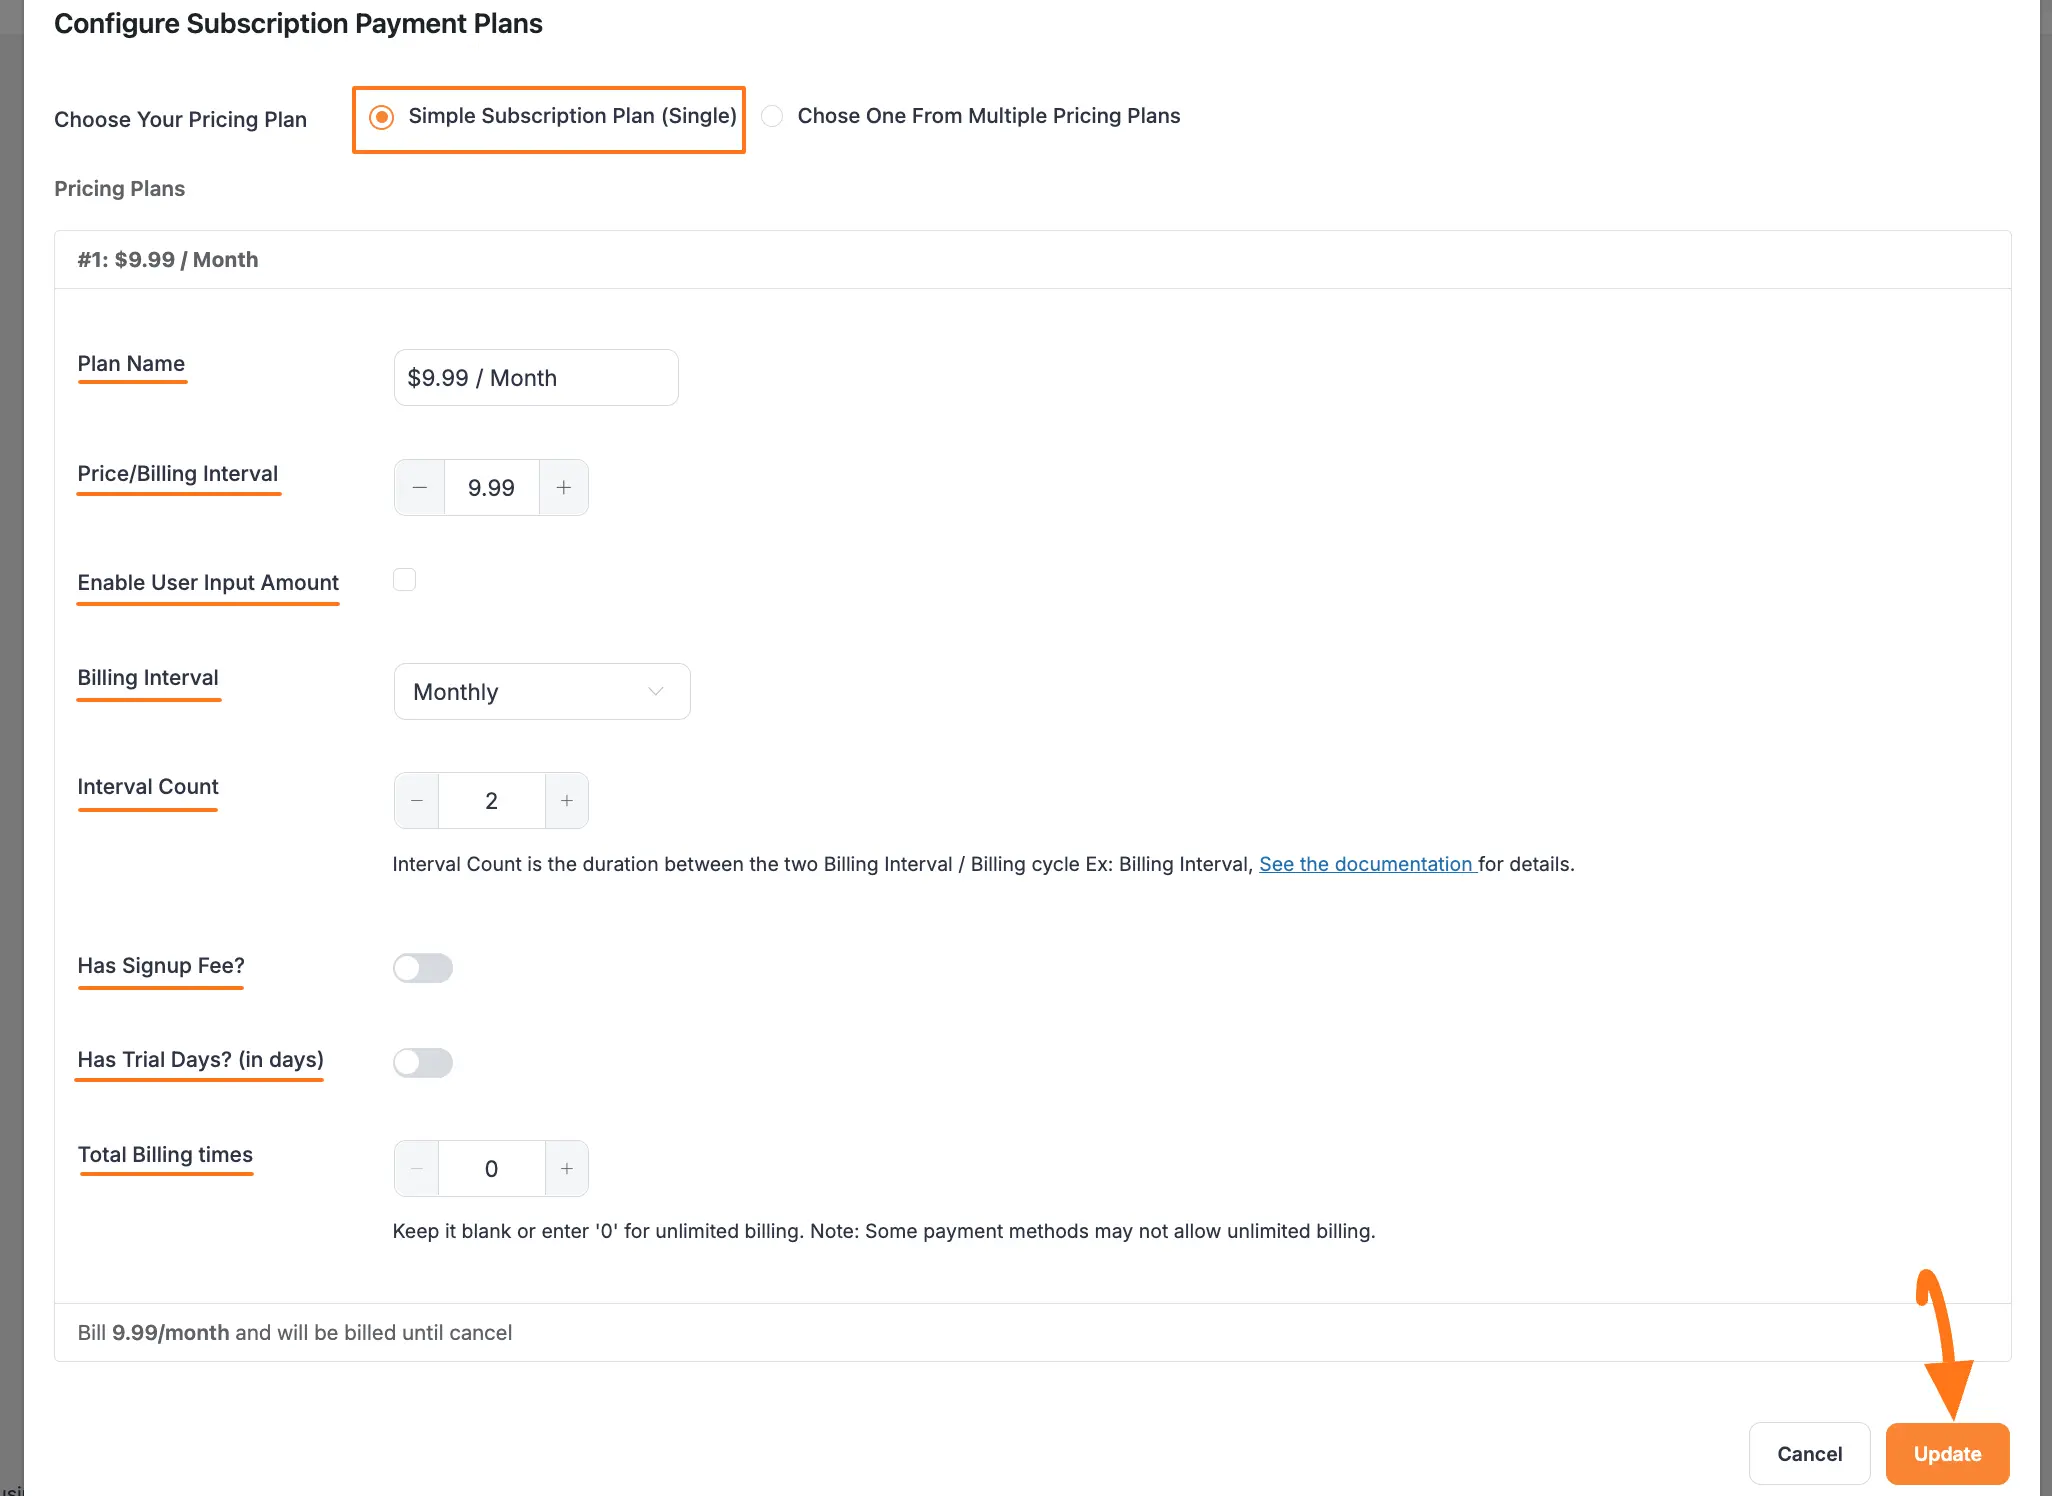
1. Simple Subscription Plan (Single)
Select this plan if you want to offer one pricing plan to your user for collecting payments.
Plan Name: Give the name of your plan in this field.
Price Billing/Interval: Here, set the price for your subscription.
Enable User Input Amount: Enable this feature to customize the pricing plan by setting a fixed Minimum and Default amount, along with a Label for this amount.
Billing Interval: Here, set the billing interval as Daily, Weekly, Fortnightly, Monthly, Quarterly, Half-Yearly, or Yearly) for the subscription.
Interval Count: This feature enables you to specify the number of intervals between subscription billings allowing you to customize your Billing Interval that suits your needs.
For example, by choosing a Monthly Billing Interval and setting the Interval Count to 2, subscription bills will occur every 2 months.
WARNING
Remember, this Interval Count works only for Stripe and PayPal payment methods. For Stripe, a maximum of 3 Years / 156 Weeks / 36 Months interval is allowed. And, for PayPal, a maximum of 1 Year / 52 Weeks / 12 Months interval is allowed."
Has Signup Fee?: Enable this option if you want to set a custom amount as a Signup Fee. This amount will be deducted from customers' accounts once they sign up on your website.
Has Trial Days?: Enable this option to offer users a trial period without a subscription fee.
Total Billing Times: Here, you can set how many times your website will pull funds from customers' accounts. Keep the field blank or put 0 (Zero) for billing for an unlimited time.
Once you complete the setup, click the Update button to save all your settings and changes.
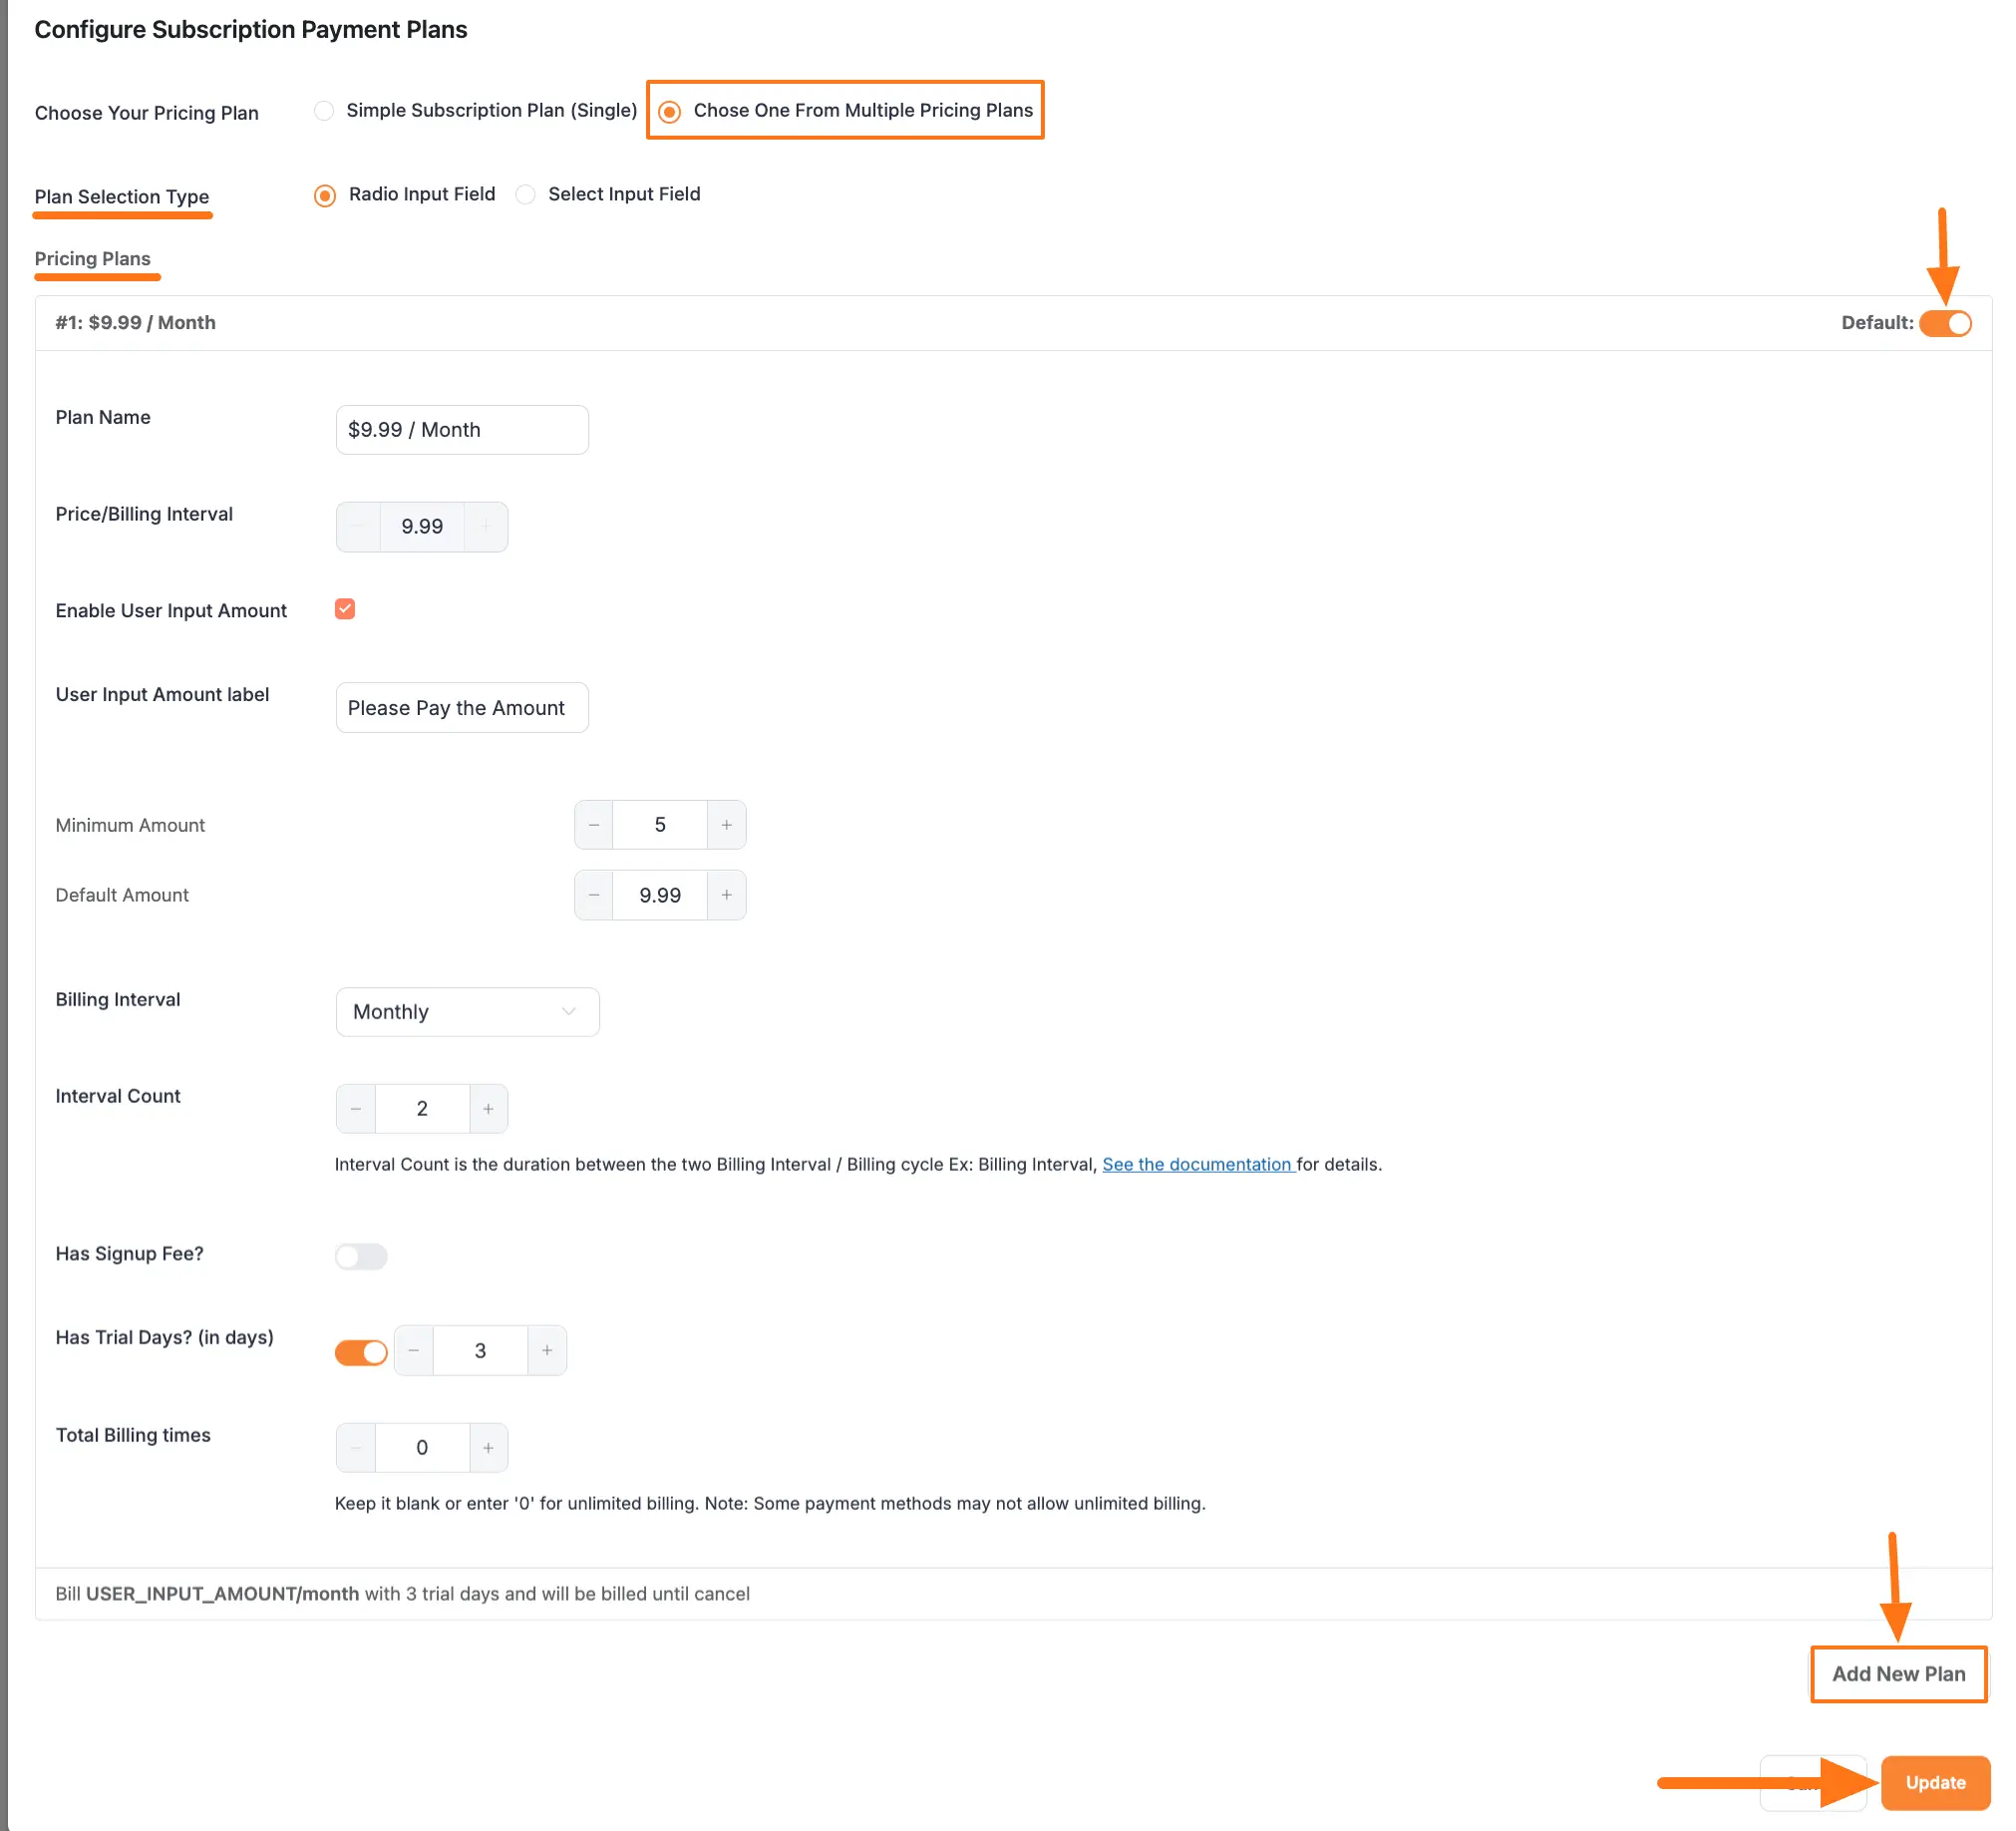
2. Choose One from Multiple Pricing Plans
Select this option if you want to offer multiple pricing plans to your users for choosing one plan when making a subscription.
Plan Selection Type: With this option, you can set whether you want to set the item selection type as a Radio button or Select (dropdown list).
Pricing Plan: The pricing plan of this option exactly works similarly to the pricing plan of Simple Subscription Plan (Single). To learn all the settings of the Pricing Plan, click here.
WARNING
To add multiple pricing plans, click the Add New Plan button and to delete any item, click the Trash icon in the right corner of the section.
Also, If you want a pricing plan to be selected by default from all your pricing plans, enable the Default Toggle for that plan.
Once you are done, click the Update button to save all your settings and changes.
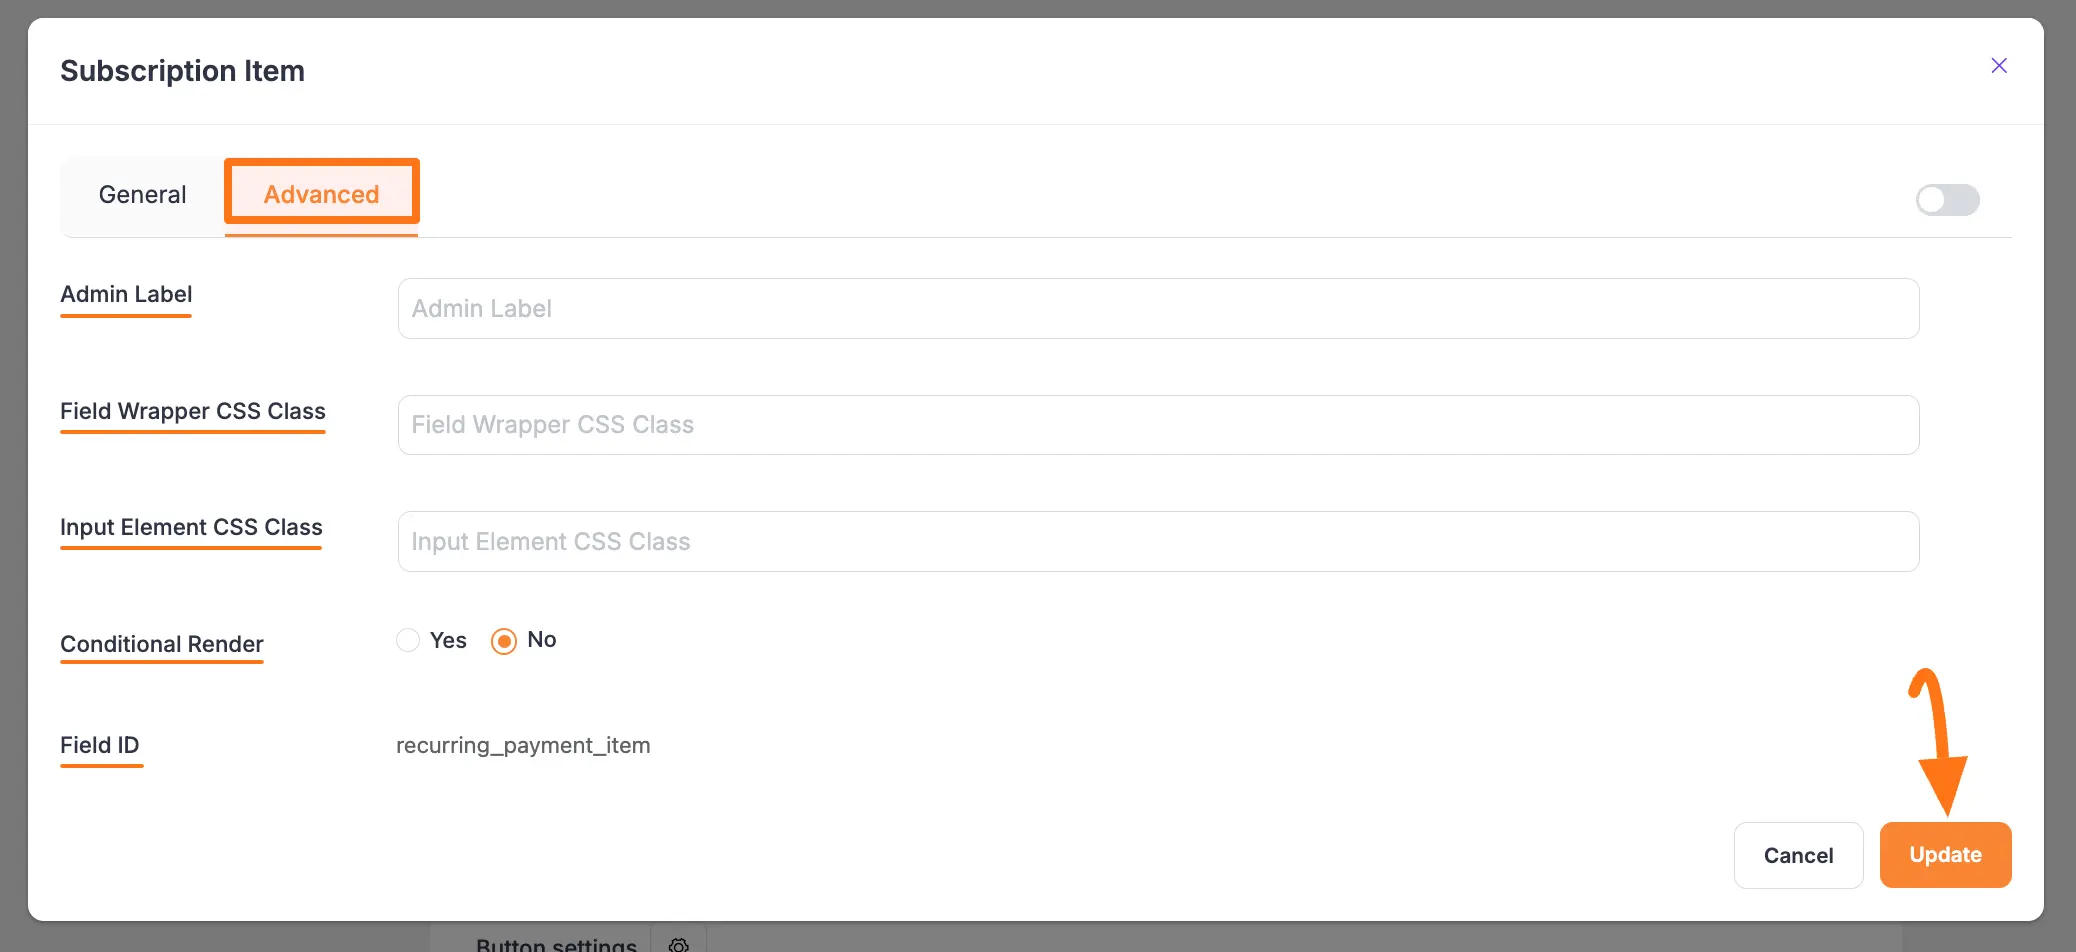
Advanced Settings
Once you complete the General settings, go to the Advanced tab, and you will find some advanced settings for your Payment Item field. These are:
Admin Label: This label is used for the admin wants to see the field's label from the back end.
Field Wrapper CSS Class: This is used for adding a Custom CSS/JS for an entire field of a specific form using the Field Wrapper CSS Class element. To learn more, click here.
Input Elements CSS Class: This is used for adding a Custom CSS/JS for a specific input field of a form using the Input Elements CSS Class element. To learn more, click here.
Conditional Render: You can set conditional logic to display the field in the form that will be triggered by specific actions taken on a previous input field. To learn more about conditional renderings, click here.
Field ID: This option is used for adding or tracking form fields. Plus, creating the custom CSS/JS for a specific form field.
Once you finish, click the Update button to save all your configuration.
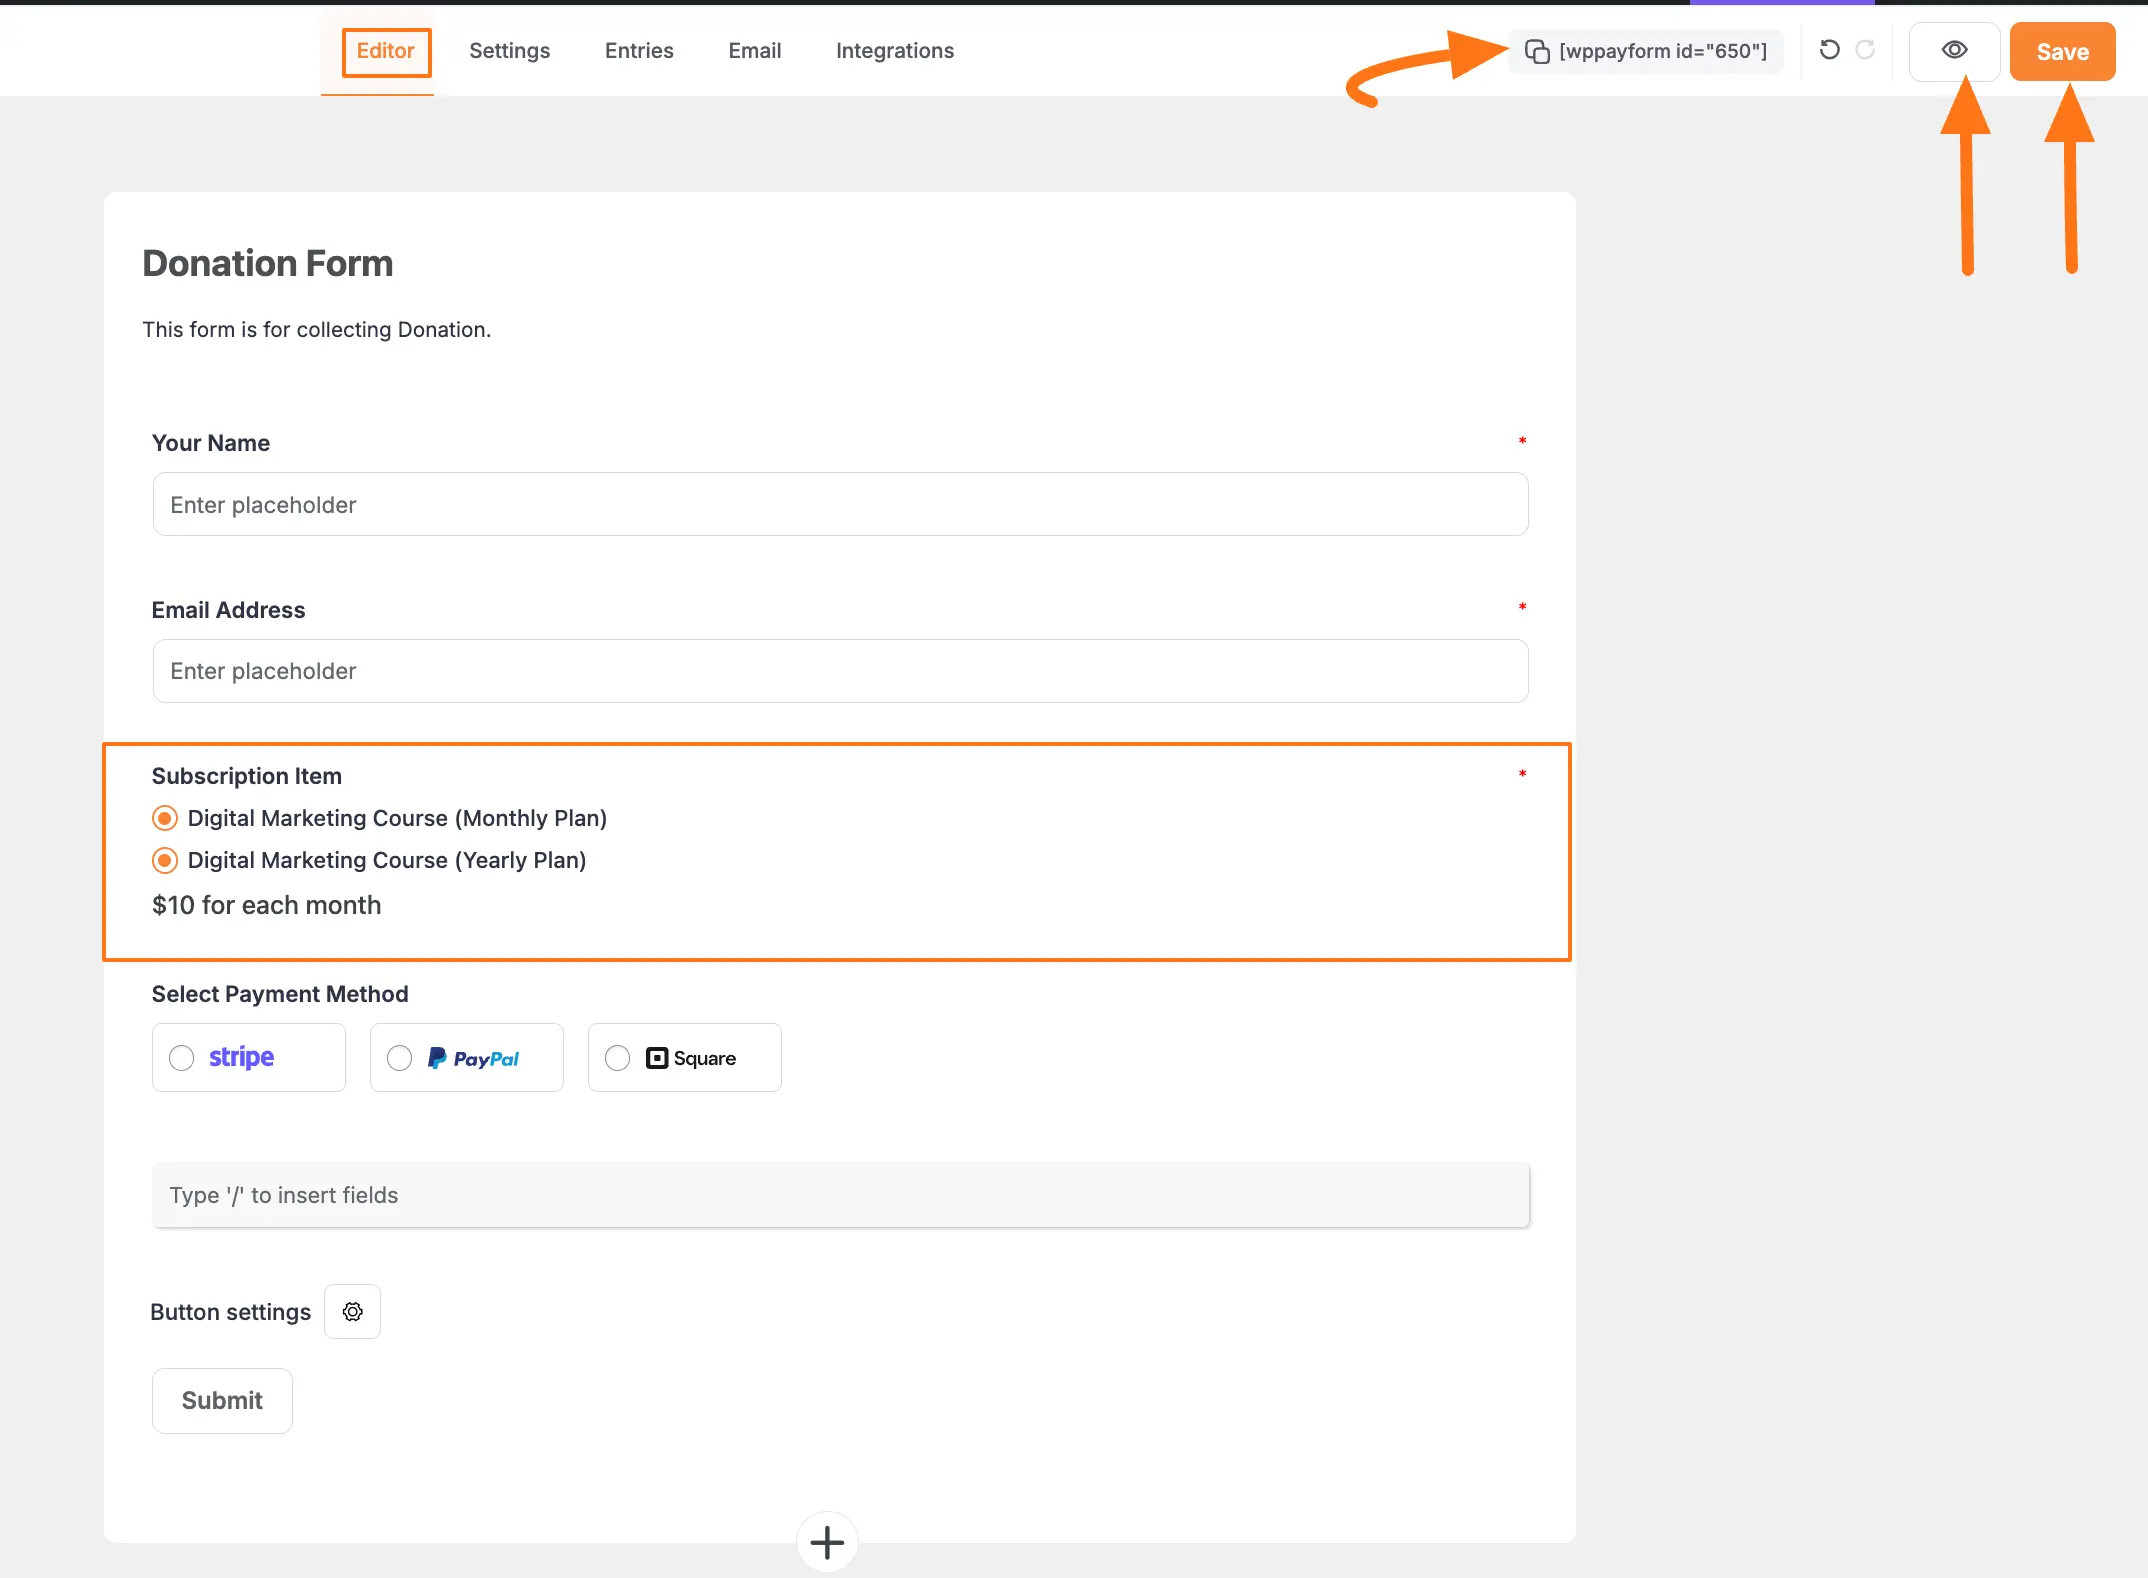
Embedding Form into Frontend
Here, you can see the Subscription Payment field and other necessary fields are added to the form.
Now, to embed and display the form on a specific Page/Post, copy this Shortcode and paste it into your desired Page/Post.
Once you complete the edit, press the Save button to save all the changes you made. And, to see the Preview of the form, click the Eye icon.
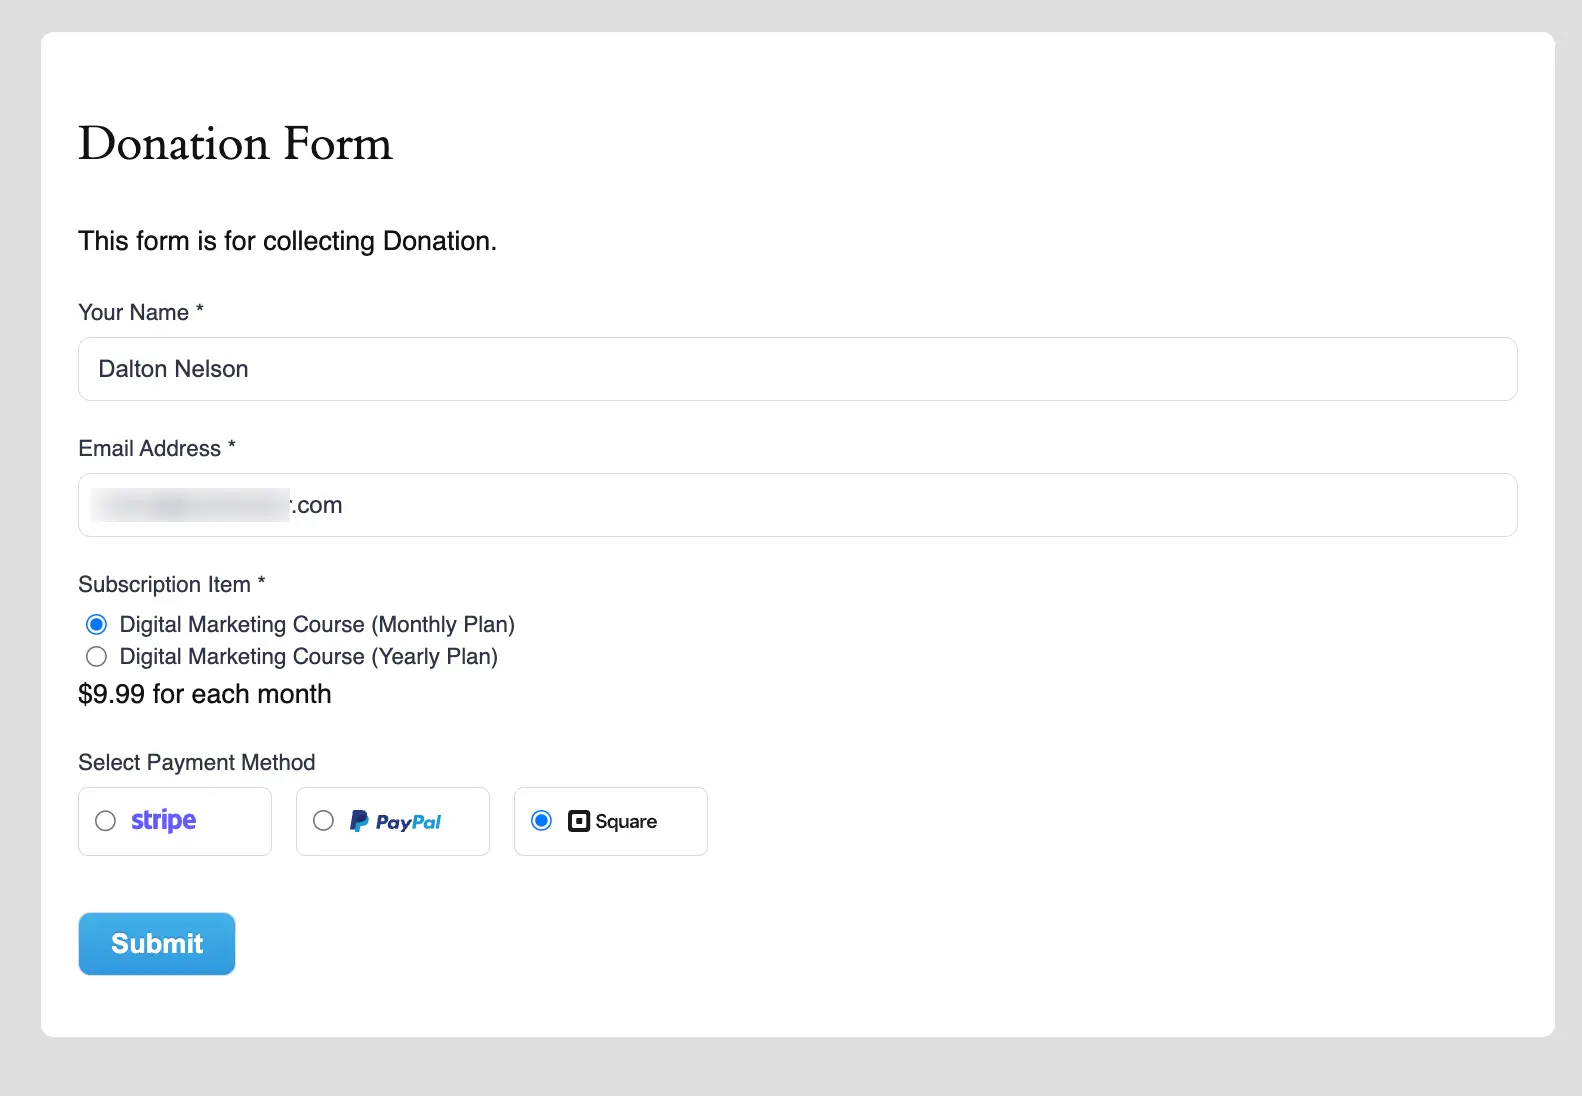
Preview of Subscription Payment field
Here is the preview of the Subscription Payment field in a Form.
This way you can easily add the Subscription Payment field in Paymattic Forms! If you have any further questions, concerns, or suggestions, please do not hesitate to contact our @support team. Thank you.