How to Change Currency Settings in WordPress with Paymattic
Paymattic allows you to set up the currency for your payment gateways, for local or global use, and change the existing currency settings for an individual Paymattic Form. This article will guide you through setting up the currency settings for all payment gateways or changing the existing currency settings for a specific Paymattic Form.
Currency Settings Globally for All Forms
First, go to Settings from the Paymattic Navbar, click the General Settings tab from the left sidebar, and four major settings sections will appear. These are:
Available sections:
- Currency Settings
- Currency Switcher Settings
- Honeypot Security
- Other Settings
Note
Global settings apply to all forms except Currency Switcher, which is only for donation forms.
Once you are done with the customization, press the Save Settings button and all your changes will be saved.
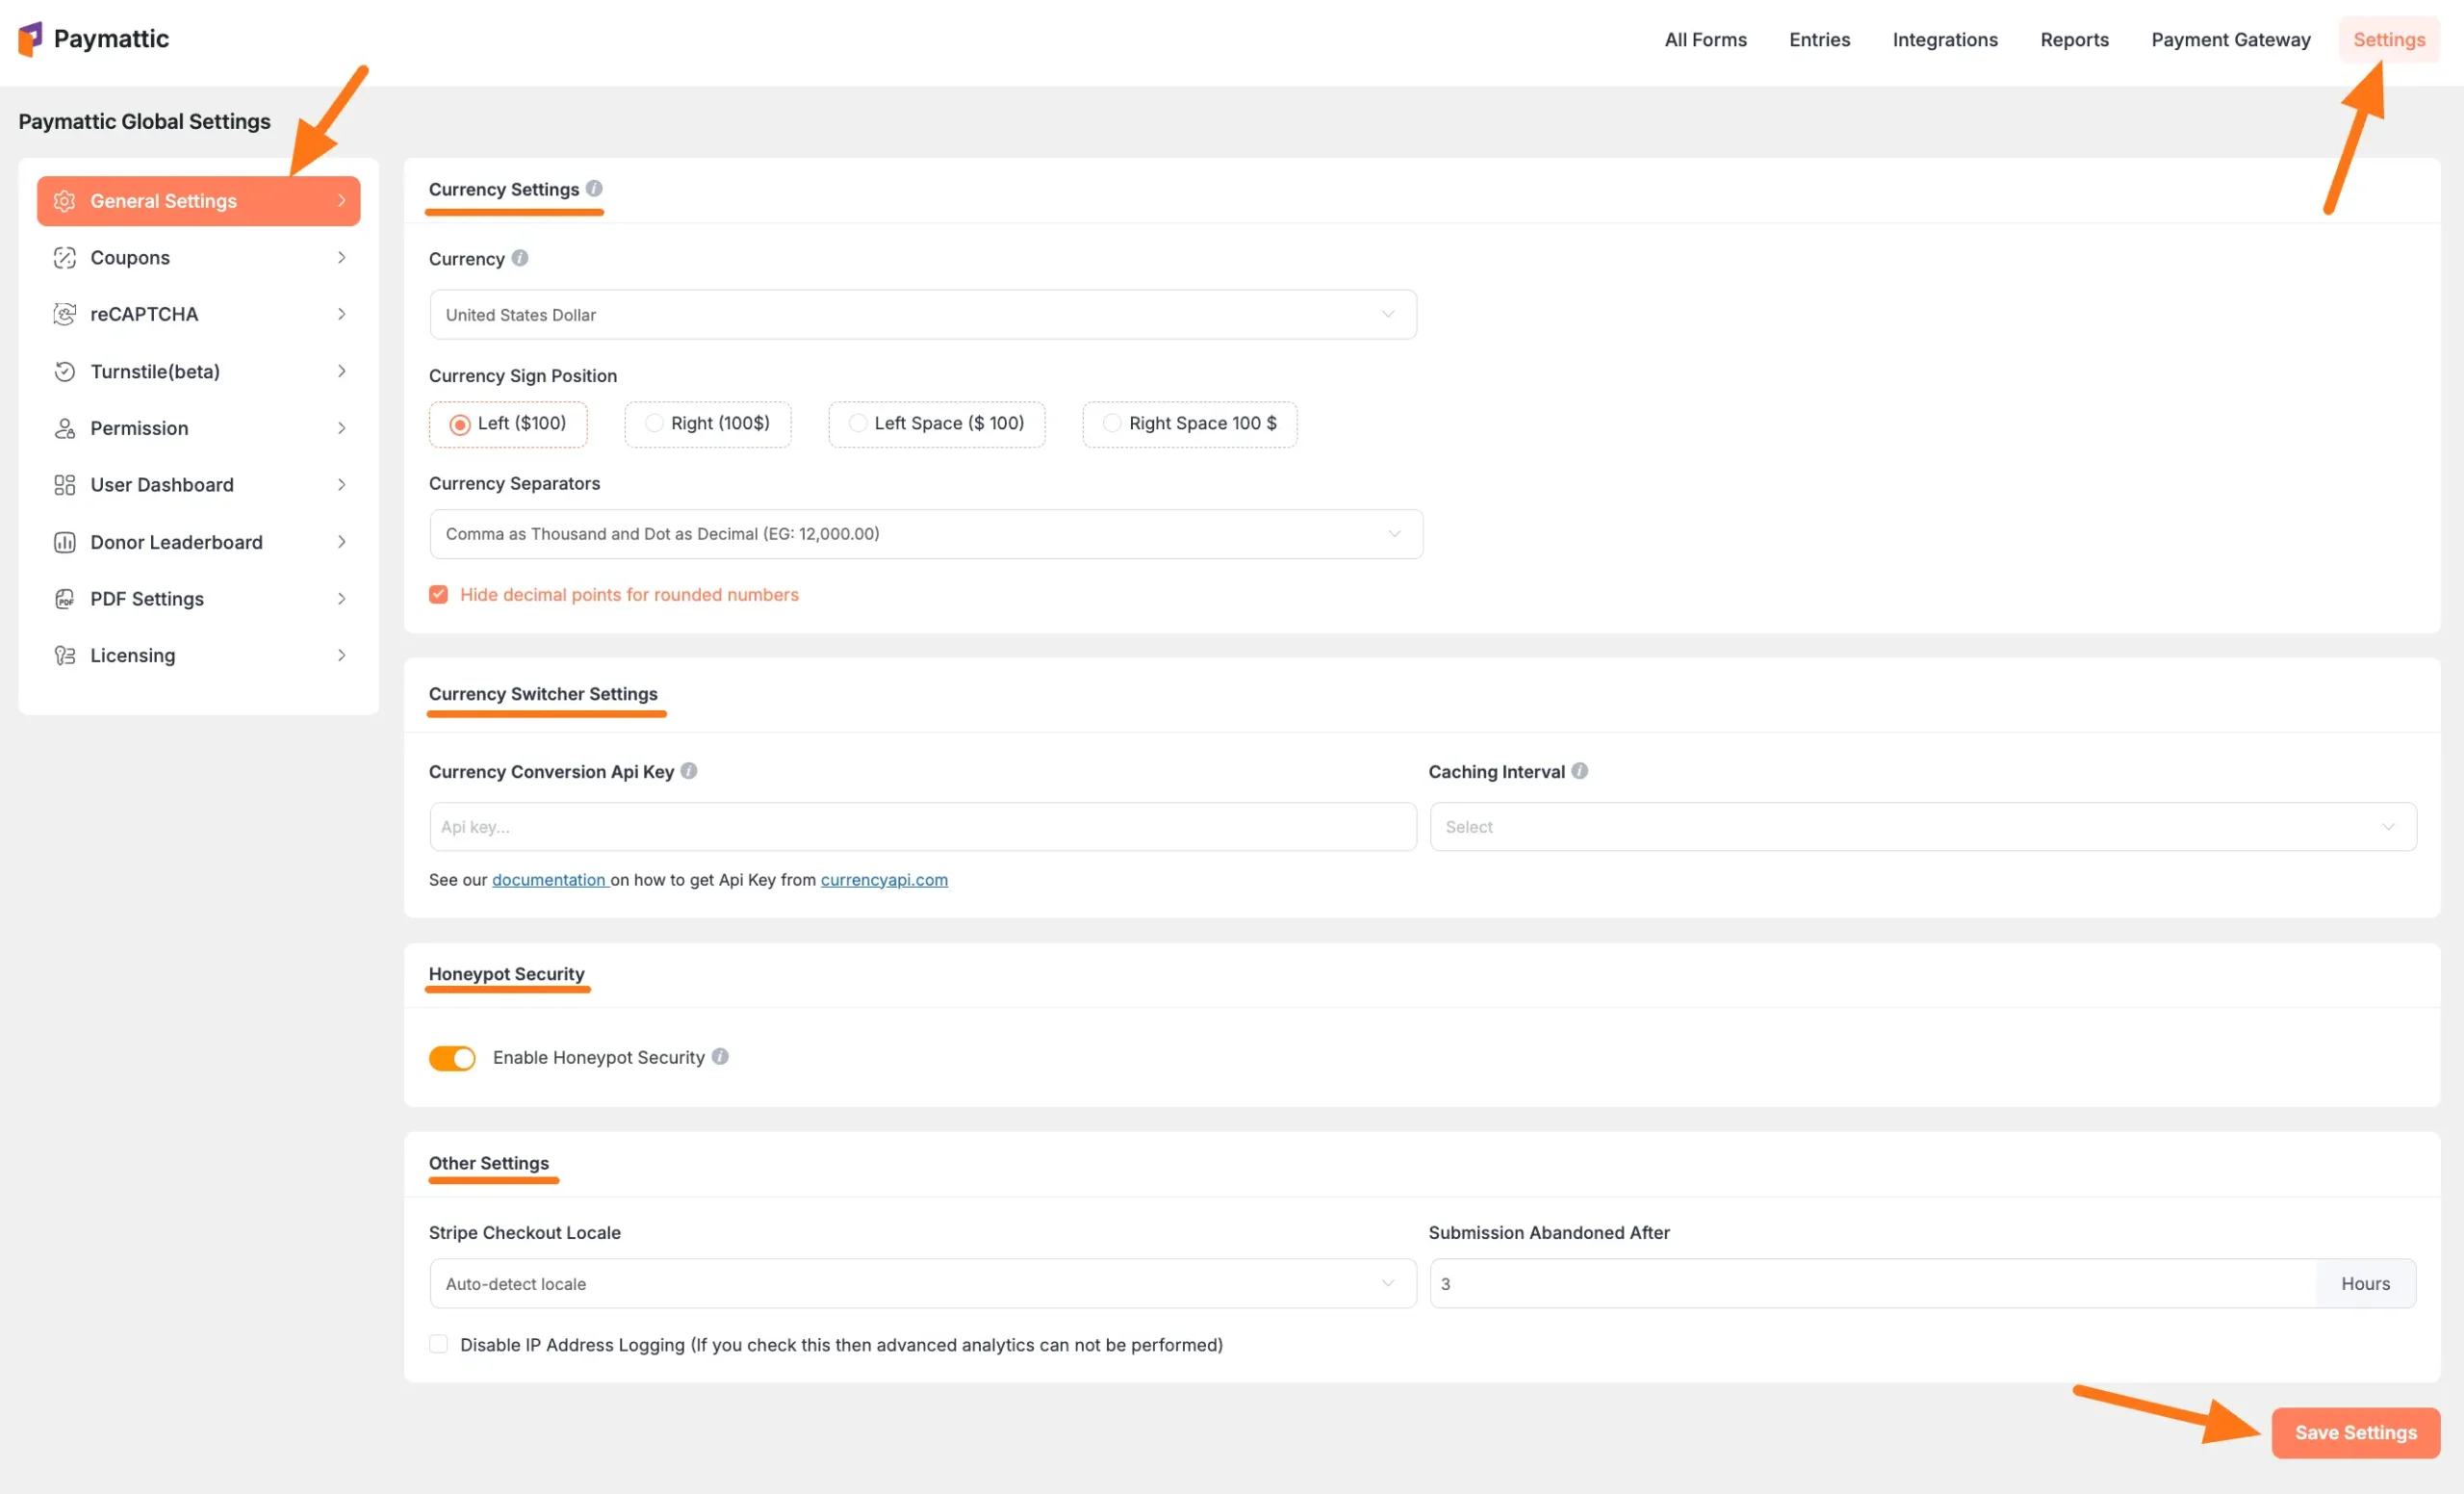
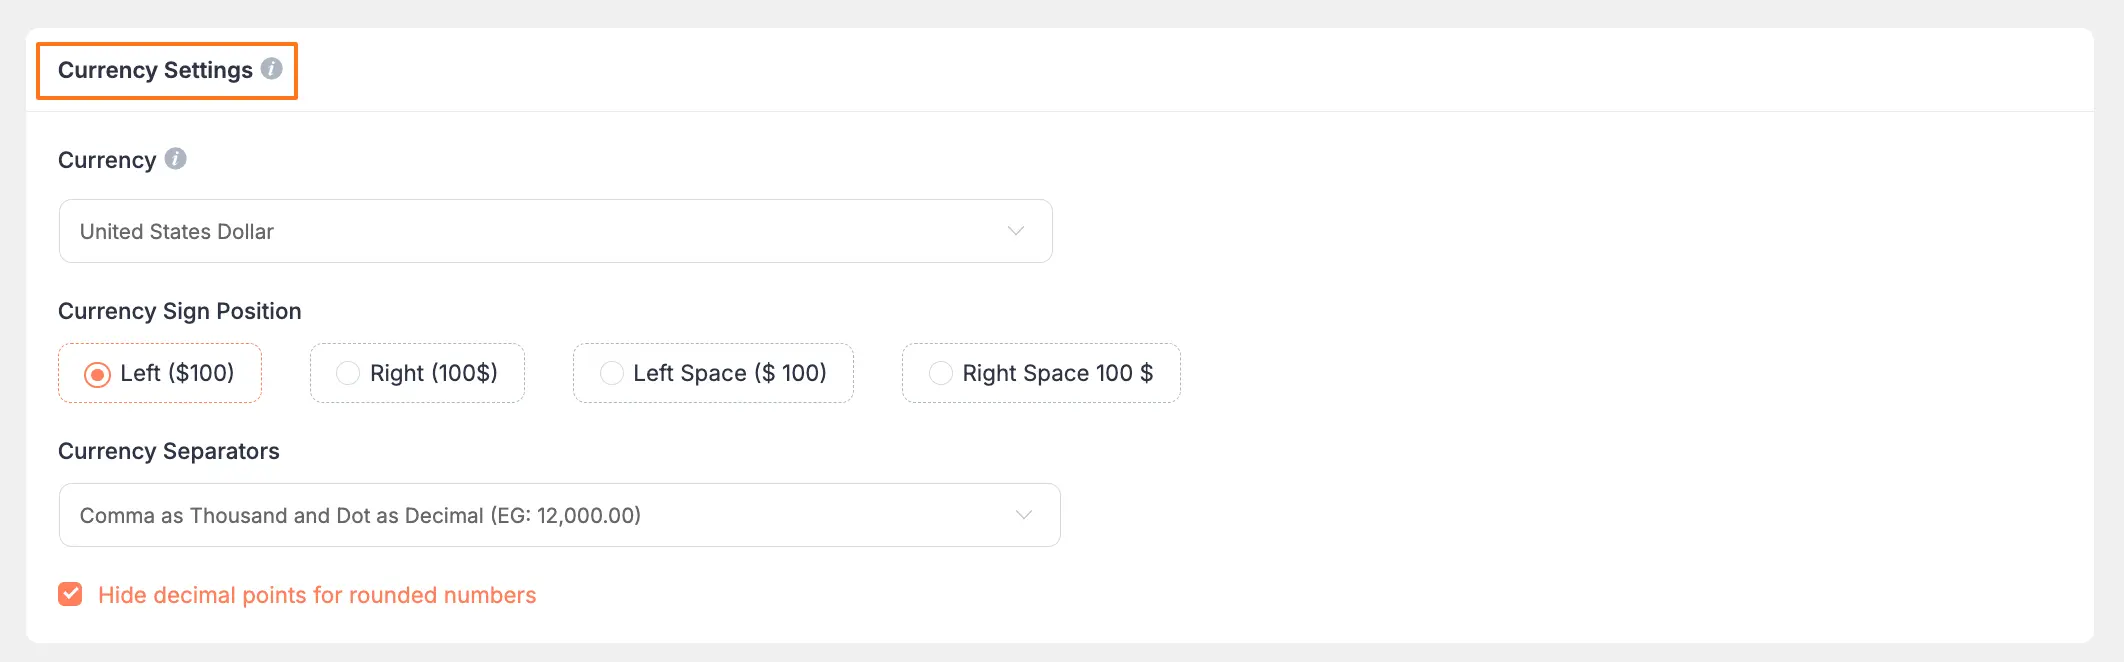
Currency Settings
This setting will help you to set up your currency type and how you want to display the currency on your payment collection forms for your payment gateways.
- Currency: Here, you can set the currency type from the dropdown list according to your requirements, e.g., I choose the United States Dollar.
- Currency Sign Position: Here, you can set the currency sign position according to your requirements by clicking the checkbox, e.g., I choose the Right(100$) option.
- Currency Seperator: Here, you will get two types of currency separators from the dropdown list. Choose anyone according to your needs. Hide decimal points for rounded numbers: Check this box if you don’t want decimal points if the currency figure is rounded.
WARNING
Remember, this Currency Settings will function generally for all Paymattic Forms.
Currency Switcher Settings
Paymattic’s Currency Switcher is a premium feature that allows donors to choose from over 135 currencies right within the donation form.
Note
Remember, this Currency Settings will function only for all Paymattic’s Donation Forms. To learn how to add the Currency Switcher feature in WordPress Forms through this Currency Switcher Settings, read this Documentation.

Honeypot Protection
Honeypot is a clever cybersecurity strategy that acts like a digital decoy, designed to lure cybercriminals into a trap and keep them away from legitimate targets. Enable this setting if you want Paymattic to verify honeypot security for all Paymattic Forms.
NOTE
To learn about Honeypot Security in detail, read this Article.
Additional Settings
Here you will find three more settings. These are:
- Stripe Checkout Locale: This is used to determine the language displayed on the checkout page for your Stripe Users (i.e., setting the locale to Dutch will show the Stripe Checkout page in Dutch). We recommend selecting the Auto-detect locale to automatically detect the user’s language based on their locality.
- Submission Abandoned After: Here, you can set the duration for a form’s submission/entry to include in the abandoned list. For example, if a form entry has a “pending” payment status for 3 hours, it will be added to the abandoned list while still showing as pending. You can view the abandoned entries in the list.
- Disable IP Address Logging: If you disable this option, the IP addresses of your users will not be tracked by your site anymore.

Changing Currency Settings for Specific Forms
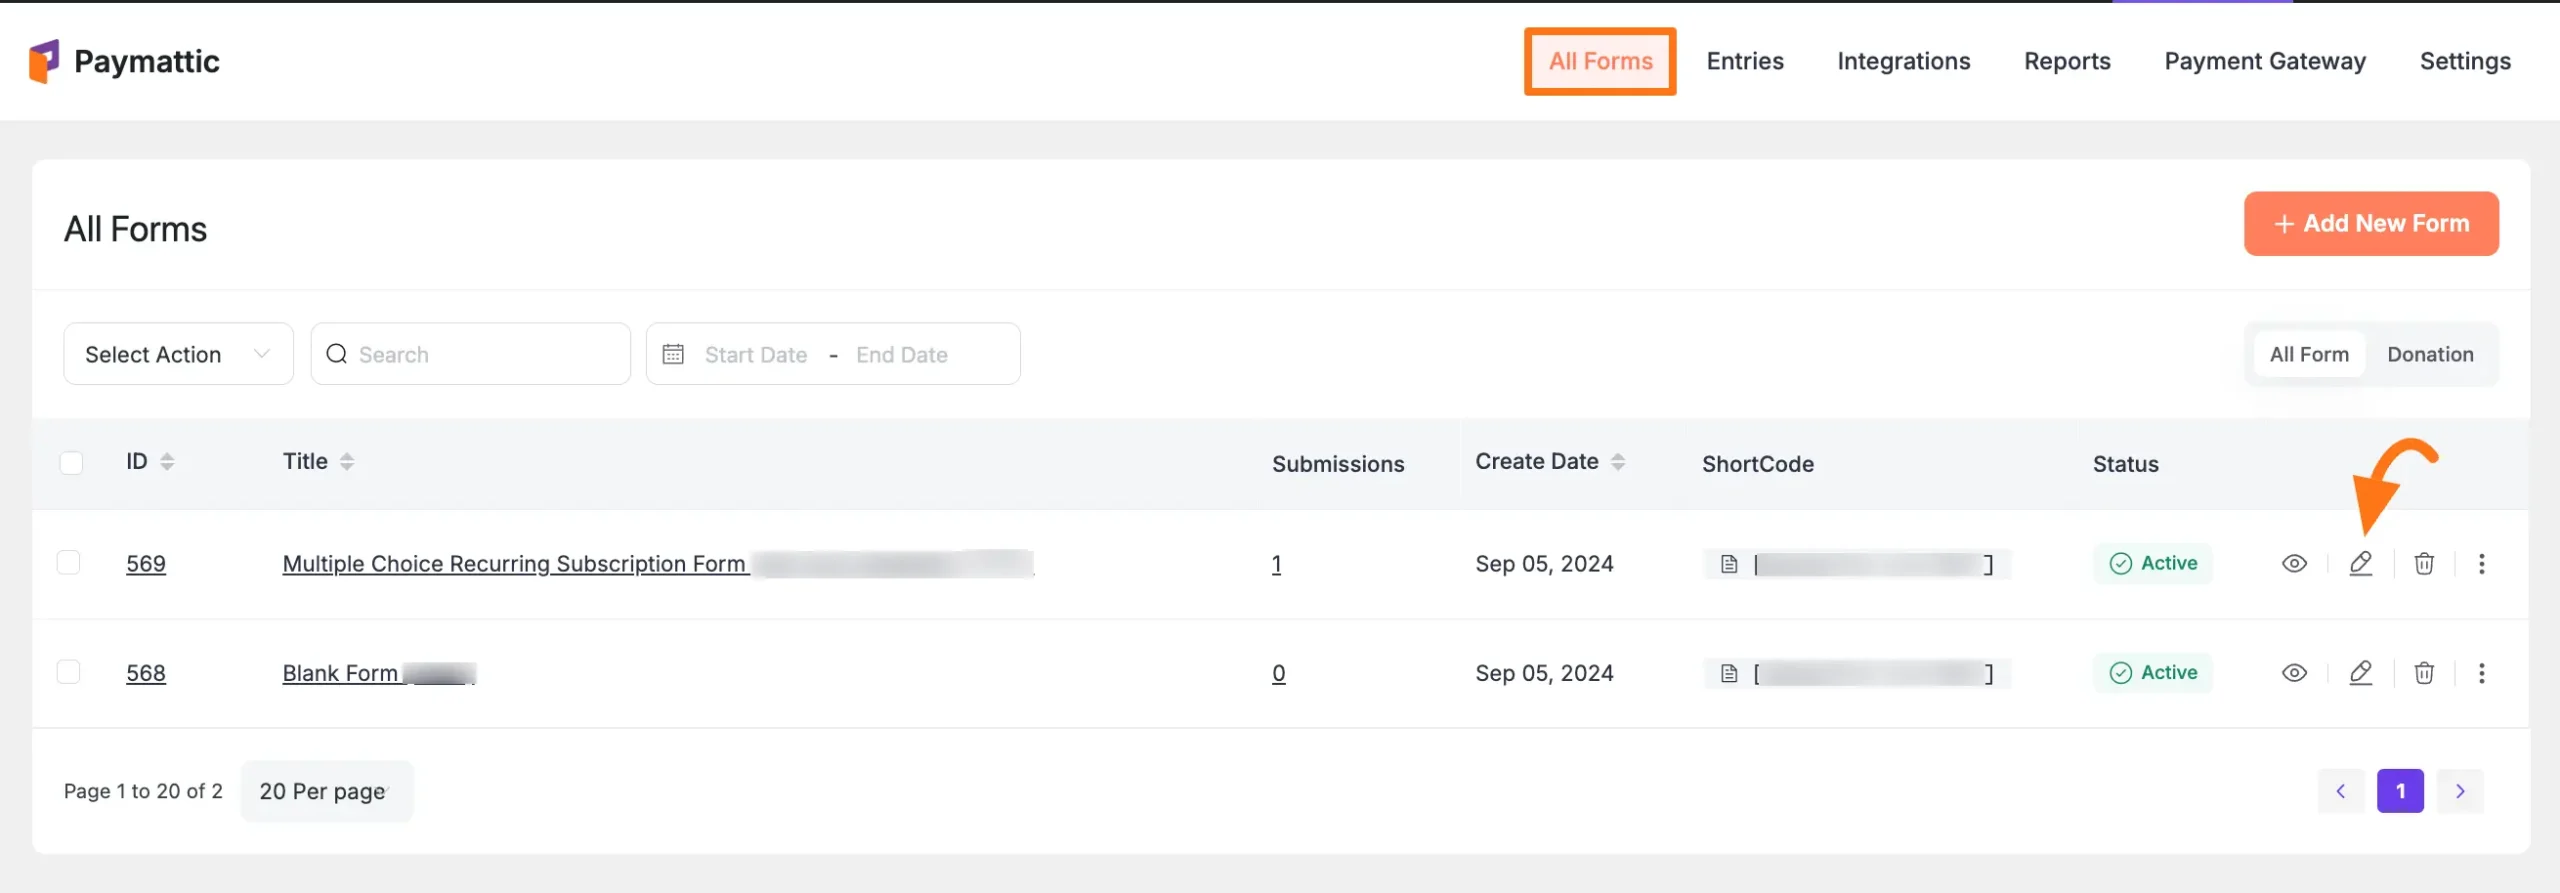
First, go to the All Forms from the Paymattic Navbar, choose the form you wish to work on, and click the Pencil/Editor icon.
New Forms
Need to create a form? See our guides for creating from scratch or using templates.
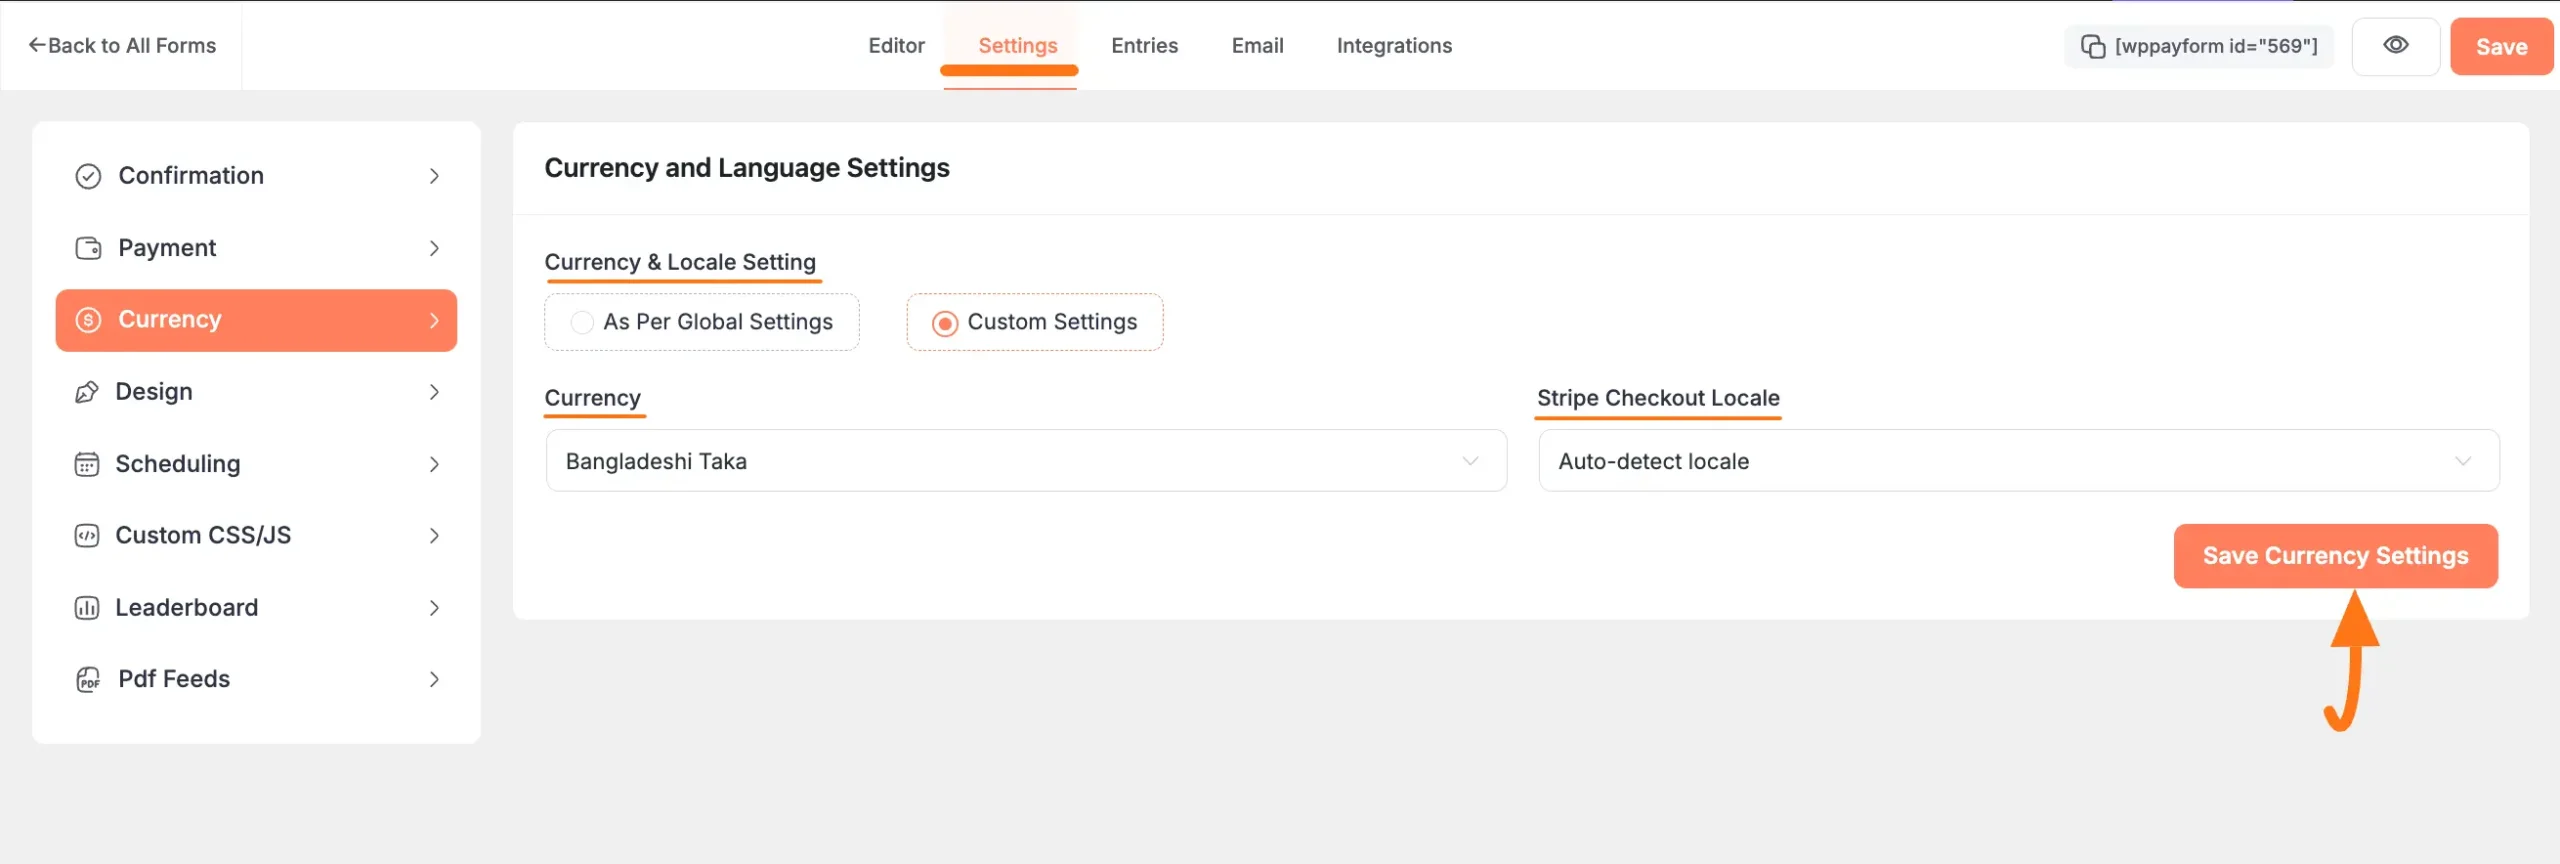
Now, go to the Settings section, open the Currency tab, and you will get the settings options to change the currency settings for this form. These are:
- Currency & Locale Setting: Here, you will get two options; As Per Global Settings (to keep the general settings same for this form) and Custom Settings (to change the currencies). You must click the Custom Settings button to change the Currency settings.
- Currency: Here, you can set the currency type from the dropdown list according to your need only for this individual form.
- Stripe Checkout Locale: Here, you can select the language displayed on the checkout page for your Stripe Users only for this form.
Once you are done with the customization, press the Save Currency Settings button and all your changes will be saved for this form.
Need Help?
If you have any questions, concerns, or suggestions, please contact our support team.