How to Integrate Viva Wallet With Paymattic
With Paymattic, you can easily integrate the Viva Wallet payment method to accept payments. This article will guide you through configuring Viva Wallet on your WordPress Site with the Paymattic plugin.
Prerequisites
To get access to the Viva Wallet payment gateway, you need the Paymattic Pro Plugin.
Enabling Viva Wallet Payment Method
To learn how to enable the Viva Wallet payment gateway through Paymattic, follow the steps with screenshots below:
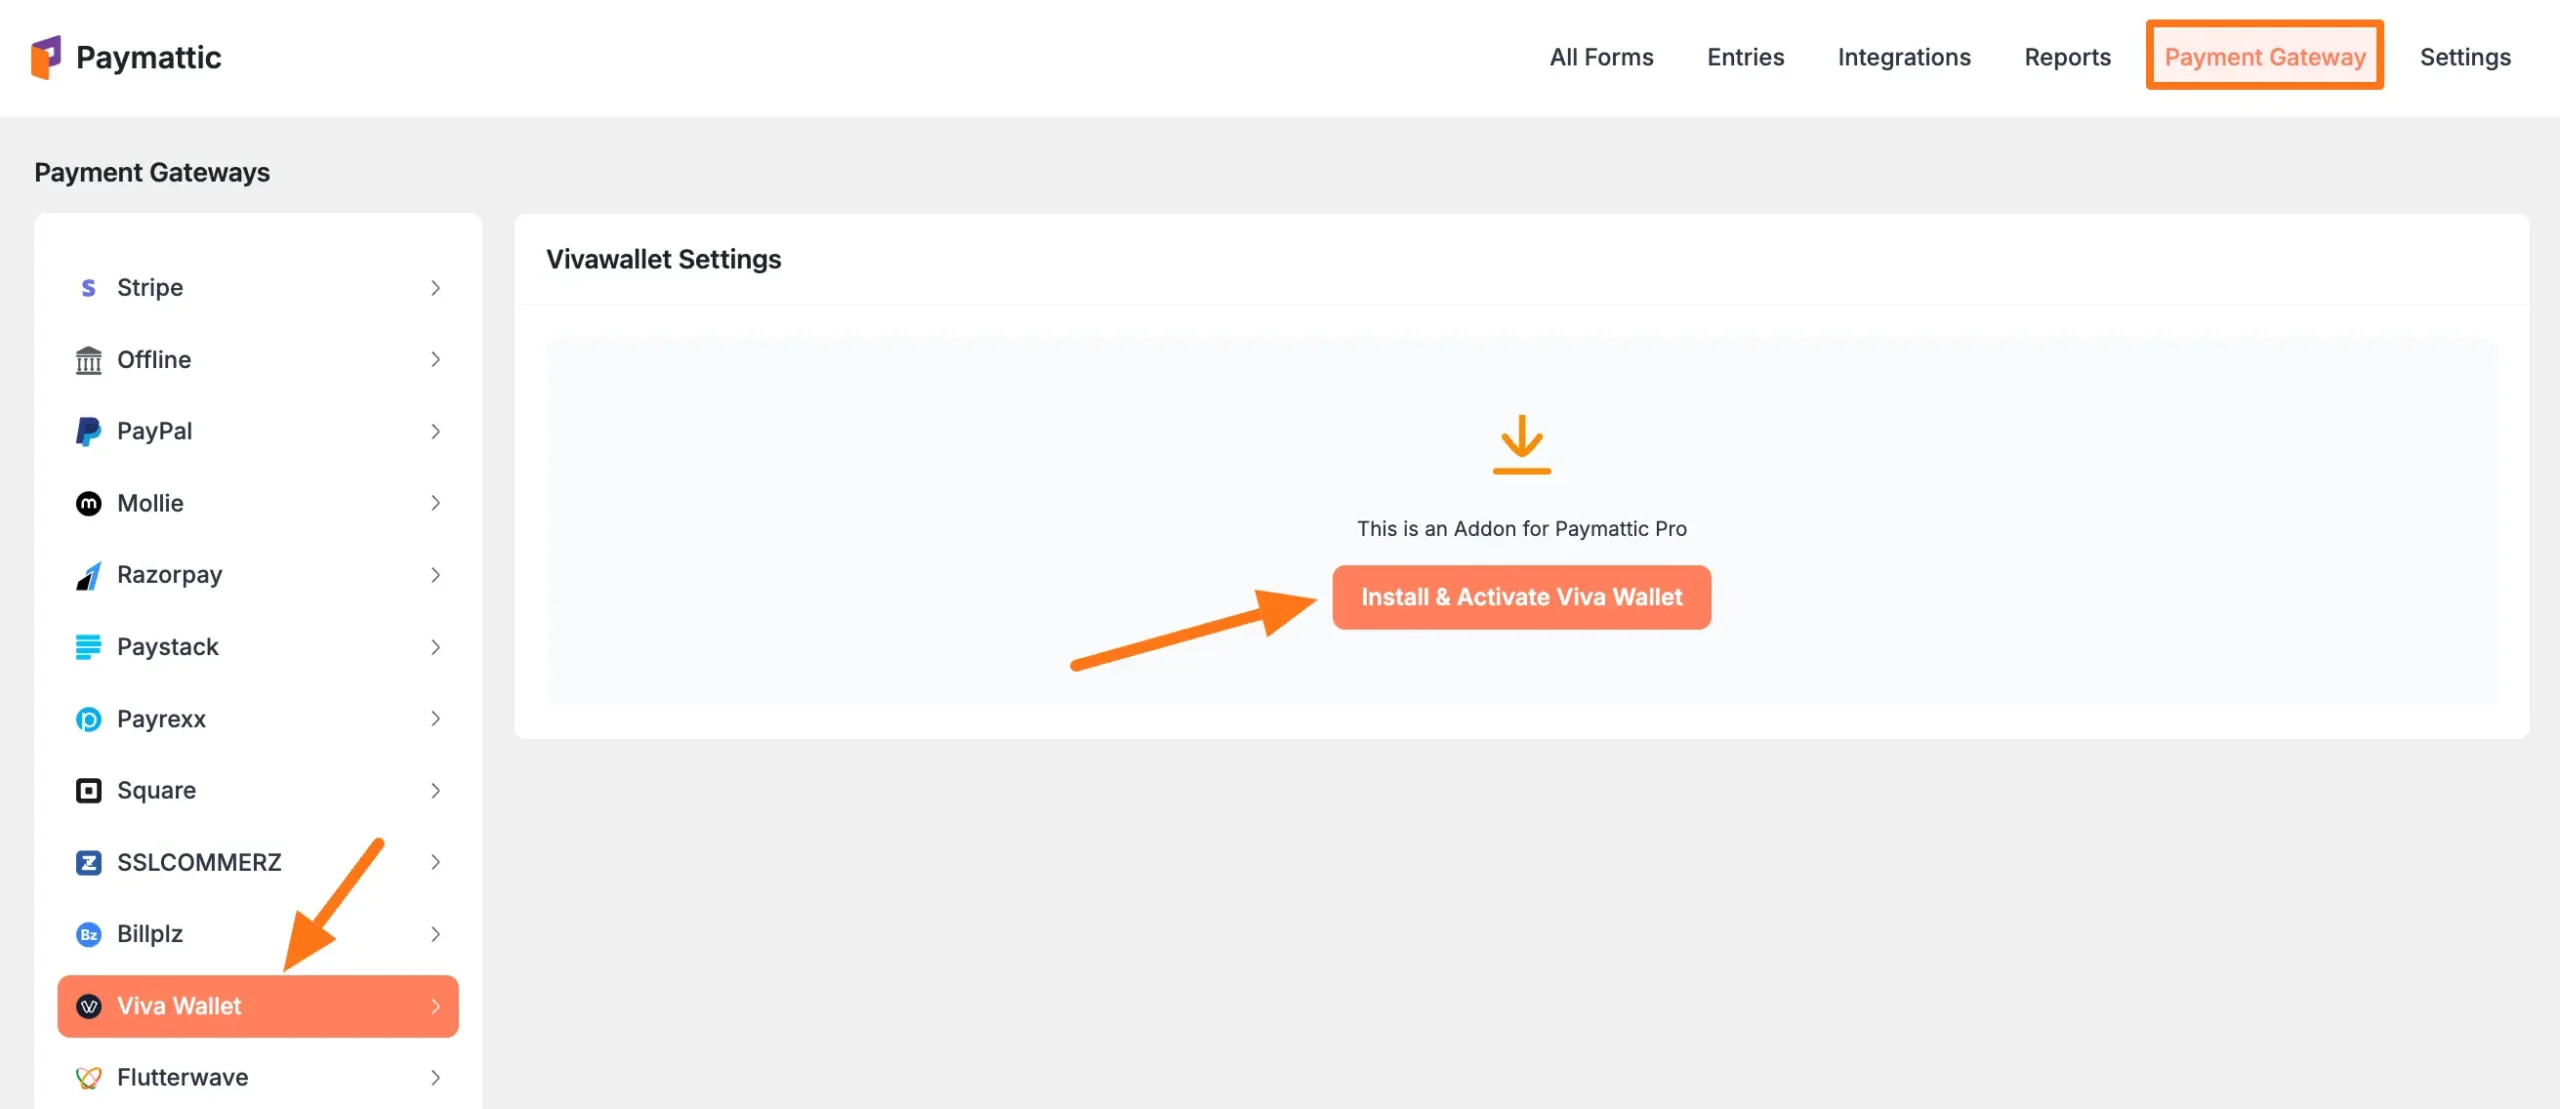
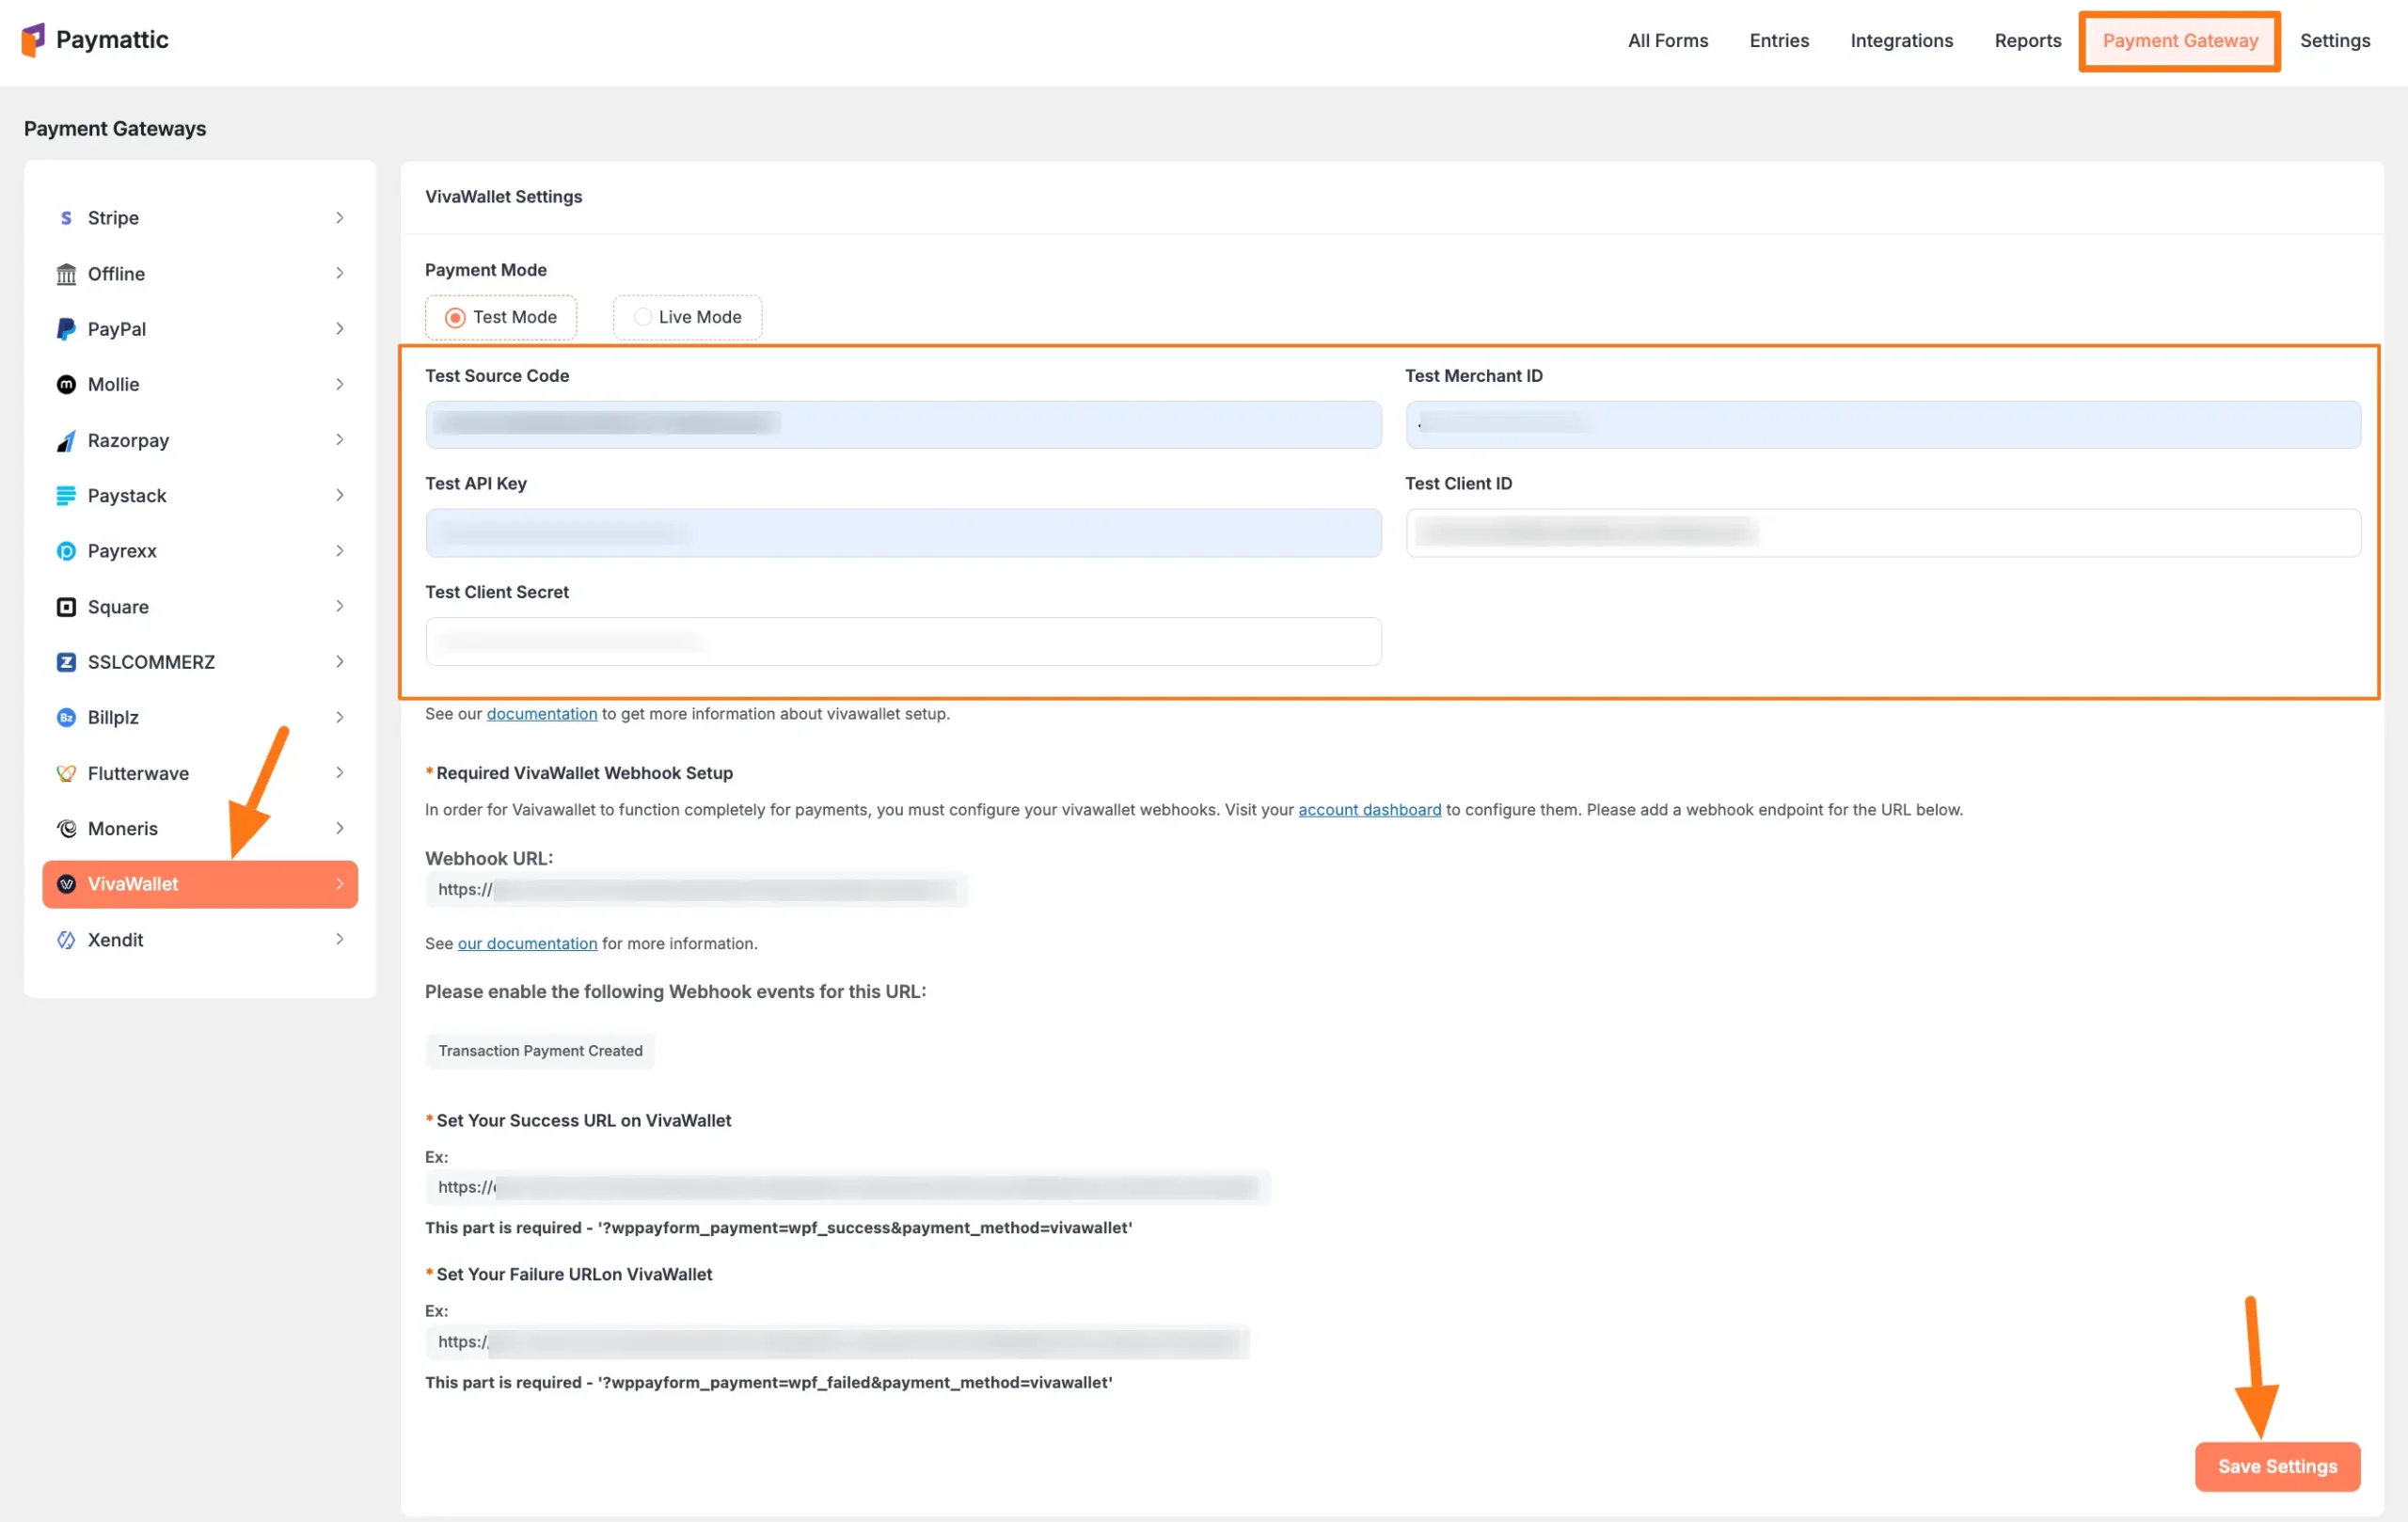
First, go to Payment Gateway from the Paymattic Navbar, click the Viva Wallet tab from the left sidebar, and the Viva Wallet Settings page will open.
Click the Install and Activate Viva Wallet button to connect Viva Wallet with Paymattic Pro.
Note
This add-on needs to be installed the first time you integrate with Viva Wallet.
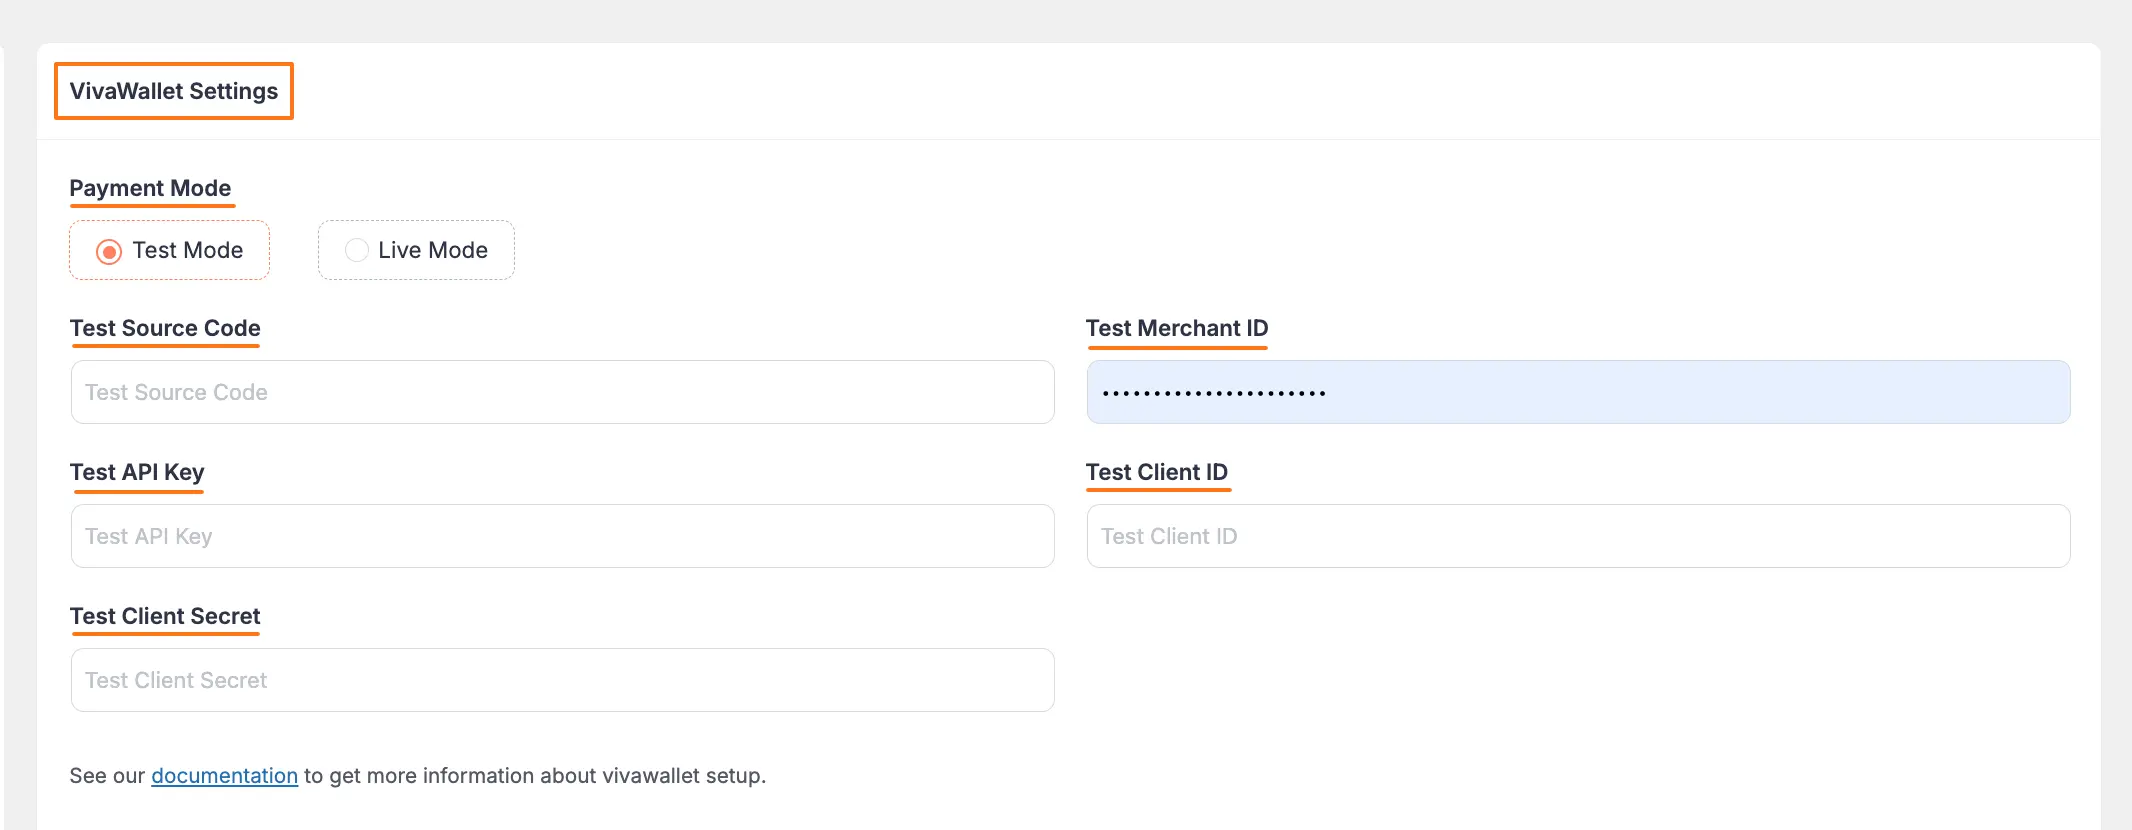
Select any Payment Mode between:
- Test (for test payments)
- Live (for real payments)
Both options follow the same configuration process. For this guide, we'll use Test Mode.
You need to obtain all the necessary credentials from your Viva Wallet Account:
- Source Code
- Merchant ID
- API Key
- Client ID
- Client Secret
Get All the Credentials from Viva Wallet
Follow these steps to get all the required credentials from your Viva Wallet account:
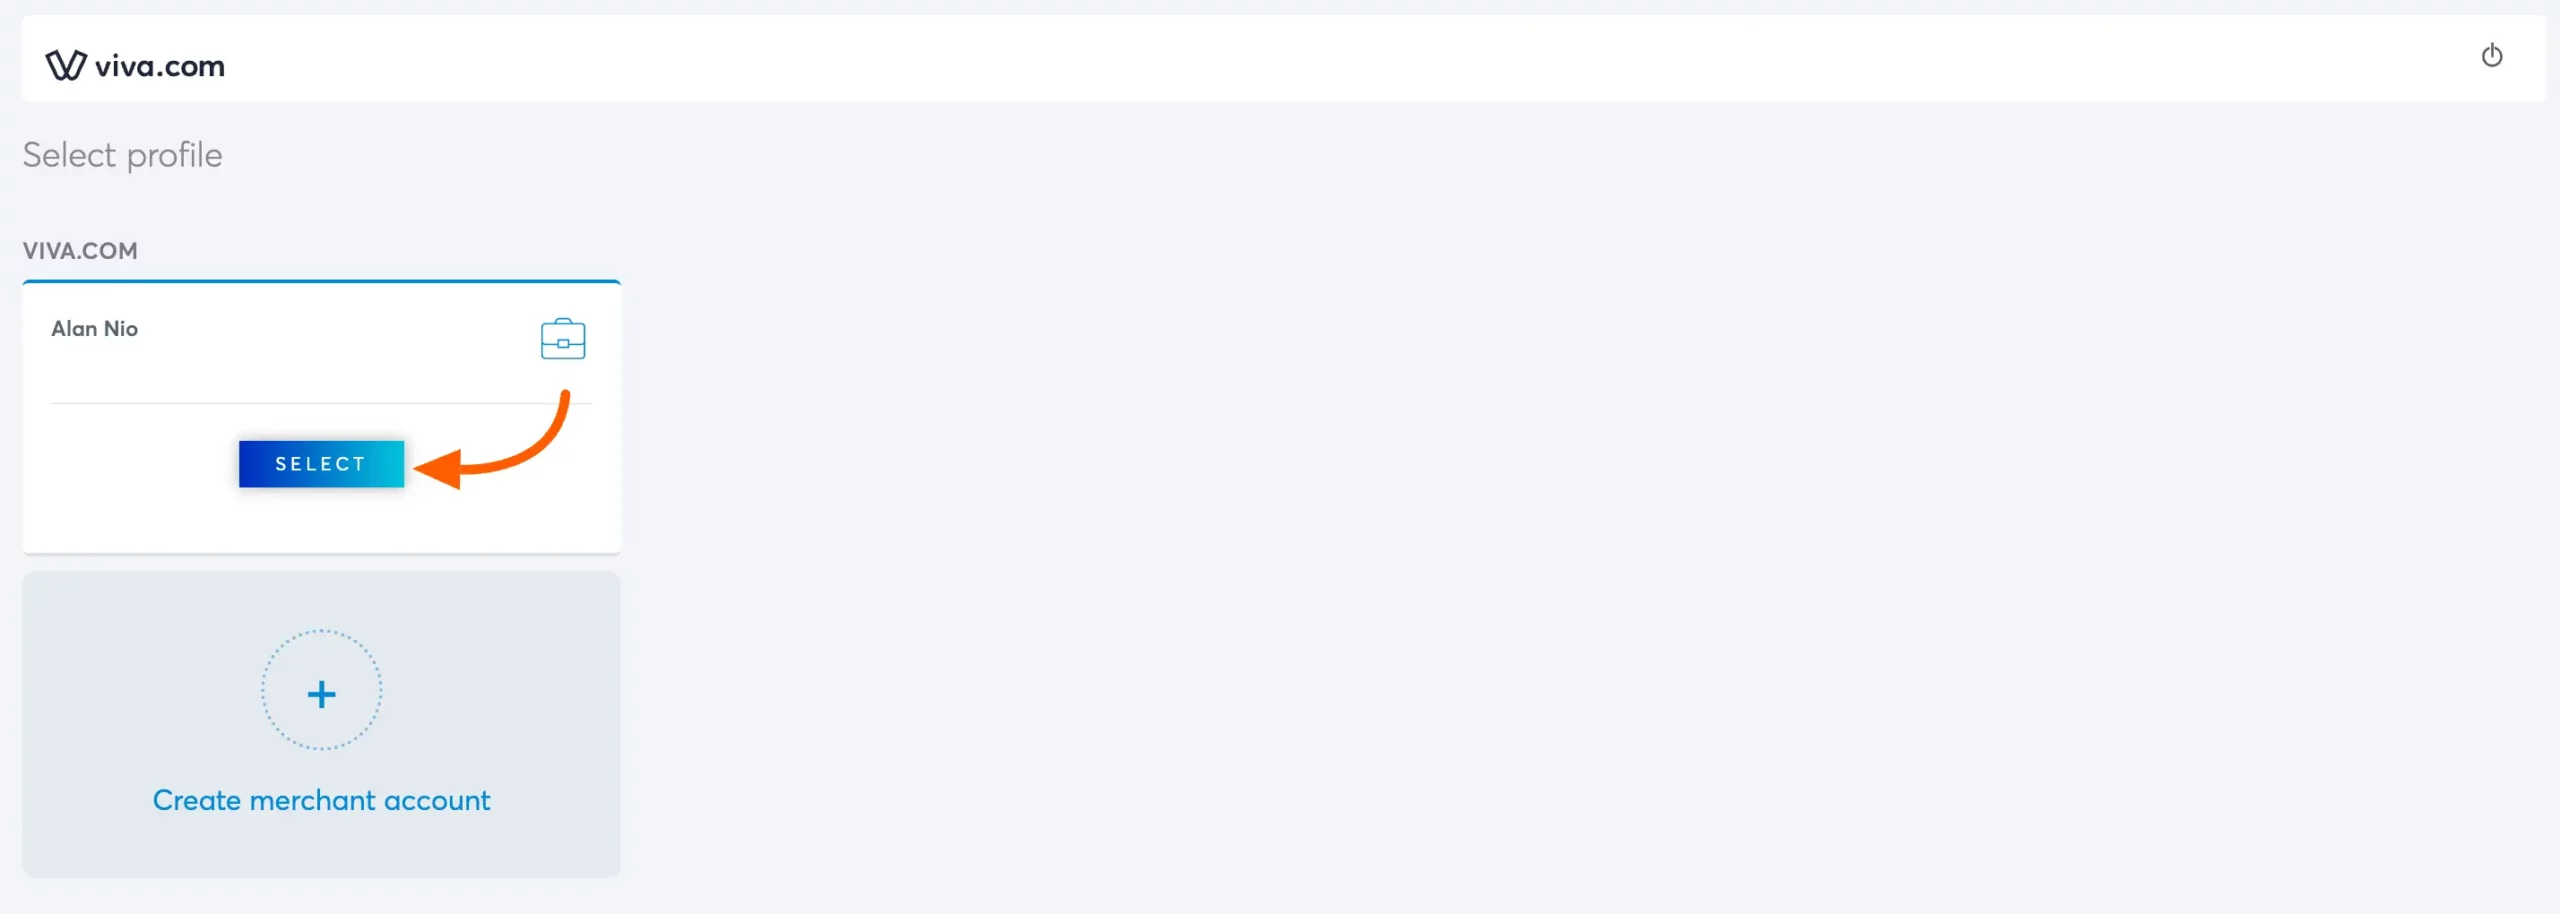
Log in to your Viva Wallet Account:
TIP
If you don't have an account, sign up here.
Click the Select button on your Viva Account Profile.
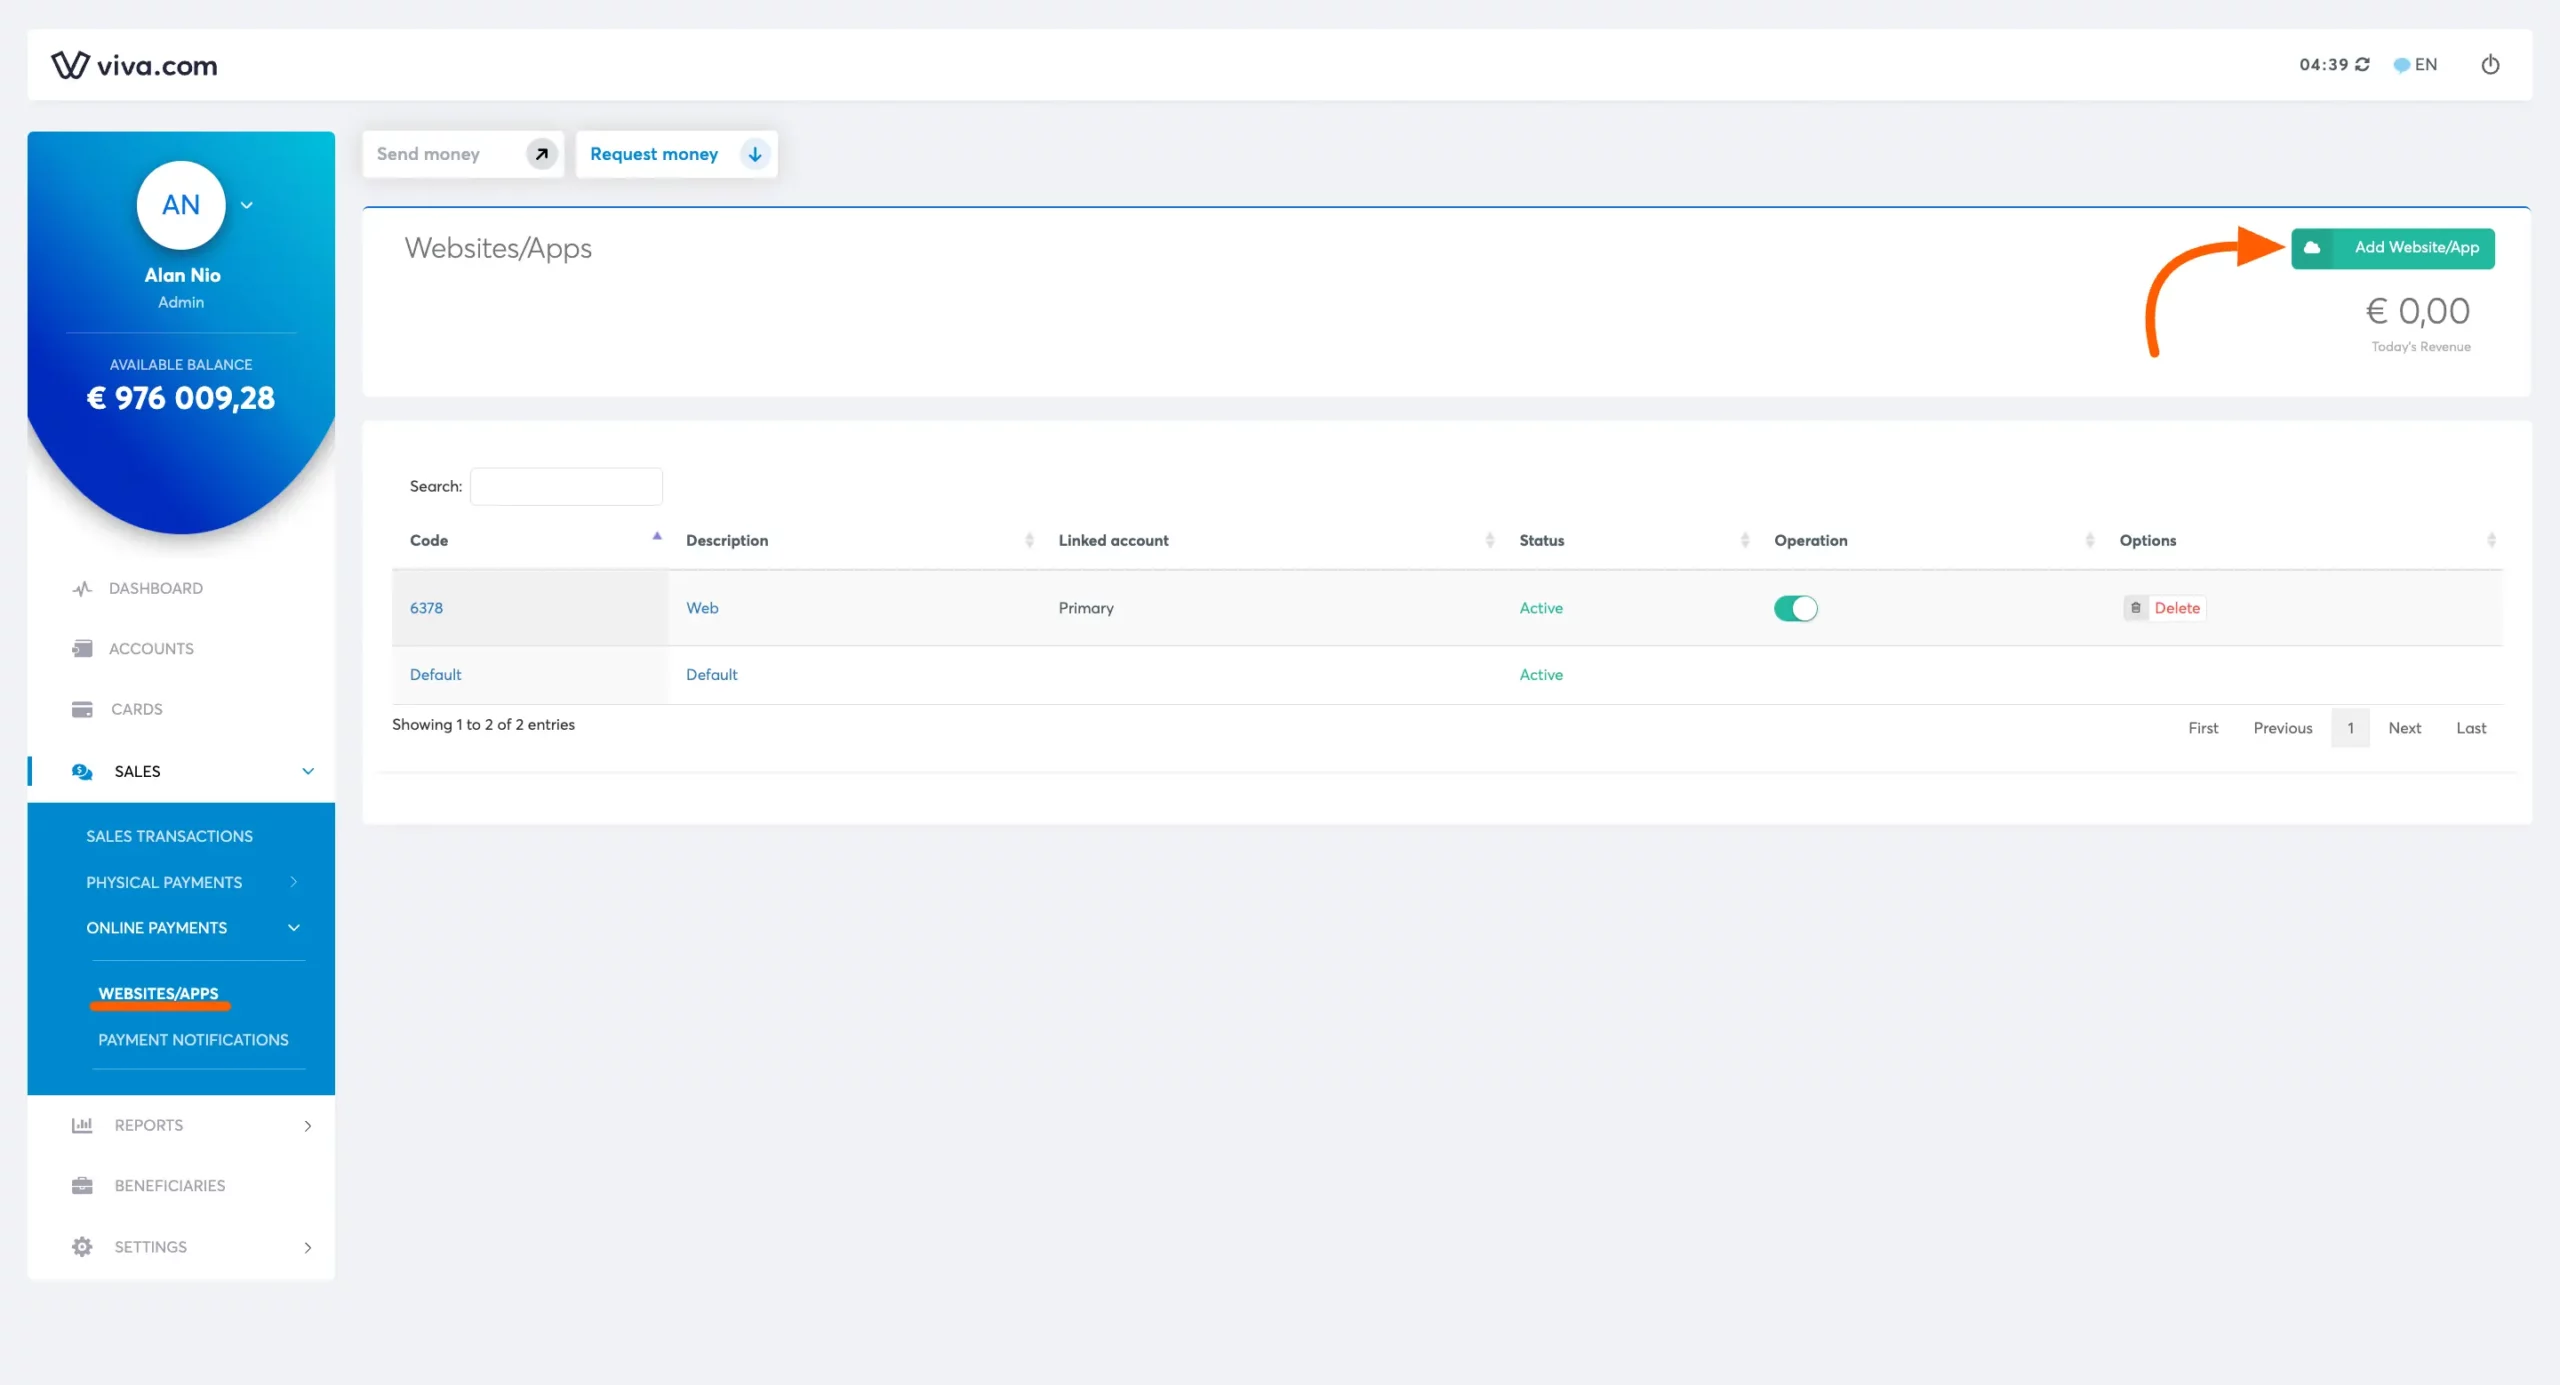
- In your Viva Wallet profile settings, create a Web App:
- Select Sales > Online Payment > Website/Apps
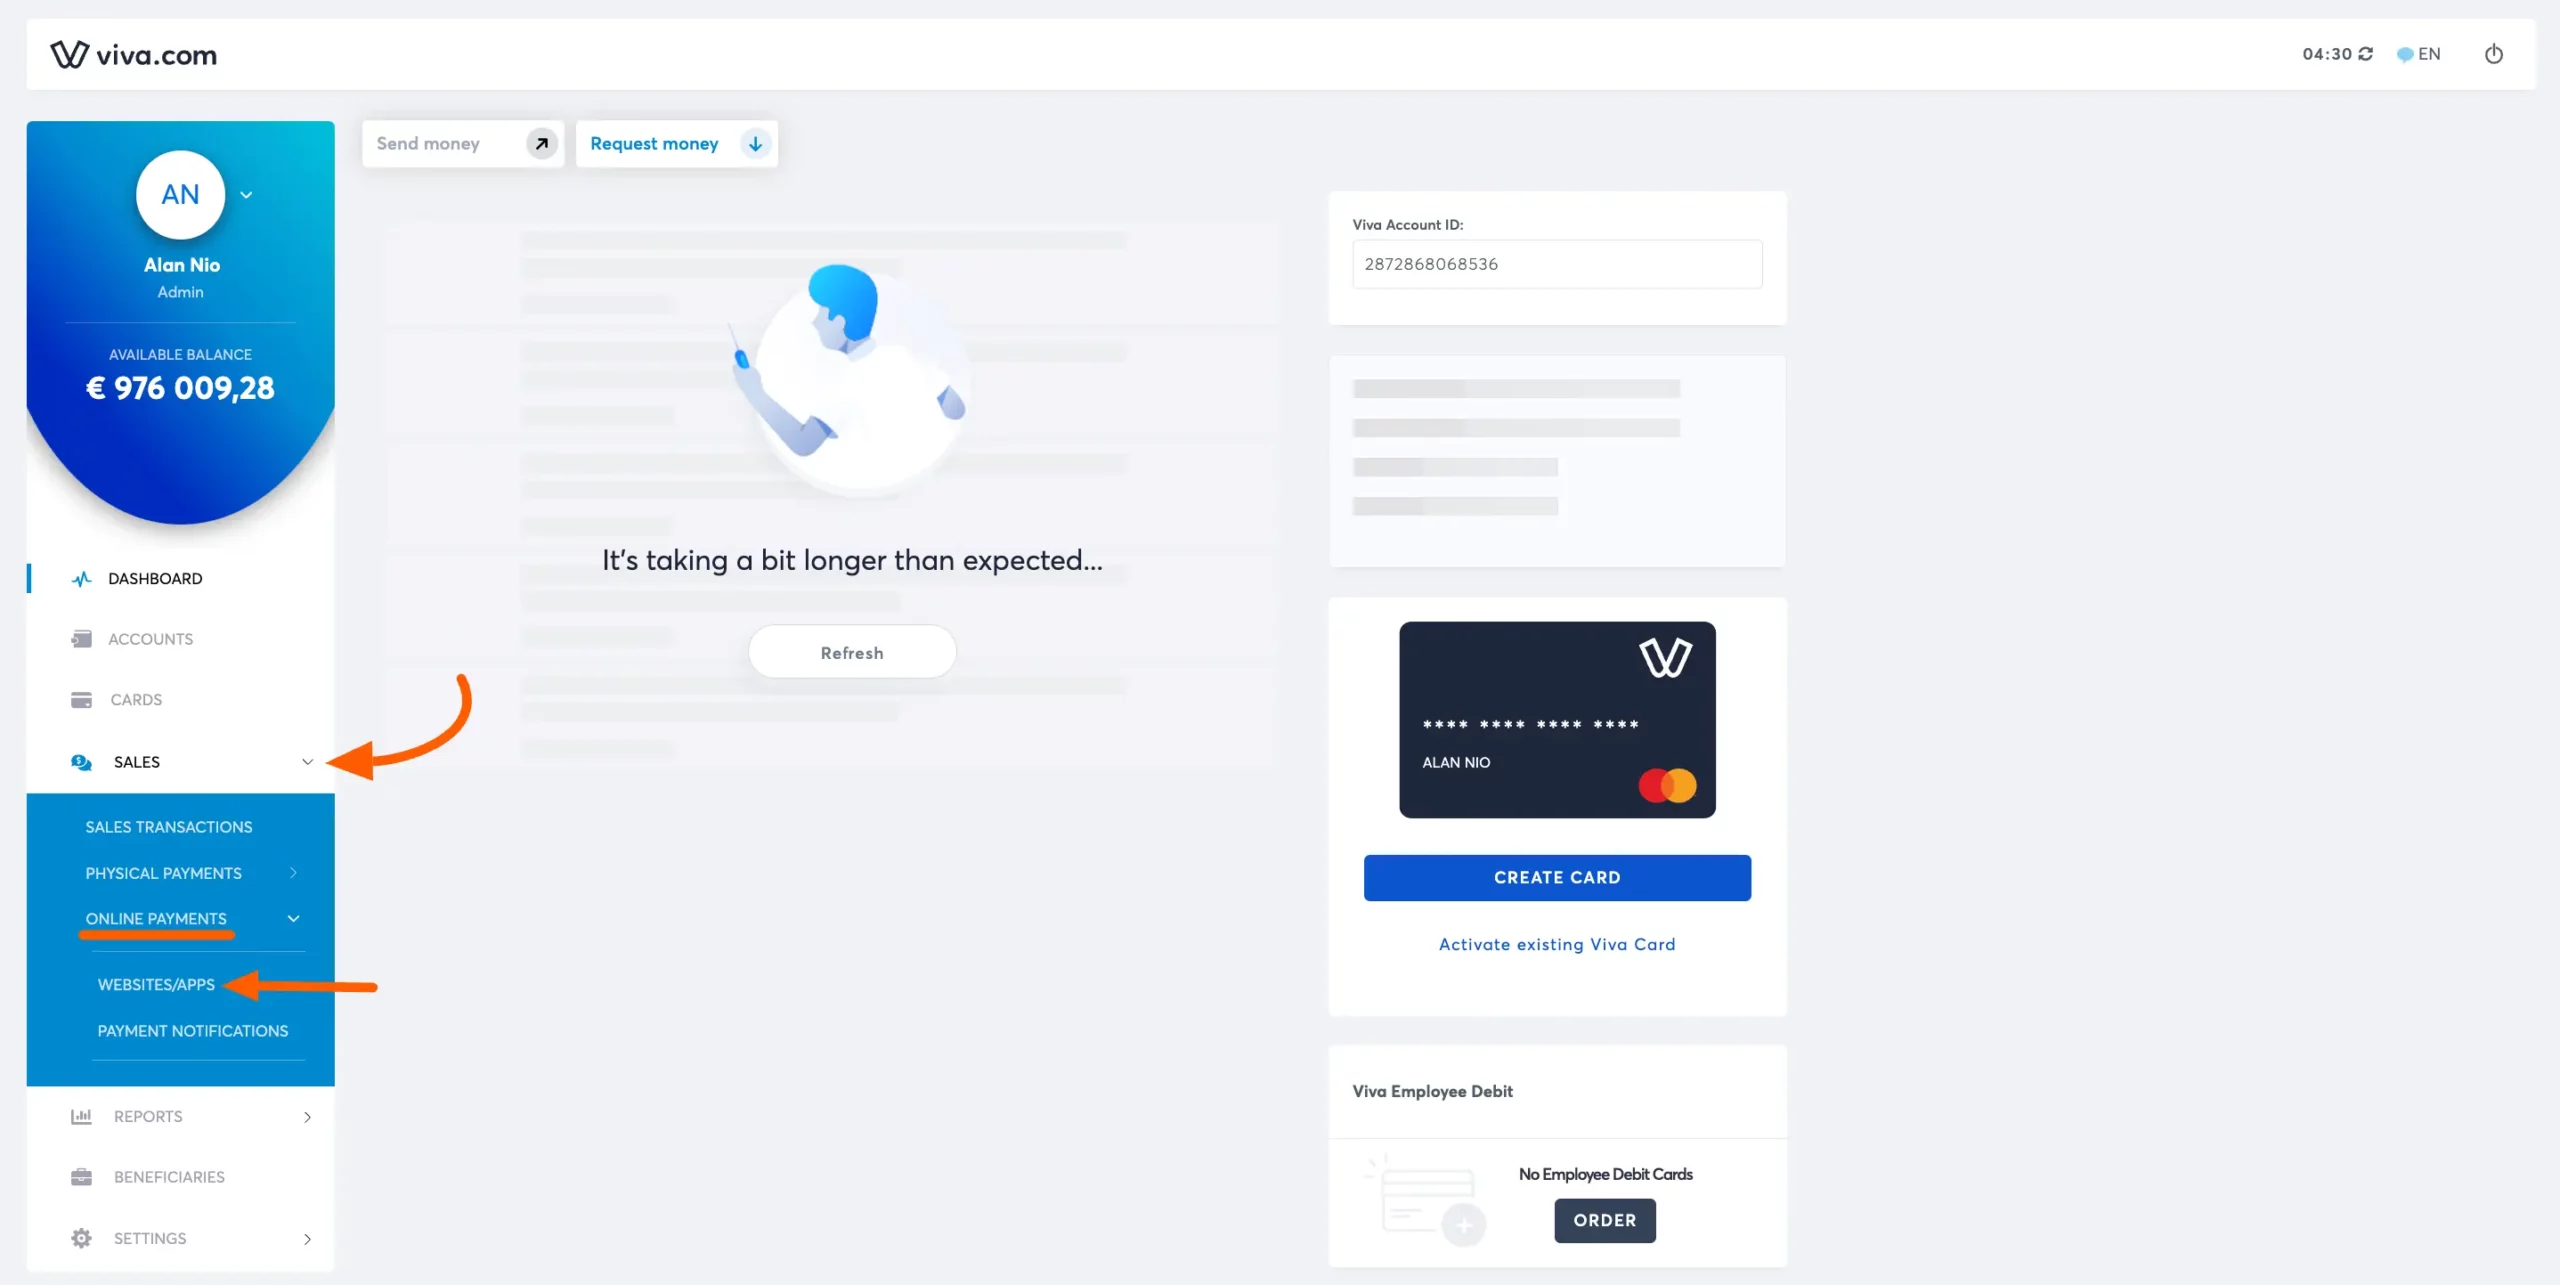
- Click the Add Website/App button.
Getting Source Code
Copy the Code provided - this is your Source Code for Paymattic.
Configure the following:
- Domain name
- Success URL
- Failure URL
Check all the Checkboxes and click the Create button.
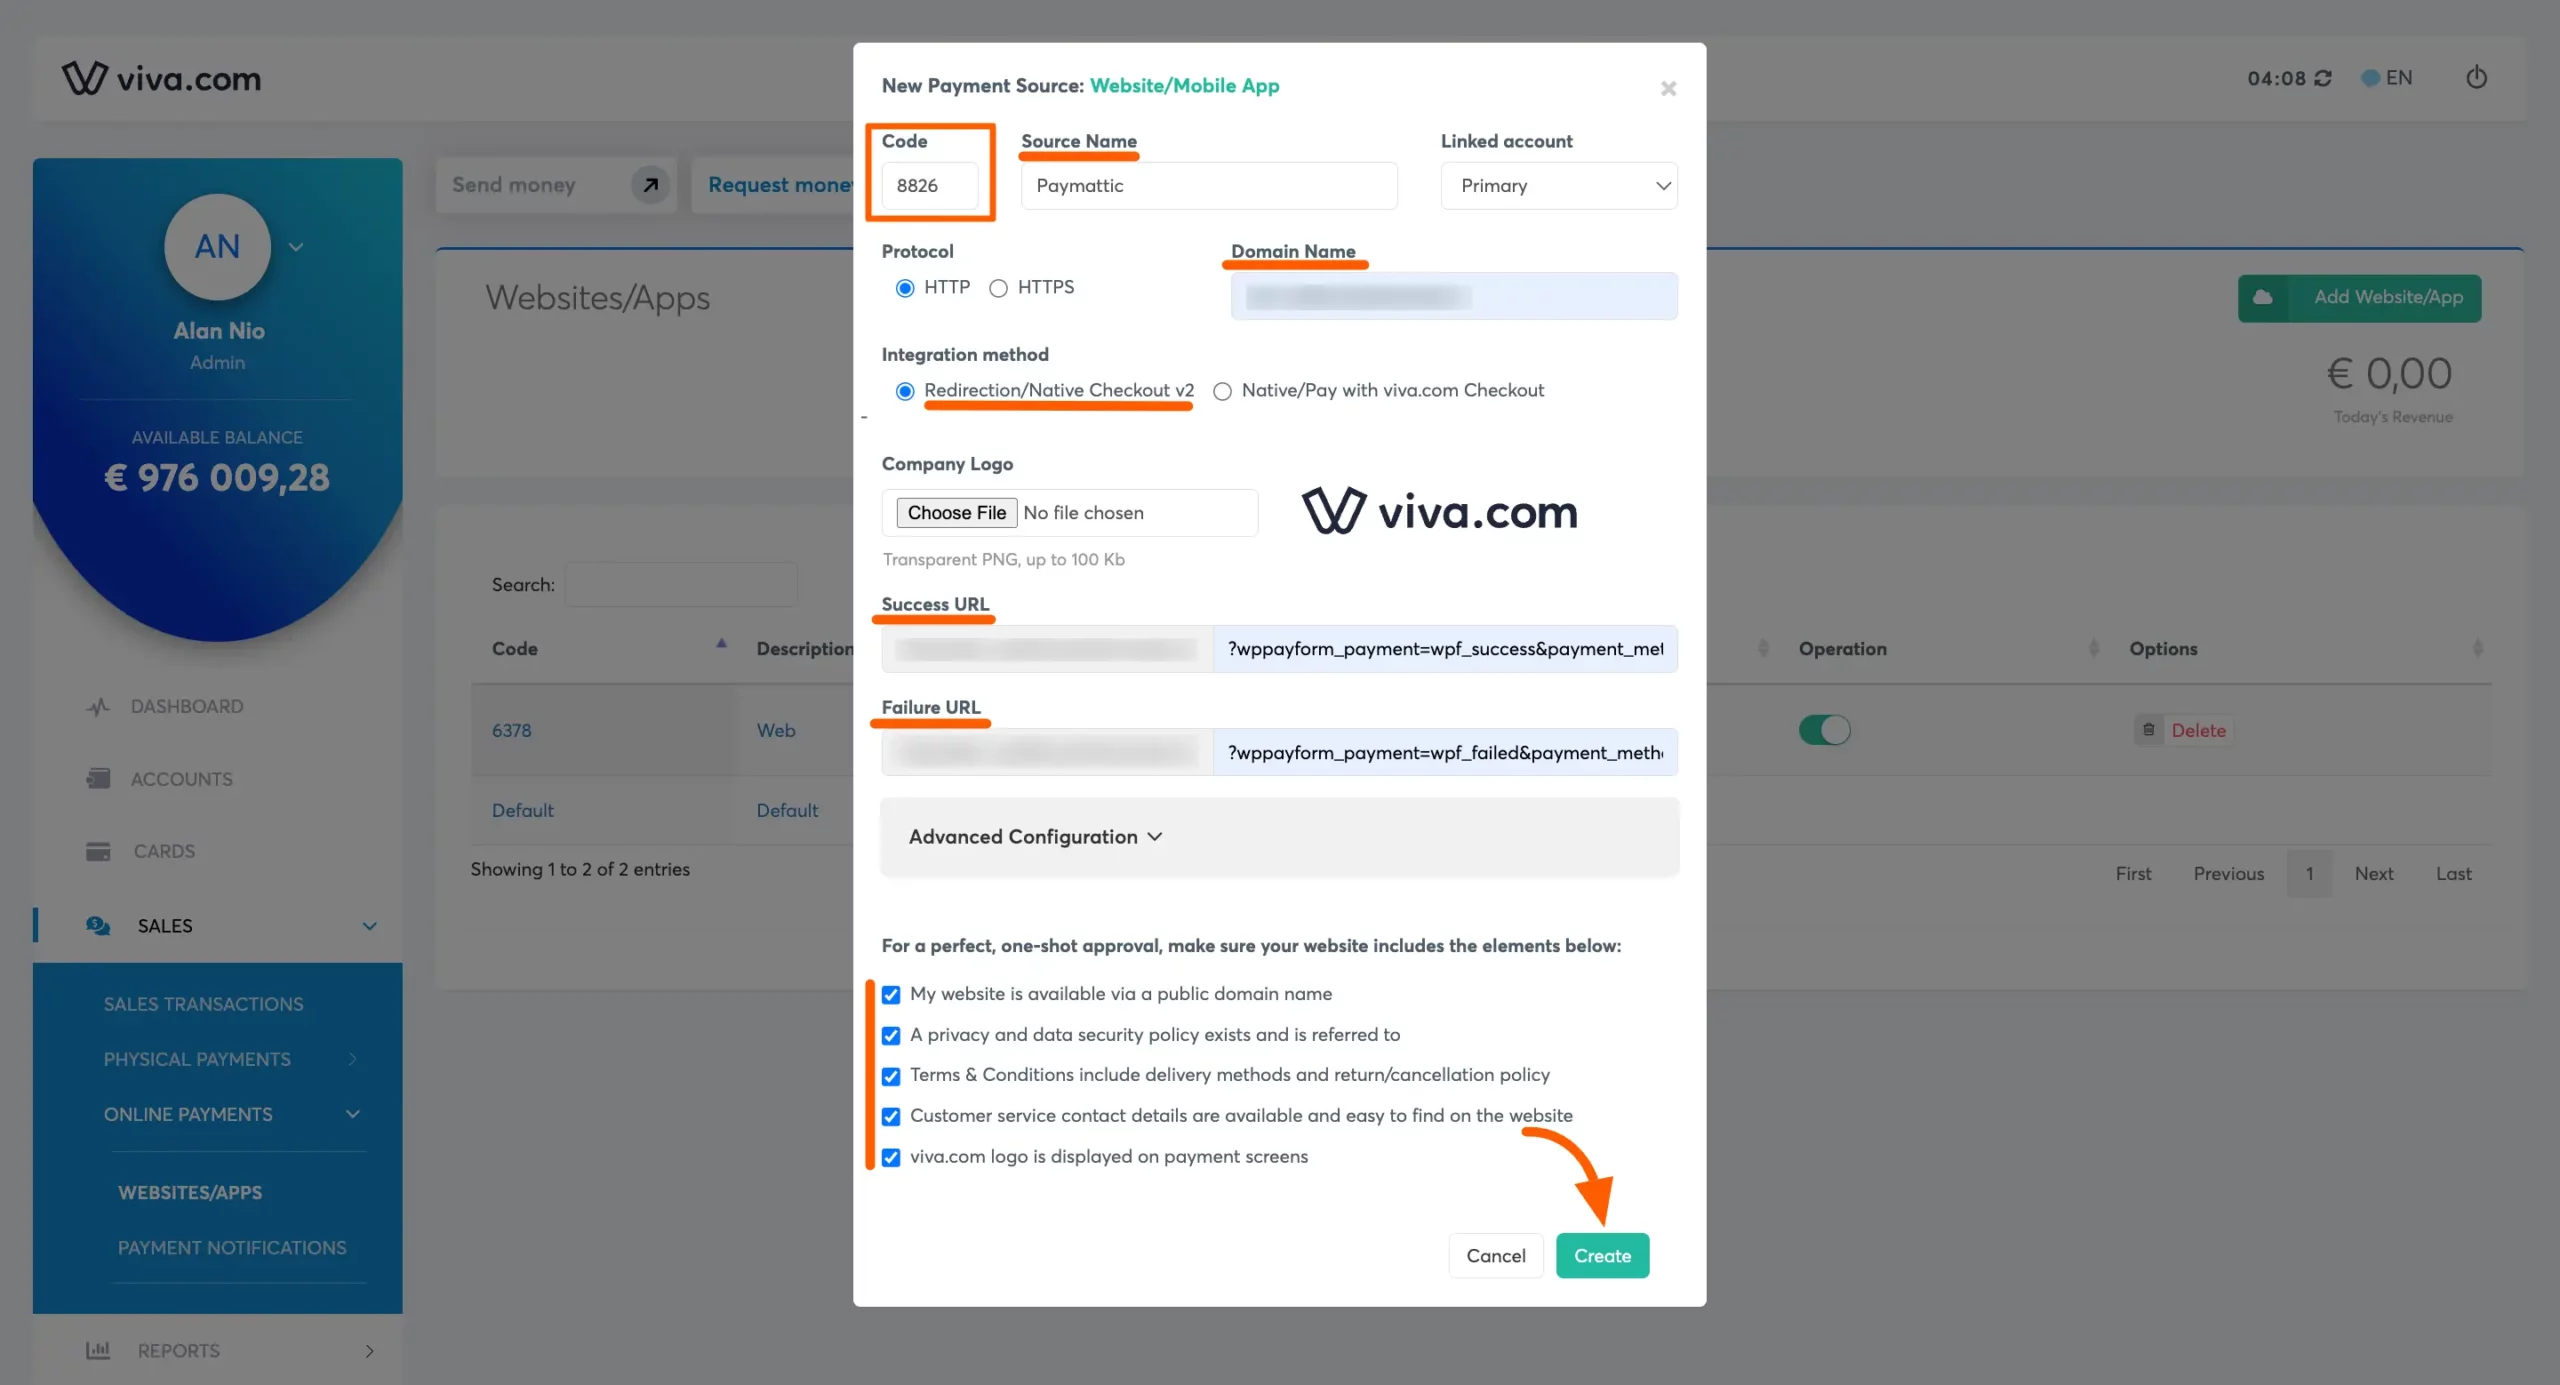
TIP
You can find your Domain Name, Success URL, and Failure URL in the Viva Wallet Settings section of Paymattic.

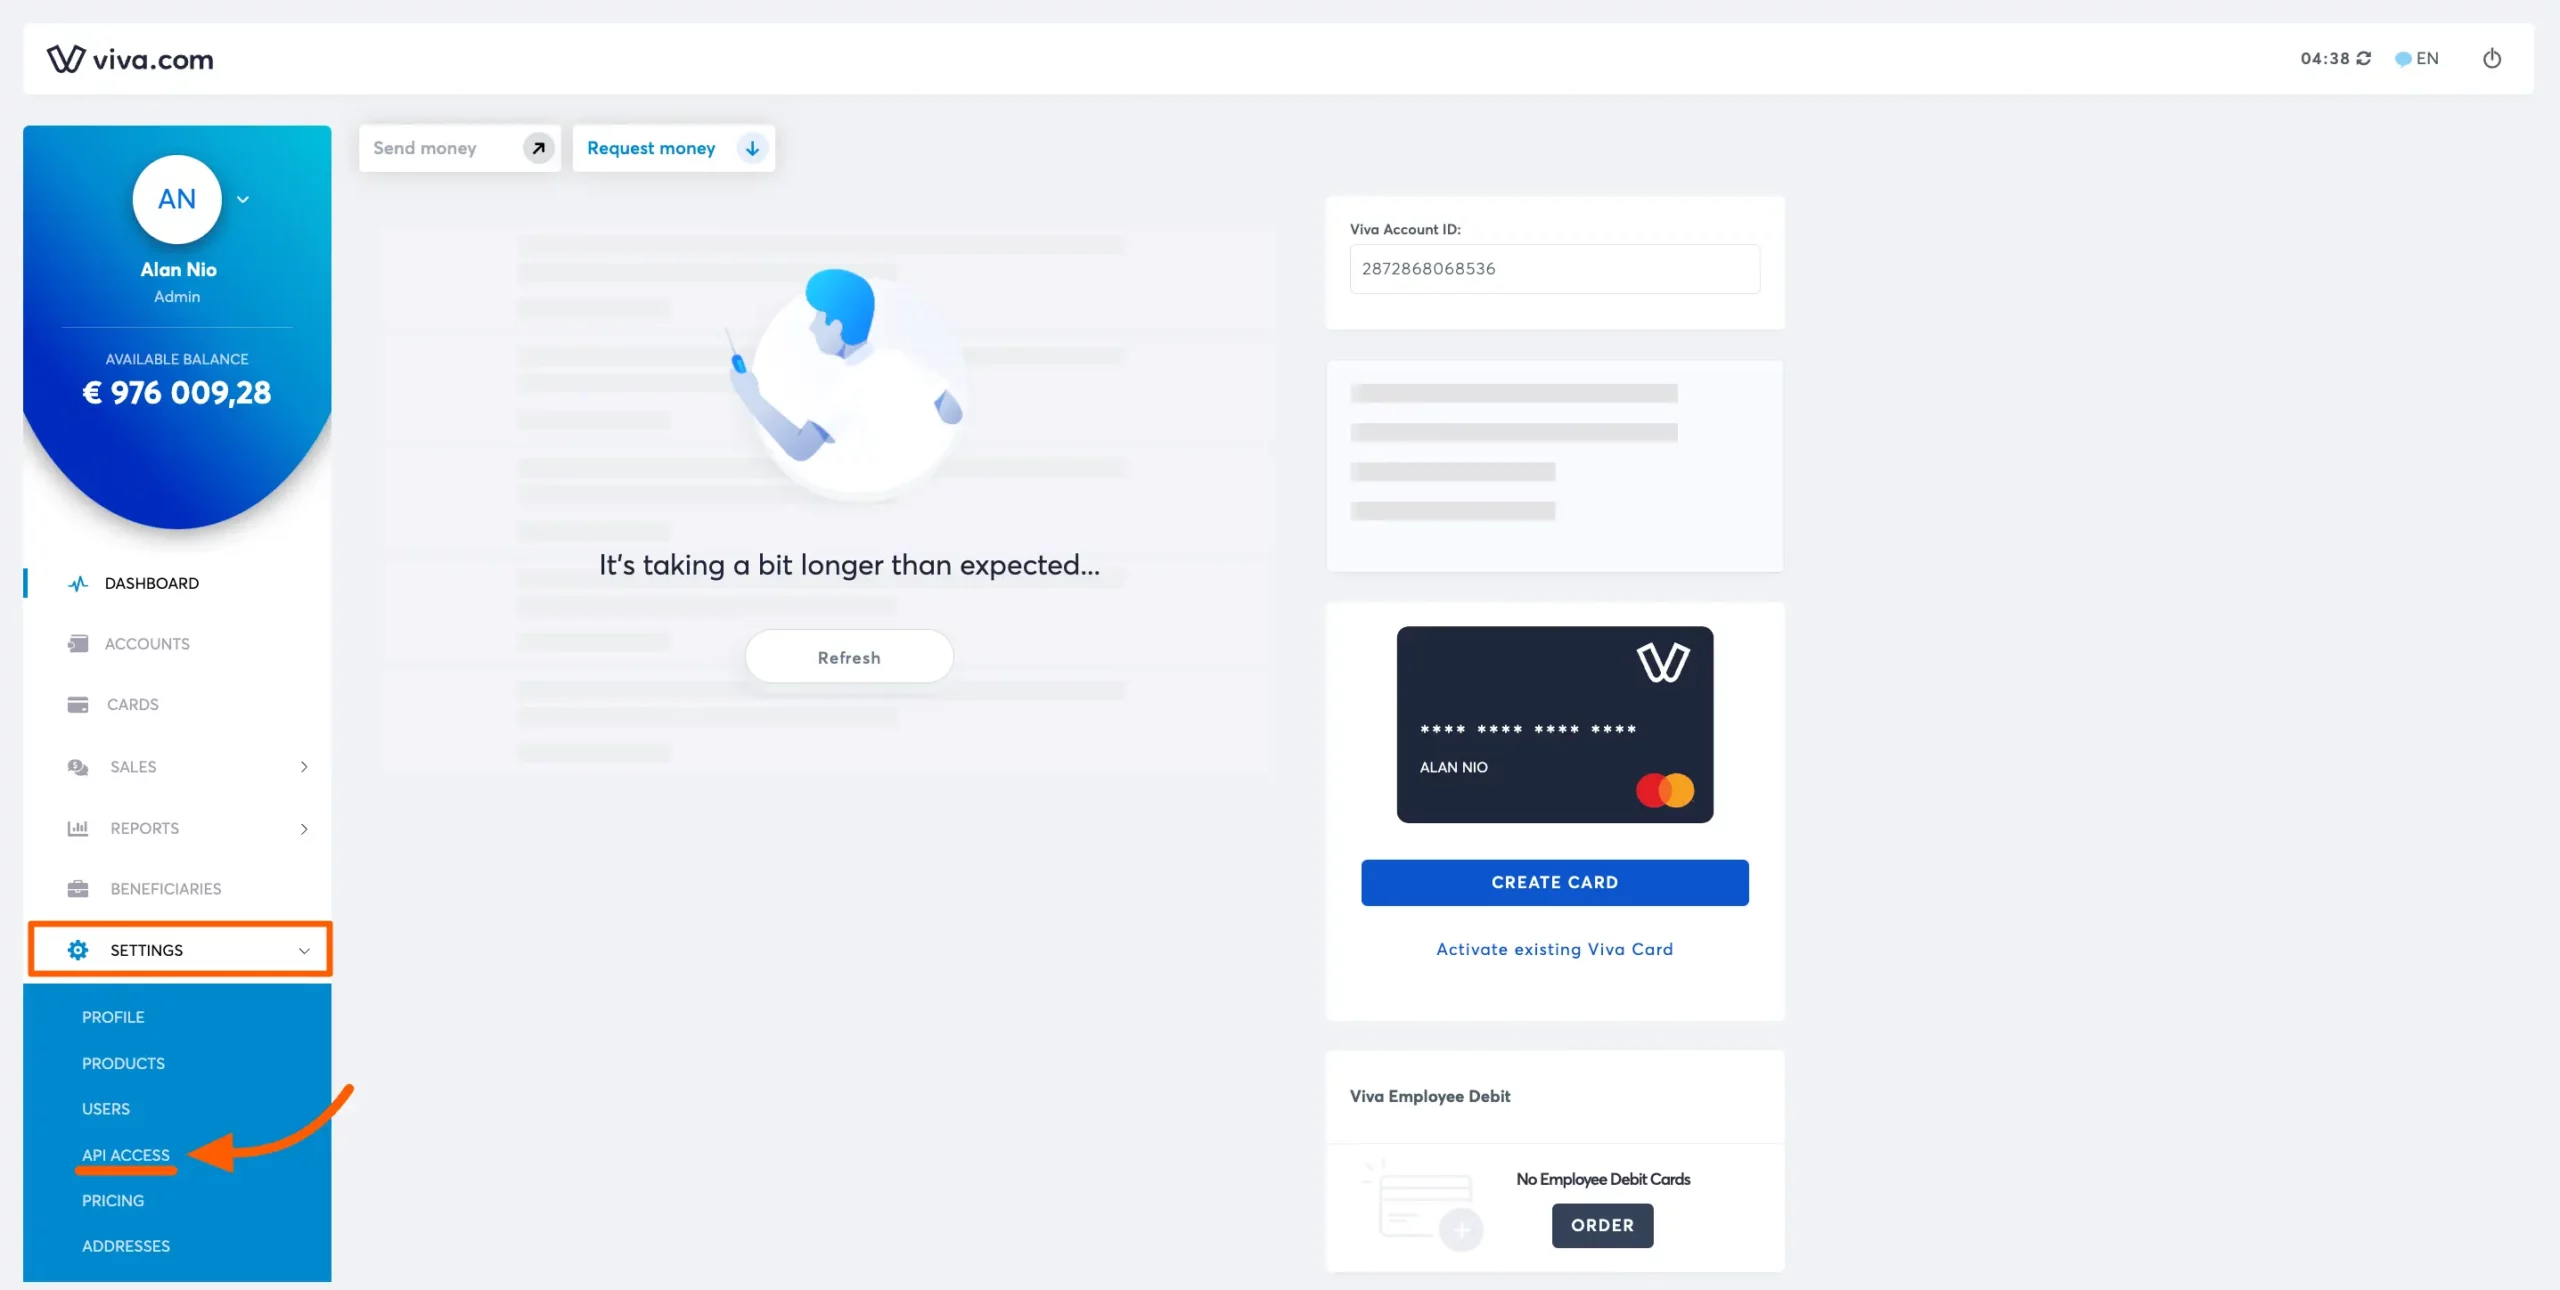
Getting API Access Credentials
- Go to Settings in your Viva Wallet profile
- Click on API Access
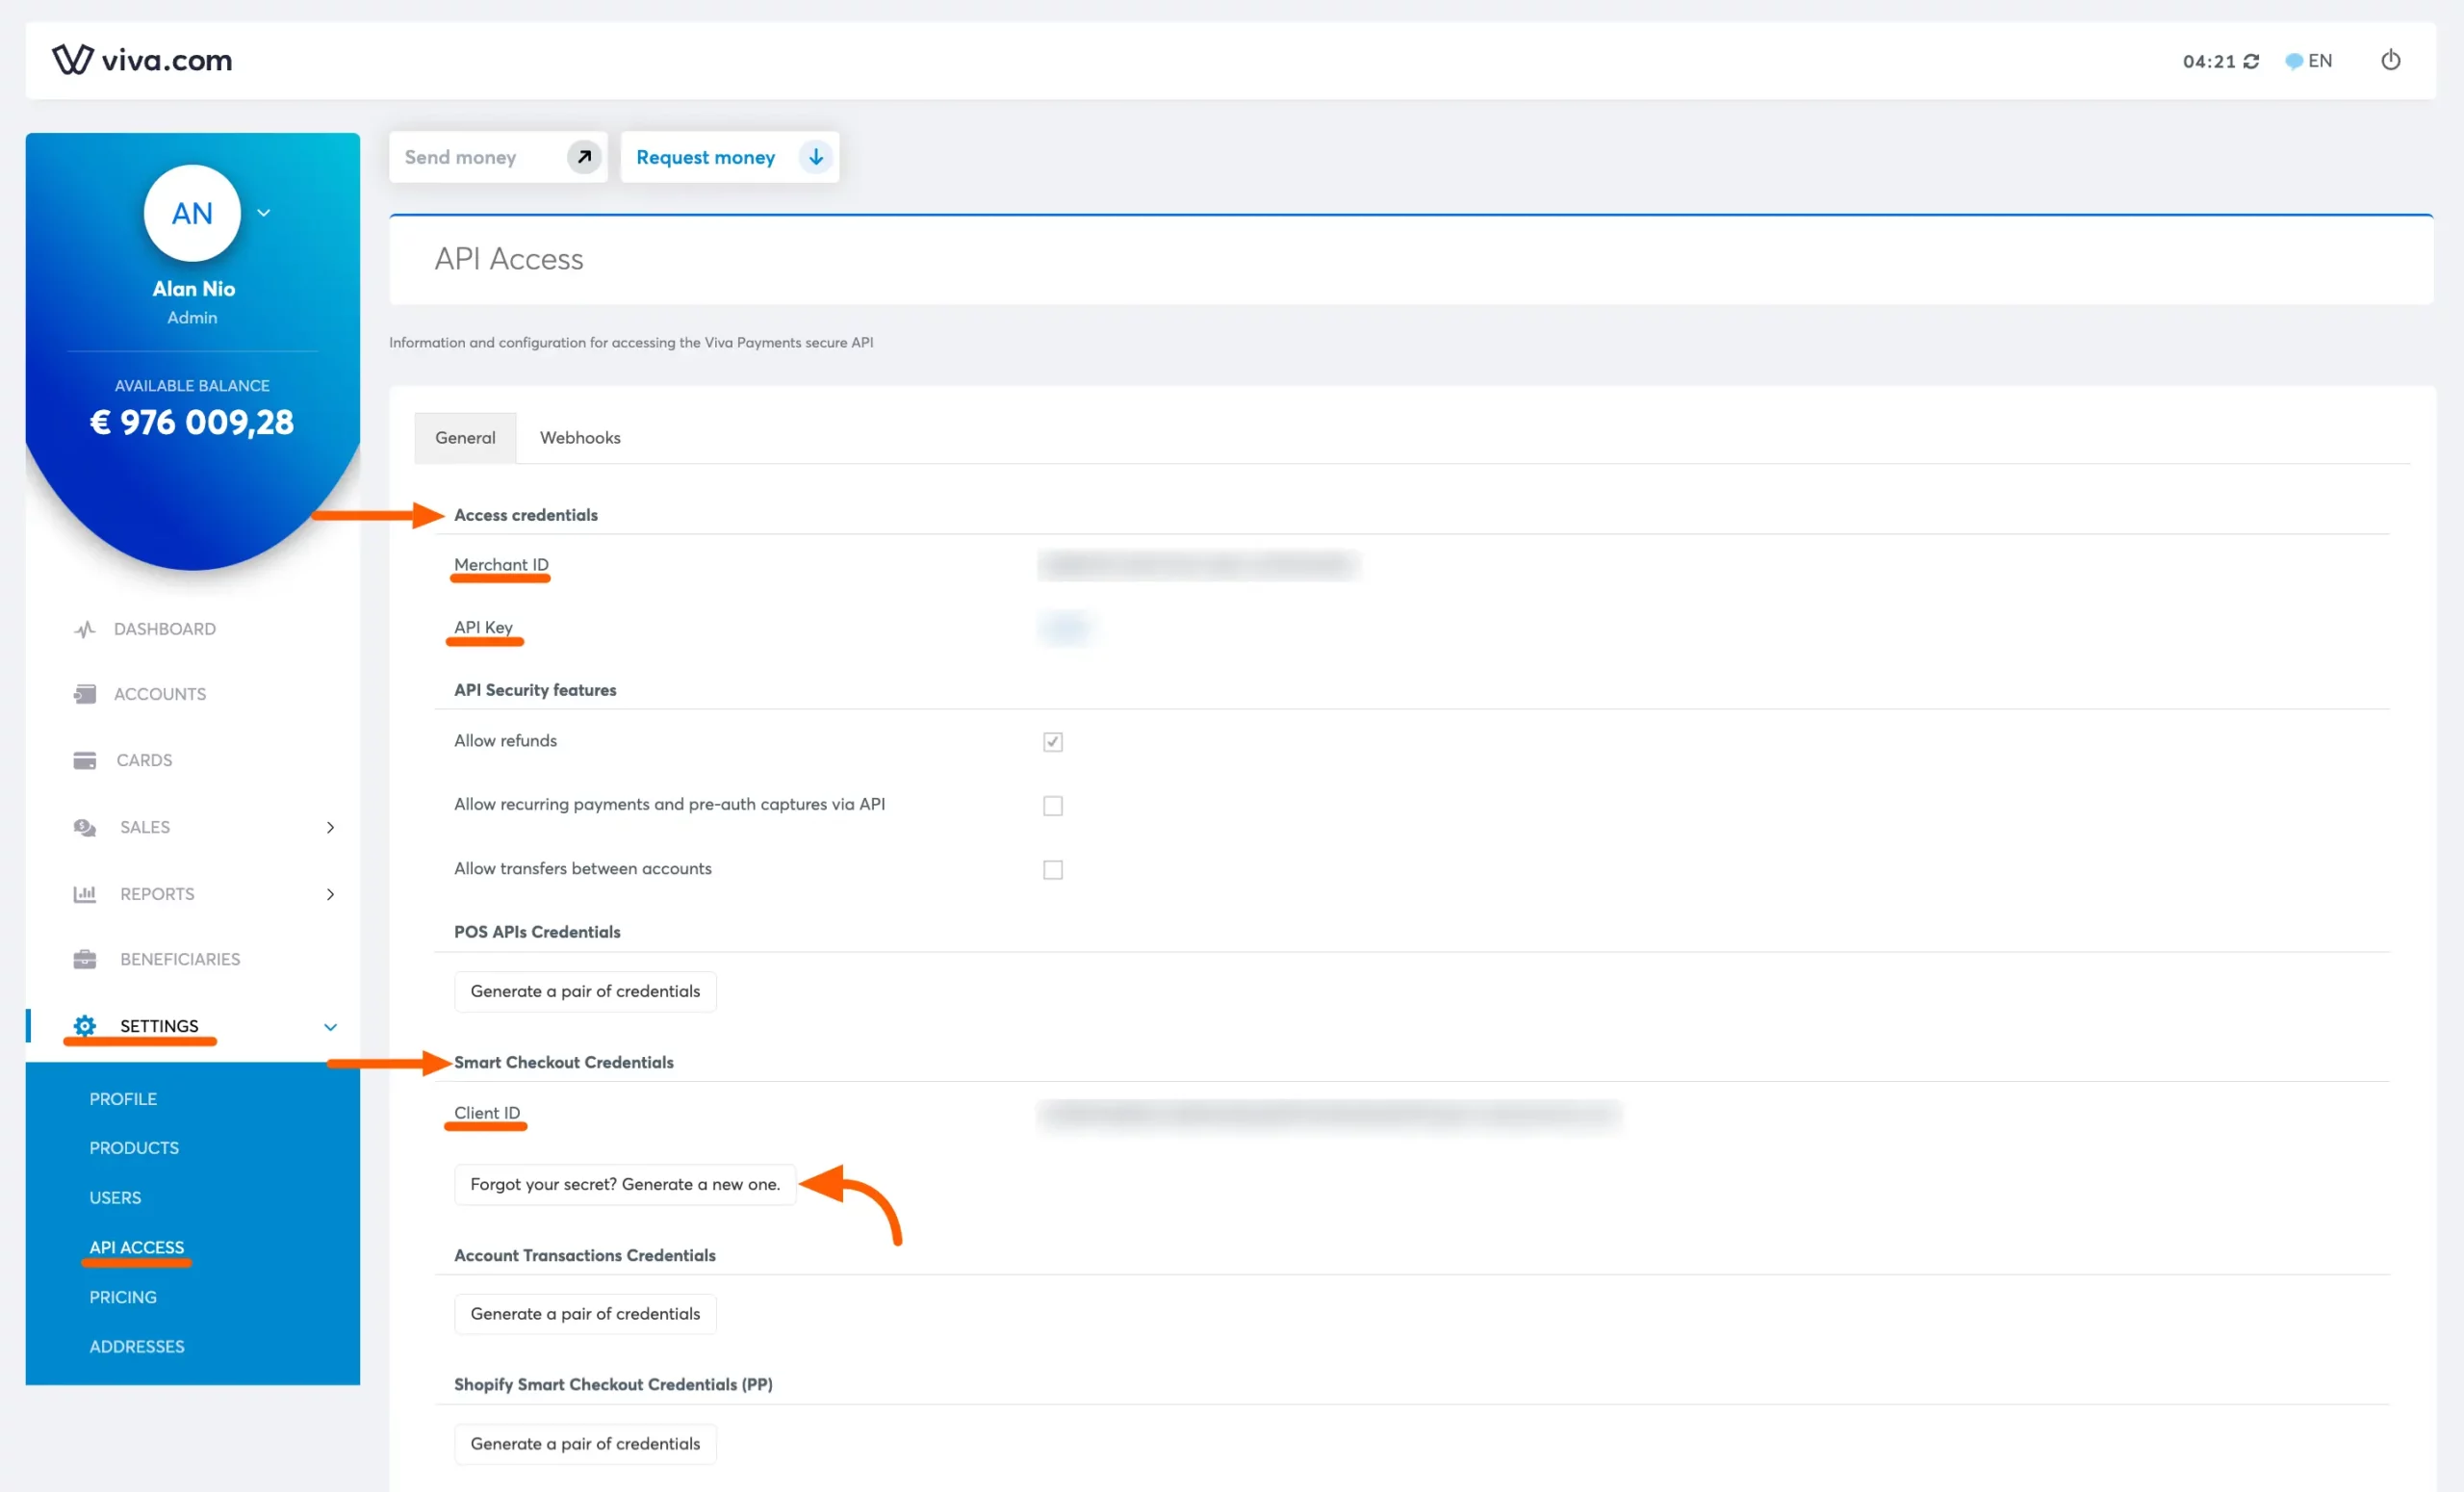
Getting Merchant ID, API Key, and Client ID
In your Viva Wallet account:
Find the Access Credentials section for:
- Merchant ID
- API Key
Check the Smart Checkout Credentials section for:
- Client ID
- Generate a new secret code using the Forgot your Secret button if needed
Copy all these credentials to your clipboard.
Configuring Viva Wallet Settings
- Return to Payment Gateway from the Paymattic Navbar
- Click the Viva Wallet tab
- Paste all the Credentials you copied from Viva Wallet into their respective fields
- Click the Save Settings button to complete the integration
Add Viva Wallet Webhooks
Important
To ensure your Viva Wallet dashboard and Paymattic dashboard are in sync, you must configure the Viva Wallet Webhooks.
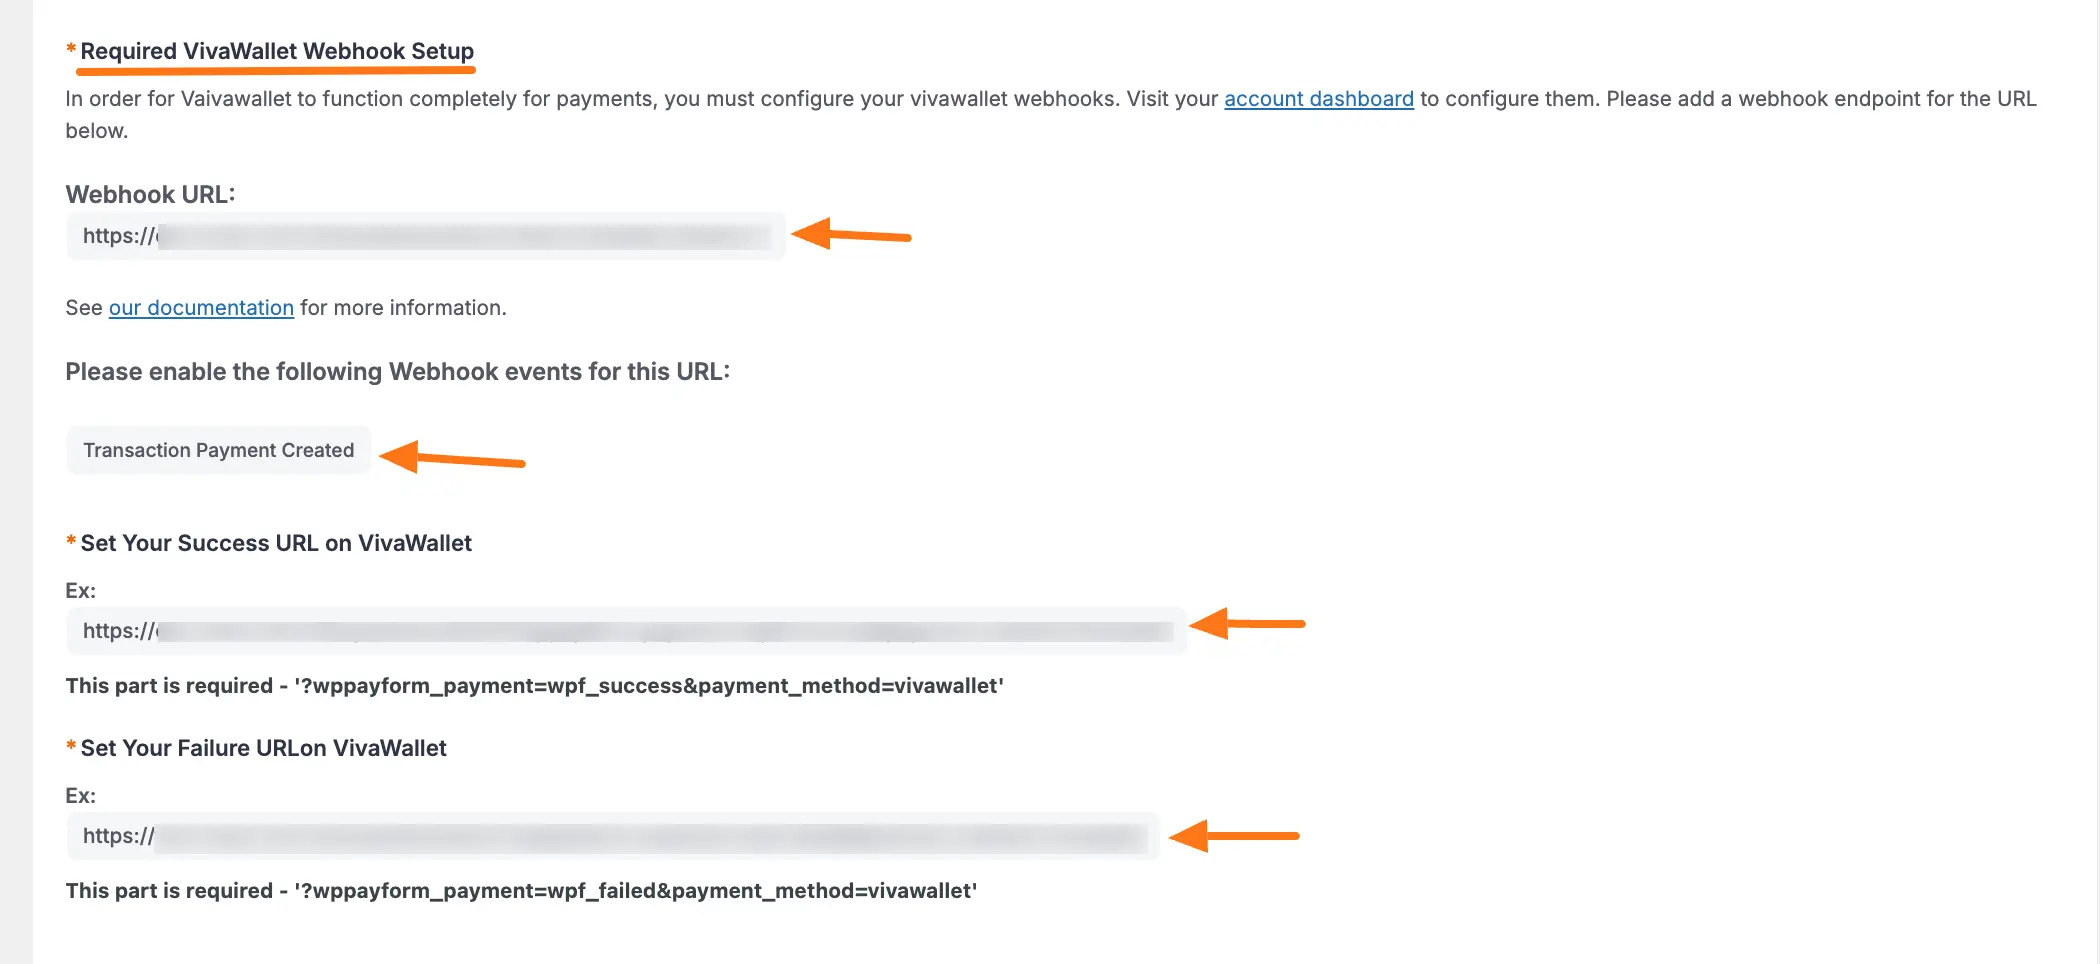
Step 1: Copy Webhook URLs
- Copy the Webhook URL from Paymattic
- Copy the Success and Failure URLs
These URLs will be used to configure Viva Wallet Webhooks for your WordPress site.
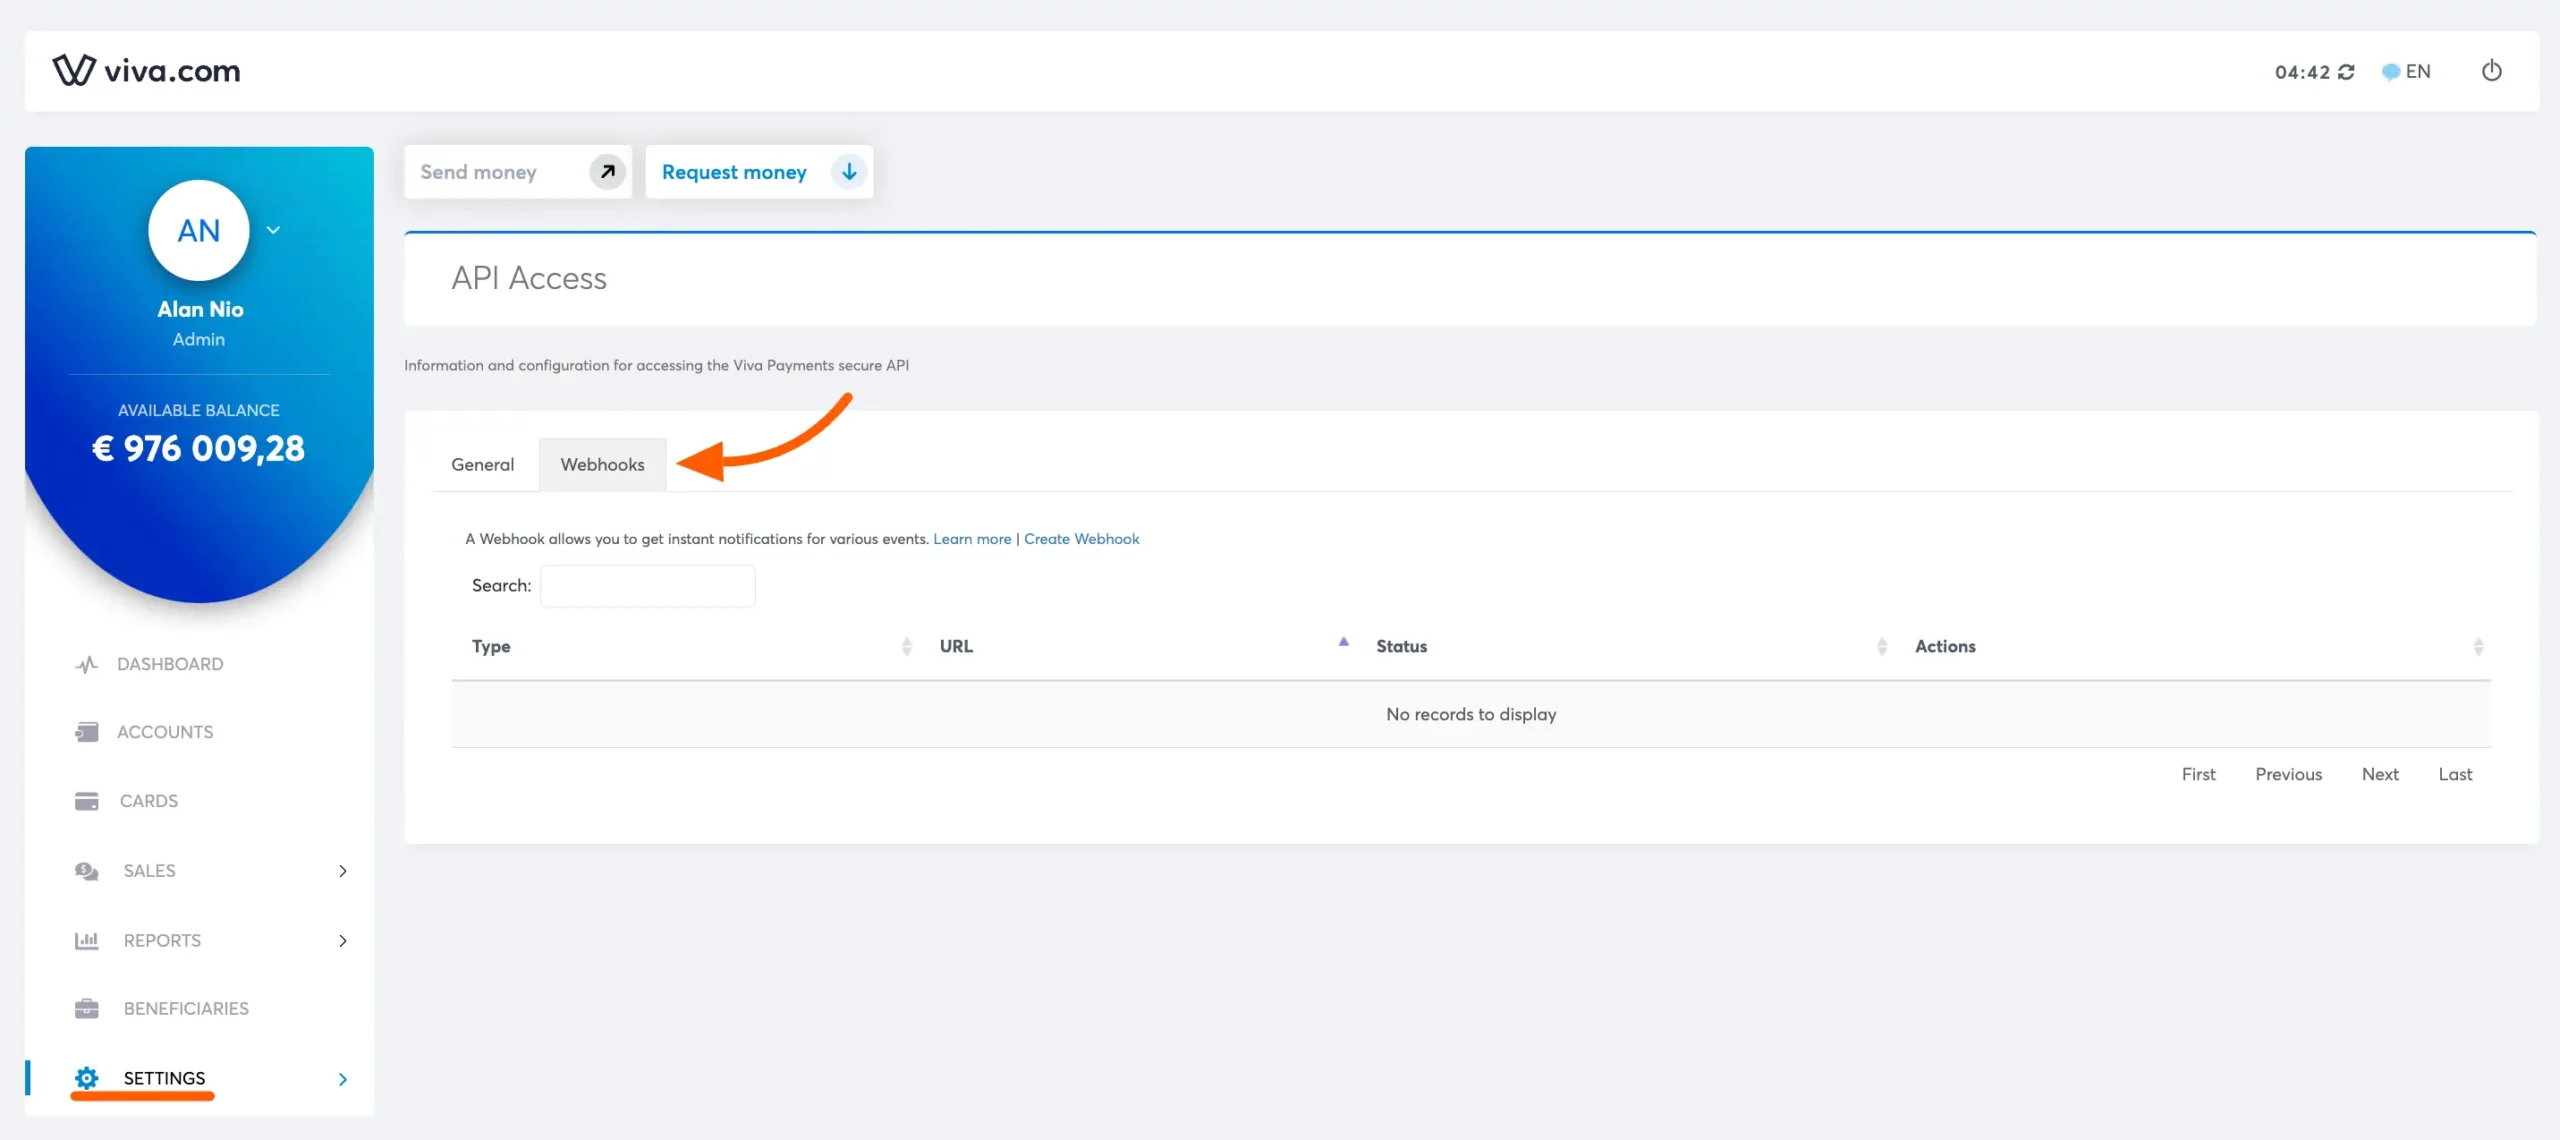
Step 2: Configure Webhooks
- Visit your Viva Wallet Dashboard
- Go to Settings > Webhooks
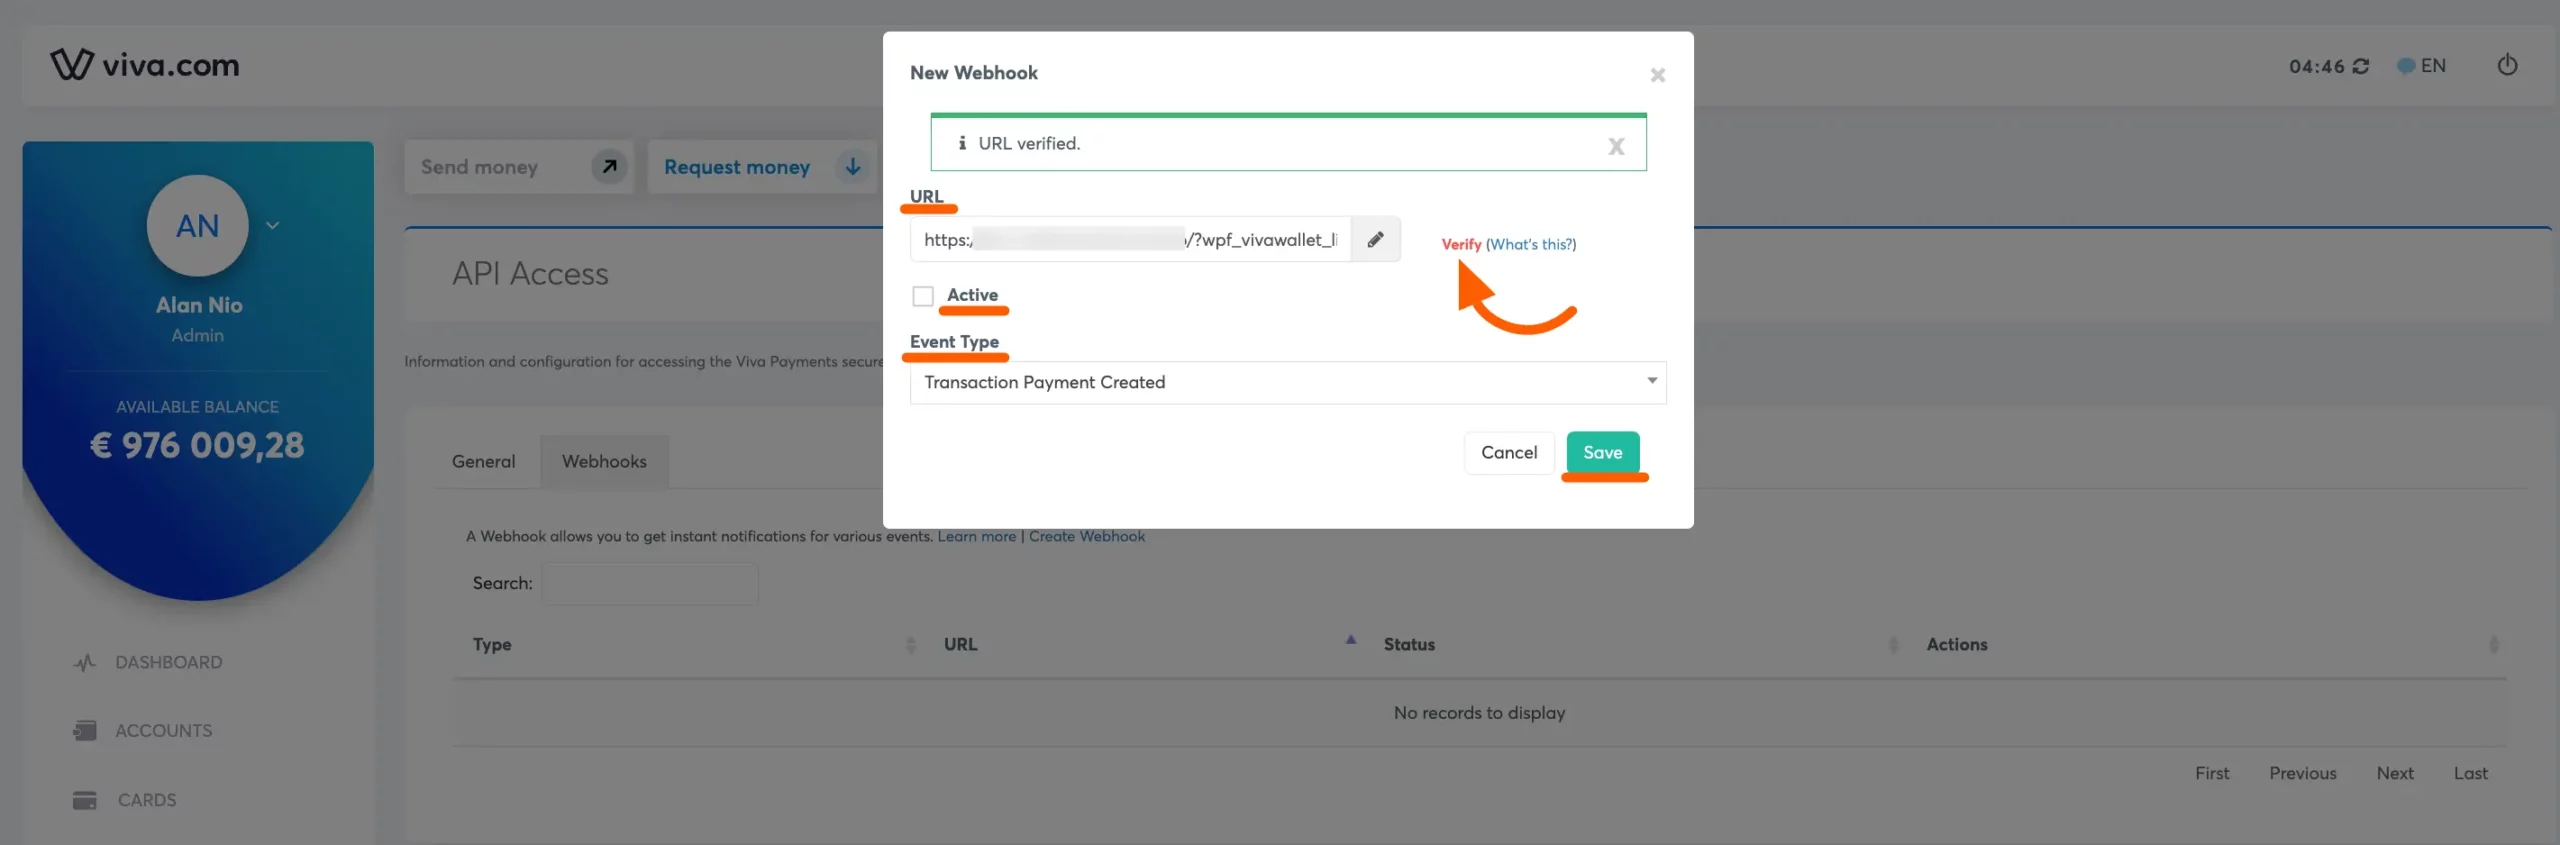
- Configure the webhook:
- Paste the Webhook URL
- Check the Active box
- Select Transaction Payment Created from the dropdown
- Click Save
Add Viva Wallet to Forms
Once you've completed the setup, you can add Viva Wallet to your forms:
For existing forms: Add it to any Payment Form
For new forms:
Learn more about adding payment methods
Note
The Viva Wallet payment method will not function unless you complete the configuration process properly.
Currency Selection in Payment Form
Important
Select the Payment Currency according to your Viva Wallet account to ensure functional and smooth transactions.
To learn how to change currency settings for a specific form, read our Currency Settings Documentation.
Need Help?
If you have any questions, concerns, or suggestions, please contact our @support team. We're here to help!