How to Integrate Paystack in WordPress with Paymattic
Integrating Paystack, a leading African payment gateway, into your WordPress site allows you to accept payments securely and efficiently from your customers. With the Paymattic plugin, this integration is straightforward and seamless.
This detailed guide will walk you through every step of connecting your Paystack account to Paymattic, enabling you to start accepting payments in minutes.
Prerequisites
Before you begin, please ensure you have the necessary tools. Access to the Paystack payment gateway is a premium feature, which requires an active license of the Paymattic Pro Plugin.
Configuring the Paystack Payment Method
The following steps will establish the primary connection between your Paymattic plugin and your Paystack account. This is a one-time setup that will enable Paystack as a payment option across all your forms.
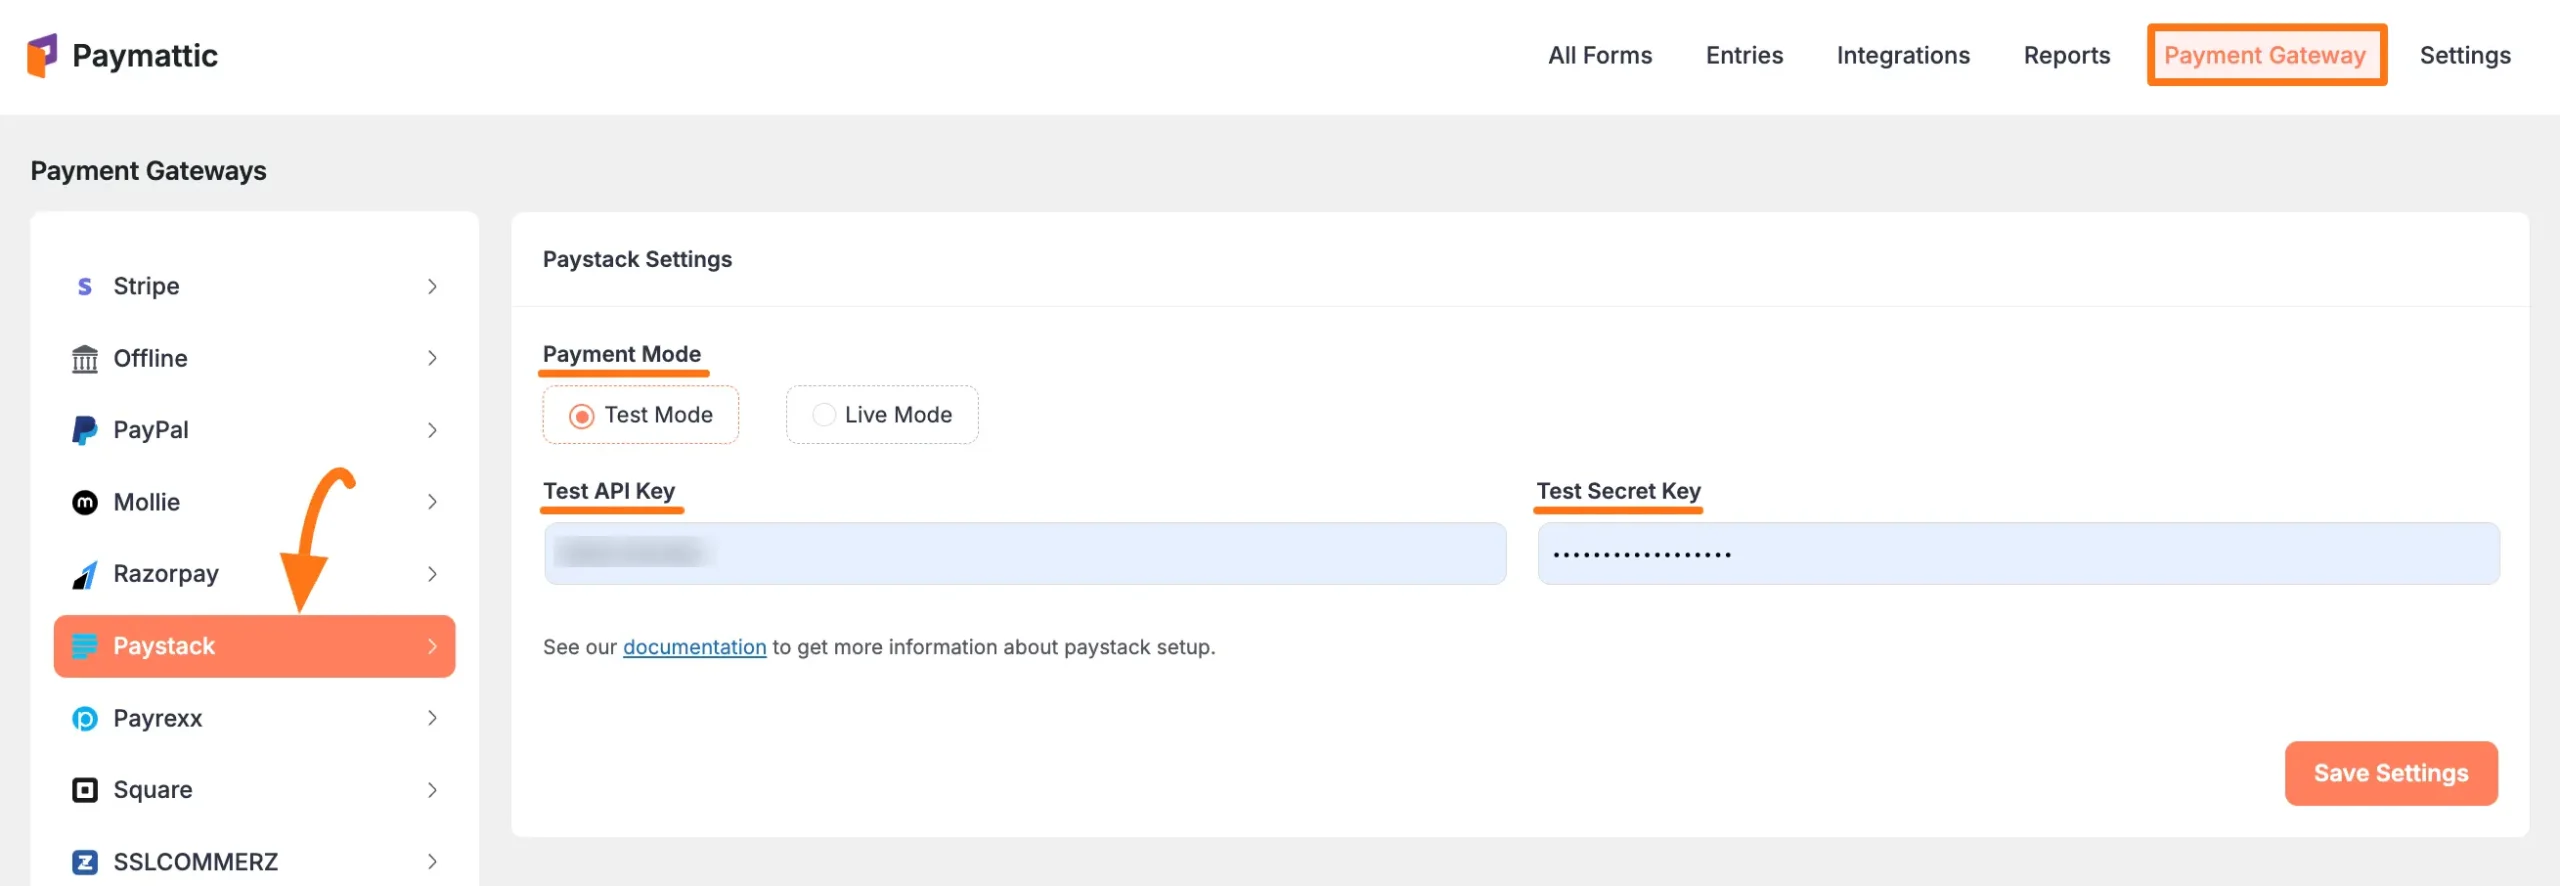
Step 1: Navigate to the Paystack Settings Page
First, you need to locate the Paystack configuration area within your Paymattic dashboard.
- From your WordPress admin panel, navigate to the Paymattic menu and click on Payment Gateway.
- On the next screen, you will see a list of available gateways. Select the Paystack tab from the left sidebar.
- This action will open the main Paystack Settings page, where you will enter your credentials.
Step 2: Set the Payment Mode and Identify Required Keys
Before entering your credentials, you must decide whether you want to run live transactions or test your setup.
Select your Payment Mode:
- Test Mode: This is a safe environment for testing your payment forms without processing real money. It requires a test API key from Paystack.
- Live Mode: Select this when you are ready to start accepting actual payments from your customers. It requires a live API key.
For the purpose of this guide, we will proceed using Test Mode. The configuration process is identical for both modes.
Identify Required Credentials: To connect your account, Paymattic requires two unique keys from your Paystack Account: an API Key (Public Key) and a Secret Key. These keys act like a username and password that allow your website to communicate securely with Paystack.
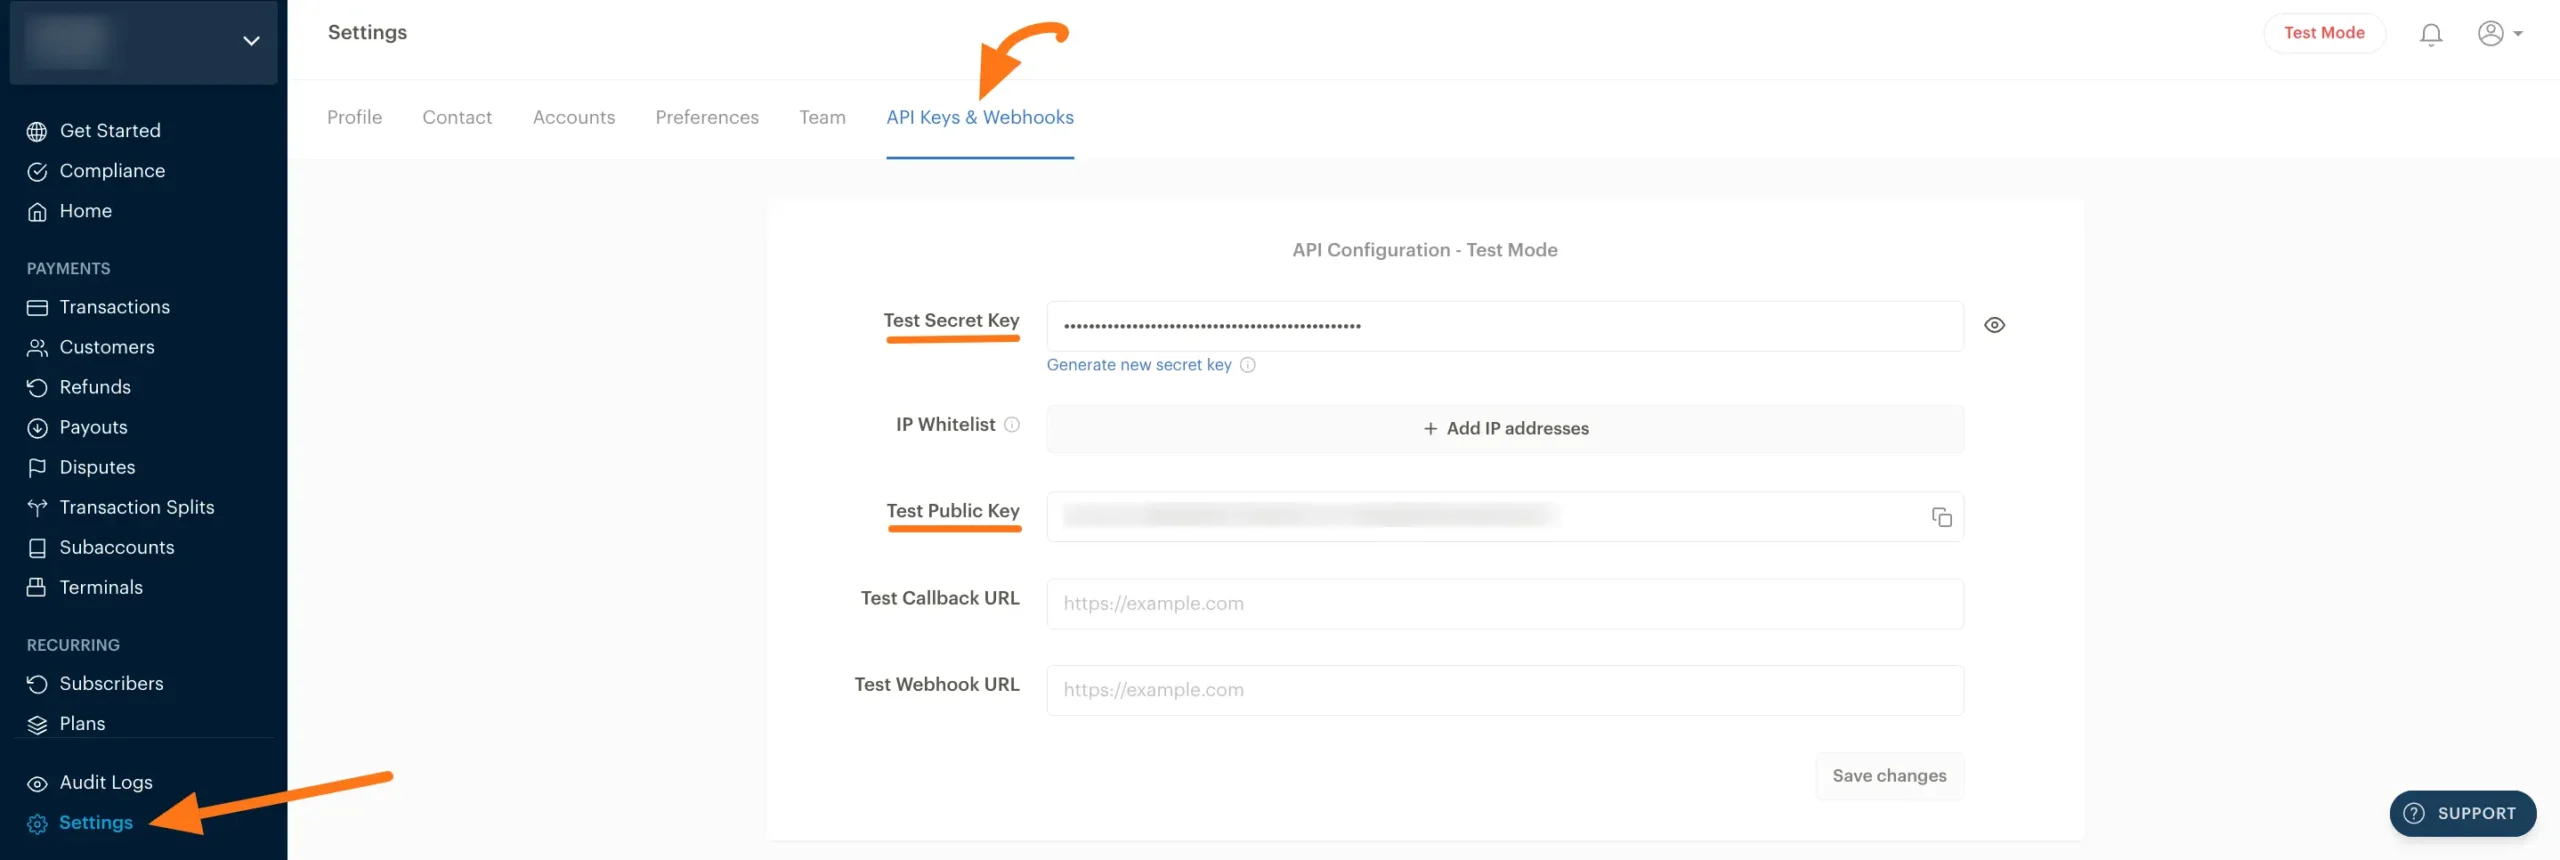
Step 3: Retrieve Your API Keys from Paystack
Now, you need to log in to your Paystack account to find the required API keys.
- Open a new browser tab and log in to your Paystack Account.
TIP
If you don't have an account, you can easily sign up here.
- Once you are logged in to the Paystack Dashboard, look for the Settings option in the bottom-left sidebar menu and click on it.
- On the Settings page, navigate to the API Keys & Webhooks tab. This screen holds the credentials you need.
- Carefully copy your Secret Key and Public Key. Be sure to copy the correct keys (Test or Live) that correspond to the Payment Mode you selected in Paymattic.
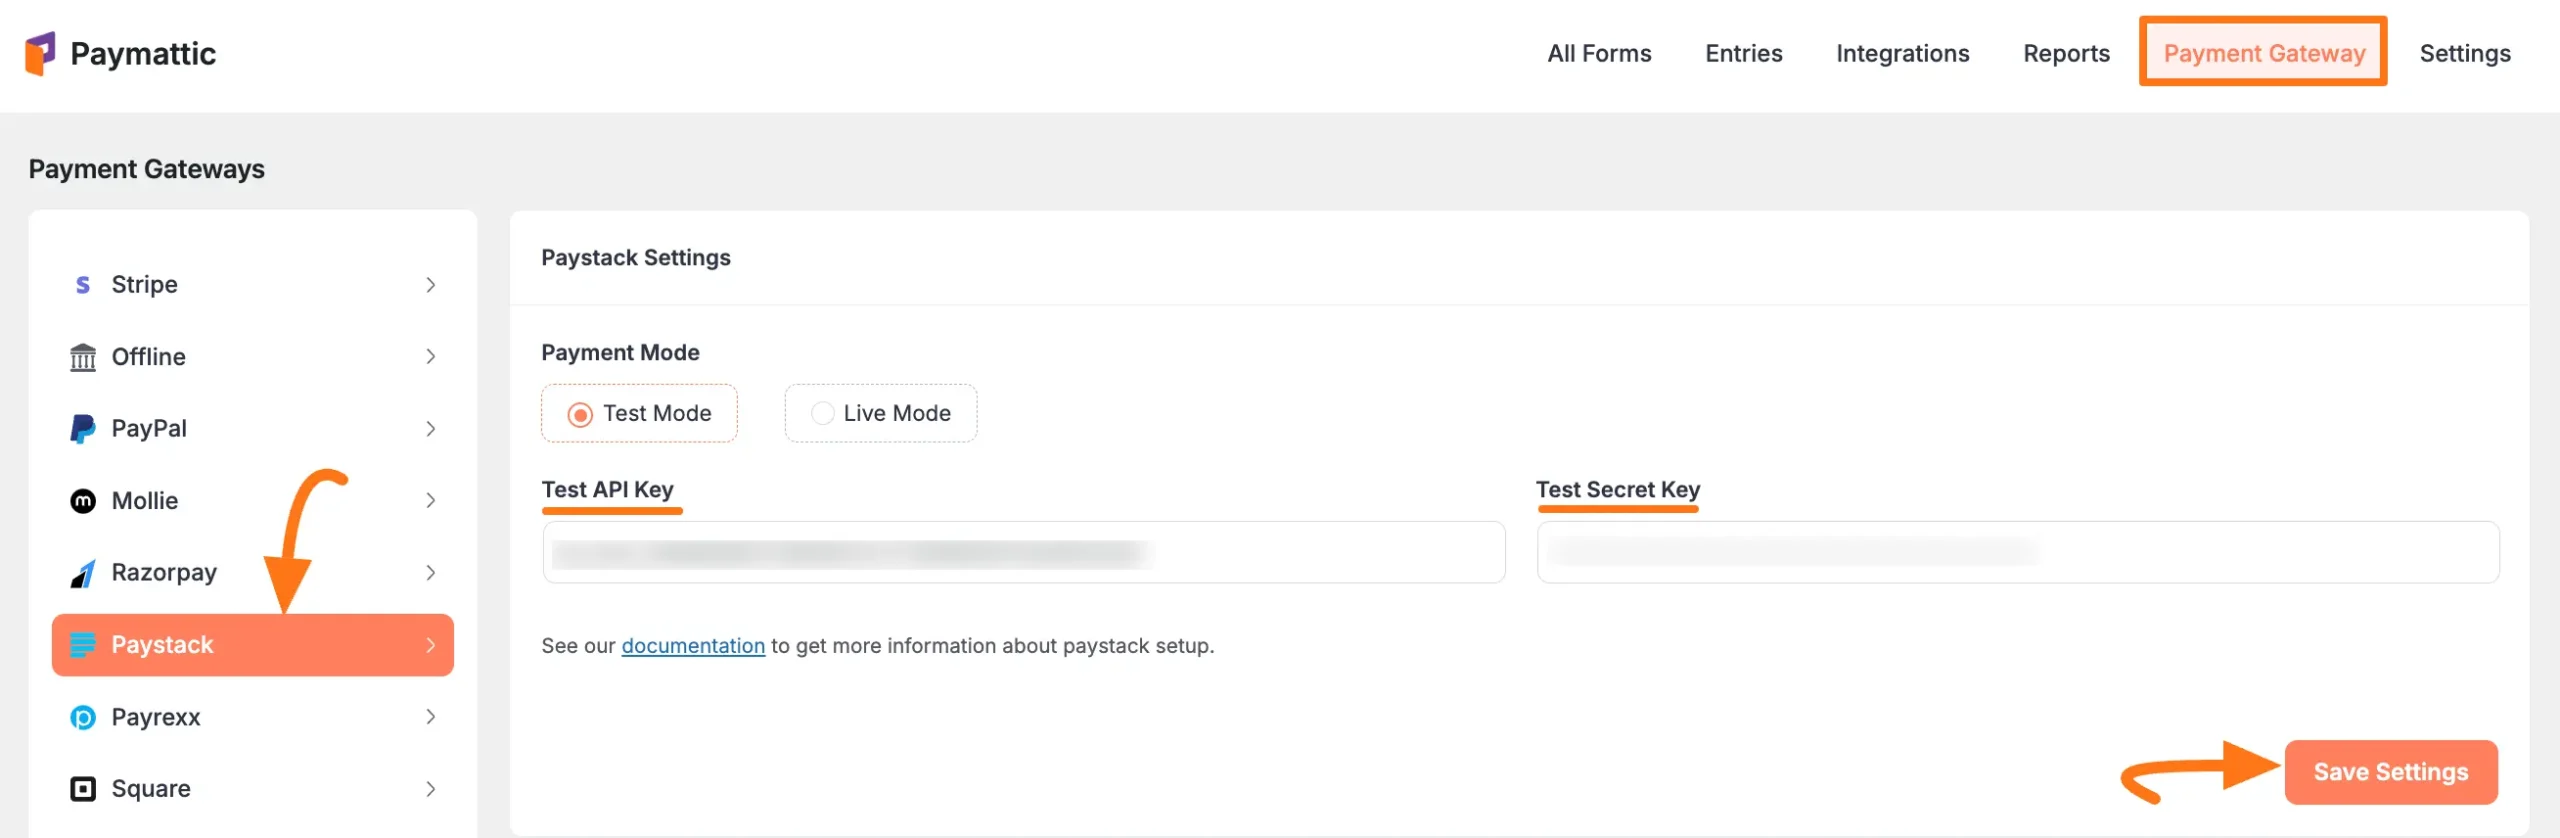
Step 4: Enter and Save Your Credentials in Paymattic
With your API keys copied, it's time to return to your WordPress dashboard and finalize the setup.
- Navigate back to the Paymattic → Payment Gateway → Paystack tab.
- Carefully paste the keys into their respective fields:
- Paste the Public Key from Paystack into the API Key field in Paymattic.
- Paste the Secret Key from Paystack into its corresponding Secret Key field.
- Double-check that the keys are correct and then click the Save Settings button to complete the integration.
Enabling Paystack in Your Payment Forms
Now that the global configuration is complete, the final step is to add Paystack as a payment option within your forms.
- To add Paystack to an existing form, simply edit the form and add the Payment Method field, ensuring Paystack is enabled. You can learn more about this in our guide on creating a Payment Form.
- If you're building a new form, you can either Create a Form from Scratch or get a head start when you Use Form Templates.
- For a detailed overview of the payment method field itself, see our guide on adding payment methods.
Note
Please remember that the Paystack payment option will not appear or function on your forms unless the global configuration steps outlined above are completed correctly and the keys are saved.
Need Help?
If you encounter any issues during this process or have further questions, our dedicated support team is here to assist you. Please don't hesitate to contact our @support team. We're always happy to help!