How to Collect Offline Payments in WordPress with Paymattic
Paymattic provides a flexible Offline Payment option, allowing you to accept payments that are not processed in real-time through an online gateway. This method is perfect for businesses and organizations that want to accommodate traditional payment methods or for customers who prefer not to share their card details online.
It's an ideal solution for collecting payments via:
- Direct bank transfers
- Personal or company checks
- In-person cash payments
This guide will show you exactly how to set up and use the offline payment feature on your WordPress site with Paymattic.
Benefits of Offline Payments
- Flexible payment options for customers
- No need for online payment processing
- Support for traditional payment methods
- Manual payment verification
- Ideal for bank transfers and checks
Configuring the Offline Payment Method
Setting up the offline payment gateway in Paymattic is incredibly simple. It's essentially a matter of enabling the option so you can add it to your forms. Here's how to do it.
Step 1: Navigate to the Offline Settings
First, you need to find the Offline gateway configuration panel within your Paymattic dashboard.
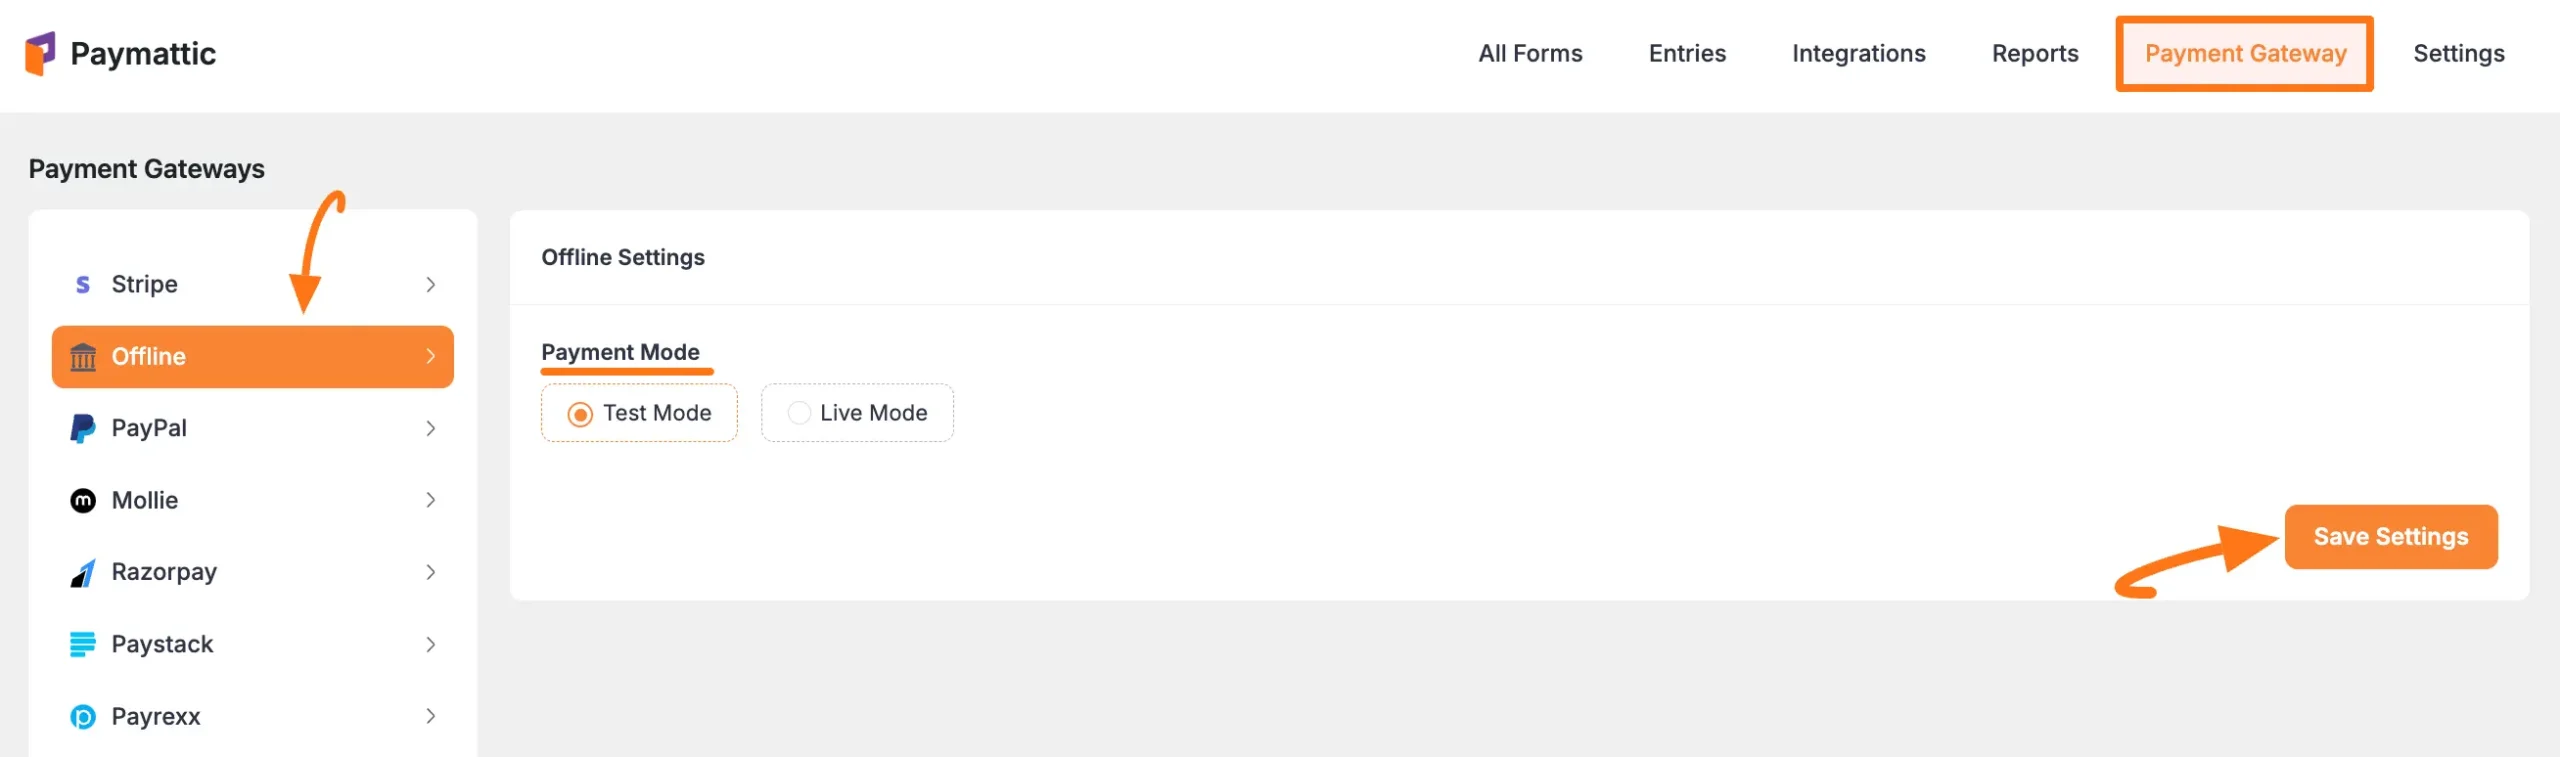
- From your WordPress admin panel, go to Paymattic → Payment Gateway.
- In the list of available gateways on the left, click on the Offline tab.
- This will open the main Offline Settings page.
Step 2: Set the Payment Mode and Save
The only setting required for the offline method is to choose your operational mode.
Select your Payment Mode:
- Test Mode: Use this to test your form submissions without cluttering your live transaction records.
- Live Mode: Use this to accept real payment pledges from your users.
Both modes function identically for this payment method. For this guide, we'll select Test Mode.
Click the Save Settings button to apply your changes. The Offline gateway is now active!
Enabling Offline Payments in Your Forms
With the gateway enabled, the next step is to add it as a payment choice in your forms. This gives your users the option to select it during checkout.
- For an existing form, simply edit the form, add the Payment Method field from the input fields panel, and ensure that 'Offline' is enabled as an option. You can learn more in our guide on creating a Payment Form.
- When building a new form, you can either Create a Form from Scratch or get a head start when you Use Form Templates.
- For a detailed look at the payment field itself, refer to our documentation on adding payment methods.
Note
The offline payment method will not function unless you complete the configuration process properly.
Payment Process
When a customer chooses offline payment:
- They can submit the form without immediate payment
- You'll receive a notification of the pending payment
- You can manually verify the payment when received
- Mark the payment as complete in your dashboard
Need Help?
If you have any questions, concerns, or suggestions, please contact our support team. We're here to help!