How to View Reports and Payment Analytics in WordPress?
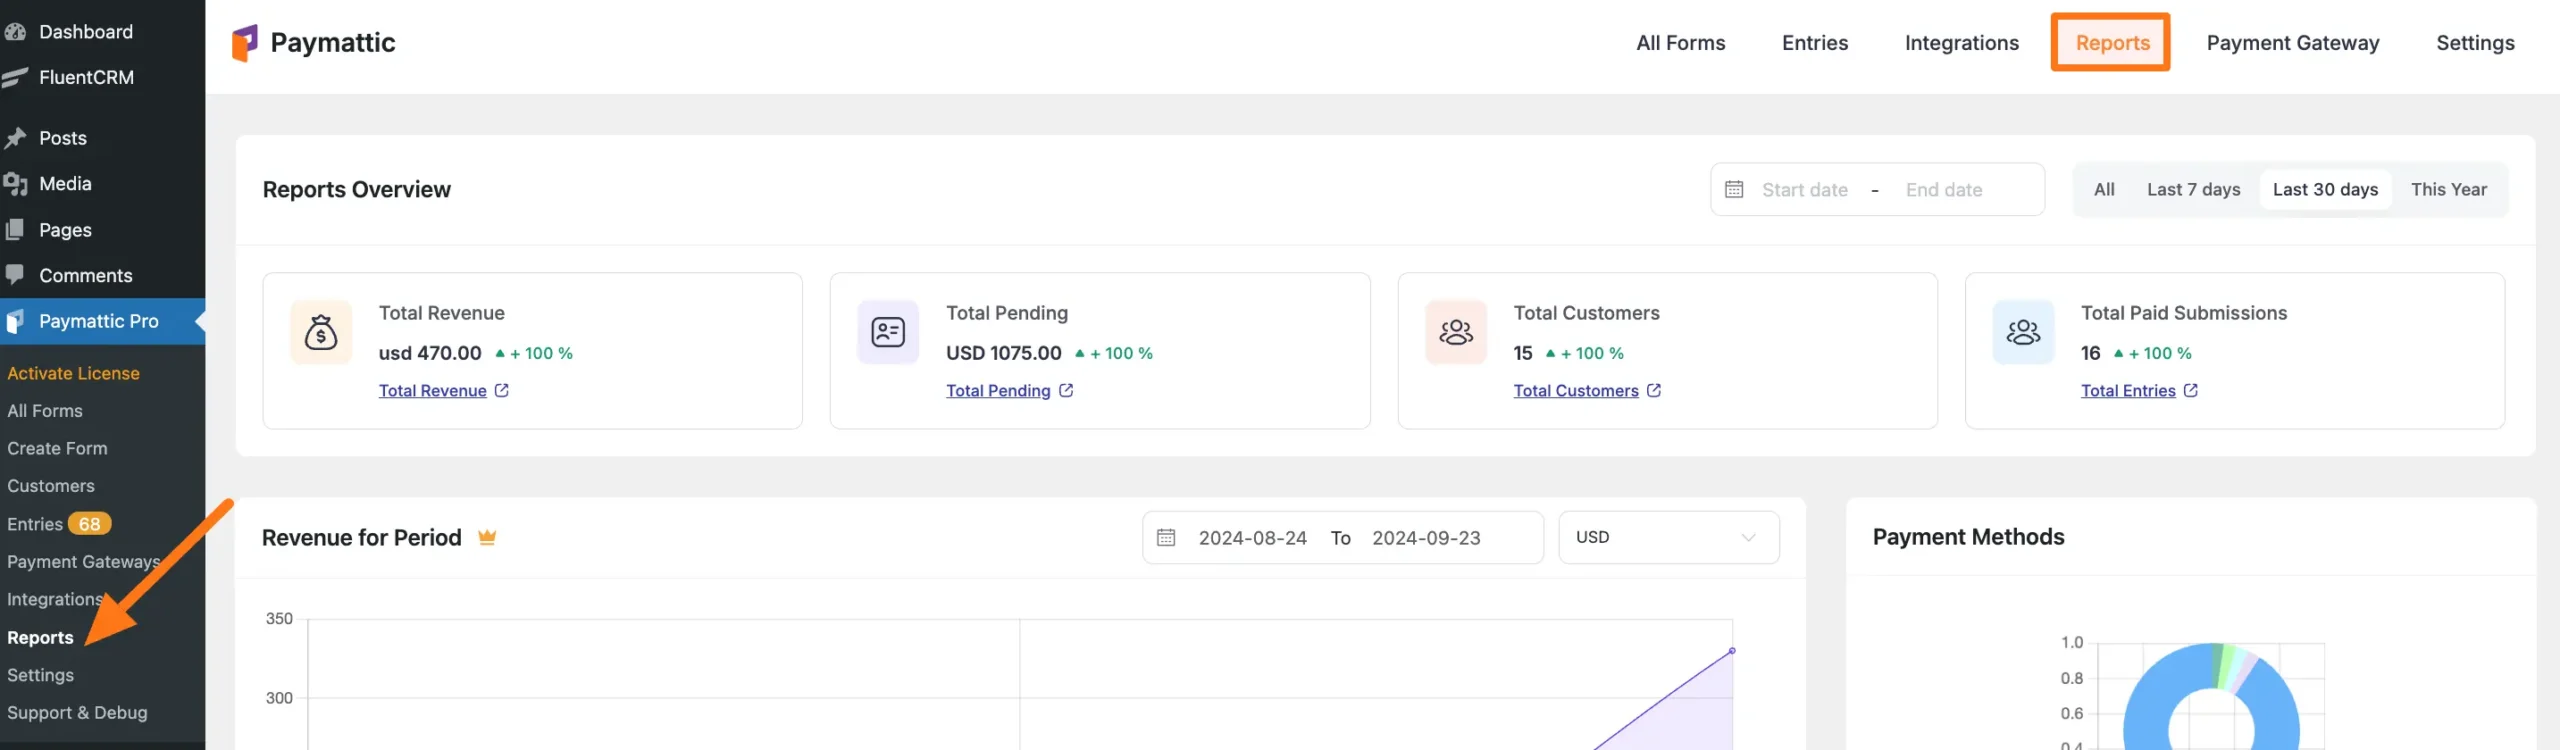
The Report section of Paymattic will provide a quick rundown of all the entries submitted through your forms. It gives you an easy-to-digest overview of all the submitted entries on a single page. In general, you will have a bird-eye-view of the performance of your payment forms. This article will guide you through using all the features of the Paymattic Reports Section.
View Reports and Payment Analytics
First, go to Paymattic Dashboard from the WordPress Left Sidebar, click the Reports section, and all the features will appear to help you view your overall Reports.
All the features for viewing the overall report of entire Paymattic activities are organized into nine major sections: These are:
Reports Overview
Revenue for Period
Payment Methods
Recent Transactions
Payment Status
Top Customers
Revenue Breakdown
Form Status
Active Subscriptions
All the available Sections including their Features are explained below:
1. Reports Overview
In this section, you will get four major features to view reports of your Paymattic activities. These are:
A. Total Revenue
B. Total Pending
C. Total Customers
D. Total paid submissions
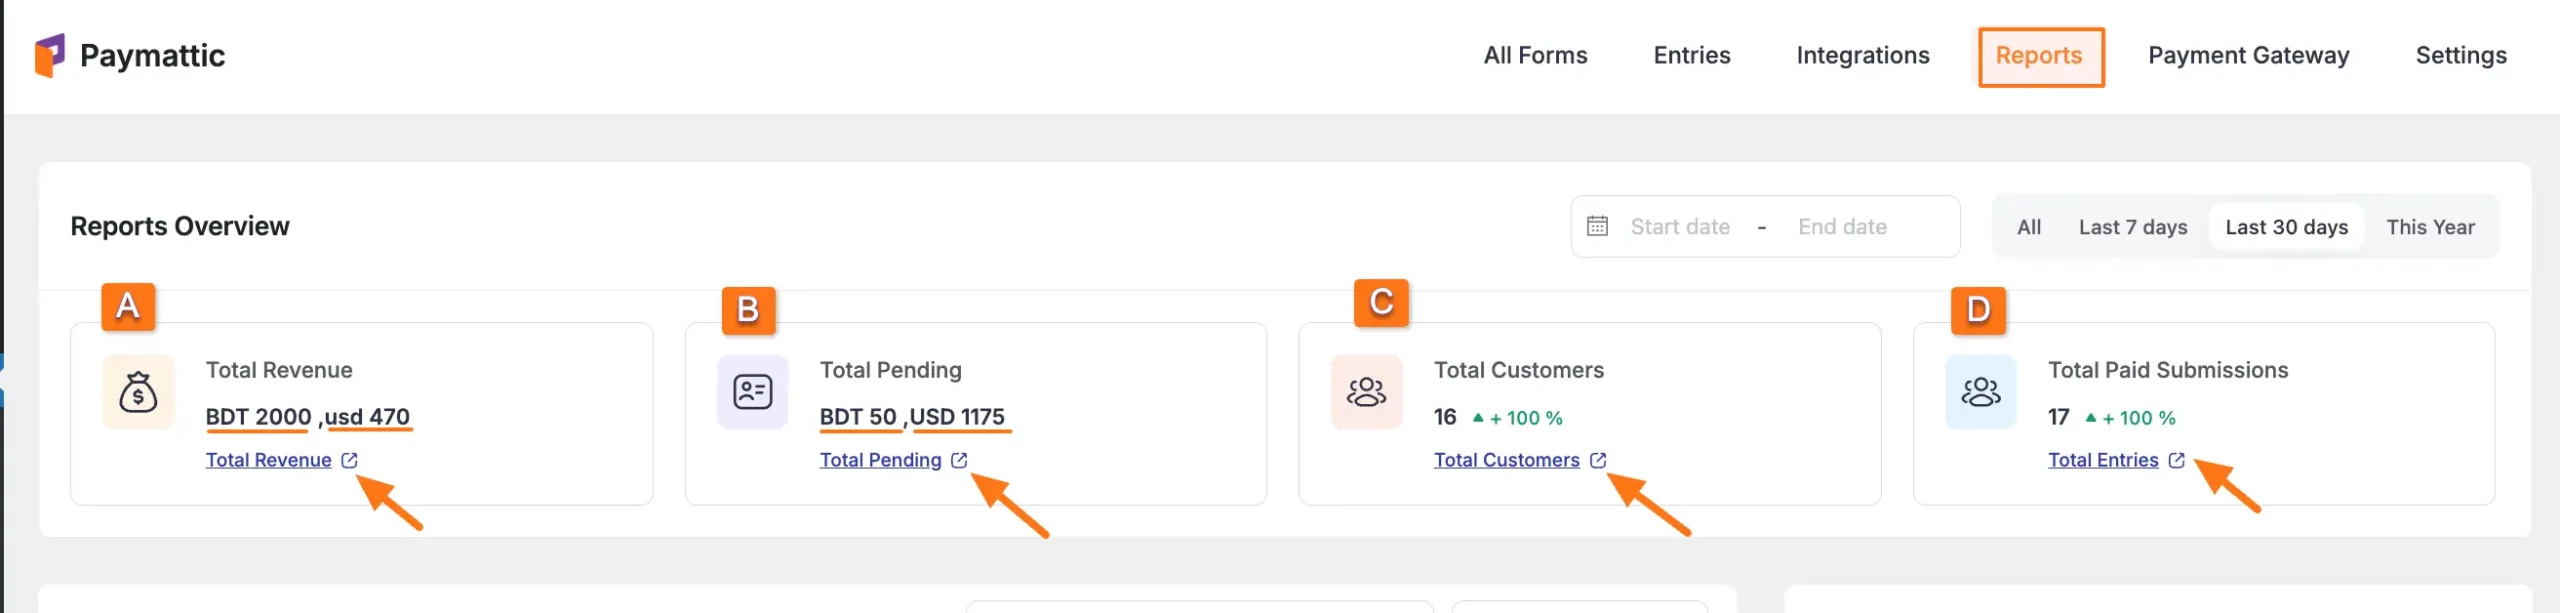
A. Total Revenue
The Total Revenue tab displays the total amount of payments made by the users till today. If the users pay in different currencies, this tab will also break down the amount into respective currencies.
To view the complete revenue details for each entry, click the Total Revenue button.
NOTE
It will redirect you to the “Entries” section from the Paymattic Navbar and open all the entries under the “Paid” entry status. For details, please refer to this Documentation.
B. Total Pending
The Total Pending tab displays the total amount of pending payments by users till today. If the users pay in different currencies, this tab will also break down the amount into respective currencies.
To view the complete pending details of each form entry, click the Total Pending button.
NOTE
It will redirect you to the “Entries” section from the Paymattic Navbar and open all the entries under the “Pending” entry status. For details, please refer to this Documentation.
C. Total Customer
The Total Customers tab displays the total number of all the customers and their submission details.
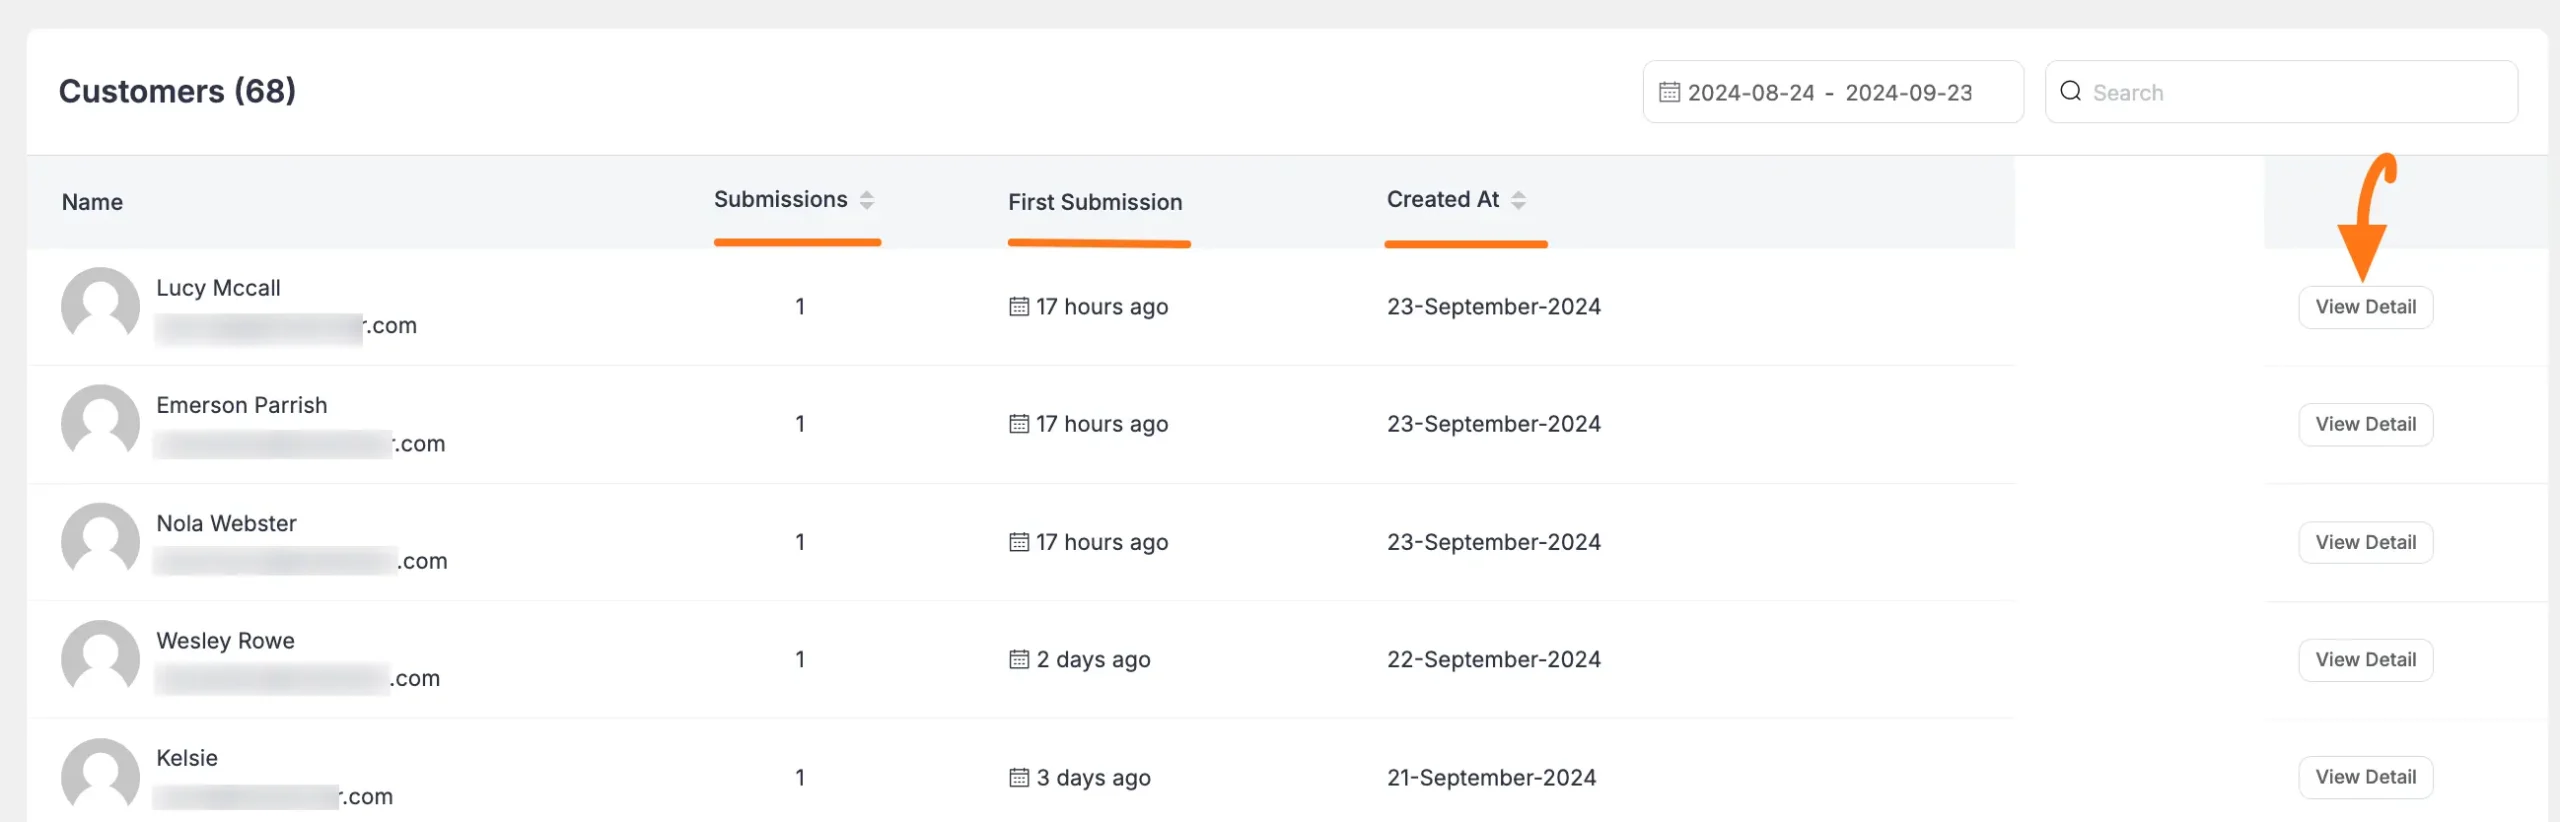
To view the complete details of each customer, click the Total Customer button. It will redirect you to the customer detail page.
Here, you can see the total number of form submissions, the time of the first form submission, and the creation date of the first submission for each customer details.
D. Total Paid Submissions
The Total Paid Submissions tab displays the total number of all the form submissions with successful payments and their submission details.
To view the complete paid submission details for each entry, click the Total Entries button.
NOTE
It will redirect you to the “Entries” section from the Paymattic Navbar and open all the entries under the “Paid” entry status. For details, please refer to this Documentation.
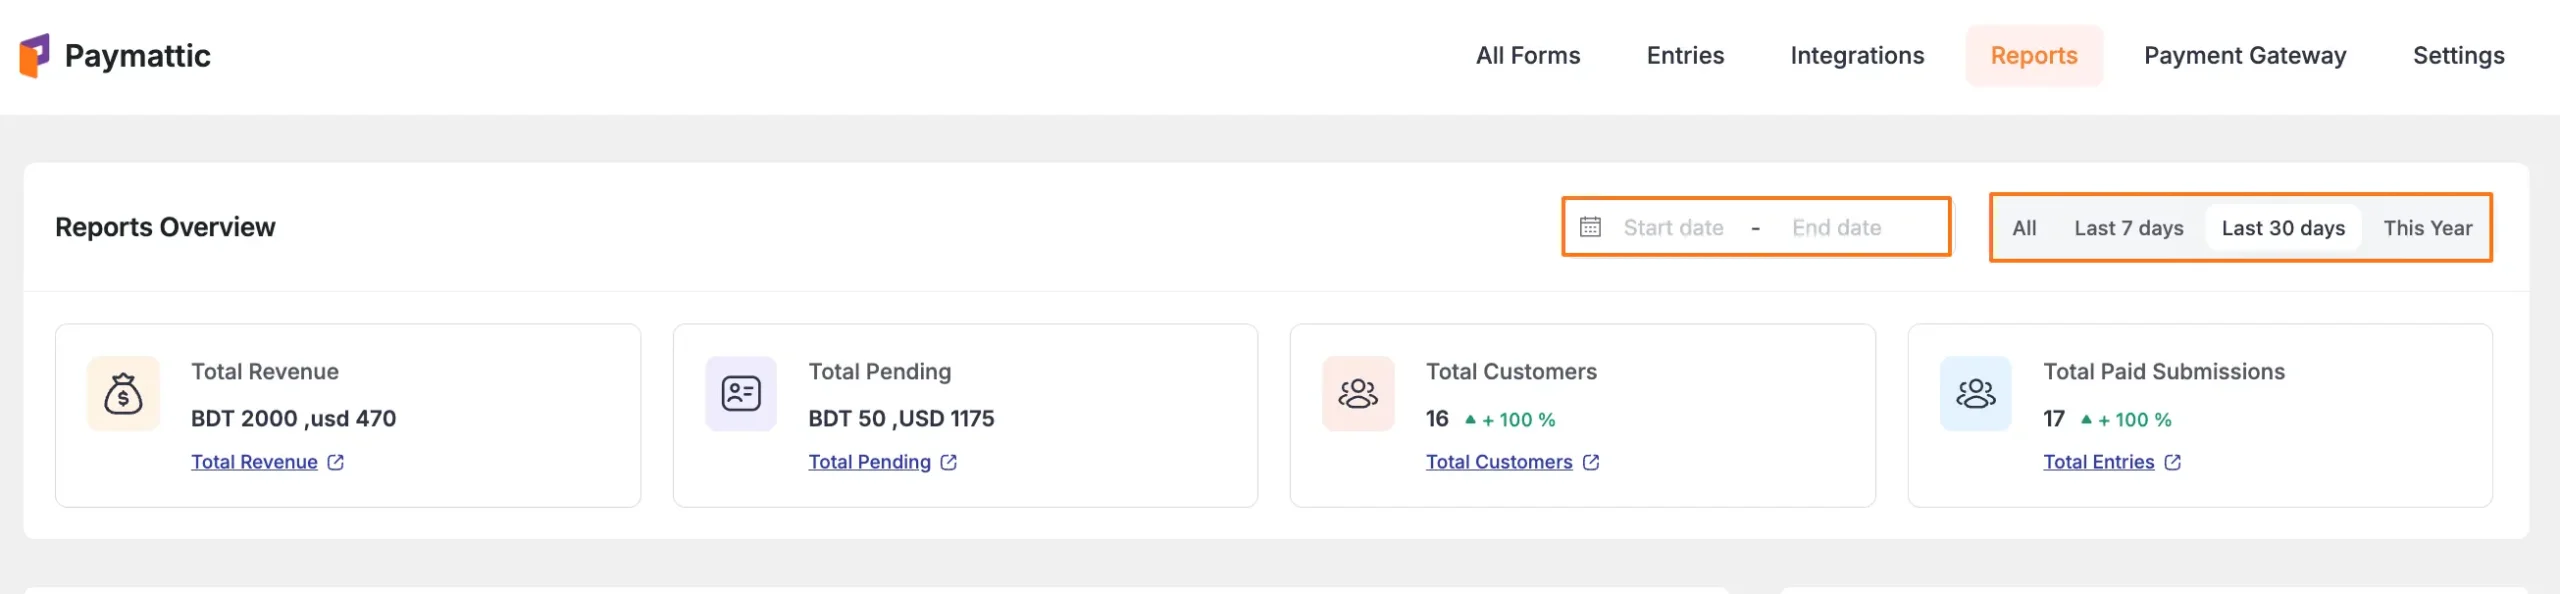
Filter Options
Here, you will get two options for filtering the data you want to view specifically in the top right corner. These are:
- Date filter: With this option, you can view reports from a specific period based on dates.
- Days filter: With this option, you can view reports from a specific period based on the last week/month, ongoing year, or all reports till the ongoing day.
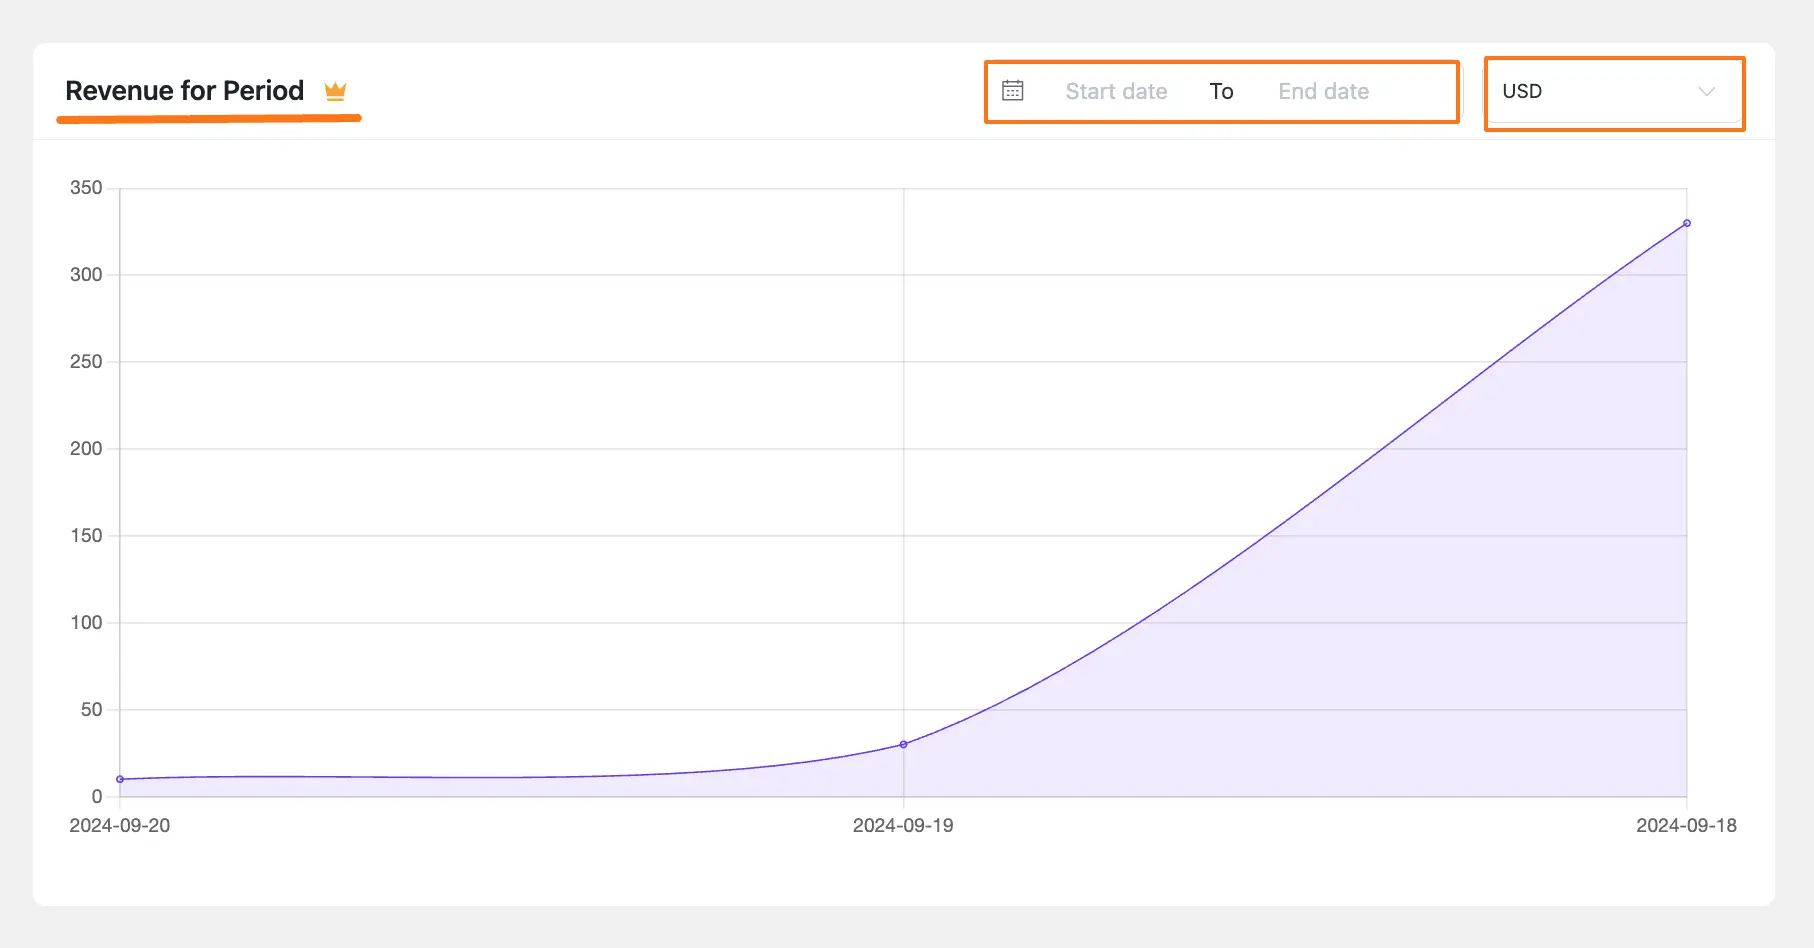
2. Revenue for Period
Premium Feature
The Revenue for Period section is a Pro feature i.e., to use this feature for viewing reports you need the Paymattic Pro Plugin.
This section shows you the trend of revenue earned in the recent period through a line chart. Each data point on the graph displays the total amount of revenue generated on a specific date while you hover the mouse over it.
You will also get two options for filtering your report data. These are:
- Date filter: With this option, you can view reports from a specific period based on dates.
- Currency filter: With this option, you can select the currency from the dropdown list to view the revenue for different currencies.
3. Payment Methods
This section presents a donut chart about the number of submissions through each payment method. Each type of payment method is marked in different colors on the chart. If you hover the mouse over on a specific colour it pops up the number of submissions for different payment methods.

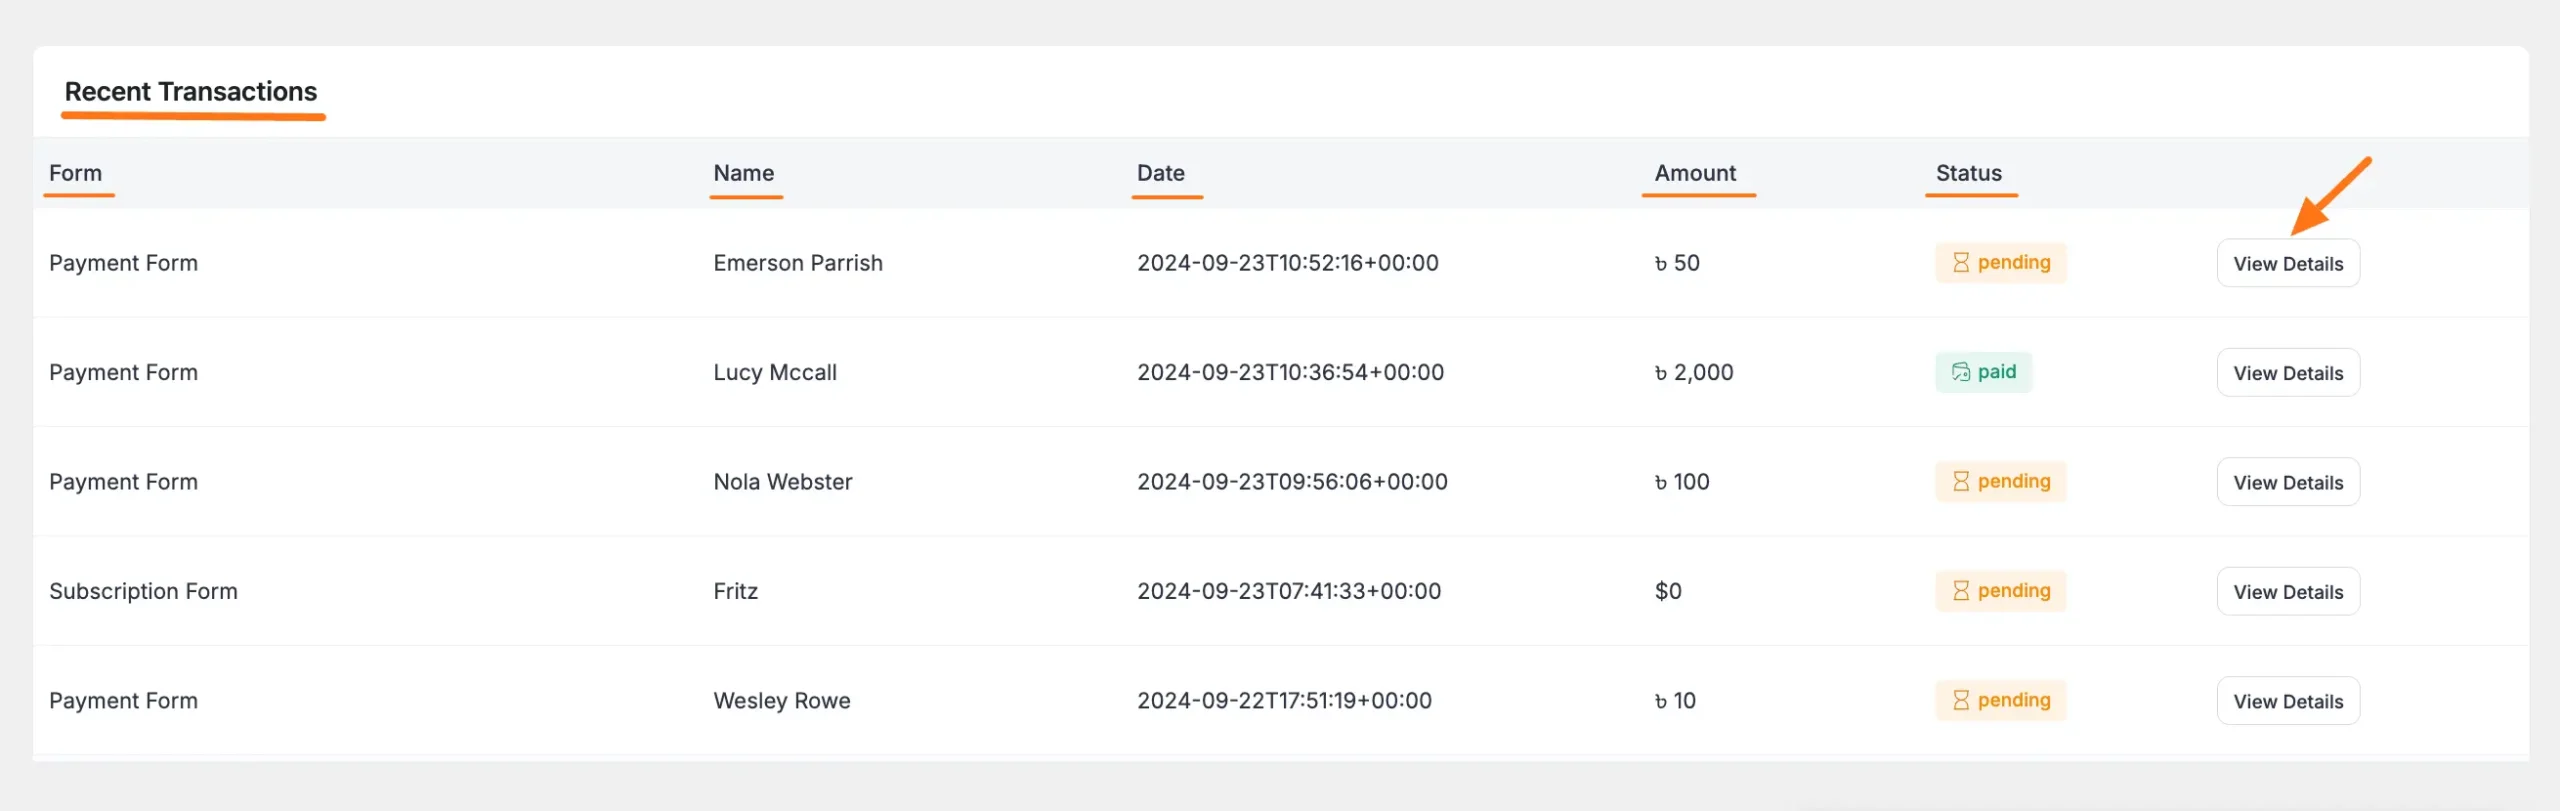
4. Recent Transactions
This section shows the list of recent payments made through your website. Each row in the list includes the Form Name, Customer Name, Time of Transaction/Payment, Payment Amount, and Payment Status.
Also, the payment amount is marked in different colors based on paid, pending, processing, refunded, and failed status.
NOTE
To view the complete transaction details for each entry, click the View Details button. For details, please refer to this View Details for complete transaction info.
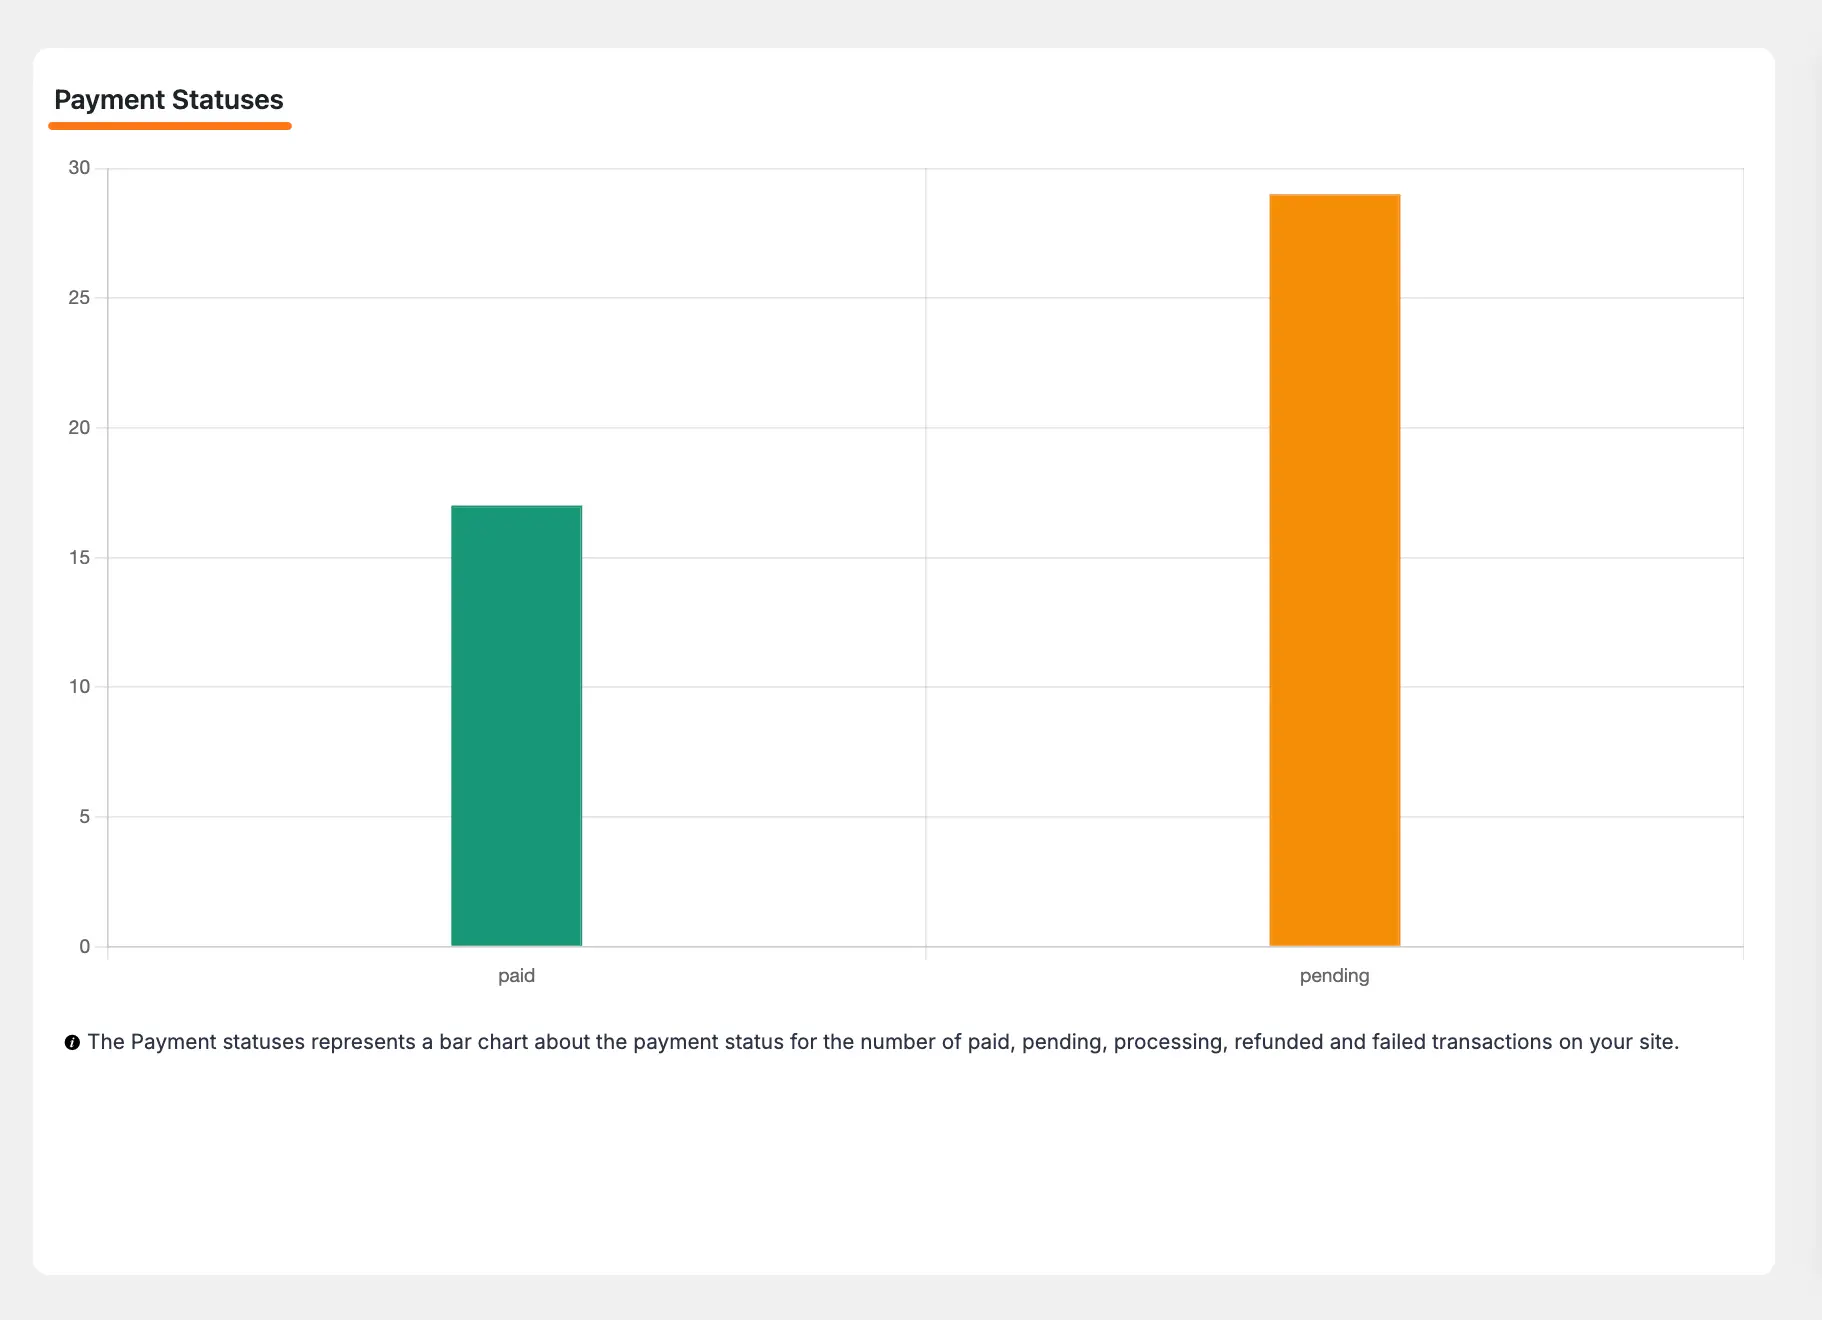
5. Payment Status
This section represents the number of form submissions based on payment statuses e.g., Paid, Pending, Processing, Refunded, Failed, and Abandoned transactions on your site.
To know the exact number of submissions, just hover the mouse over the bars. Also, it generates different color bars based on different types of submissions.
Hover for exact counts.
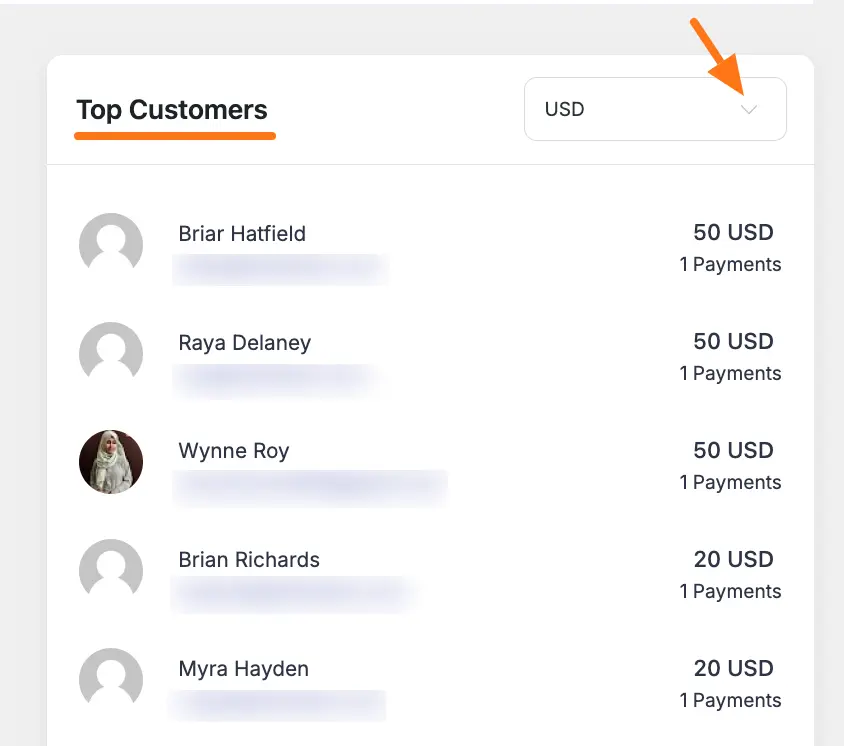
6. Top Customers
This section filters the customer list based on the highest amount of payments received. By default, this tab shows the list of customers who paid in dollar($) currency. However, you can change the currency from the top corner to view the top customer list for different currencies.
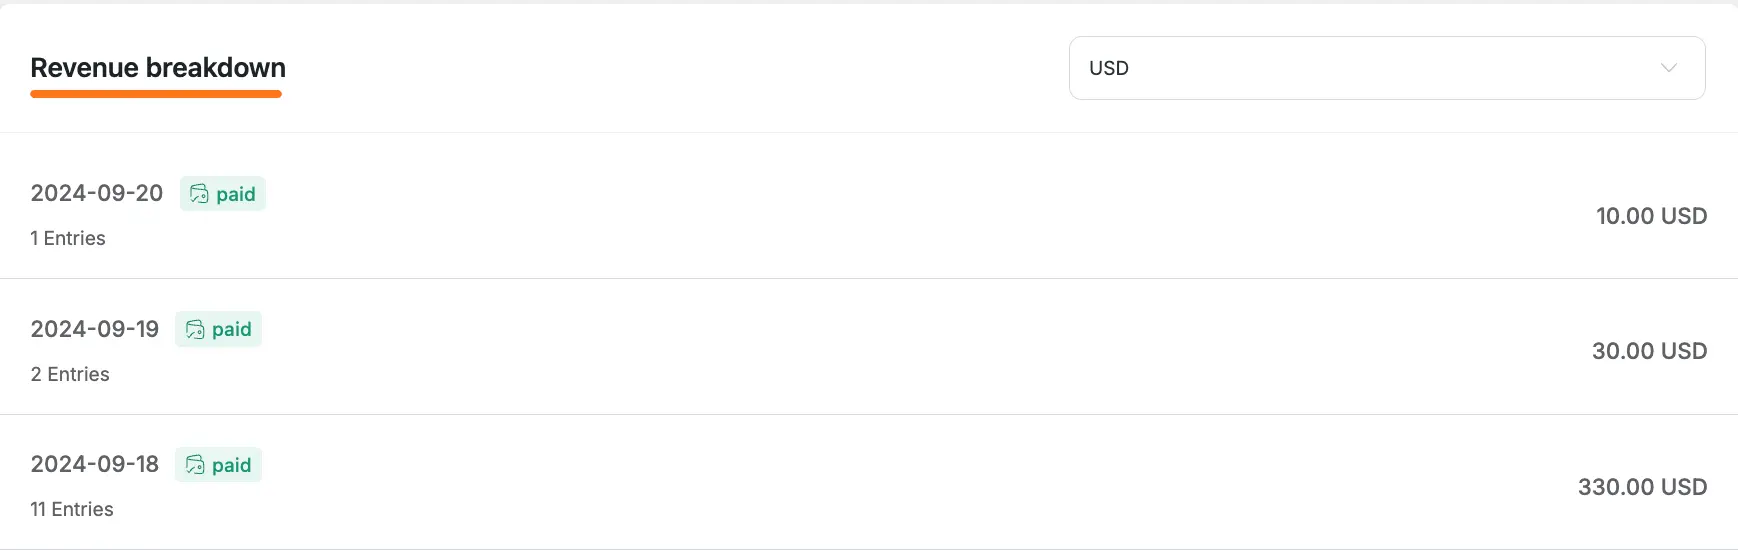
7. Revenue Breakdown
This section shows you the recent net revenue amount based on specific dates. You can view the number of submissions for each date of payment. Also, you can change the currency to view the revenue breakdown in different currencies.
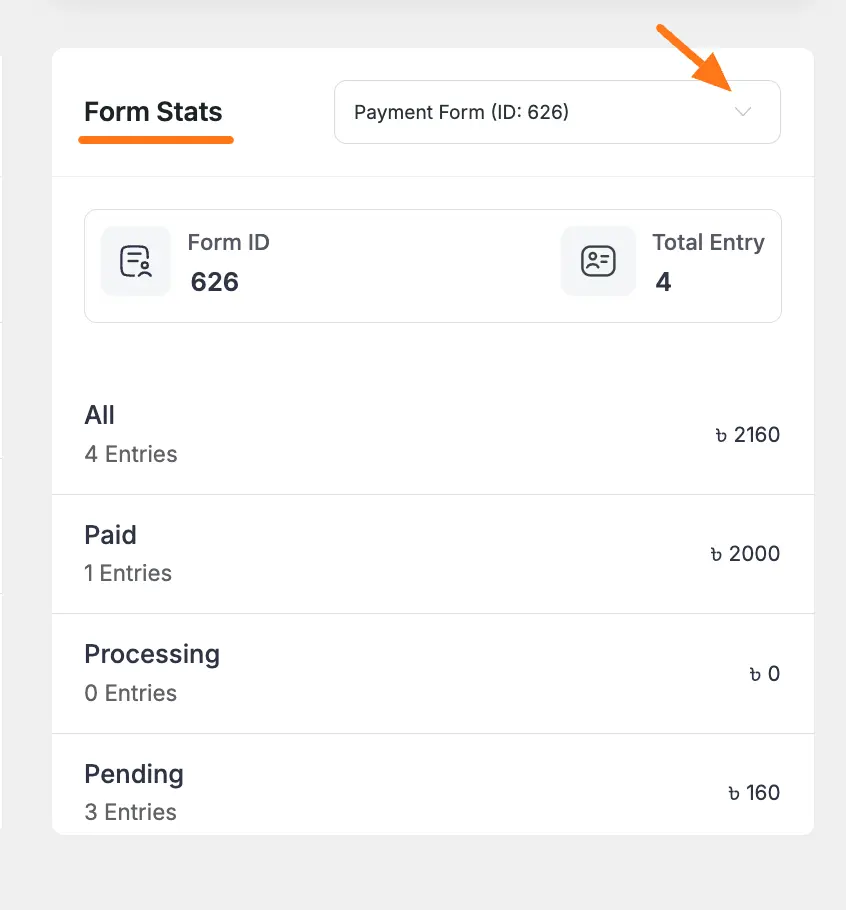
8. Form Status
This section helps you to get a bird-eye-view of the performance for individual forms.
To do this, you need to select a Form from the dropdown list and it will display Form ID, Total Entries, and payment received for this specific form.
It also displays the entry count and payment amount based on the Payment Statuses (Paid, Processing, Pending, etc.).
9. Active Subscriptions
Premium Feature
The Active Subscription is a Pro feature i.e., to use this feature for viewing reports you need the Paymattic Pro Plugin.
This section shows you only the list of recent paid subscriptions made through your Paymattic forms on your site. Each row in the list includes the Form Name, Customer Name, Subscription Plan, Subscription Date, Recurring Amount, Total Amount, and Billing Count.
To view the complete subscription details for each entry, click the View Details button. For details, please refer to this Documentation
And, to view the full Subscription list, click the All Subscription button.

10. Recent Applied Coupons
This section shows you a list of the last ten coupons that have been successfully applied to your payment forms. It provides a quick and convenient way to monitor your recent coupon activity.
Each row in the list includes the Form name, Submission ID, the Coupon code used, Customer name, Email, the Discount amount, and the date it was Created At.
To view the complete submission details for a specific coupon use, click the View Details button. Furthermore, you can click the All Coupons button located at the top right corner to navigate to the main coupon management page.

Need Help?
If you have any questions, concerns, or suggestions, please contact our support team.