How to Create a Step Form with Paymattic
In Paymattic, you can easily create Step Forms i.e., to create multi-step forms that allow you to collect more data without scaring the users away. This article will guide you through Creating Step Forms.
Creating a Step Form
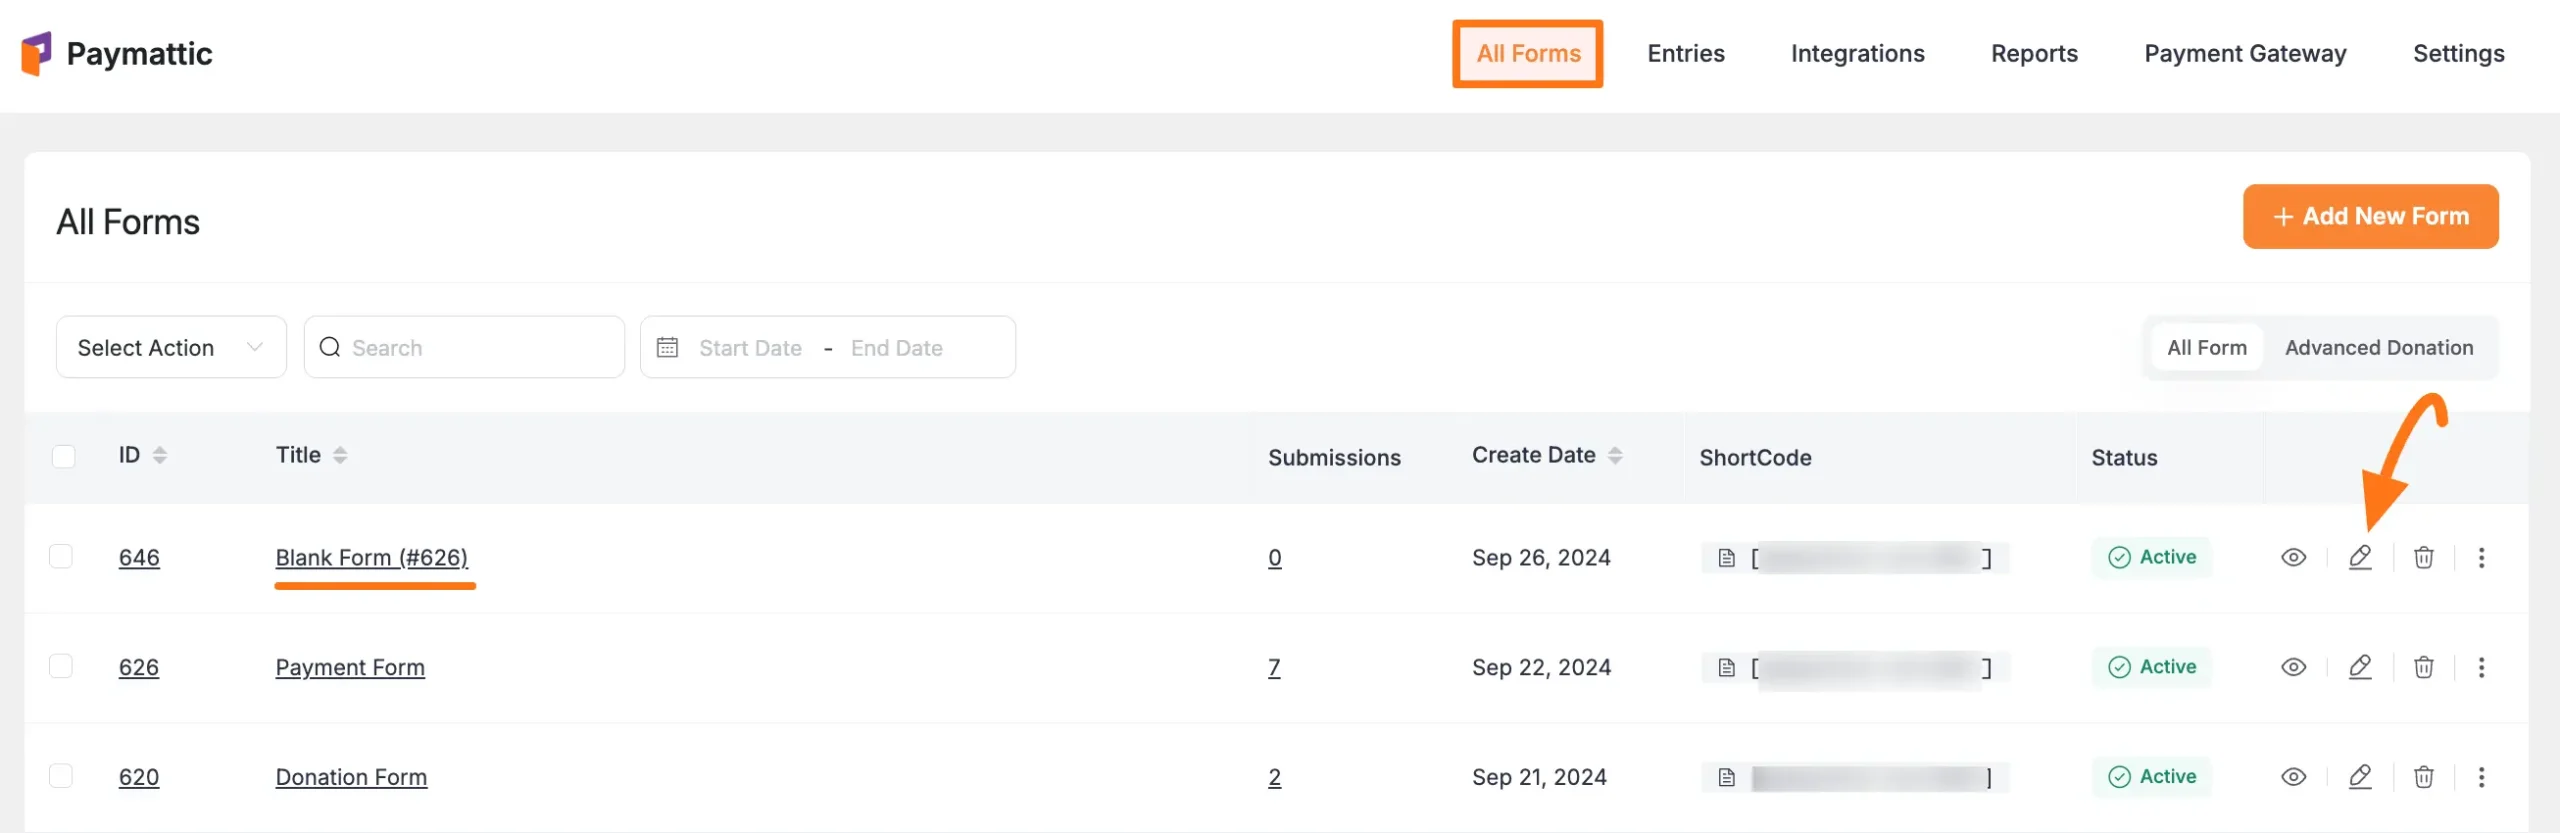
First, go to the All Forms section from the Paymattic Navbar, choose a Form, and click the Pencil/Edit icon to open the Editor page of that form.
For example, I choose an existing form to show the whole process.
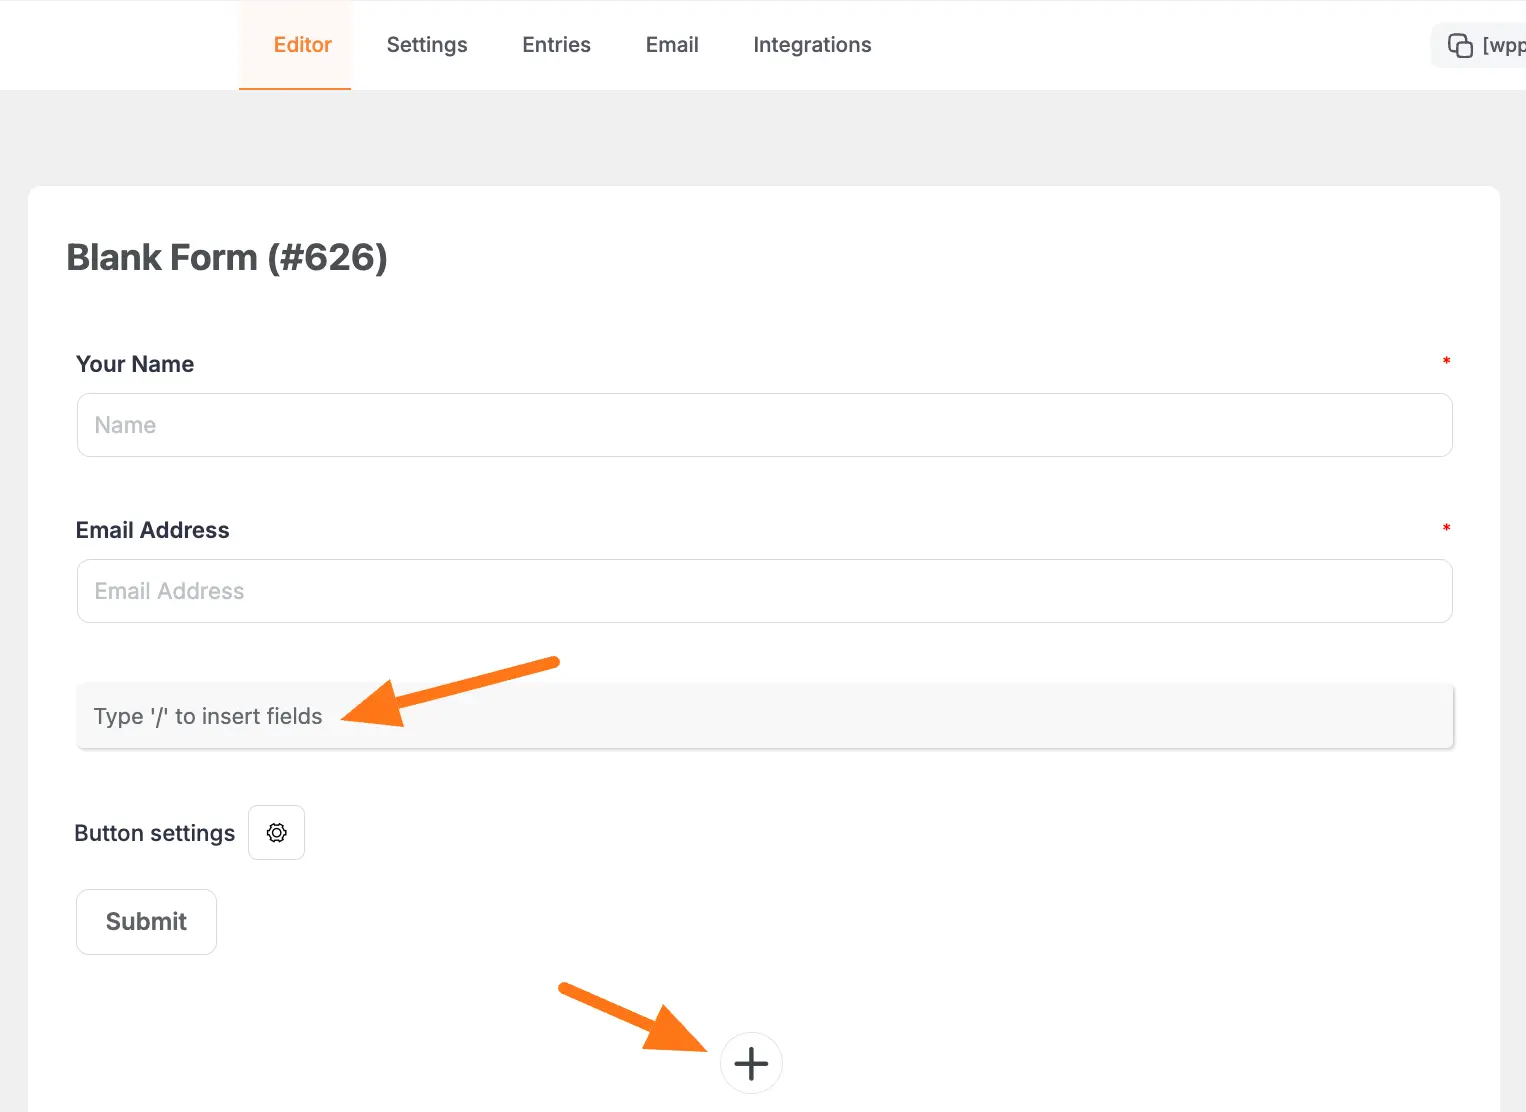
Once you open the Editor page, add the necessary fields by typing the " / " or clicking the Plus Icon placed at the bottom.
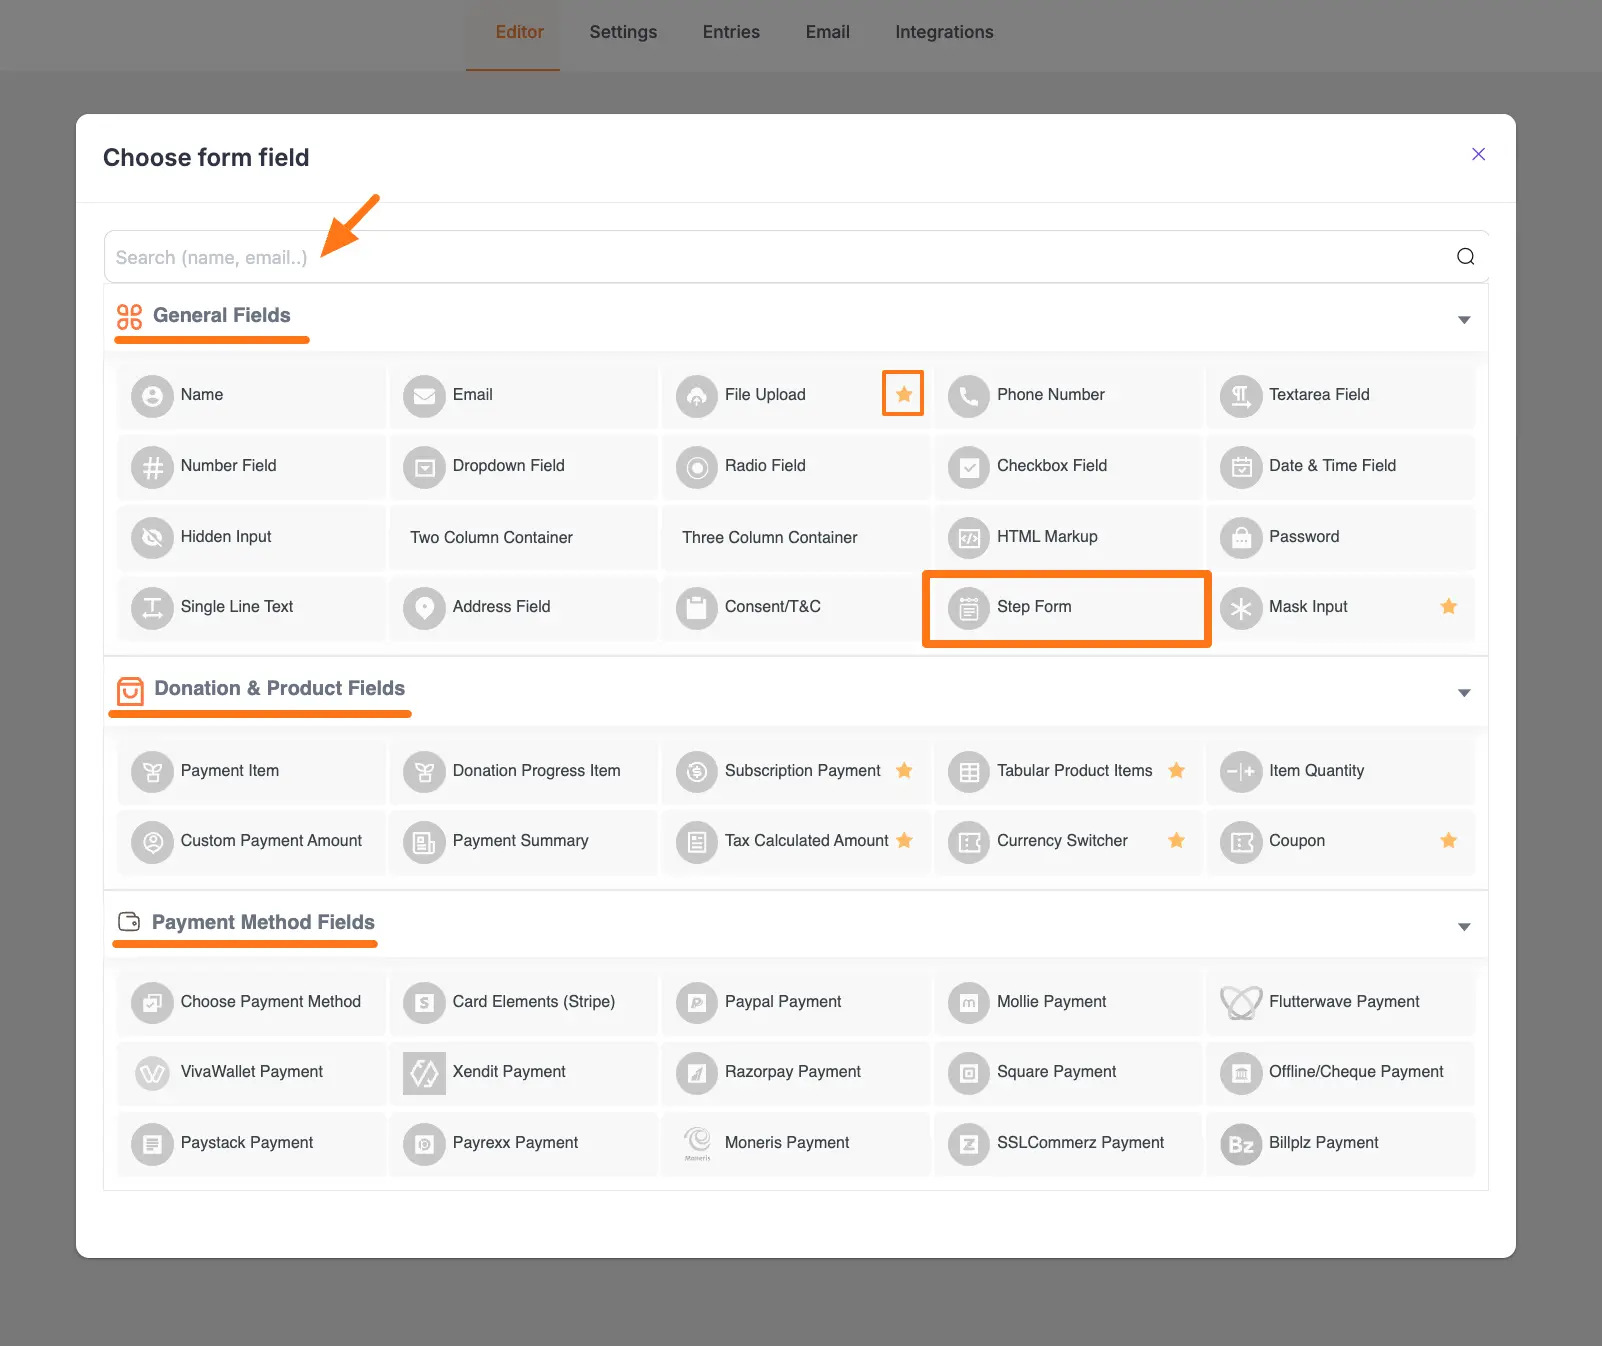
On the Choose form field page, you will get all the fields that Paymattic offers.
Required Field
Remember, to create a Step Form, you must add the Step Form field.
Customizing Step Form Field
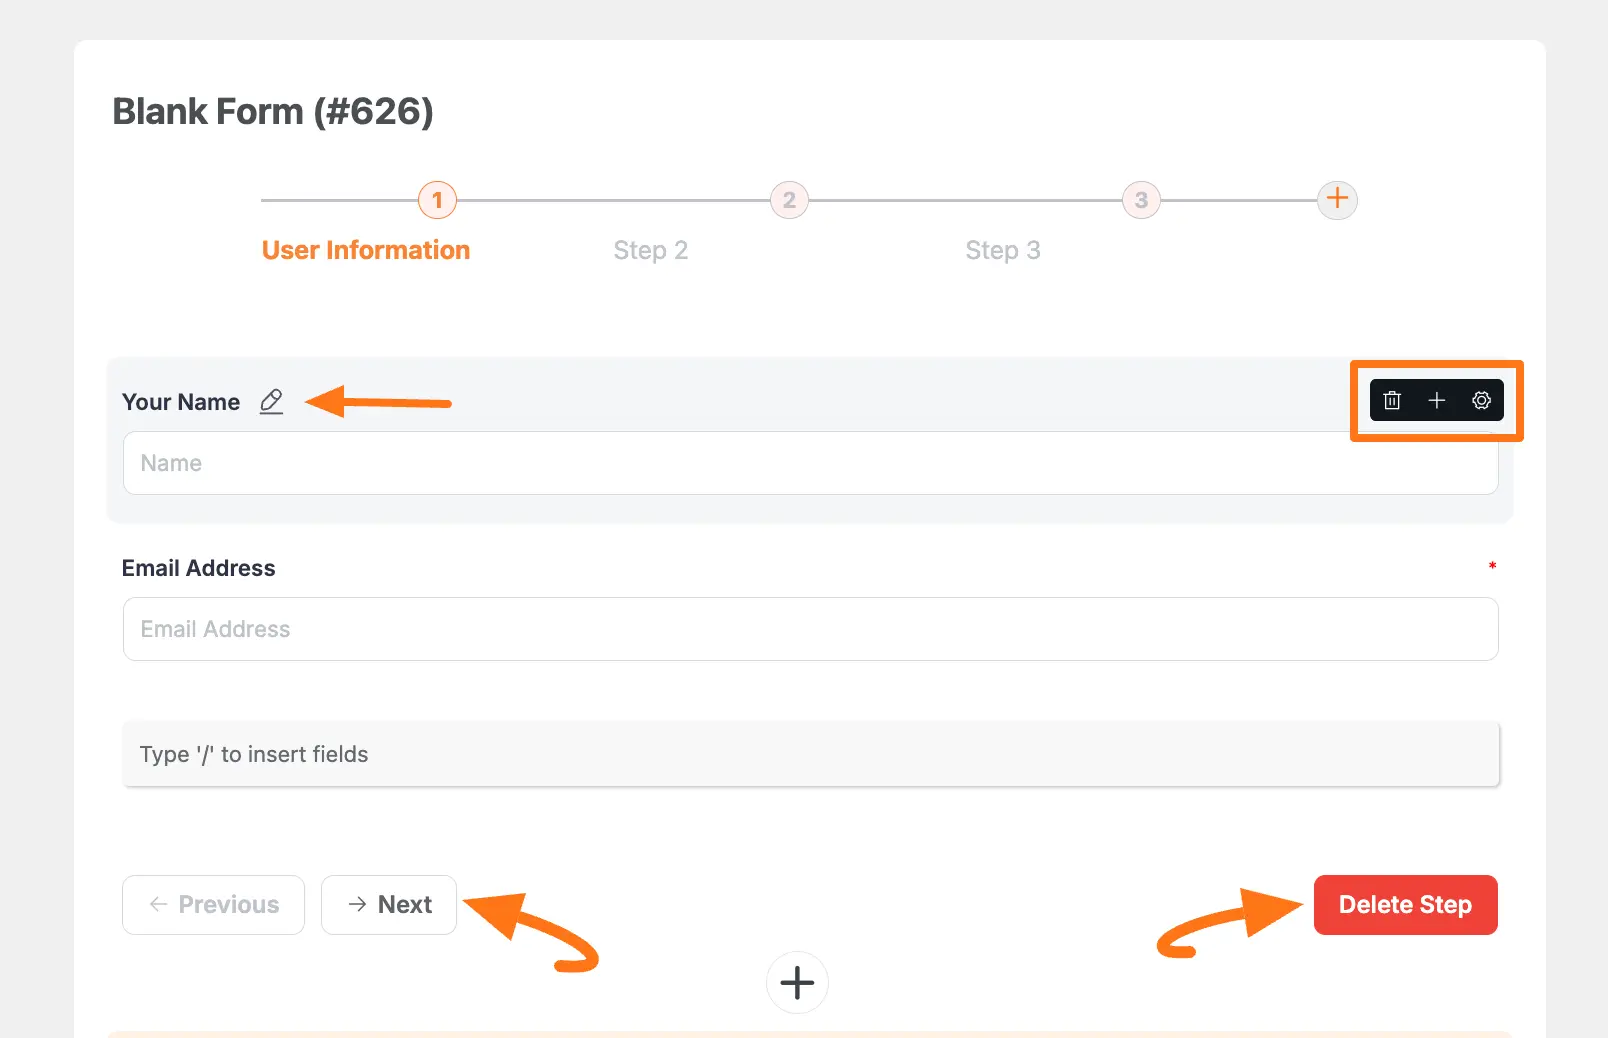
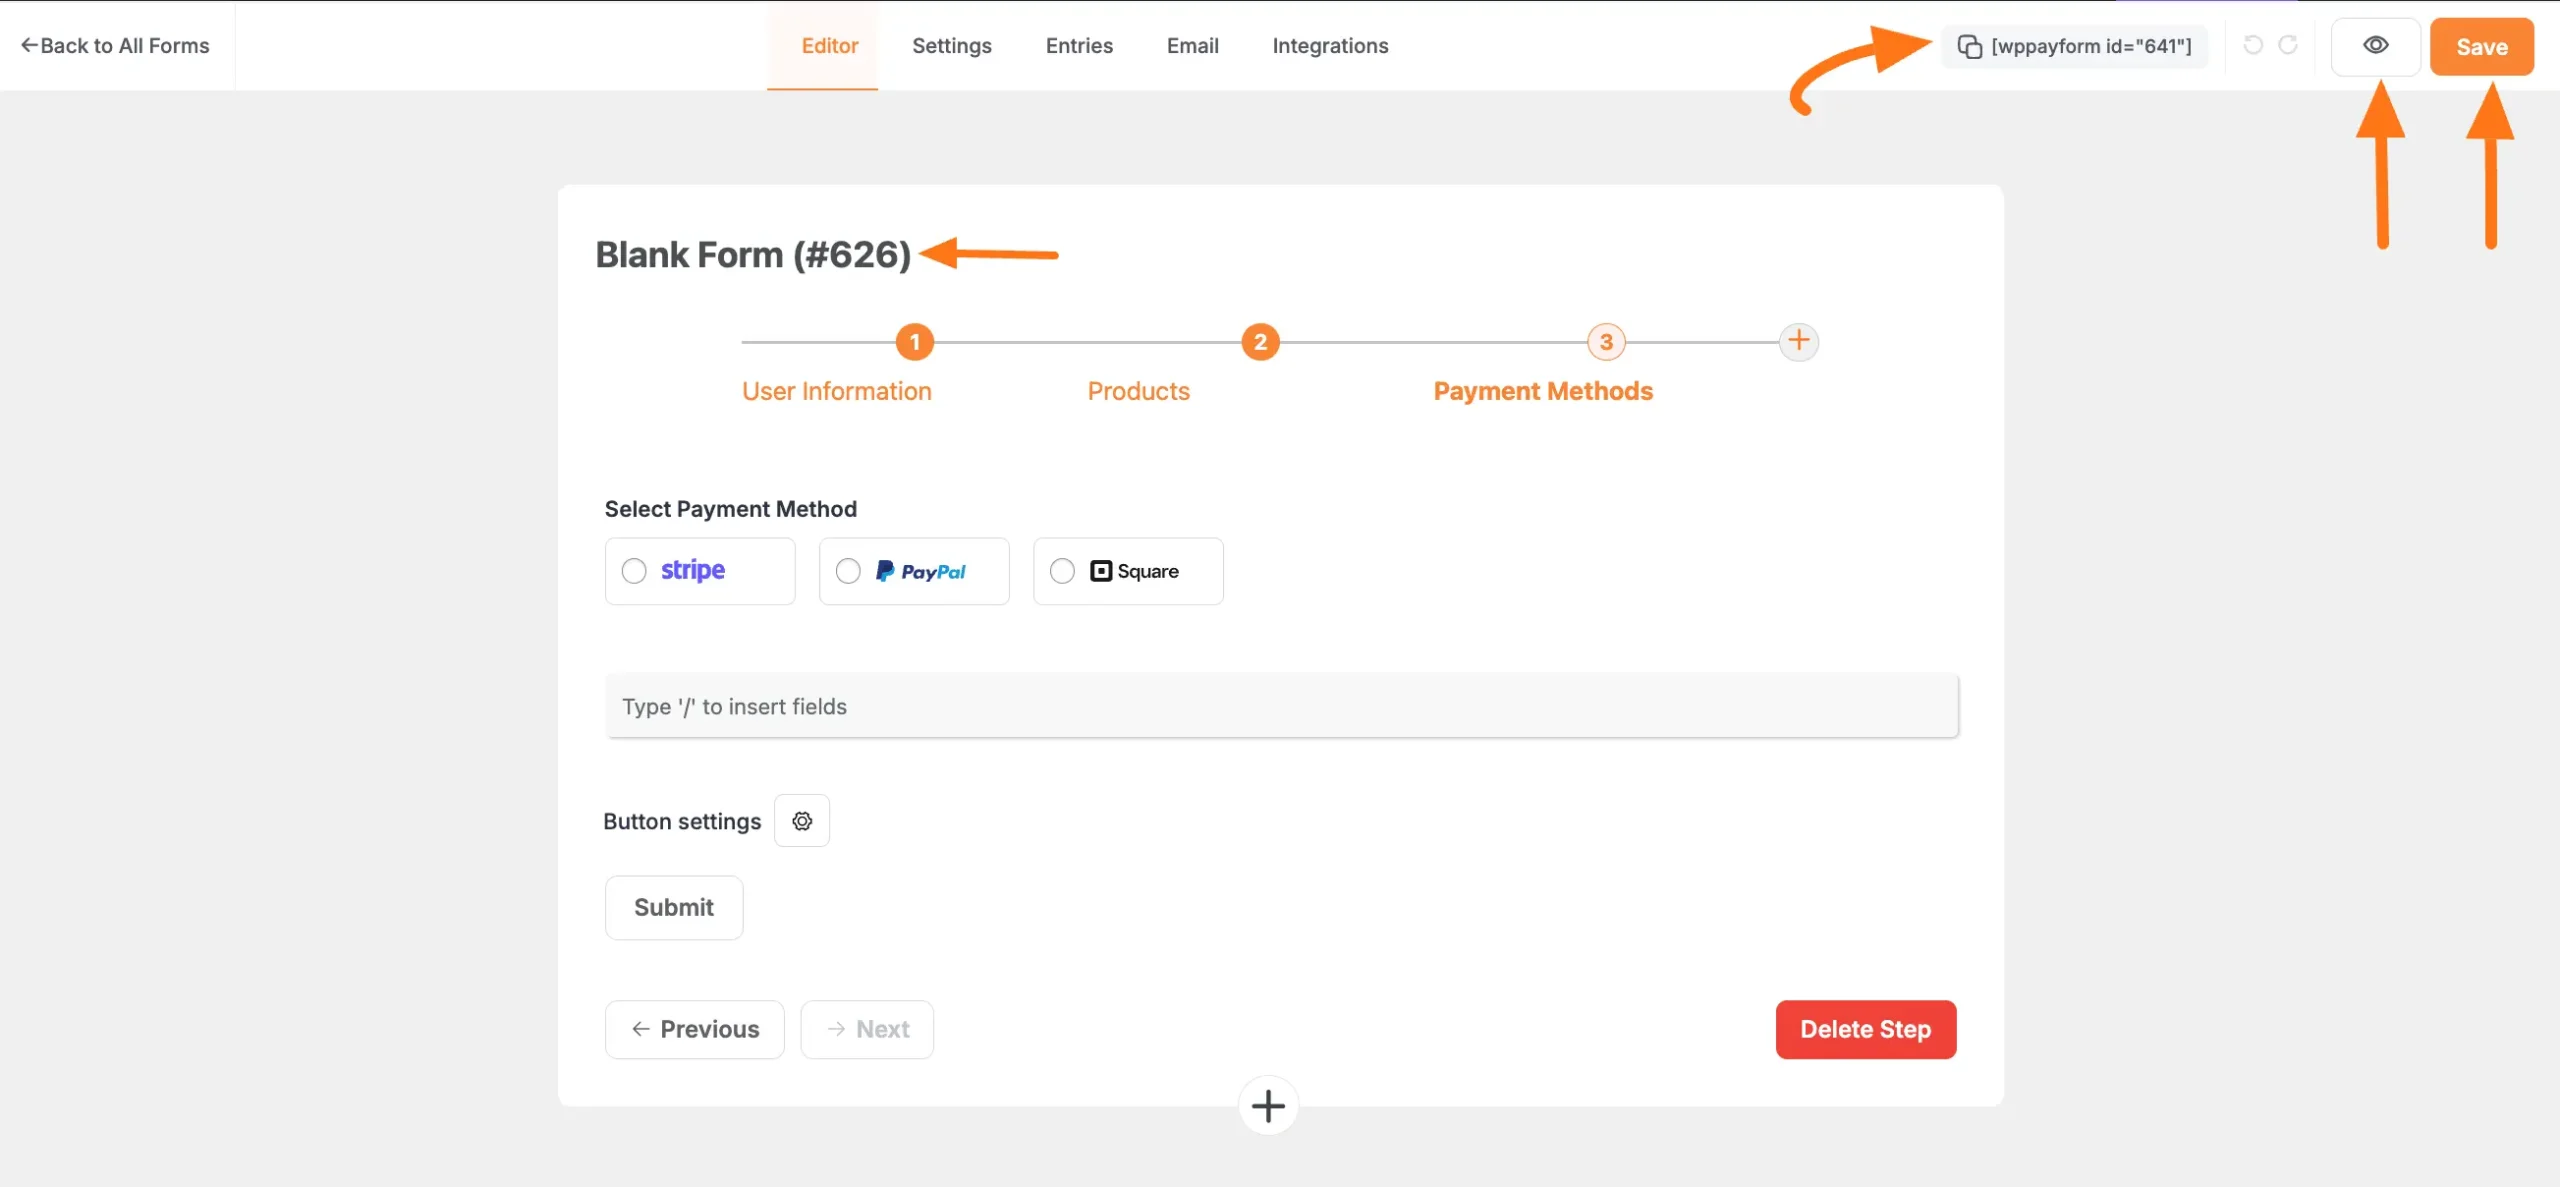
Here, you can see the Step Form field is added with two steps.
You can add as many steps as you need by clicking the Plus Icon in the top right corner. Also, you can provide a name for each step by clicking the Pencil Icon right next to Step 1.
Now, under one specific step, you can add any field as per your need by typing "/" into the fields shown in the screenshot above.
To add more different field/s, click the Plus Icon placed at the bottom.
![]()
Field Customization Options
After adding the fields, you can change the name of the fields by clicking the Pencil icon.
You can also adjust the settings of the fields with the help of three icon options in a black box in the right corner. These are:
- Trash Icon: Use this if you want to delete any fields anytime if needed.
- Plus Icon: Use this to add a new field right below. You can also use the Plus Icon placed at the bottom of the page.
- Settings Icon: Use this to Edit the field's settings.
Once you complete Step 1, click Next to go to Step 2 and follow the same process to add your desired fields. You can also delete any steps by clicking the Delete Step button.
Note
Remember, almost every step has a similar functionality for adding and customizing field/s. For example, I chose the Name and Email field to show the process.
Embedding the Form in Frontend
You can change the form's Title and Description by clicking on it.
Also, to embed and display the form on a specific Page/Post, copy this Shortcode and paste it into your desired Page/Post.
Once you complete the edit, press the Save button to save all the changes you made. And, to see the Preview of the form, click the Eye icon.
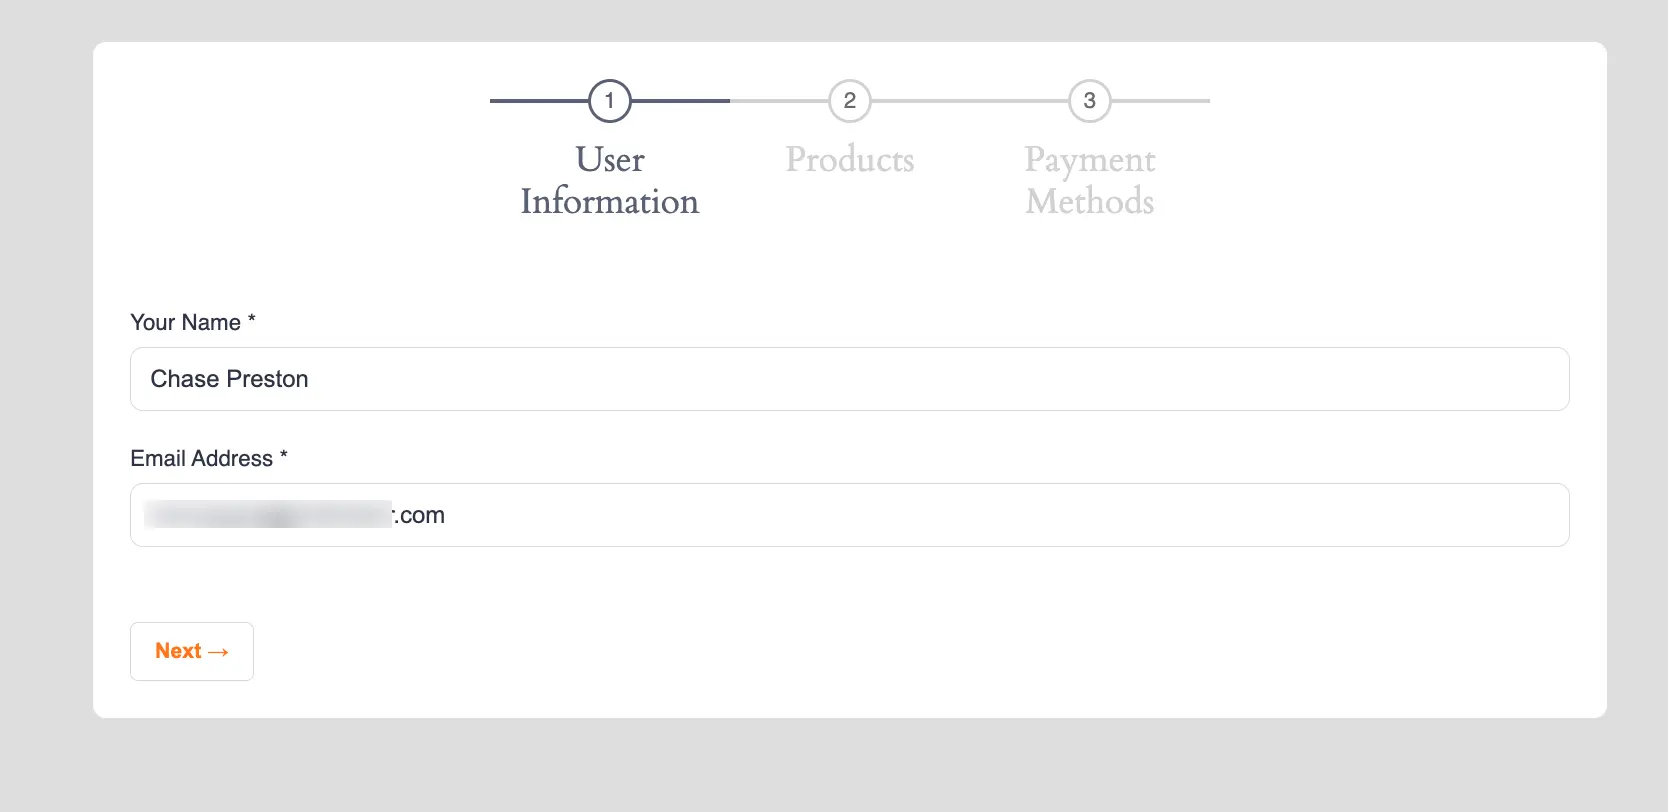
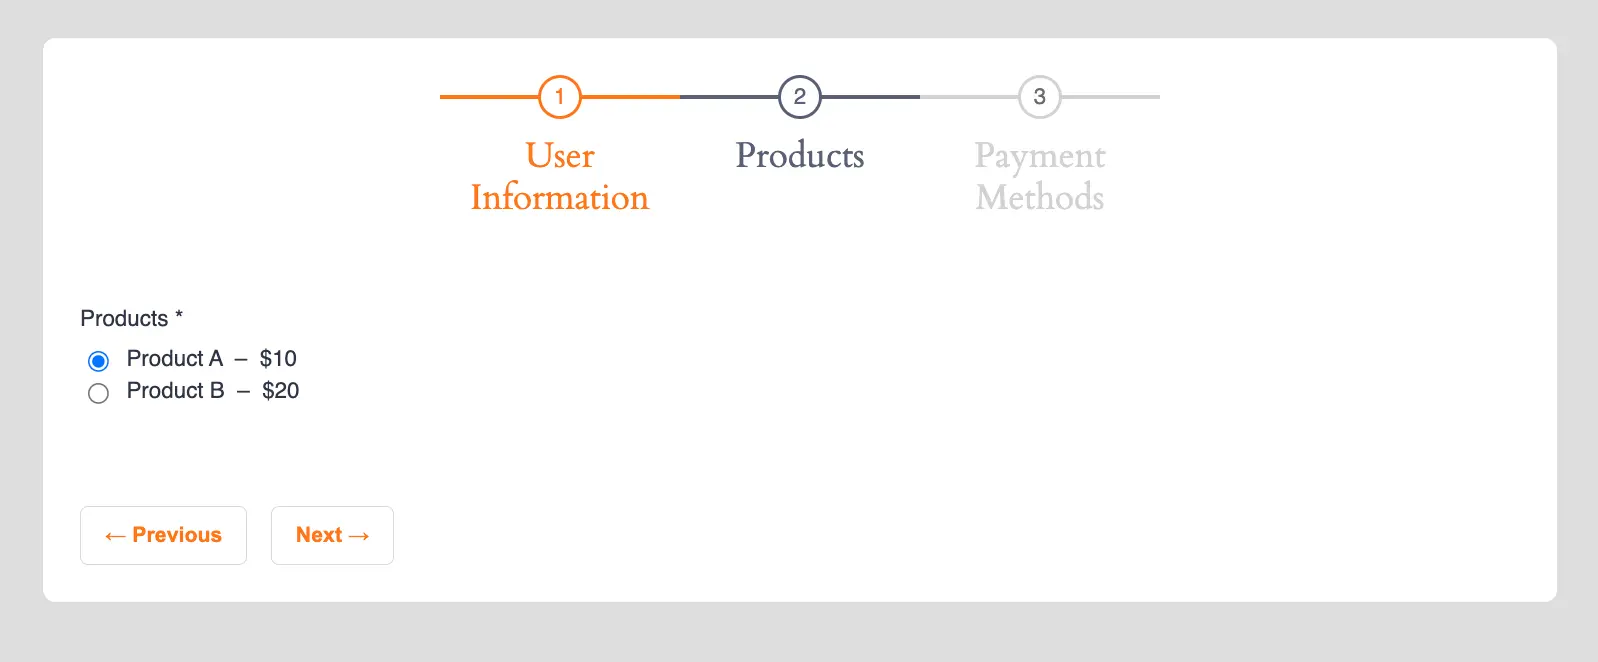
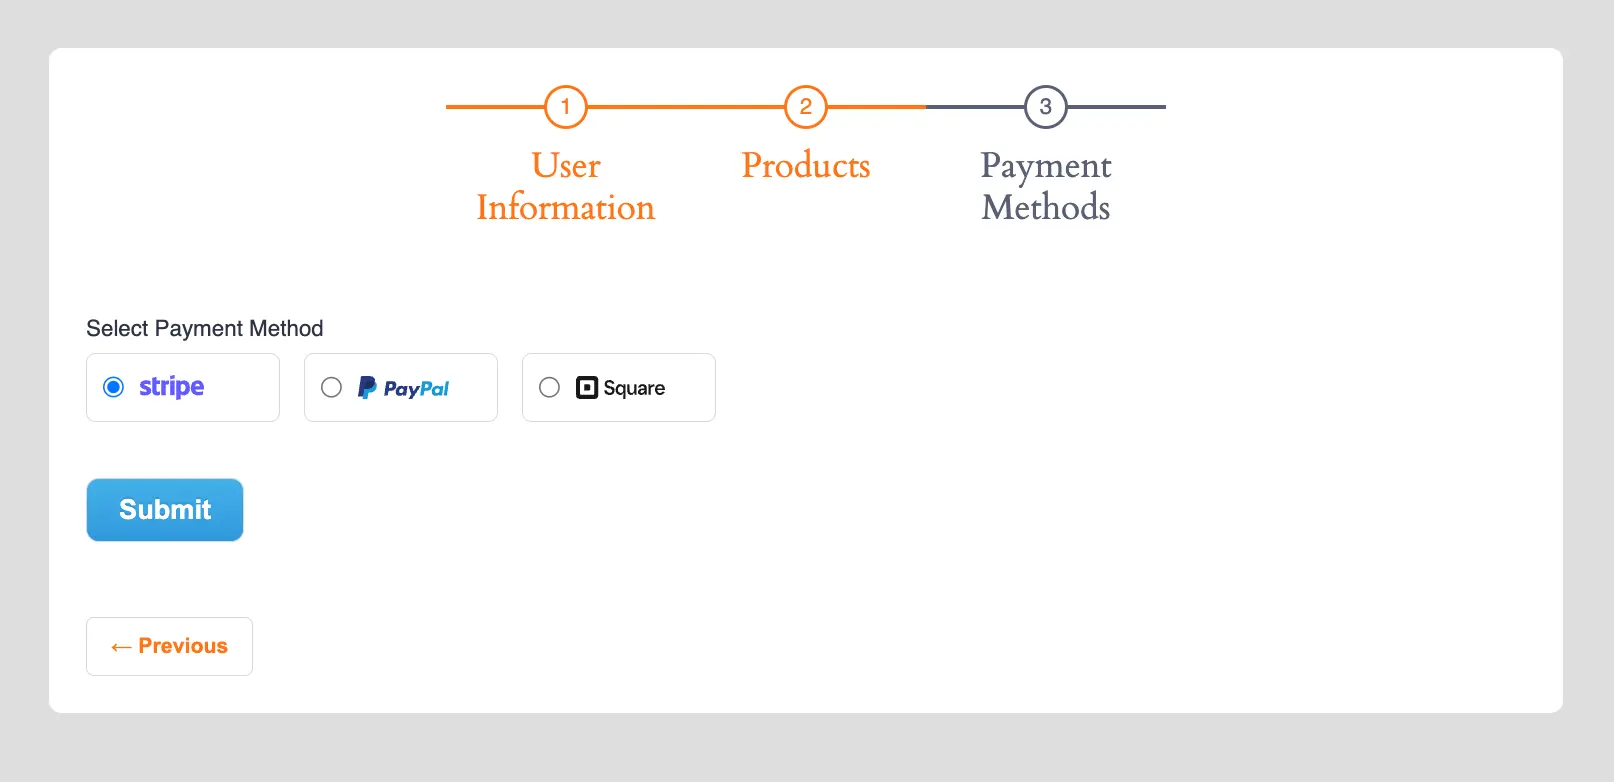
Preview of Step Form
Here is the preview of the Step Form:
Step 1: User Information
Step 2: Products
Step 3: Payment Methods
This way you can easily add the Step Form fields in Paymattic Forms!
Need Help?
If you have any further questions, concerns, or suggestions, please do not hesitate to contact our support team. Thank you.